Advertisement
Quick Links
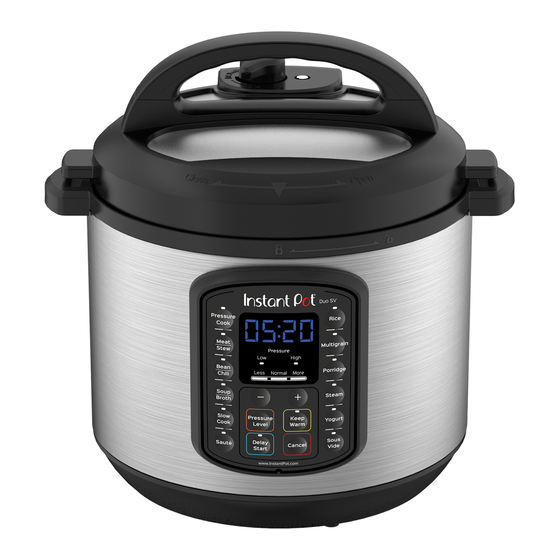
DUO SV
TM
Multi-Use Pressure Cooker
Welcome
Getting Started
Venting Methods
Initial Test Run (Water Test)
More Controls
Smart Programs
Sous Vide Cooking Steps
Support & Contact Information
Getting Started Guide
Full manual and instruction videos available at instantpot.com.au
Register your product today at instantpot.com.au/support/register
Advertisement

Related Manuals for Instant Pot DUO SV


Summary of Contents for Instant Pot DUO SV
- Page 1 DUO SV Multi-Use Pressure Cooker Welcome Getting Started Venting Methods Initial Test Run (Water Test) More Controls Smart Programs Sous Vide Cooking Steps Support & Contact Information Getting Started Guide Full manual and instruction videos available at instantpot.com.au Register your product today at instantpot.com.au/support/register...
- Page 2 Welcome to the world of Instant cooking. Hello! Thank you for welcoming us into your kitchen. Having families ourselves, we developed the Duo SV to allow busy families and professionals alike to cook healthy, delicious meals more easily and in less time.
-
Page 3: Initial Setup
Remove all packaging material from in and around the cooker, and verify that all parts are accounted for. • Use only the Instant Pot Duo SV lid with the Instant Pot Duo SV pressure cooker. • Place the cooker on a stable, level surface, away from external heat sources. -
Page 4: Getting Started
Getting Started... - Page 5 Lid Structure Steam Release Handle Float Valve Lid Handle Top of Lid Lid Fin Lid Position Symbol Locking Pin Anti-Block Shield Bottom of Lid Float Valve Silicone Cap Silicone Sealing Ring Sealing Ring Rack Illustrations are for reference only and may differ from actual product.
- Page 6 Cooker Base Condensation Drain Hole Heating Element Outer Pot Cooker Handle Control Panel Base Connection Socket (Rear) Cooker Handle Illustrations are for reference only and may differ from actual product.
- Page 7 Open & Close Lid When cooker is plugged in, it will play a jingle when the lid is opened and closed. Open Close Open: Grip handle and turn lid counter-clock- Close: Grip handle and align the symbol on wise until symbol on lid is aligned with lid with on rim of cooker base.
- Page 8 12-18 months or when deformation or damage is noticed. Always check for cuts or deformations in sealing ring prior to cooking. Only use authorized CAUTION Instant Pot sealing rings. Failure to follow these instructions may cause food to discharge, ®...
- Page 9 Remove & Install Float Valve The float valve has 2 positions. It pops up to indicate when the cooker is pressurized, and lowers into the lid when the cooker is depressurized. Remove: Place one finger on the flat top of float valve.
- Page 10 Remove & Install Anti-Block Shield Remove: Grip lid and press firmly against side of anti-block shield (pressing towards side of lid and up) until it pops off the prongs underneath. Anti-block shield must be installed before use and cleaned frequently. Install: Place anti-block shield over prongs and press down until it snaps into position.
- Page 11 Remove & Install Steam Release Handle Remove: Pull steam release handle up and off steam release pipe. Steam release handle must be installed before use, and cleaned frequently. Install: Place steam release handle on steam release pipe. Press down. Fits loosely when installed properly, but will remain in place when the lid is turned over.
- Page 12 Place inner pot into cooker base before cooking. Food must be placed in inner pot, not cooker base. The inner pot is an integral part of product safety. Always use an authorized Instant Pot inner pot when cooking. Failure to do so may cause personal injury or property damage.
- Page 13 Install Condensation Collector Install: On back of cooker base, align grooves on condensation collector over tabs and push condensation collector into place. The condensation collector accumulates excess water and should be installed before cooking. Must be emptied after use. Remove: Pull condensation collector away from cooker base. Do not pull down on condensation collector.
-
Page 14: Venting Methods
Venting Methods... - Page 15 Venting Methods Once cooking completes, there are 2 methods to release pressure: Natural Release (NR) Leave the steam release handle in the “Sealing” position. The cooker dissipates heat so pressure releases naturally over time. Sealing This method must be used when cooking food such as soups, stews or chilis, as well as food that expands, such as beans and grains.
- Page 16 Initial Test Run (Water Test) 1. Remove the inner pot from the cooker base and 10. Once pressurized, Cooking begins. add 3 cups (750ml) of water to the inner pot. Display changes from “On” to cook time countdown. 2. Insert inner pot into cooker base. 11.
- Page 17 More Controls Cancel Press to stop a Smart Program at any time. Delay Start Postpone cooking up to 24 hours. Select a Smart Program and if de- sired, adjust the cook time, then press Delay Start to turn the setting on. Use the + / - keys to adjust the number of hours before cooking will begin.
- Page 18 Smart Programs Smart Setting Suggested Use Note Program Less Soft texture Choose setting based on meat texture desired, or adjust cook time manually. Meat/ Normal Very soft texture Allow meat to “rest” for 5-30 minutes, depending on size. It will retain cooking juices for Stew tender, succulent meat.
- Page 19 Smart Setting Suggested Use Note Program Less Oatmeal—steel cut or rolled Adjust time as directed in recipe. Normal White rice, porridge/congee Porridge Always use NR to release pressure when cooking foods that expand. Rice porridge/congee with a More mixture of various grains Less Vegetables Use steam rack provided to elevate food above the cooking liquid.
- Page 20 Sous Vide Cooking Steps...
- Page 21 Sous Vide Cooking Steps 1. Remove the inner pot from cooker base and place steam 11. Cooker beeps once water temperature is reached. rack on the bottom of the inner pot. Remove lid and immerse sealed pouches in water. Contents should be submerged, but seal should 2.
- Page 22 Let’s get cooking! Enjoy time well spent with the Instant family of small appliances. Register your product today at: ©2019 Corelle Brands (Australia) Pty Ltd. Ph 1800 251 643 or 02 9317 1000 instantpot.com.au/support/register Distributed by Corelle Brands (Australia) Pty Ltd. support@instantpot.com.au 9c Commercial Road, Kingsgrove, NSW, 2208, Australia instantpot.com.au...
Need help?
Do you have a question about the DUO SV and is the answer not in the manual?
Questions and answers