Advertisement

Before installation or starting the compressor for
the first time, this manual should be studied careful-
ly to obtain a clear knowledge of the unit and of the
duties to be performed while operating and main-
taining the unit.
RETAIN THIS MANUAL WITH UNIT.
This Technical manual contains IMPORTANT SAFE-
TY DATA and should be kept with the air compres-
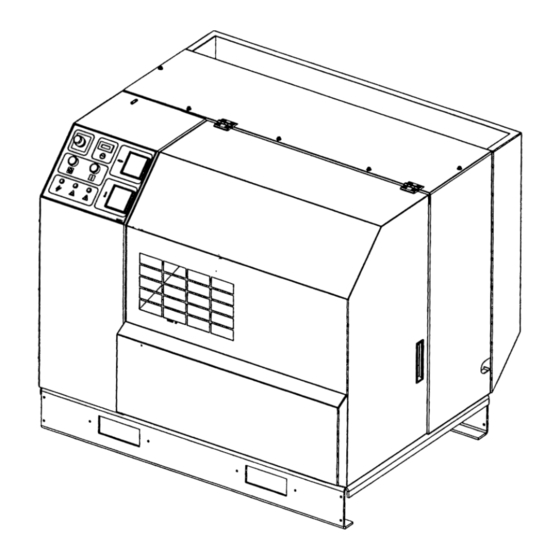
XF 20 - 30
EP 20 - 30
HP 20 - 30
HXP 20 - 30
OPERATORS/
INSTRUCTION MANUAL
OPTIONS
®
APDD 739
June 1999

Advertisement

Table of Contents
loading
Need help?

Need help?

Do you have a question about the XF 20 and is the answer not in the manual?

Questions and answers

Subscribe to Our Youtube Channel

Summary of Contents for Ingersoll-Rand XF 20

  • Page 1 ® XF 20 - 30 EP 20 - 30 HP 20 - 30 HXP 20 - 30 OPERATORS/ INSTRUCTION MANUAL OPTIONS Before installation or starting the compressor for the first time, this manual should be studied careful- ly to obtain a clear knowledge of the unit and of the duties to be performed while operating and main- taining the unit.
  • Page 2 EXTENDED AIREND WARRANTY The Ingersoll-Rand Company Rotary Screw Air Compressor that has been filled prior to its original shipment from Ingersoll-Rand Company with ULTRA COOLANT and which has been operated solely on ULTRA COOLANT there- after shall have its AIREND warranted for twenty four (24) months from the date of placing the COMPRESSOR in operation or thirty (30) months from the date of shipment, whichever occurs first.
  • Page 3 This unit was purchased from ––––––––––––––––––––––––––––––––––––––––––––––––––––––––––– ––––––––––––––––––––––––––––––––––––––––––––––––––––––––––– ––––––––––––––––––––––––––––––––––––––––––––––––––––––––––– Ingersoll-Rand Company reserves the right to make changes or add improvements without notice and without incurring any obligation to make such changes or add such improvements to products sold previously. No. of units on order: Customer Order No: Ingersoll-Rand Co.
  • Page 4: Table Of Contents

    5.10 inlet air filter element TABLE OF CONTENTS 5.11 coolant filter 5.12 coolant change 0.0 SAFETY AND WARNINGS 5.13 coolant hoses 0.1 safety instructions 5.14 airend discharge hose 0.2 safety precautions 5.15 coolant separator filter element 0.3 decals 5.16 separator tank scavenge 1.0 RECEIPT OF EQUIPMENT check valve/screen/orifice 1.1 inspection...
  • Page 5: Safety And Warnings

    0.0 SAFETY AND WARNINGS Safety instructions in the operators manual are bold-faced for emphasis. The signal words DANGER, WARNING and CAU- 0.1 SAFETY INSTRUCTIONS TION are used to indicate hazard seriousness levels as fol- Before you install this air compressor you should take the time lows: to carefully read all the instructions contained in this manual.
  • Page 6 It is the responsibility of the installer and owner to provide the appropriate service pipework to and from the machine. WARNING “Ingersoll-Rand air compressors are not designed, intended, or approved for breathing air applications. Ingersoll-Rand does not approve specialized equipment for breathing air application and assumes no responsibility or liability for compressors used for breathing air services.”...
  • Page 7: Decals

    0.3 DECALS This section contains representative examples of If for some reason a decal is defaced, parts are decals which will be appearing throughout this manual replaced or painted over, we recommend that you and are applied to the compressor unit. obtain a replacement (See Parts manual APDD 742 for Decal Kit Number).
  • Page 8 CAUTION NOTICE To obtain satisfactory compressor operation and maintenance a Incorrect lifting of minimum of 3 feet clearance on 3 sides is required 3-1/2 feet is machine can cause injury required in front of the control panel or property damage. (or minimum required by latest National Electrical code or applicable local codes).
  • Page 9 WARNING Hot surface. Can cause severe injury. 39557095 Do not touch. Allow to cool before servicing. INGERSOLLrAND ® 39541362 ! WARNING NOTICE Filler Cap. Use only recommended coolant. Read instruction book before servicing. 39543921 Exposed moving belts and sheaves. Can cause severe injury or death. 39540281 Do not operate with guards removed.
  • Page 10: Receipt Of Equipment

    WILLINGNESS ON OUR PART DOES NOT MAKE US RESPONSIBLE FOR COLLECTION OF CLAIMS OR REPLACEMENT OF MATERIAL. THE ACTUAL FILING AND PROCESSING OF THE CLAIM IS YOUR RESPONSIBILITY. Ingersoll-Rand Company Davidson, North Carolina APDDGFO-99-79 1.2 UNPACKING AND HANDLING The compressor package has been mounted on a base which provides for forklifting between the two side chan- nels to facilitate handling during shipment.
  • Page 11: Installation

    2.0 INSTALLATION 2.1 VENTILATION Oil flooded rotary air compressors produce large amounts of heat. Because of this large heat production, the compressor must be placed in a room with adequate ventilation. A room in which the amount of air that is drawn in and exhausted is equal to or greater than the cooling fan air flow requirement for the compressor that is installed.
  • Page 12 2.3 PIPING (Continued) A dripleg assembly and isolation valve should be mount- ed near the compressor discharge. A drain line should be ISOLATION connected to the condensate drain in the base. VALVE IMPORTANT: The drain line must slope downward from the base to work properly.
  • Page 13: Electrical Installation

    SAFETY ISOLATION VALVE VALVE Contact your local Ingersoll-Rand distributor for assis- PRESSURE tance in selecting correct Ingersoll-Rand filtration or dry- GAUGE ROTARY ing products. COMPRESSOR NOTE: Screw type compressors should not be installed in air systems with reciprocating compressors without a...
  • Page 14: Voltage Conversion

    2.5 VOLTAGE CONVERSION NOTE: This procedure applies only to units manufac- tured to multi-voltage specifications. Motor nameplate IMPORTANT: This procedure should only be carried must indicate multiple voltatges. out by a qualified electrician, electrical contractor or your local Ingersoll Rand Distributor or Air Center HIGH VOLTAGE LINE VOLTS...
  • Page 15: Rotation Check

    Procedure: For the compressor motor and fan rotation check, the motor jogging should be as short a time as possible. Put main disconnect in the OFF position, lock and tag (See Figure 2.5-2). 1. Assure that the Emergency Stop button is in the stop (depressed) position.
  • Page 16: Before Starting - Starting - Stopping

    CORRECT ROTATION CORRECT ROTATION FIGURE 2.6-2 MAIN FAN FIGURE 2.6-3 AUXILIARY FAN 2.7 BEFORE STARTING - STARTING - STOPPING Read and understand the following instructions EMERGENCY CONTROL HOUR START PRESSURE before operating or performing any maintenance STOP PANEL METER BUTTON GAUGE BUTTON on this unit...
  • Page 17: Outdoor Sheltered Installation

    2.8 OUTDOOR SHELTERED INSTALLATION Many times a compressor must be installed outside due Power disconnect switch should be within line of sight to jobsite conditions or limited space within a manufactur- and in close proximity to the unit. N.E.C. and local ing facility.
  • Page 18 FIGURE 2.8-1 TYPICAL OUTDOOR SHELTERED INSTALLATION...
  • Page 19: Systems

    SSR air compressors are factory filled with are encountered, we recommend you contact your SSR ULTRA COOLANT which is designed to nearest Ingersoll-Rand representative for additional operate for 8,000 hours or two years, whichev- information. er comes first. The coolant must be changed at these intervals to avoid breakdown and equip- The standard maximum temperature 115°F.
  • Page 20: Air System

    Before being injected into the airend, all coolant flows through the coolant filter. If tis an aubomotive type full The separator element performs the final separation of flow filter with a single replacement spin-on element, coolant and cleaning of the air prior to leaving the rated at 4 micron.
  • Page 21: Capacity Control

    3.6 CAPACITY CONTROL 2. Remove pressure switch cover by turning the cover screw counterclockwise. The SSR compressor is supplied with on-line/off-line NOTE: It is required that the load or on-line pressure and automatic start/stop controls as standard. be set first, before the unload or off-line pressure is Optional modulation control enables the compressor set.
  • Page 22: Acs Control (Intellisys Modulation Option Only)

    3.8 MODULATION/ACS CONTROL (OPTIONAL) For those plants which have relatively high constant air demand, relative to the compressor capacity, the recommended control mode is modulation. The modulation control system retains the features of the on-line/off-line control, but also provides for throttling of the inlet flow up to the off-line air pres- sure setpoint value.
  • Page 23 Delay Load Time ® The Intellisys has a fixed minimum differential of 10 psi between the off-line air pressure setting and the This is the amount of time the line pressure must on-line air pressure setting. The differential may be remain below the on-line setpoint before the com- increased by adjusting the on-line air pressure set- pressor will load or start (if the unit was stopped due...
  • Page 24: Modulate Control Valve Adjustment (Optional)

    3.10 Modulate Control Valve Adjustment (Optional) WARNING Ensure that the compressor is isolated from the compressed air system by closing the isolation valve and venting pressure from the drip leg. Ensure that the main power disconnect switch is locked open and tagged. 1.
  • Page 25: Intellisys

    4.0 INTELLISYS (OPTIONAL)
  • Page 26: Emergency Stop Switch

    Unload Stop 4.0 INTELLISYS Pressing this button will activate the unload stop. If 4.1 EMERGENCY STOP SWITCH the compressor is running loaded, it will unload. Seven seconds later it will stop. if the compressor is Pressing this switch stops the compressor immedi- running unloaded, it will stop immediately.
  • Page 27 Pressure Sensor Calibration (Zeroing) Routine 4.3 PUSH BUTTONS (Continued) This routine is entered if the unit is not running and Display Select both the up and down arrows button are pressed at the same time. Make sure all pressure is relieved Pressing this button will change the information from the compressor before calibration.
  • Page 28: Setpoint Procedure

    ** The lead/lag feature allows the customer to choose 4.4 SETPOINT PROCEDURE one compressor as the “lead” compressor and any oth- ers as the “lag” compressor (simulates the mode of a This procedure allows the customer to modify 11 sequencer). The lag compressor’s on-line and off-line variables in the controller logic.
  • Page 29: Alarms

    10) CK MTR ROTATION 4.6 ALARMS This alarm will occur if a unit is started and compres- sor has incorrect rotation. When an alarm occurs, the alarm indicator will light and display will show actual alarm message. If alter- 11) CALIBRATION FAIL nately multiple alarms have occurred the display will This alarm will occur if the sensor calibration routine show SCROLL FOR ALARM.
  • Page 30: Maintenance

    ** Clean cooler cores if discharge air temperature is excessive or if unit shutdown occurs on high air temperature. kept by you, the owner, should you require warranty SPECIAL NOTE: service work by your Ingersoll-Rand Distributor or Air Replace separator element when the separator dif- Center. Maintenance record sheets are located at the...
  • Page 31: Pressure Relief Valve Check

    Before beginning any work on the compressor, 5.5 SHEAVE ALIGNMENT open, lock and tag the main electrical disconnect Any degree of sheave misalignment will result in a and close the isolation valve on the compressor reduction of belt life. Misalignment of belt drive should discharge.
  • Page 32 Align Sheaves 5. Slowly tighten the three screws evenly until the sheave is pressed from the bushing. (Light tapping on Ensure that the compressor is isolated from the bushing may assist removal.) compressed air system by closing the isolation valve and venting pressure from the drip leg. 6.
  • Page 33: Drive Belt

    There is no adjust- 1. Remove the belt/fan safety panel from the cooler ment required to insure proper belt tensioning. Be sure box. to use only Ingersoll-Rand Genuine parts to assure correct belt tension. 2. Disconnect aftercooler inlet tube and discharge hose.
  • Page 34 Before beginning any work on the compressor, bly. The term "out board" side will refer to the face open, lock and tag the main electrical disconnect closest to the sheave. and close the isolation valve on the compressor discharge. Wait 2 minutes after stopping to allow 3.
  • Page 35 11. Put a thin continuous coat of Loctite 609 on the outer diameter of the single lip seal. 12. Position the seal in the seal housing from the out- board side. The seal should be oriented such that the edge of the lip is installed first. 13.
  • Page 36: Inlet Air Filter Element

    5.10 INLET AIR FILTER ELEMENT Special Tools The inlet air filter should be changed at the interval Suitable clean drain pan or container to hold coolant shown in the maintenance chart or any time the filter drained from unit. becomes dirty. A quantity of proper coolant sufficient to top off the The filter element is not washable and must be coolant level in the compressor.
  • Page 37: Coolant Change

    9. Fill unit with new coolant as follows: OIL DRAIN VALVE a. Fill tank to just below the threads of the fill port. b. Restart machine and verify that coolant level is in the green operating zone as viewed through the sight tube (See Figure 5.11-2). 10.
  • Page 38: Coolant Hoses

    The flexible hoses that carry coolant through the cool- ing system may become brittle with age and will require replacement. Have your local Ingersoll-Rand Distributor or Air Center check them every year and replace them as needed or every 2 years.
  • Page 39: Airend Discharge Hose

    5.14 AIREND DISCHARGE HOSE Before beginning any work on the compressor, open, lock and tag the main electrical disconnect The flexible hose from the airend discharge to sepa- and close the isolation valve on the compressor rator tank may become brittle with age and require discharge.
  • Page 40: Separator Tank Scavenge Check Valve/Screen/Orifice

    6. Replace cover and start the retaining bolts. 4. Visually check the cooler cores for build up of dirt, dust, lint or other foreign material. 7. Torque bolts evenly to 80 ft.-lb (109 N-m). 5. Using an OSHA approved air gun, blow air through the cooler cores in the opposite direction of normal air 8.
  • Page 41 CAUTION WARNING Overgreasing can be a cause of bearing and motor failure. Make sure dirt and contaminants are not introduced when adding grease. Hazardous voltage. Can cause Procedure for relubrication severe injury or death. Disconnect power before servicing. CAUTION Lockout/Tagout machine. INGERSOLLrAND ®...
  • Page 42 Follow these precautions to minimize damage from 5.19 COOLER CORES: CLEANING static electricity. Static can cause severe damage to microcircuits. Ensure that the compressor is isolated from the compressed air system by closing the isolation valve 1) Make the least possible movement to avoid building and venting pressure from the drip leg.
  • Page 43: Trouble Shooting

    6.0 TROUBLE SHOOTING 6.1 TROUBLE SHOOTING CHART (STANDARD CONTROL) TROUBLE CHECK POINT NUMBERS Compressor Fails to Start 1,2,3 Repeat Shutdowns 3,4,5,2 High Amp Draw 8,9,6,7 Low Amp Draw 1,10,12 High Discharge Pressure 13,15,16,19 Low Air System Pressure 22, 20,17,18,13,15,14,19,7 Unit Running Hot 22,21,23,24,6 High Coolant Consumption 28,27,25,26...
  • Page 44: Intellisys Control

    6.2 TROUBLE SHOOTING CHART - INTELLISYS CONTROL (CONTINUED) TROUBLE CAUSE &/OR DISPLAY WHAT TO DO Compressor fails to start. 110/120V control voltage not available. — Check fuses. Check transformers and wiring connections. "STARTER FAULT". — Inspect contactors. "EMERGENCY STOP". — Rotate emergency stop button to disengage, and press"SET"...
  • Page 45 Drain line/drip leg incorrectly installed. — Slope drain line away from trap. Install drip leg. No refrigerated or desiccant dryer in — Contact local Ingersoll-Rand air system. Distributor or Air Center. V-belts slipping. — Adjust belt tension or replace belts.
  • Page 46: Options

    7.0 OPTIONS 7.1 REMOTE START/STOP WARNING The remote start/stop option allows the operator to control the compressor from a remote mounted Disconnect power before This machine is remote start/stop station. This option may be factory servicing. start and stop equipped. installed or a field installation kit is available.
  • Page 47 NOTE:...
  • Page 66: Typical System Flow Diagrams

    TYPICAL SYSTEM FLOW DIAGRAM 8.13 TYPICAL SYSTEM FLOW DIAGRAMS...
  • Page 67 8.13 TYPICAL SYSTEM FLOW DIAGRAMS...
  • Page 68 8.13 TYPICAL SYSTEM FLOW DIAGRAMS...
  • Page 69 8.13 TYPICAL SYSTEM FLOW DIAGRAMS...
  • Page 70 8.10 TYPICAL SYSTEM FLOW DIAGRAMS...
  • Page 71 9.0 MAINTENANCE RECORD DATE RUN TIME WORK DONE QTY. UNIT WORK (HOURS) MEASURE...
  • Page 72: Maintenance Record

    MAINTENANCE RECORD DATE RUN TIME WORK DONE QTY. UNIT WORK (HOURS) MEASURE...
  • Page 73 MAINTENANCE RECORD DATE RUN TIME WORK DONE QTY. UNIT WORK (HOURS) MEASURE...
  • Page 74 MAINTENANCE RECORD DATE RUN TIME WORK DONE QTY. UNIT WORK (HOURS) MEASURE...

This manual is also suitable for:

Xf 30Ep 20Ep 30Hp 25Hp 20Hp 30 ... Show all

Table of Contents

Save PDF