Advertisement
Quick Links
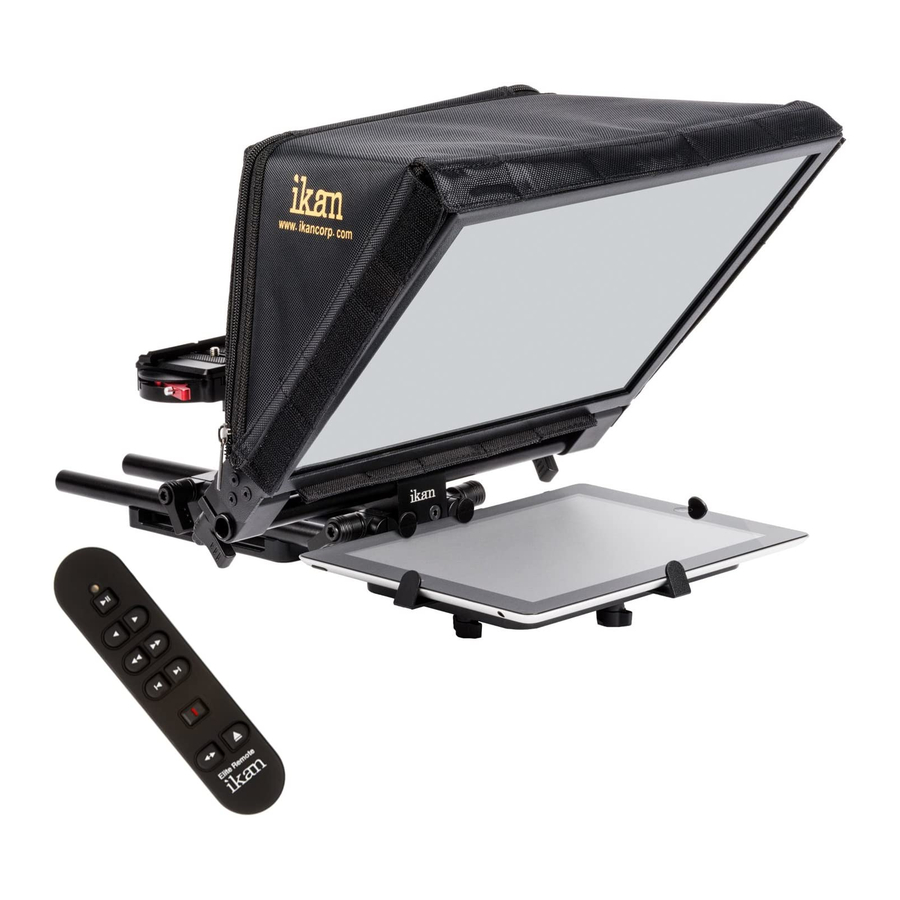
PT3100
15" Teleprompter QUICKSTART GUIDE
What's included
Checked by
�
�
�
�
24 x PhillipsHead Screw
24 x T-Slot Nut
4 x 1/4-20 Mounting Screw
4 x M4 X 8mm
Mounting Screw
�
�
�
ELE-DBLPT
Quick Release Plate
2 x Mounting Bracket
(One for monitor mount and one
for optional pro battery mount)
�
�
�
Hood
Prompter Glass Frame
Camera Lift
�
15" Monitor & AC Power Adapter
�
PrompterPro Software
�
24" T-Slot Bar
www.ikancorp.com
713-272-8822
Advertisement

Related Manuals for Ikan PT3100


Summary of Contents for Ikan PT3100
- Page 1 PT3100 15” Teleprompter QUICKSTART GUIDE What’s included Checked by � � � � 24 x PhillipsHead Screw 24 x T-Slot Nut 4 x 1/4-20 Mounting Screw 4 x M4 X 8mm Mounting Screw � � � ELE-DBLPT Quick Release Plate...
- Page 2 PT3100 15” Teleprompter QUICKSTART GUIDE Attach six Phillips Head screws and six T-Slot nuts to Double Cheese Plate, ELE-DBLPT. Slide the Double Cheese Plate, ELE-DBLPT onto T-Slot bar. ** Tiny hole side facing front. www.ikancorp.com 713-272-8822...
- Page 3 PT3100 15” Teleprompter QUICKSTART GUIDE Attach your own tripod skid plate. ** Note: Heavy Duty tripod only. Attach Mounting Bracket onto the monitor with four 4mm Mounting Screw. Then, attach four Phillips Head screws and four T-Slot nuts. www.ikancorp.com 713-272-8822...
- Page 4 PT3100 15” Teleprompter QUICKSTART GUIDE Slide the Monitor onto the T-Slot Bar. Attach four Phillips Head screws and four T-Slot nuts on the Prompter Glass Frame. www.ikancorp.com 713-272-8822...
- Page 5 PT3100 15” Teleprompter QUICKSTART GUIDE Slide the Prompter Glass Frame onto the T-Slot Bar. Slide the Prompter Glass Frame upon the monitor. www.ikancorp.com 713-272-8822...
- Page 6 PT3100 15” Teleprompter QUICKSTART GUIDE Attach four Phillips Head screws and four T-Slot nuts on the Camera Lift. Slide the Camera Lift onto the T-Slot Bar. www.ikancorp.com 713-272-8822...
- Page 7 PT3100 15” Teleprompter QUICKSTART GUIDE Slide the Camera Lift upon the Prompter Glass Frame. Attach the Quick Release Plate onto the Camera Lift with four 1/4-20 Mounting Screws. www.ikancorp.com 713-272-8822...
- Page 8 PT3100 15” Teleprompter QUICKSTART GUIDE Attach velcro on three sides of the Prompter Glass Frame. Attach the Hood. www.ikancorp.com 713-272-8822...
- Page 9 PT3100 15” Teleprompter QUICKSTART GUIDE Attach tripod plate to your camera. Slide your camera onto the Camera Lift. Adjust the Camera Lift’s height that fits your camera. www.ikancorp.com 713-272-8822...
- Page 10 • Damage caused by abuse or misuse, dismantling, or changes to the product not made by the company. • Damage caused by natural disaster, abnormal voltage, and environmental factors etc. 3903 Stoney Brook Dr. Houston TX 77063. 1-713-272-8822. support@ikancorp.com © 2010 ikan Corporation. All right reserved. www.ikancorp.com...
- Page 11 You can connect a pro battery using the optional accessories, V17PBK-S or V17PBK-A (Pro Battery Kit) and then plugging that plate into the DC-In connector. Connecting PT3100 to your computer with VGA cable (not included in the PT3100 package). 3ft minimum for best viewing distance.
- Page 12 (figure 1) 1) Fist thing to do is make sure that the monitor of your ikan teleprompter is plugged in powered on and connected to the VGA port of your computer. (It’s the blue 15 pin connector on the back of your computer) 2) The easiest way to set up your computer if you are using a laptop is to use the hot keys.
- Page 13 Click on the Intel Dual Display Clone button on the left. h. Click on apply. i. You are now ready to start Prompter Pro V.2 For additional help please call the ikan support team at 1-713-272-8822 or email us at support@ikancorp.com Office Hours: 9am - 6pm Central Time...
Need help?
Do you have a question about the PT3100 and is the answer not in the manual?
Questions and answers