Table of Contents
Advertisement
Quick Links
Advertisement
Table of Contents

Related Manuals for Maytronics WAVE 300 XL


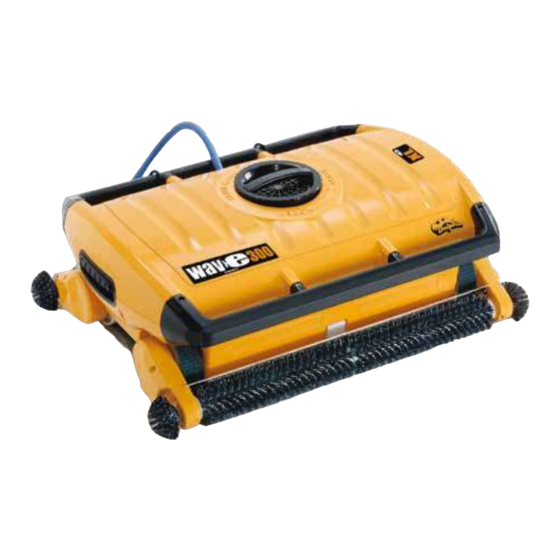
Summary of Contents for Maytronics WAVE 300 XL
- Page 1 WAVE 300 XL User Instructions ....p. 1 Mode d’emploi ....p. 13 Istruzioni per l’uso ... p. 25 Instrucciones de uso ..p. 37 Gebrauchsanweisung ..p. 49 Gebruiksinstructies ..p. 61 Manual de instruções ..p. 73 8151436...
-
Page 2: Table Of Contents
Wave 300 XL User Instructions Table of Contents 1. SAFETY PRECAUTIONS ............2 2. FCC STATEMENT..............3 3. INTRODUCTION ..............4 4. CONTENTS ................3 Assembly instructions .............. 4 5. MMI GENERAL NOTES ............5 6. DEFAULT SETTING FOR CLEANING SESSIONS ..... 5 Starting a cleaning session............ -
Page 3: Safety Precautions
1. SAFETY PRECAUTIONS Please adhere strictly to the following warnings: Do not operate the Dolphin Wave Robot Pool Cleaner when there are people in the swimming pool. When examining the Dolphin Wave Robot Pool Cleaner, disconnect the main power supply. Risk of electric shock. -
Page 4: Fcc Statement
• Consult the dealer or an experienced radio/TV technician for help. Changes or modifications to this equipment not expressly approved by the party responsible for compliance (Maytronics Ltd.) could void the user’s authority to operate the equipment. 3. INTRODUCTION This user guide describes how to use your MMI operating console for the Dolphin Wave robotic pool cleaner. -
Page 5: Assembly Instructions
Assembly instructions Refer to Figure 1 1. Attach the Caddy handle to the Caddy base and fasten with the screws and nuts provided. 2. Place the Dolphin Wave robot on the Caddy in front of the power supply as shown in Figure 1. 3. -
Page 6: Mmi General Notes
5. MMI GENERAL NOTES • In this user manual, the instruction press “Start” is performed by pressing both green buttons - simultaneously on the MMI console (Figure 2). • The MMI is equipped with a screensaver that comes into effect after 5 minutes idle time. Press Pool and Home in that order to unlock the MMI console. -
Page 7: Removing The Robot From The Swimming Pool
5. Using the arrows select the required pool length. Press Set. hh:mm:s For ft. measure units continue scrolling to the right using arrow. - cycle 6. Press Start. The cleaning session will begin. CrissCross The factory default settings are used. In order 03:59:59 to change parameters refer to Configuring Additional Pool Profiles on page 9. -
Page 8: Customized Settings
MMI Alerts Filter bag: This LED will light up when the filter bag is full and needs cleaning at Filter the end of the cleaning cycle. You are not required to immediately stop the operation. Alert The LED indicator will automatically reset on the next operation with a clean bag. -
Page 9: Main Menu Parameters
Defining the robot’s parameters: 1. Switch on the power supply. The MMI Wave Main Menu screen opens in the home window. Pool Profile 2. Press Menu to enter the Main Menu Filter State Clean (Figure 6). Technician Mode Statistics Select Exit Figure 6: Main Menu screen There are two Main Menu screens and you access... -
Page 10: Configuring Additional Pool Profiles
In order to return to English from any other language, press and hold the "menu" button for 3-4 seconds, on the Wave screen. 9. CONFIGURING ADDITIONAL POOL PROFILES The Dolphin Wave can be configured for four different pool profiles. The configured settings are stored in the MMI’s memory. -
Page 11: Manual Procedure For Configuring Pool Profiles
Manual procedure for configuring pool profiles Figure 10: Pool profile diagram Wave XL User Instructions... - Page 12 1. From the Wave screen, press Menu. Pool A Profil 2. From the Main Menu screen, with Pool Profile highlighted, press Select and then Pool Length 25 m. modify, to display the current active profile Cycle Time 3 h. screen. Pool Type Rec.
-
Page 13: Starting Cleaning Operations
11. After setting the Scan Mode , from the Pool Profile screen, scroll down to the Pool A Profile next screen (Figure 15). Delay Time 12. Press Select to enter Delay Time. Line Spacing Medium Setting a Delay Time allows you to delay the start of cleaning operations by a time Reset Pool A profile factor selected from the MMI screen. -
Page 14: Operating Guidelines
6. Preventive Maintenance (PM) should be performed on the Dolphin Wave robot, in order to keep it in good and long lasting working condition. Maytronics provides the parts required – as a dedicated PM kit. The work and the service will be provided through the dealer. PM service should be performed every 1,500 working hours or 1 year (the earlier of the two). - Page 15 Using the remote control unit 1. To activate the remote control unit, press the touch pad as indicated in the diagram. Four activation lights will Forward light up. On-the-spot 2. Press the forward arrow briefly. The turning robot will start moving in a forward direction.
-
Page 16: Troubleshooting
Move the robot from its position and remove on wall a vertical position of more the obstacle. Reactivate. than 70º? If this reoccurs, contact Maytronics dealer. Has the robot stuck on an obstacle? Out of water Was the robot operated out... - Page 17 Note: The fuse holder is located beneath the power supply on the right hand side. Replace the fuse with the spare provided. Note: This is a special fuse and a replacement can be obtained from your Maytronics dealer. Does the problem occur when Contact Maytronics dealer. Communication...
- Page 18 WAVE 300 XL www.maytronics.com...
Need help?
Do you have a question about the WAVE 300 XL and is the answer not in the manual?
Questions and answers