
Subscribe to Our Youtube Channel
Related Manuals for Grundig GWN59650CHB


Summary of Contents for Grundig GWN59650CHB
- Page 1 WASHING MACHINE USER‘S MANUAL GWN59650CHB www.grundig.com Document Number 2820525765_EN/ 12-11-18.(16:59)
- Page 2 Please read these instructions first before using your appliance Dear Customer, Thank you for choosing a Grundig appliance. Please take some time to read this user manual before using your appliance, to ensure you know how to safely operate the controls and functions.
-
Page 3: Table Of Contents
TABLE OF CONTENTS Important instructions for safety laundry and detergent ... .37 and environment End Time ......37 Starting the programme . -
Page 4: Important Instructions For Safety And Environment
Important instructions for safety and environment This section contains safety instructions that will help protect from risk of personal injury or property damage. Failure to follow these instructions shall void any warranty. General safety • This product can be used by children at and above 8 years old and by persons whose physi- cal, sensory or mental capabilities are not fully developed or who lack experience and knowl-... -
Page 5: Product Safety
• Connect the product to a grounded outlet pro- tected by a 16 A fuse. Have the grounding instal- lation made by a qualified electrician. Our com- pany shall not be liable for any damages that will arise when the product is used without ground- ing in accordance with the local regulations. -
Page 6: Intended Use
• Place the product on a rigid, flat and level surface. • Do not place it on a long-pile rug or similar sur- faces. • Do not place the product on a high platform or near the edge on a cascaded surface. •... -
Page 7: Compliance With The Weee Directive
While washing the laundry at high temperatures, the loading door glass becomes hot. Therefore, keep child- ren away from the loading door of the machine while the washing operation is in progress. Compliance with the WEEE Directive This product complies with EU WEEE Directive (2012/19/EU). -
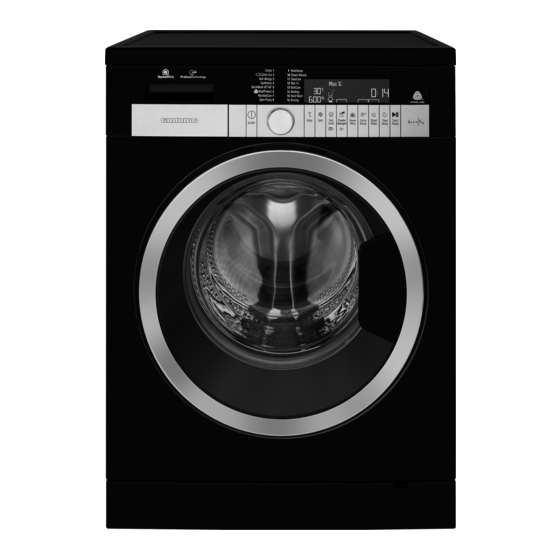
Page 8: Your Washing Machine
Your washing machine Overview 1- Power cable 2- Top panel 3- Control panel 4- Filter cap 5- Adjustable feet 6- Loading door 7- Detergent drawer 8- Drain hose... -
Page 9: Package Contents
Package Contents 1- Power cable 2- Drain hose 3- Transportation safety bolts * 4- Mains water inlet hose (One of the following filter types is used for the mains hose connection.) a- Electronic water shut-off b- Mechanical water shut-off c- Standard 5- Liquid detergent container** 6- User Manual 7- Blind plug***... -
Page 10: Technical Specifications
Technical specifications Complying Commission Delegated Regulation (EU) No 1061/2010 Supplier name or trademark GRUNDIG Model name GWN59650CHB Rated capacity (kg) Energy efficiency class / Scale from A+++ (Highest Efficiency) to D (Lowest Efficiency) A+++ Annual Energy Consumption (kWh) Energy consumption of the standard 60°C cotton programme at full load (kWh) 0,900 Energy consumption of the standard 60°C cotton programme at partial load (kWh) -
Page 11: Installation
Installation Appropriate installation location • Place the machine on a rigid floor. To make the product ready for Do not place it on a long pile rug use, review the information in the or similar surfaces. user manual and make sure that •... -
Page 12: Removing The Transportation Locks
Removing the • Attach the plastic covers supplied in the User Manual bag into the transportation locks holes on the rear panel. WARNING: Do not remove the transportation locks before taking out the packaging reinforcement. WARNING: Remove the transportation safety bolts before operating the washing machine! Otherwise, the product will... -
Page 13: Connecting To The Drain
• Tighten all hose nuts by hand. • In case the hose is elevated Never use a tool when tightening after laying it on the floor level the nuts. or close to the ground (less than 40 cm above the ground), water discharge becomes more difficult and the laundry may come out excessively wet. -
Page 14: Adjusting The Feet
Adjusting the feet Electrical connection Connect the product to a grounded WARNING: In order to outlet protected by a 16 A fuse. Our ensure that the product company shall not be liable for any operates more silently damages that will arise when the and vibration-free, it must product is used without grounding stand level and balanced... - Page 15 Should the mains lead of the Connect the brown (live) wire to appliance become damaged or the terminal in the plug marked ‘L’ need replacing at any time, it must or coloured red. be replaced by a special purpose With the alternative plugs a 13A fuse made mains lead which can only be must be fitted either in the plug or obtained from a Authorised Service...
-
Page 16: Preparation
Preparation Sorting the laundry • Sort laundry according to type of fabric, colour, and degree of soiling and allowable water temperature. • Always obey the instructions given on the garment tags. LAUNDRY WASH SYMBOLS Machine Wash Symbols WASH Maximum Water Temperatures Symbol(s) Drying... -
Page 17: Preparing Laundry For Washing
Preparing laundry for washing • Laundry that are subjected to materials such as flour, lime • Laundry items with metal dust, milk powder, etc. intensely attachments such as, underwired must be shaken off before placing bras, belt buckles or metal into the machine. -
Page 18: Initial Use
Initial use Laundry Weight (g) type Before starting to use the product, Bathrobe make sure that all preparations are 1200 completed in accordance with the Napkin instructions in sections "Important Duvet cover safety and environment instructions" Bed Sheet and "Installation". Pillowcase To prepare the product for washing Tablecloth... - Page 19 Detergent, softener and other soiling level the programme is cleaning agents started with start/pause button. • The machine will measure the load, and determine the detergent amount depending on the load amount and selected functions. During the washing operation, the detergent intake is not visible, it will be intaken directly with the water.
-
Page 20: Tips For Efficient Washing
Adding Detergent and Softener to Clothes Wrong Compartment: Colours • If the detergent and softener are (Recommended added to wrong compartments temperature range based see “Cleaning the detergent on soiling level: cold -40 drawer” °C) Tips for efficient washing Powder and liquid detergents recommended Clothes for colors can be used at... - Page 21 Clothes Clothes Dark colours Delicates/Woollens/Silks (Recommended (Recommended temperature range based temperature range based on soiling level: cold -40 on soiling level: cold -30 °C) °C) Liquid detergents suitable Prefer liquid detergents for colors and dark colors produced for delicate Heavily can be used at dosages Heavily clothes.
-
Page 22: Operating The Product
Operating the product Control panel Cotton MultiSense Cotton Eco Steam Refresh Anti-Allergy StainCare Synthetics Mini 14' QuickWash 40°/40' DarkCare WoolProtect Bedding MachineCare Hand Wash Spin+Pump Rinsing Temp. Spin Soil Powder Silent Time Home Extra Start On/Off Level Detergent Whiz Rinse Mode Delay Pause... -
Page 23: Programme And Consumption Table
Programme and consumption table Selectable temperature Programme (°C) range °C 2.03 1600 • • • • Cold-90 Cotton 1.33 1600 • • • • Cold-90 0.93 1600 • • • • Cold-90 60** 0.900 1600 Cold-60 Cotton Eco 60** 0.670 1600 Cold-60 40**... - Page 24 The auxiliary functions in the table may vary according to the model of your machine. Water and power consumption may vary subject to the changes in water pressure, water hardness and temperature, ambient temperature, type and amount of laundry, selection of auxiliary functions and spin speed, and changes in electric voltage.
-
Page 25: Preparing The Machine
Preparing the machine Programme Selection display. All programme selections are shown • Check if the hoses are connected in this way. tightly. Programmes are limited • Plug in your machine. with the highest spin • Turn the tap on completely. speed appropriate for that •... -
Page 26: Quickwash 40°/40
Programme 3 Programme 5 • Anti-Allergy • QuickWash 40°/40’ Use this programme for your Use this programme to wash lightly laundry for which you require an soiled and unspotted cotton clothes anti-allergic and hygienic washing in a short time. at high temperature with intensive Programme 6 and long washing cycles. -
Page 27: Machinecare 70
Programme 7 Programme 8 • Spin+Pump • MachineCare Use this programme to drain the Use this programme regularly water in the machine. (once in every 1-2 months) to clean the drum and provide the required hygiene. Run the programme Programme 9 without any laundry in the •... -
Page 28: Selectable
Suitable clothes and the appropriate Automatic programme settings for washing them are shown in the table below. Selectable Max. laundry Type of laundry Laundry content temperature amount levels Home textiles (duvet cover, bed sheet, pillowcase, coverlet, towel, bathrobe, table Cotton, lycra Cold - 60 ˚C Full capacity cloth, hand cloth, napkin, couch cover, beach... - Page 29 Programme 10 Programme 14 • Steam Refresh • Bedding To soften the soiling, it pre-treats Use this programme to wash your the laundry by giving steam. fiber duvets that bear „machine You can also use this programme washable“ tag. Make sure that you to moisten the rumpled shirts and have loaded the duvet correctly in open their creases.
-
Page 30: Temperature Selection
Temperature selection If you scroll to cold wash Whenever a new programme option and press Temperature is selected, the recommended Adjustment button again, the temperature for the programme recommended maximum appears on the temperature temperature for the selected indicator. It is possible that the programme appears on recommended temperature value the display. -
Page 31: Soiling Level Selection
This function holds the laundry in the If you want to spin the laundry held final rinsing water. in water, adjust the Spin Speed and press Start / Pause / Cancel button. The programme resumes. Water Rinse Hold is drained, laundry is spun and the programme is completed. - Page 32 • StainCare • Select the automatic stain There is a special stain program in programme. your machine that ensures removal • Select the stain type you wish to of different types of stains properly. remove. • Ensure that the garment tag is Wash your colorfast cotton clothes read carefully and appropriate with this programme;...
- Page 33 Practical Pre-treatment Processes Deodorant/Sweat: You can perform Recommended for Stains pre-treatment on the stained area by using stain remover or liquid Shoe Polish: Apply pre-treatment detergent if it is a fresh stain, and on liquid polish stains by using white vinegar if it is an old one. powder detergent made pasty with Perform normal washing with a little water.
- Page 34 Cosmetics: Apply pre-treatment Oil (Kitchen Oils, Motor Lubricants, Butter, Salad Dressing, Grease, on the stained cloth by using Mayonnaise, Tar): Clean the stain remover or liquid detergent. Wash the cloth at the appropriate excessive part of the stain and apply temperature complying with the pre-treatment.
-
Page 35: Dosing Liquid Detergent
Dosing liquid detergent • After closing the detergent drawer, the flashing ‚detergent Installation: symbol ‘ will start to lit steadily. Add Liquid Detergent • Indicates that the components are filled and the drawer is closed. For coloured and white laundry, it is recommended to fill commonly used liquid detergent in the compartment. -
Page 36: Auxiliary Function
Auxiliary function Frame of the auxiliary function symbol that cannot be selected with the current programme will not illuminate. When you press the button of such auxiliary functions, "Not adjustable" appears on the display for 3 seconds. Also the frames of the auxiliary function suitable for the current programme after the washing has started remain illuminated. -
Page 37: Recommendations For The Amount Of
Recommendations for the LOAD SENSOR: amount of laundry and detergent Since the load sensor is The amount of loaded laundry is only available in certain measured when the loading door is models it may not be open and the Load indicator shows available in your product. -
Page 38: Starting The Programme
When the End Time selection is done, the time End time setting appearing on the screen consists of end time plus the duration of the selected programme. Starting the programme In order for the End Time function • Press Start / Pause button to is activated and the programme is start the programme. -
Page 39: Loading Door Lock
Loading door lock Changing the programme selection after programme has started: There is a locking system on the The programme change is loading door of the machine that not allowed when the current prevents opening of the door in cases programme is running. -
Page 40: Child Lock
Child Lock To deactivate the Child Lock: Press and hold 1 Auxiliary Function Use Child Lock function to prevent button for 3 seconds. After the children from tampering with the countdown as "Child Lock: 3 ıı ıı ıı machine. Thus you can avoid any ”... -
Page 41: End Of Programme
Use 1 and 3 Auxiliary Function If you want to open the buttons to navigate in menus. loading door after you have cancelled the programme but it is not possible to open Store Settings? the loading door since the water level in the machine is above the loading door opening, then turn the Programme Selection... - Page 42 • Press and hold either 1 or 3 • Press and hold either 1 or 3 Auxiliary Function button for Auxiliary Function button when 3 seconds when the desired the desired brightness level is language is displayed. "Save displayed. Desired brightness setting?"...
- Page 43 • Press either 1 or 3 Auxiliary Function button to confirm to the Volume: Low Factory Settings. "Save setting?" will be displayed. Store Settings? Restoring the factory settings When the factory settings are restored: • Display language will return to •...
-
Page 44: Your Machine Is Equipped With A "Standby
Your machine is equipped • The amount of detergent that will be used during washing will be with a “Standby Mode” determined automatically based In case of not starting any on this value and the selected programme or waiting without programme, amount of laundry making any other operation when and level of soiling. - Page 45 Your washing machine will send you HomeWhiz notifications in the following cases: Function • When the programme is oven, • When the door of the washing HomeWhiz allows you to use your machine is opened, smart device to check your washing •...
-
Page 46: The Homewhiz Function
HomeWhiz Setup and After connecting your smart device to the „HomeWhiz“ network, return Settings Menu to the HomeWhiz app. On the app, In order for the application to run, you can see the washing machine a connection between your white you are adding. -
Page 47: Setting Up A Washing Machine That Is Connected To Someone Else's
Deleting HomeWhiz You can use your washing machine with more than one smart device. To Account Linking: do this, download the HomeWhiz app If you want to use a washing machine on the other smart device as well. which has been associated and linked When you launch the app, you will with another user‘s account, you can need to log in with the account you... -
Page 48: Wlan Settings
WLAN Settings • Press 2nd auxiliary function button. A confirmation message To manage the wireless connection will be displayed when you press settings; the button. Press the 1st auxiliary • Go to the Settings menu. function button to save the •... -
Page 49: Using The Homewhiz Function
In the event that HomeWhiz symbol on the screen indicates the function cannot be turned on, the connection status. If the symbol is constantly lit, it indicates that function frame on the button will be your appliance is connected to the off. -
Page 50: Functions In Which You Can Use The Smart Anti Crease Function
Troubleshooting If you want to take out your Take the following actions when you laundry experience any problems related to before the anti crease the control or connection. Observe function ends, you need whether the problem persists to switch the machine after the action you have taken. -
Page 51: Quick User Guide
Quick User Guide Always select the lowest required temperature. Preparing the machine Higher temperature means • Check if the hoses are connected higher power consumption. tightly. Auxiliary function selection • Plug in your machine. Select the desired auxiliary functions • Turn the tap on completely. before starting the programme. -
Page 52: Starting The Programme
Cancelling the programme Starting the programme The programme is cancelled when • Press Start / Pause button to the machine is turned off and on start the programme. again. Press and hold On / Off button • Start indicator lights to show for 3 seconds. -
Page 53: Child Lock
Child Lock To deactivate the Child Lock: Press and hold 1 Auxiliary Function Use Child Lock function to prevent button for 3 seconds. After the children from tampering with the countdown as "Child Lock: 3 ıı ıı ıı machine. Thus you can avoid any ”... -
Page 54: Maintenance And Cleaning
Maintenance and cleaning Service life of the product extends and frequently faced problems decrease if cleaned at regular intervals. • Remove the top cover of the Cleaning the detergent drawer detergent drawer and wash inside of the drawer. • After washing it, place the cover back to its location. -
Page 55: Cleaning The Body And Control Panel
If the holes on the bellow shown in • Remove the nuts of the water the figure is blocked, open the holes intake hoses to access the filters using a toothpick. on the water intake valves. Clean them with an appropriate brush. Foreign metal substances If the filters are too dirty, take will cause rust stains in... -
Page 56: If The Product Has An Emergency Draining Hose, To Discharge The Water
• Some of our products have WARNING: After each use emergency draining hose and close the supply hose tap of some does not have. Follow the the product. steps below to discharge the In order to clean the dirty filter and water. -
Page 57: Troubleshooting
Troubleshooting Program does not start after closing the door. *Press the Start / Pause / • Start / Pause / Cancel button was not pressed. >>> Cancel button. • The programme will not start if the liquid detergent container is empty or if the Fill the liquid detergent container. - Page 58 Machine directly discharges the water it takes in. Connect the water draining • Draining hose might not be at adequate height. >>> hose as described in the operation manual. No water can be n in the machine during washing. This is not •...
- Page 59 Machine does not switch to spinning step. (*) Automatic • There might be an imbalance of laundry in the machine. >>> unbalanced load detection system might be activated due to the unbalanced distribution of the laundry in the drum. Check the filter •...
- Page 60 It does not rinse well. • The amount, brand and storage conditions of the detergent used are Use a detergent appropriate for the washing machine and your inappropriate. >>> laundry. Keep detergents closed in an environment free of humidity and do not expose them to excessive temperatures.
- Page 61 Too much foam forms in the machine. (**) • Improper detergents for the washing machine are being used. >>> detergents appropriate for the washing machine. Use only sufficient amount of • Excessive amount of detergent is used. >>> detergent. Store detergent in a closed •...
- Page 62 Accidental damage, misuse or abuse of a product. An attempted repair of a product by anyone other than a Grundig Approved Engineer (the “Engineer”). Installation or use of a product where such installation or use fails to meet the requirements contained in this guarantee or the User Instructions Booklet.
- Page 63 11. Optional extras, where available (i.e. extendable feet) are supplied on a chargeable basis only. Does Grundig offer replacements? This is a repair-only guarantee. On occasion, the Manufacturer may at its sole discretion, replace your product with a new product instead of carrying out a repair.
- Page 64 You can register by first visiting grundig.co.uk/register and by following the online instructions. Grundig Free standing and Built-in appliances come with a 36 month parts and labour guarantee as standard, which can be extended to a 60 months parts and labour guarantee by registering within 90 days of the original purchase date To make a claim against your Grundig Eco Inverter Motor Guarantee (the “Guarantee”), all customer and product details must...
- Page 65 Send us a secure message through our online contact us form. Please visit our website, click Contact Us and choose a product support topic from the list of options. Complete the required details and click send message. Product registrations For UK and Republic of Ireland product registrations please visit grundig.co.uk/register.
- Page 68 www.grundig.com...
Need help?
Do you have a question about the GWN59650CHB and is the answer not in the manual?
Questions and answers