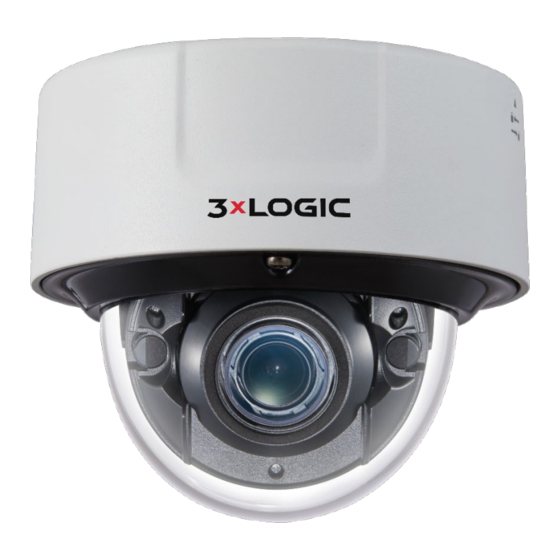
Summary of Contents for 3xLogic VX-2S-D4-RIA
- Page 1 S-Series Camera Quick Start Guide | VX-2S-D4-RIA VISIX S-Series Indoor IP Dome Camera VX-2S-D4-RIA Quick Start Guide v01-2019 12000 Pecos St., Suite 290, Westminster, CO 80234 | www.3xlogic.com | (877) 3XLOGIC...
-
Page 2: Table Of Contents
................11 ETECTING CTIVATING HANGING THE AMERA DDRESS 1.1 A VISIX S-S VIGIL S .................... 12 DDING A ERIES AMERA TO ERVER 1.2 A .......................... 14 CCESS ROWSER 12000 Pecos St., Suite 290, Westminster, CO 80234 | www.3xlogic.com | (877) 3XLOGIC... -
Page 3: Camera Overview
VX-PM-D2: Pendant Mount Adaptor VX-FM-D2: Indoor Ceiling Flush-Mount Adaptor VX-POLE: Pole Mount Adaptor VX-CM: Corner Mount Adaptor VX-WMJ-D2: Wall Mount Adaptor with Junction Box 12000 Pecos St., Suite 290, Westminster, CO 80234 | www.3xlogic.com | (877) 3XLOGIC... -
Page 4: Installation
Steps: 1. Use the supplied hardware to unfasten the dome screws and remove the from the chassis. 2. Insert the microSD card into the available reader slot. 12000 Pecos St., Suite 290, Westminster, CO 80234 | www.3xlogic.com | (877) 3XLOGIC... -
Page 5: Installing The Camera - Cabling Routed Through Base
Route the cablings harness through the center cable hole. Use a Philipps-head screwdriver to fasten the mounting base to the installation surface. Proceed to Installation – Cabling and Safety Wire for next steps. . 12000 Pecos St., Suite 290, Westminster, CO 80234 | www.3xlogic.com | (877) 3XLOGIC... -
Page 6: Installing The Camera - Cabling Routed Through Side
Drill the anchoring points into the installation surface. Insert the anchors. Use a screwdriver to fasten the mounting base to the installation surface. Proceed to Installation – Cabling and Safety Wire for next steps. 12000 Pecos St., Suite 290, Westminster, CO 80234 | www.3xlogic.com | (877) 3XLOGIC... -
Page 7: Installation - Cabling And Safety Wire
(A). If you are routing the cable through the side of the camera, no action is required (B). 2. Attach the safety cable to the clip located on the camera mounting base. 12000 Pecos St., Suite 290, Westminster, CO 80234 | www.3xlogic.com | (877) 3XLOGIC... - Page 8 4. Remove the alarm and power blocks from the camera. 5. Wire the alarm and power blocks as necessary. Available wiring and inputs / outputs may vary depending on your camera model. 12000 Pecos St., Suite 290, Westminster, CO 80234 | www.3xlogic.com | (877) 3XLOGIC...
- Page 9 If you are routing cabling through the base of the camera, proceed to Installation – Finalizing Installation. If routing through the side of the camera chassis, remove the cabling plug and route the cabling harness through the side. 12000 Pecos St., Suite 290, Westminster, CO 80234 | www.3xlogic.com | (877) 3XLOGIC...
-
Page 10: Installation - Finalizing Installation
1. Secure the camera body to the mounting base aligning the camera and base using the indicators then pushing and turning the camera body counter-clockwise into the base until snug. 2. Use the provided torx key to secure the camera body to the base. 12000 Pecos St., Suite 290, Westminster, CO 80234 | www.3xlogic.com | (877) 3XLOGIC... -
Page 11: Camera Setup
After networking the camera with the LAN, the user must obtain the camera’s IP address to connect to the device. To obtain the IP address, the 3xLOGIC Camera (VISIC IP) Setup Utility, a software tool which can automatically detect online network cameras on the LAN, add these devices to VIGIL Server and list the device information including IP address, subnet mask, port number, device serial number, device version, etc…... -
Page 12: Adding Avisix S-Series Camera To Vigil Server
1.1 Adding a VISIX S-Series Camera to VIGIL Server Purpose: By following the steps outlined in this section, a user can add a camera to VIGIL Server using the 3xLOGIC Camera (VISIX IP) Setup Utility. The utility was previously utilized in Section 2.1.2 to detect and change the camera’s IP address. - Page 13 S-Series Camera Quick Start Guide | VX-2S-D4-RIA 3xLOGIC Camera (VISIX IP) Setup Utility – Selecting Camera from Online Devices List Figure 1-2 7. After the utility successfully accesses the camera, click Save to VIGIL. A window will deploy where the user can assign the camera’s stream profiles.
-
Page 14: Access Ui Via Web Browser
The username/password for the camera will have been configured during camera activation If the camera has already been configured using one of 3xLOGIC’s setup tools (VIGIL Easy Setup Wizard, 3xLOGIc Camera Setup Utility) then default credentials will have been changed by the installer (this is a standard security precaution enforced by the setup tools). - Page 15 After the Web Components plugin successfully install, you can access and operate the camera’s browser interface. Visit the 3xLOGIC Document Library for the latest available support documentation. 12000 Pecos St., Suite 290, Westminster, CO 80234 | www.3xlogic.com | (877) 3XLOGIC...
- Page 16 Toll Free: 877.3xLOGIC www.3xlogic.com © 2019 3xLOGIC Inc. All rights reserved. Information in this document is subject to change without notice. 3xLOGIC and the 3xLOGIC logo are trademarks of 3xLOGIC, Inc. all other trademarks are property of their respective owners.


