
Related Manuals for 3xLogic VX-3V-ID-RIAWD


Summary of Contents for 3xLogic VX-3V-ID-RIAWD
- Page 1 V-Series Camera Quick Start Guide | VX-3V-ID-RIAWD VISIX V-Series All-in-One Camera – Gen II VX-3V-ID-RIAWD Quick Start Guide v01-2017 12000 Pecos St., Suite 290, Westminster, CO 80234 | www.3xlogic.com | (877) 3XLOGIC...
-
Page 2: Table Of Contents
V-Series Camera Quick Start Guide | VX-3V-ID-RIAWD Table of Contents 1 CAMERA OVERVIEW ............................ 3 VX-3V-ID-RIAWD ......................3 AMERA ESCRIPTION Available Mounts ............................4 Installation – Ceiling Mount ........................... 5 2 CAMERA SETUP ............................8 ........................8 VAILABLE AMERA ETUP OOLS DHCP ....................8 AMERA ETUP NABLED ETWORKS -DHCP ......................8 AMERA ETUP ETWORKS VIGIL ..........9 EMOTE ONITORING AND IEWING DDING A ERIES AMERA TO LIENT LOGIC EMOTE... -
Page 3: Camera Overview
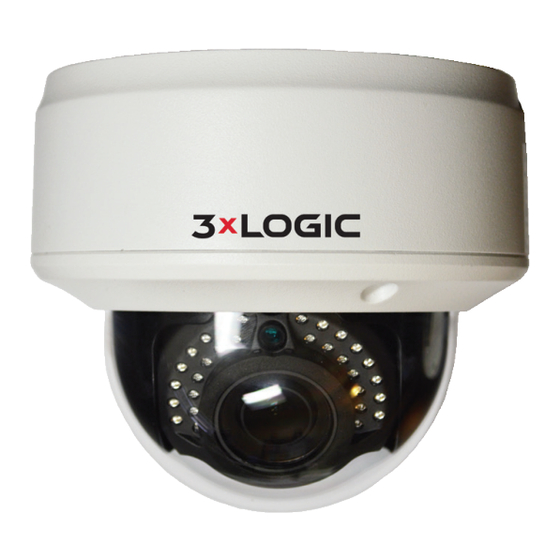
V-Series Camera Quick Start Guide | VX-3V-ID-RIAWD 1 Camera Overview VX-3V-ID-RIAWD Camera Description See below for descriptions of the different camera components. Description of Overview 2 Number Description Number Description Black Liner Bubble Lens BNC Interface Reset Status Indicator Test Serial Port Micro SD Card Slot Adapter Plate Side Outlet Overview Figure 1-1 Overview (2) Figure 1-2 12000 Pecos St., Suite 290, Westminster, CO 80234 | www.3xlogic.com | (877) 3XLOGIC... -
Page 4: Available Mounts
V-Series Camera Quick Start Guide | VX-3V-ID-RIAWD The interfaces on the rear panel are shown below: Overview (3) Figure 1-3 Description of Overview (3) Name/Label Description 10M/100M Self-adaptive Ethernet Port(PoE Supported) LAN ( PoE ) AUDIO OUT/IN Audio Out/In Auxiliary video output CVBS,GND Alarm Out 1A,1B RS-485 Interface D+,D- ALARM IN IN,GND Power Supply Interface(12 VDC ) DC12V NOTE: Press and hold RESET for 10s when the camera is powering on or rebooting to restore the default settings, including the user name, password, IP address, port No., etc. AVAILABLE MOUNTS D2 Ceiling Flush Mount (3xLOGIC Product #: VX-FM-D2) D2 Wall Mount (3xLOGIC Product #: VX-WM-D2) D2 Wall Mount w/ Junction Box (3xLOGIC Product #: VX-WMJ-D2) Universal Corner Mount (3xLOGIC Product #: VX-CM) Universal Pole Mount (3xLOGIC Product #: VX-POLE) 12000 Pecos St., Suite 290, Westminster, CO 80234 | www.3xlogic.com | (877) 3XLOGIC... -
Page 5: Installation - Ceiling Mount
V-Series Camera Quick Start Guide | VX-3V-ID-RIAWD INSTALLATION – CEILING MOUNT Steps: Drill the screw holes and the cable hole according to the supplied drill template. Hole BOTTOM Drill Template Figure 1-4 NOTE: (Optional) Routing the cable from the side outlet instead of the cable hole drilled on the ceiling is possible. Use pliers to remove the part shown in Figure 1-5, and simply route the cables through the side outlet. Side Outlet Side Outlet Figure 1-5 Attach the adapter plate to the ceiling with the supplied screws. 12000 Pecos St., Suite 290, Westminster, CO 80234 | www.3xlogic.com | (877) 3XLOGIC... - Page 6 V-Series Camera Quick Start Guide | VX-3V-ID-RIAWD Install the Adapter Plate Figure 1-6 Align the mounting base with the adapter plate and rotate the mounting base counter-clockwise to affix it to the adapter plate, and then secure it by tightening the lock screw. Lock Screw Install the Mounting Base Figure 1-7 Adjust the surveillance angle according to the figure below. Panning angle [0~80°], tilting angle [0~355°], and azimuth angle of the lens [0~355°]. 0~80° 0~355° 0~355° 3-axis Adjustment Figure 1-8 Zoom and Focus Adjustment: Cameras of this series are equipped with a motor-driven lens. You can adjust the zoom and focus level on PTZ control panel by visiting the camera via web browser or client software. See Section 2 for information on identifying and setting up the camera on your network Please reference the VIGIL Client User Guide or the 3xLOGIc VISIX V-Series Gen II User Manual for information on adjusting zoom and focus from VIGIL Client or from the camera browser interface respectively. 12000 Pecos St., Suite 290, Westminster, CO 80234 | www.3xlogic.com | (877) 3XLOGIC...
- Page 7 V-Series Camera Quick Start Guide | VX-3V-ID-RIAWD Figure 5-1 Zoom and Focus Adjustment via Camera Browser Interface Attach the black liner to the dome drive. Attach the bubble to the dome drive and rotate to tighten it Bubble Dome Drive Black Liner Install the Black Liner and Bubble Figure 1-9 Tighten the lock screw to complete the installation. Complete the Installation. 12000 Pecos St., Suite 290, Westminster, CO 80234 | www.3xlogic.com | (877) 3XLOGIC...
-
Page 8: Camera Setup
Follow prompts in the VSX Setup app, and scan the camera’s QR to complete configuration and enrollment. You will be required to activate the camera by assigning a complex password. Be sure to remember the VIGIL Connect Alias as well as the username and password you assign to the camera. These credentials will be required to add the camera to other VIGIL utilities. Ensure that the camera is configured with the proper time zone, auto daylight savings update and set for NTP (auto time sync). The cameras live view will be displayed in the app for final positioning. Setup results can be emailed upon completion for easy monitoring configuration. Note: The V-Series camera will automatically check for updates and format the SD card. Please allow 15 minutes before power cycling the camera. Camera Setup - Non-DHCP Networks The 3xLOGIC All-in-One PC Setup software was engineered specifically for use in non-DHCP networks where the mobile app (requires DHCP) cannot be used to configure the camera. A laptop connected to the same network as the camera will be required to discover the camera and assign a valid IP address using the 3xLOGIC All-in-One PC Setup. Download and install the 3xLOGIC All-in-One PC Setup Utility for Windows from: http://www.3xlogic.com/support-center/software 12000 Pecos St., Suite 290, Westminster, CO 80234 | www.3xlogic.com | (877) 3XLOGIC... -
Page 9: Remote Monitoring And Viewing - Adding A V-Series Camera To Vigil Client
V-Series Camera Quick Start Guide | VX-3V-ID-RIAWD Confirm the PC is networked with the cameras then launch the utility. If properly networked, the utility will automatically detect cameras on the network (click Refresh to refresh the list). Select the desired device from the list of available cameras. Click IP Setup and assign the desired IP. Fill out installer and company information. To activate the camera, you will be required to assign a complex password. Confirm the camera Live View preview is as desired and click Continue. Adjust any/all camera settings including the camera name and VIGIL Connect alias. Be sure to remember the VIGIL Connect Alias as well as the username and password you assign to the camera. These credentials will be required to add the camera to other VIGIL utilities. Fill out remaining information and complete steps in the setup tool to receive an installation summary e-mail. Note: The V-Series camera will automatically check for updates and format the SD card. Please allow 15 minutes before power cycling the camera. Remote Monitoring and Viewing - Adding a V-Series Camera to VIGIL Client Steps: To interface a V-Series Camera with VIGIL Client: Launch VIGIL Client (Local Mode only; VCM mode will only display Servers from a networked VCM Server) and select Servers from the Servers top menu. This will launch the Servers window. VISIX V-Series devices are considered edge recording devices and thus are recognized as their own VIGIL Server within the VIGIL suite. -
Page 10: Remote Monitoring And Viewing - Adding A V-Series Camera To
V-Series Camera Quick Start Guide | VX-3V-ID-RIAWD If the test is successful, then VIGIL Client can successfully communicate with the Server. Click OK at the bottom of the Add Server window after configuring all required fields to save the new Server to VIGIL Client. For more information on configuring VIGIL Servers, please see Section 5.1 of the VIGIL Client Users Guide. NOTE: The camera will be visible in the Client treeview and will be represented by a icon. The camera video stream can be added to the VIGIL Client viewer in the same manner as VIGIL Server cameras; Simply extend the camera’s drop-down menu and double click the icon to add it to the viewer. Alternatively, a user can drag-and-drop the camera stream icon into the desired frame of the VIGIL Client viewer. For more information on configuring VIGIL Servers/V-Series All-in-One camera in VIGIL Client, please see Section 5.1 of the VIGIL Client Users Guide Remote Monitoring and Viewing - Adding a V-Series Camera to 3xLOGIC View Lite II Mobile (Android and iOS) Steps: To interface a V-Series camera with 3xLOGIC’s View Lite II mobile app, launch the View Lite II app on your mobile device (Android OS is pictured in the below screenshot, however, the process is identical in the iOS version). Open the Options side menu and select Server Configuration. The Video Source list will display. Opening Video Source Menu Figure 2-2 Select VIGIL Server. VISIX V-Series devices are considered edge recording devices, and thus are recognized as their own VIGIL Server within View Lite II. The VIGIL Server window will now deploy. A menu of all VIGIL Servers already interfaced with View Lite II will be visible. : Adding a Video Source - Add Video Source Figure 2-3 To add a new instance of a video source, tap the icon. Enable VIGIL Connect. Alternatively, if you wish to use traditional network connection criteria, leave VIGIL Connect disabled and enter in an IP/DNS Name and Port info (if using standard network connection criteria, also ignore step 6 of these instructions) for the device. Enter in the VIGIL Connect alias for the desired VISIX V-Series camera (VSeriescam1 used in the above example). 12000 Pecos St., Suite 290, Westminster, CO 80234 | www.3xlogic.com | (877) 3XLOGIC... - Page 11 V-Series Camera Quick Start Guide | VX-3V-ID-RIAWD View Lite II - Add/Edit Server Form - Android Figure 2-4 Fill in the remaining required fields and tap Save to save the V-Series camera to View Lite II. A user may now add the camera stream to the View Lite viewer using the same process as adding VIGIL Server, VCM or 3xCLOUD networked cameras. 12000 Pecos St., Suite 290, Westminster, CO 80234 | www.3xlogic.com | (877) 3XLOGIC...
- Page 12 12000 Pecos St., Suite 290 Westminster, CO 80234 303.430.1969 Toll Free: 877.3xLOGIC www.3xlogic.com © 2018 3xLOGIC Inc. All rights reserved. Information in this document is subject to change without notice. 3xLOGIC and the 3xLOGIC logo are trademarks of 3xLOGIC, Inc. all other trademarks are property of their respective owners. Revised: November 29th, 2017...
Need help?
Do you have a question about the VX-3V-ID-RIAWD and is the answer not in the manual?
Questions and answers