Table of Contents
Advertisement
Quick Links
Advertisement
Table of Contents

Related Manuals for Keller CellaTemp PX 21


Summary of Contents for Keller CellaTemp PX 21
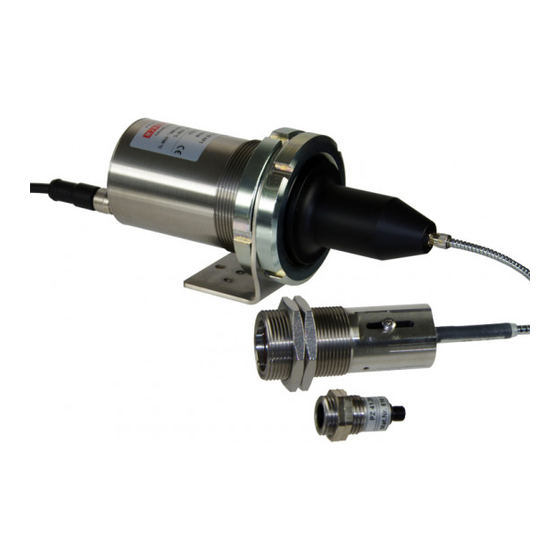
- Page 1 Pyrometer CellaTemp PX 21 / 31 / 36 Ident.-Nr.: 1102807 09/2019...
-
Page 2: Table Of Contents
Operating instructions CellaTemp PX 21 / 31 / 36 Content 11 General ��������������������������������������������������������������������������������������������������������������4 1�1 Information about the manual ���������������������������������������������������������������������4 1�2 Explanation of the symbols �������������������������������������������������������������������������4 1�3 Liability and Warranty ����������������������������������������������������������������������������������4 1�4 Copyright �����������������������������������������������������������������������������������������������������5 12 Safety �����������������������������������������������������������������������������������������������������������������5 2�1 Intended use �����������������������������������������������������������������������������������������������5 2�2 User´s responsibility ������������������������������������������������������������������������������������5... - Page 3 Operating instructions CellaTemp PX 21 / 31 / 36 11�7 Hysteresis function ����������������������������������������������������������������������������������20 11�8 Window function ������������������������������������������������������������������������������������21 11�9 Switching output OUT 2 ������������������������������������������������������������������������22 11�10 Damping function ����������������������������������������������������������������������������������22 11�11 Peak hold function ���������������������������������������������������������������������������������23 11�12 ATD function ������������������������������������������������������������������������������������������23 11�13 IO-Link ���������������������������������������������������������������������������������������������������27 12 Menu ����������������������������������������������������������������������������������������������������������������27 12�1 Analogouge output Ao �����������������������������������������������������������������������������27...
-
Page 4: General
Operating instructions CellaTemp PX 21 / 31 / 36 1 General 1.1 Information about the manual The Operating Manual shall enable the user to properly install the pyrometer and the required accessories� Before starting installation, be sure to read and... -
Page 5: 1�4 Copyright
Operating instructions CellaTemp PX 21 / 31 / 36 1.4 Copyright This Operating Manual should be treated as confidential� It is solely intended for the use by persons involved with the instrument� This manual may not be made available to a third party without prior Manufacturer’s consent� Please contact the Manufacturer if the need should arise�... -
Page 6: 2�4 Laser Radiation Hazard
Operating instructions CellaTemp PX 21 / 31 / 36 2.4 Laser Radiation Hazard Laser radiation can be harmful to eyey! The CellaTemp PX with laser operates with a class 2 red light laser� Direct pro- longed viewing of a laser beam can injure the retina� Therefore, the following safe- ty precautions must be strictly observed, otherwise the laser may not be operated! •... -
Page 7: Shipping, Packaging And Disposal
Operating instructions CellaTemp PX 21 / 31 / 36 If the pyrometer is installed within, a machine or equipment in such a way that the instrument’s warning label is visibly blocked, additional laser warning labels (not included in scope of delivery) must be affixed to the equipment or accessory in immediate vicinity to the laser beam emission path opening�... -
Page 8: Theory Of Non-Contact Temperature Measurements
Operating instructions CellaTemp PX 21 / 31 / 36 4 Theory of Non-Contact Temperature Measurements All materials radiate thermal energy in all states of aggregation above absolute zero� This radiation is mainly caused by atomic or molecular oscillations� This temperature radiation is only a limited sector within the total electromagnetic radiation spectrum�... -
Page 9: 4�3 Measurements Of Real Radiators
Operating instructions CellaTemp PX 21 / 31 / 36 The emissivity coefficient indicates the ratio of radiation of a real body (target) to the radiation of an ideal black body (target) to the radiation of an ideal black body� ε(λ): Emissivity coefficient of the object’s surface (targeted spot) at wavelengh λ... -
Page 10: Ways To Determine Emissivity
Operating instructions CellaTemp PX 21 / 31 / 36 5 Ways to determine emissivity Technical literature or operating manuals often contain data on the emissivity of various materials� This information should be used with caution, however� It is important to know for which temperature and which wavelength the emissivity value is applicable�... -
Page 11: Installation
Operating instructions CellaTemp PX 21 / 31 / 36 7 Installation 7.1 Assembly basic unit The basic unit should be mounted where it is not unnecessarily exposed smoke, heat or vapour� ATTENTION At ambient temperature > 65 °C, the basic unit must be cooled or protected against radiation by shielding plate�... -
Page 12: 7�3 Aiming The Pyrometer
Operating instructions CellaTemp PX 21 / 31 / 36 7.3 Aiming the pyrometer Point the measuring head at the object to be measured� If possible, the pyrometer should be installed at an angle of 90° to the object to be measured� The angle should not be less than 45°... - Page 13 Operating instructions CellaTemp PX 21 / 31 / 36 The activated laser pilot light can influence the measured temperature� This influence will vary, depending on the instrument model and the temperature� To protect the laser against overload, an over temperature is provided� At tempera- tures above 60 °C, the laser switches of an can no longer be activated�...
-
Page 14: Electrical Connection
Operating instructions CellaTemp PX 21 / 31 / 36 8 Electrical connection ATTENTION • The pyrometer may only be installed by a skilled, qualified electrician� Do not connect the instrument while the voltage supply source is turned on� Please observe international safety regulations at all times�... -
Page 15: Setup
Operating instructions CellaTemp PX 21 / 31 / 36 9 Setup For non-contact temperature measurement, the pyrometer uses the intensity of the infrared radiation� In order to obtain accurate measurement results, the respective emissivity of the measurement object must be set on the pyrometer (→ emissivity determination)�... -
Page 16: Shielding And Grounding
Operating instructions CellaTemp PX 21 / 31 / 36 10 Shielding and Grounding The pyrometer housing is connected to the shielding via the cable connector! Differences in ground potentials might cause an equalising current to flow between devices through a cable shielded at both ends� In this case, be sure to install an additional equipotential bonding line�... -
Page 17: Operating Control And Display
Operating instructions CellaTemp PX 21 / 31 / 36 11 Operating control and display 1 to 4: Indicator-LEDs LED 1 = Switching state of switching output OUT1 LED 2 = Switching state of switching output OUT2 LED 3 = Laser pilot light active... -
Page 18: 11�1 Processing Of Measuring Signals
Operating instructions CellaTemp PX 21 / 31 / 36 11.1 Processing of measuring signals The pyrometer disposes of an IO-Link interface� The generated three output signals correspond to the parameterization: • Out 1: Switching output/ IO-Link ■ Switch signal: threshold value temperature / status signal •... -
Page 19: 11�3 Switching Threshold Out 1
Operating instructions CellaTemp PX 21 / 31 / 36 11.3 Switching threshold OUT 1 OUT1 changes its switching status when the configured upper or lower thersholds [d1. S P,d1. r P] are exceeded. Source d1. S specifies the signal that is output at OUT1�... -
Page 20: 11�7 Hysteresis Function
Operating instructions CellaTemp PX 21 / 31 / 36 11.7 Hysteresis function [dr] [dr] [dS] [dS] [dr] [dS] [dS] [dS] [dr] [dS] [dr] [dS] [dS] [dr] [dS] [dr] = temperature rP = rest point = time dS = switch on delay... -
Page 21: 11�8 Window Function
Operating instructions CellaTemp PX 21 / 31 / 36 11.8 Window function [dS] [dr] [dS] [dr] [dr] [dS] [dr] [dr] [dS] [dr] [dS] [dr] [dS] [dS] = temperature rP = lower limit value = time dS = switch on delay... -
Page 22: 11�9 Switching Output Out 2
Operating instructions CellaTemp PX 21 / 31 / 36 11.9 Switching output OUT 2 OUT2 changes its switching state according to the adjusted function� The functions and parameters are the same as OUT 1� 11.10 Damping function When the target object‘s temperature is erratic, the damping function smoothens these temperature fluctuations in order to stabilize the measuring signal�... -
Page 23: 11�11 Peak Hold Function
Operating instructions CellaTemp PX 21 / 31 / 36 11.11 Peak hold function It might often be desirable to determine the peak temperature during a defined time period, for example when the objects to be measured move past the pyrom- eter, resulting in temperature readings which would appear to be cyclical�... - Page 24 Operating instructions CellaTemp PX 21 / 31 / 36 The start of a measuring cycle is determined automatically and is dependent on the following variables: Before beginning the measurement, the temperature Limit 1 (LI . 1 ) reading must have been lower than Limit 1 at least once�...
- Page 25 Operating instructions CellaTemp PX 21 / 31 / 36 When the averaging function is activated (F-PR <100%) a plausibility check will be performed� The difference in temperature between the current reading and the previously stored average is established� If the difference is higher than the plausibility threshold TSP, the transmitted data will be „0“...
- Page 26 Operating instructions CellaTemp PX 21 / 31 / 36 1500 Li. 2 t.dEl t.Act t.dEl t.Act t.dis t.dis Li. I 1000 Li. 2 = limit 2 t. d EL = time delay Li. I = limit 1 t. A ct = sampling time t.
-
Page 27: 11�13 Io-Link
Operating instructions CellaTemp PX 21 / 31 / 36 11.13 IO-Link This device has an IO-Link communication interface, which requires an IO-Link- capable module (IO-Link master) for operation� The IO-Link interface allows direct access to process and diagnostic data and offers the possibility to parameterize the device during operation�... -
Page 28: 12�2 Switching Output Out 1
Operating instructions CellaTemp PX 21 / 31 / 36 12.2 Switching output OUT 1 8888 Mode dI . S Mode dI .Fn dI .SP dI .rP dI .dS dI .dr Mode Mode... -
Page 29: 12�3 Switching Output Out 2
Operating instructions CellaTemp PX 21 / 31 / 36 12.3 Switching output OUT 2 8888 Mode d2 . S d2 .Fn Mode d2 .SP d2 .rP d2 .dS d2 .dr Mode Mode... -
Page 30: 12�4 Spectral Channel
Operating instructions CellaTemp PX 21 / 31 / 36 12.4 Spectral channel 8888 Mode E .EPS t.dEL S .tAU t.Act t.diS S .FiL Li. I S .MEM S .AtD Li.L2 P .Phd t.FPr Mode S .tMP t.Ano P.Phd t.oUT TIME Mode t.FAL... -
Page 31: 12�5 Advanced Features
Operating instructions CellaTemp PX 21 / 31 / 36 12.5 Advanced Features 8888 Mode diSP Unit t.SiM rES . i.t. Mode Mode... -
Page 32: Menu Explanation
Operating instructions CellaTemp PX 21 / 31 / 36 13 Menu explanation 13.1 Analogue output Parameter Function Comments Select source LiLambda 1 Ao . S 0 – 20 mA 0/4 – 20 mA Ao . F n 4 -20 mA... -
Page 33: 13�3 Out 2 (D2)
Operating instructions CellaTemp PX 21 / 31 / 36 13.3 OUT 2 (d2) Parameter Function Comments Li Lambda 1 tU Innentemperatur Select source D2 . S A . L I . A ATD Trigger A . L I . t ATD Tact... - Page 34 Operating instructions CellaTemp PX 21 / 31 / 36 Parameter Function Comments Opening of the lower menu level ATD S . A td** Function** Time delay t. d EL Sampling time t. A ct Cut-off interval t. d iS Limit 1 Li.
- Page 35 Operating instructions CellaTemp PX 21 / 31 / 36 Opening of lower menu level Peak- S . P . h d* Hold Function* Hold time Peak-Hold Time in sec� tiME function Damping Damping Closing of lower menu level Peak- Hold Function...
-
Page 36: 13�5 Advanced Features
Operating instructions CellaTemp PX 21 / 31 / 36 13.5 Advanced Features (EF) Parameter Function Comments on current temperature value Process value display diSP off run is shown on the display Temperature unit Temperature displayed in °Cor °F Unit Temperature A temperature can be simulated t. - Page 37 Operating instructions CellaTemp PX 21 / 31 / 36 Change parameter value ► Press [MODE]. 4-20 > Current parameter value is MODE displayed� ► Press [˄ or ˅] for 2 second. > > Display flashes three times� ► Press [˄ or ˅] to change the 4-20 parameter�...
-
Page 38: Error Indications
Operating instructions CellaTemp PX 21 / 31 / 36 15 Error indications Overload switching output Sc und blinken der LED Out 1/2 Display ot and the process value Overtemperature change with 0�5 Hz Incorrect connection of supply voltage The display is turned off Supply voltage ≤... -
Page 39: 16�2 Simulate A Desired Temperature
Operating instructions CellaTemp PX 21 / 31 / 36 16.2 Simulate a desired temperature ► [t. S iM] Select extended functions [EF] ► Press [MODE] > The display shows the previously set temperature ► Press the ˄ key for 2 s >... -
Page 40: 17�2 Replacing The Protective Screen
Operating instructions CellaTemp PX 21 / 31 / 36 17.2 Replacing the protective screen To protect the pyrometer optics against contamination in harsh industrial envi- ronments, an additional protective screen is often used� A contamination of the protective screen also leads to a reduced indication of the measuring value�... -
Page 41: Field Of View
Operating instructions CellaTemp PX 21 / 31 / 36 19 Field of view With a pyrometer with focusable optics, the size of the measurement field is determined by the distance ratio D� The measurement field diameter d at the focal distance is defined by the formula: On our website you will find a measurement field calculator�... -
Page 42: General Technical Data
Operating instructions CellaTemp PX 21 / 31 / 36 20 General technical data Pyrometer Analogue output 0(4) -20 mA linear according NAMUR 43, switchable, scalable load 500 Ω Switching output OUT1 PNP Open Collector outputs 24 V, ≤ 150 mA switch point [°C]/ return switch point [°C],... - Page 43 Operating instructions CellaTemp PX 21 / 31 / 36 Configuration parameter Emissivity ε 10 - 110 % Transmissions factor τ 10 - 100 % Smoothing function t 0�1 – 999�9 s Peak hold function 0�1 – 999�9 s ATD function...
-
Page 44: Device-Specific Technical Data
Operating instructions CellaTemp PX 21 / 31 / 36 21 Device-specific technical data PX 21 Temperature range 250 - 2000 °C (Default setting analog output 300 - 2000 °C) Sensor Photodiode Spectral sensitivity 1�1 -1�7 µm Focussing range 0.4 m - ∞ optic PA 41.01 M30 0.12 m - ∞... - Page 45 Operating instructions CellaTemp PX 21 / 31 / 36 PX 31 Temperature range 500 - 2500 °C Sensor Photodiode Spectral sensitivity 0�78 - 1�06 µm Focussing range 0.4 m - ∞ optic PA 41.01 M30 0.12 m - ∞ optic PA 41.05 M16 33 - 45 mm optic PZ 41�18 M16...
- Page 46 Operating instructions CellaTemp PX 21 / 31 / 36 PX 36 Temperature range 650 - 3000 °C (AF 2) Sensor Photodiode Spectral sensitivity 0�82 - 0�93 µm Focussing range 0.4 m - ∞ optic PA 41.01 M30 0.12 m - ∞ optic PA 41.05 M16 33 - 45 mm optic PZ 41�18 M16...
-
Page 47: Accessories
Operating instructions CellaTemp PX 21 / 31 / 36 22 Accessories A range of mechanical and electrical accessories are available for mounting the pyrometers in industrial environments� For the selection of the components use the following link: https://www.keller.de/en/its/pyrometers/accessories.htm 23 Default settings The default settings can be found in the description of the IODD�... - Page 48 Please note: Unless otherwise stated in this instruction manual, the instruments described herein are subject to change without prior notice, particularly modifications for the sake of technological advancement� © 2019 KELLER HCW GmbH Carl-Keller-Straße 2-10 D-49479 Ibbenbüren-Laggenbeck Germany www�keller�de/its...
Need help?
Do you have a question about the CellaTemp PX 21 and is the answer not in the manual?
Questions and answers