Cognex DataMan 360 Series Reference Manual
Hide thumbs
Also See for DataMan 360 Series:
- Quick reference manual (68 pages) ,
- Reference manual (173 pages) ,
- Reference manual (76 pages)
Table of Contents
Advertisement
Advertisement
Table of Contents

Related Manuals for Cognex DataMan 360 Series


Summary of Contents for Cognex DataMan 360 Series
- Page 1 ® DataMan 360 Series Reference Manual 2019 October 08 Revision: 6.1.6SR1.5...
-
Page 2: Legal Notices
Copyright © 2019. Cognex Corporation. All Rights Reserved. Portions of the hardware and software provided by Cognex may be covered by one or more U.S. and foreign patents, as well as pending U.S. and foreign patents listed on the Cognex web site at: cognex.com/patents. -
Page 3: Table Of Contents
Reading Distance and Field of View (DataMan 360 Readers with a 24 mm Lens with Liquid Lens) Reading Distance and Field of View (DataMan 360 Readers with a 25 mm Lens) DataMan 360 Series Specifications DataMan 360 Series Imager Specifications LED and Laser Wavelengths Illumination Options... - Page 4 Table of Contents External Triggers DataMan 360 Series Multi-Reader Sync Option DataMan 360 Series Tuning DataMan 360 Series Image Filtering Training the Reader Training Feedback Incremental Training for Multiple Symbologies Package Detection Support Connections, Optics, and Lighting External Light Control (CCB-M12XFLY-05)
-
Page 5: Symbols
Symbols Symbols The following symbols indicate safety precautions and supplemental information: WARNING: This symbol indicates a hazard that could cause death, serious personal injury or electrical shock. CAUTION: This symbol indicates a hazard that could result in property damage. Note: This symbol indicates additional information about a subject. Tip: This symbol indicates suggestions and shortcuts that might not otherwise be apparent. -
Page 6: Getting Started
Getting Started Getting Started This section provides general information about the DataMan 360 series readers as well as about the DataMan 360 accessories and systems. About the DataMan 360 Readers The DataMan 360 series readers are high-performance, fixed-mount ID readers that, among others, offer the following... -
Page 7: Dataman 360 Series Accessories
Cognex->DataMan Software v x.x.x->Documentation->English->Reader Configuration Codes The DM360 Quick Reference Guide provides essential information about the DM360 readers. Cognex->DataMan Software v x.x.x->Documentation->English->DM360 Series->DM360 Quick Reference Guide The DataMan Fixed-Mount Readers Reference is a complete online hardware reference for the DataMan fixed- mount ID readers. -
Page 8: Lens Covers
Getting Started 16 mm M12 lens with locking** DM300-LENS-16 25 mm M12 lens with lens spacer and hex wrench (also DM300-LENS-25 requires Extension kit)** Extension kit DM300-EXT DM500 C-Mount cover DM500-CMTLC-000 DM500 Lens cover extender DM500-LNSEXT-000 Blue, CKR-BP470 red, CKR-BP635 green, CKR-BP525 orange bandpass filters... -
Page 9: External Lights (Red Led)
Getting Started Diffuse lens cover, red illumination (assembled), ESD safe DM300-DLCOV-RE-ESD Red LED high power integrated light, 10.3 mm lens DM360-HPIL-RE (Risk Group Red LED Exempt acc. IEC 62471, Risk Group Green LED Aimer Exempt acc. IEC 62471) Polarized red LED high power integrated light, ESD safe, DM360-HPIL-RE-P 10.3 mm lens (Risk Group Red LED Exempt acc. -
Page 10: Laser Aimers
DM30X-HPIA3-IR-W Note: If using the following Cognex high power illumination lights with a DM30X-HPIA-xxx product ID: A spacer kit accessory (DMA-SPKIT-30X-00) is required when using the high power illumination accessory. When the spacer is used, the field of view will be limited for wide-angled lenses. -
Page 11: Power Supplies
Getting Started Ethernet M12 to RJ-45 cable (y=1: straight / y=6: angled, x- CCB-84901-y00x-xx xx specifies length) External Light cable (xxx specifies length) CCB-M12x4MS-xxx External Light cable (xx specifies length: 0.5m, 1m, 2m, CCB-M12LTF-xx I/O extension cable, 5m straight CKR-200-CBL-EXT * DM360 with straight and angled cable Power Supplies... -
Page 12: Dataman 360 Systems
Getting Started DataMan 360 Systems 1DMax+™ — IDQuick™ — 2DMax+™ — Omni- Multi-Reader Resolution Best-In- High-Speed for hard to directional 1- Sync Class 1-D 2DMax+™ read DPM D Code Reading Reading and damaged Reading PowerGrid™ codes DataMan 360L (DMR- √ 800x600 360L-00) DataMan 360X (DMR-... -
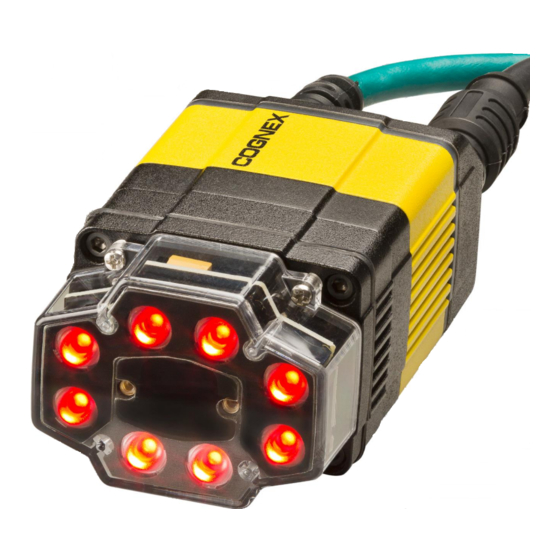
Page 13: Setting Up Your Dataman 360
Reader Layout The following image shows the built-in lighting system of the DataMan 360 series reader, underneath the plastic lighting cover, the mounting holes and the laser safety notice on the bottom of the reader. - Page 14 Setting Up Your DataMan 360 Trigger button Power Train status Good/bad read Network Error Peak meter Indicator light ring Tuning button Ethernet SD card slot External light control Power, I/O and RS232 Type Signal Color Meaning Power GREEN Power ON GREEN Trained Status...
-
Page 15: Installing The Lens
Installing the Lens You can choose between a variety of different (High-Speed) Liquid Lenses and C-Mount lens options to be installed on your DataMan 360 series reader. WARNING: Disconnect the DataMan 360 reader from power before installing the lens and light. - Page 16 Setting Up Your DataMan 360 4. Place the reader at the desired working distance from focus target. a. Connect the reader to the DataMan Setup Tool. b. Adjust your camera settings to make sure you have a brightened and high contrast image. On the Optimize Image page, check the Focus Feedback option from the drop-down menu of the Live button.
-
Page 17: Installing A Liquid Lens
Setting Up Your DataMan 360 7. Insert and tighten the screws. PHILLIPS PAN HEAD M2X6mm Note: Tighten in sequence. Torque limit: 9 Ncm (0.8 in-lbs). Note: Remove the protection film applied to the front cover before usage! Installing a Liquid Lens 1. - Page 18 Setting Up Your DataMan 360 3. Tighten the locking ring. 4. Connect the liquid lens cable to the reader. WARNING: To avoid equipment damage, the cables must be routed as shown in the figure. 5. Snap the liquid lens module onto the nose of the lens, making sure that it lies flat.
-
Page 19: Installing The 24 Mm Liquid Lens Module With Hpil
Adjust focus for maximum sharpness. Enhance image quality in the DataMan Setup Tool for better guidance. Installing the 24 mm Liquid Lens Module with HPIL The possible hardware configurations using a 24 mm liquid lens module with a DataMan 360 series reader is the following: DM3xx-system + DM300-LENS-24LL + DM360-HPIL-RE-01 / DM360-HPIL-RE-P-01... - Page 20 Setting Up Your DataMan 360 1. Attach the 24 mm Lens to the device by using the screw thread on the metal ring. 2. Insert the Liquid Lens cable into the connector of the device. 3. Attach the Liquid Lens to the front side of the 24mm Lens.
-
Page 21: Installing A C-Mount Lens
Setting Up Your DataMan 360 4. Place the DM360-HPIL-RE-01 or DM360-HPIL-RE-P-01 unit on the front of the device. CUSTOMIZED CAPTIVE SCREW, PHILLIPS PAN HEAD, M3x28mm Note: The minimum peak current capacity of the power supply for the device and the DM360-HPIL-RE-01 / DM360-HPIL-RE-P-01 is 2.2A per unit. - Page 22 Setting Up Your DataMan 360 Note: Make sure to set focus for the reader before fitting the lens cover. a. Connect the reader to the DataMan Setup Tool. b. Navigate to the Optimize Image pane, and on the Basic tab, click the triangle on the Live button to access the drop-down list, and check the Focus Feedback option.
- Page 23 Setting Up Your DataMan 360 5. Add the screws to the C-Mount cover base. PHILLIPS PAN HEAD M2 X 6 mm Note: Tighten in sequence. Torque limit: 9 Ncm (0.8 in-lbs). 6. Attach the front cover. Note: Do not unscrew the front-most part of the nose of the cover to avoid risking the glass lens falling out. 7.
-
Page 24: Installing A Filter
Setting Up Your DataMan 360 Installing a Filter Perform the following steps to install an optical filter in the front cover. Observe the following constraints on the filter: Diameter (Ø): 12.3mm<Ø<12.7mm Thickness (t): 1.6mm<t<2mm 1. First, remove the front cover: unscrew the four M3 screws and take off the LED cover. 2. - Page 25 Setting Up Your DataMan 360 4. Insert first the filter glass, then the soft spacer (which was removed from its place between the filter holder and the filter retaining clip) into the filter holder. A pair of tweezers may be helpful. Soft spacer Filter glass 5.
- Page 26 Setting Up Your DataMan 360 6. Insert the PCB with the filter retaining clip and the filter holder back into the front cover. Ensure that the hole in the PCB meets the orientation pin in the front cover. Fix the PCB with two Torx 6 screws of size 2.0x5 mm. Note: Use a torque of 8-10Ncm (11-14 oz-in).
- Page 27 Setting Up Your DataMan 360 8. Remount the front cover. Observing the tightening sequence below, tighten all four screws to 9 Ncm using a torque wrench. PHILLIPS PAN HEAD M2 X 6MM Note: Tighten in sequence. Torque limit: 9 Ncm (0.8 in-lbs).
-
Page 28: External Light Mounting Brackets
Setting Up Your DataMan 360 External Light Mounting Brackets You can mount your reader using external light mounting brackets. The brackets are intended to mount any of the different lights to the reader. They can also be used to mount the reader (with lights attached) to your machine. Pivot mounting, as illustrated, is optional. - Page 29 Setting Up Your DataMan 360 3. Choose one of the following light options: Using coaxial (DOAL) light Using dark field light Using ring light Using spot light...
-
Page 30: Setting Focus
Setting Up Your DataMan 360 Setting Focus There is a range of reading distances available for different code sizes and focus positions. To set focus on your reader, use the following options depending on whether you use a liquid lens or a manual focus lens. DataMan readers are compatible with multiple different lenses. - Page 31 Setting Up Your DataMan 360 2. Click the Optimize Focus button to optimize the focus of the liquid lens. You can find this button in the lower left section of the image panel, or you can also optimize focus during tuning by checking the box in the tune dropdown.
-
Page 32: Manual Focus Lens
Setting Up Your DataMan 360 Manual Focus Lens Click the Focus Feedback button in the image panel in SetupTool to enable focus feedback. This enables a color-coded focus feedback bar on the right side of the image panel. Once focus feedback is enabled, enter live mode and manually adjust the lens until the focus feedback bar is green. -
Page 33: Best Practices
Setting Up Your DataMan 360 Best Practices Both Optimize Focus and the Focus Feedback use the same procedure for testing the current focus. They consider various sub-regions of the image. Follow these guidelines to maximize the performance of Optimize Focus and Focus Feedback: Use a focus target (such as the one supplied with this Reference Manual) that includes high-contrast features and is big enough that if ills at least a 100x100 pixel region in the center of the field of view at the desired working distance. -
Page 34: Field Of View And Reading Distances
Setting Up Your DataMan 360 Field of View and Reading Distances The following maps show the field of view of the DataMan 360 series readers. Reading distance values are also provided for 1-D and 2-D example code distances. For the C-mount (or other non-Cognex) and S-Mount lenses, the focal length of the lens, focus setting, and aperture setting determine the field of view and reading distance. -
Page 35: Reading Distance And Field Of View (Dataman 360 Readers With A 16 Mm Lens)
Reading Distance and Field of View (DataMan 360 Readers with a 16 mm Lens) The following map shows the FoV of the DataMan 360 series readers with a 16 mm lens. The FoV values are shown as follows: outer: DM362, DM363 inner: DM360 The reading distances for the DM360 and DM362 readers are the same. -
Page 36: Reading Distance And Field Of View (Dataman 360 Readers With A 19 Mm Lens With A Liquid Lens)
Reading Distance and Field of View (DataMan 360 Readers with a 19 mm Lens with a Liquid Lens) The map below shows the FoV of the DataMan 360 series readers with a 19 mm lens with a liquid lens. The FoV values are shown as follows:... -
Page 37: Reading Distance And Field Of View (Dataman 360 Readers With A 24 Mm Lens With Liquid Lens)
Reading Distance and Field of View (DataMan 360 Readers with a 24 mm Lens with Liquid Lens) The following map shows the FoV of the DataMan 360 series readers with a 24 mm lens with a liquid lens and DM360- HPIL-RE-01 or DM360-HPIL-RE-P-01 cover. -
Page 38: Reading Distance And Field Of View (Dataman 360 Readers With A 25 Mm Lens)
Reading Distance and Field of View (DataMan 360 Readers with a 25 mm Lens) The following map shows the FoV of the DataMan 360 series readers with a 25 mm lens (with or without a liquid lens). The FoV values are shown as follows:... - Page 39 Setting Up Your DataMan 360 DM362/DM363 Distances in mm DM360...
-
Page 40: Dataman 360 Series Specifications
Setting Up Your DataMan 360 DataMan 360 Series Specifications 165 g Weight 0ºC — 40ºC (+32ºF — 104ºF) Operating Temperature -10ºC — +60ºC (+14ºF — +140ºF) Storage Temperature Maximum Humidity < 95% (non-condensing) IP65 (with cable or protection cap attached to all connectors, front cover properly installed) -
Page 41: Dataman 360 Series Imager Specifications
Setting Up Your DataMan 360 DataMan 360 Series Imager Specifications DataMan 360 Series Imager Specification Image Sensor 1/1.8 inch CMOS 6.9 mm x 5.5 mm (H x V); 5.3 µm square pixels (DataMan 360 and 362 ), 4.5 µm square pixels... -
Page 42: Illumination Options
Setting Up Your DataMan 360 λ [nm] TORCHLIGHT - WHITE 2500-5000K (Color Temperature) TORCHLIGHT - RED The peak wavelength of the green laser is 515 nm. Illumination Options Illumination 24V Externally Powered Board (in Lens Max. exposure time Max. duty cycle Max. LED-on time Max. - Page 43 Setting Up Your DataMan 360 Illumination 24V Externally Powered Board (in Lens Max. exposure time Max. duty cycle Max. LED-on time Max. exposure time Covers) with LED-on Red LED High 200 ms 25 ms 200 ms Power Integrated Light (Polarized)
-
Page 44: Using Your Dataman 360
5. Select a reader from the list and click Connect. WARNING: Do not stare into beam when adding, removing, or changing cables. Cognex recommends to unpower the reader any time you make physical changes to it. Follow the steps below to connect your reader to power and network: CAUTION: I/O wiring or adjustments to I/O devices should be performed when the reader is not receiving power. -
Page 45: Industrial Protocols
For more information on using the industrial protocols, see the DataMan Industrial Protocols Manual available through the Windows Start menu or the Setup Tool Help menu. DataMan 360 Series Triggering DataMan 360 readers support the following trigger modes: Self: At an interval you configure, the reader automatically detects and decodes codes in its field of view. If you set a higher re-read delay than the trigger interval, there is a code output only once until the code is out of the field of view for the duration of the re-read delay. - Page 46 Using Your DataMan 360 Manual: Begins acquiring images when you press the trigger button on the reader, and continues acquiring images until a symbol is found and decoded or you release the button. Burst: Performs multiple image acquisitions based on an external trigger and decodes any symbol appearing in a single image or within a sequence of images, or multiple symbols in a single image or within a sequence of images when multicode is enabled.
-
Page 47: External Triggers
Using Your DataMan 360 External Triggers If you are using external triggering, you can use any of the following methods to trigger your DataMan 360 reader: Press the trigger button on the reader. Send a pulse on the I/O cable: Trigger + (orange or red) Trigger - (black) Send a serial trigger command over the RS-232 connection or Ethernet connection. -
Page 48: Dataman 360 Series Multi-Reader Sync Option
Using Your DataMan 360 Click the Trigger button in the DataMan Setup Tool: DataMan 360 Series Multi-Reader Sync Option For trigger modes other than Presentation, the DataMan 360 supports multi-reader trigger synchronization, also known as Multi-Reader Sync. In this option, you configure multiple DataMan readers as a group. Whenever any reader in the group is triggered, all the readers are triggered and the results from all the readers are assembled and transmitted by a single reader that you designate as the Primary Reader. -
Page 49: Dataman 360 Series Tuning
DataMan 360 Systems on page 12. DataMan 360 Series Tuning By tuning, your reader automatically selects the best settings for the given reading situation, based on parameters of illumination, camera and decoder properties, and focal distance. Tuning autodisciminates all enabled symbologies (both 1-D and 2-D). - Page 50 Using Your DataMan 360 Turn on tuning in the DataMan Setup Tool. Start tuning by sending a DMCC, for more information, see the DataMan Control Commands Documentation, available through the Windows Start menu or the DataMan Setup Tool Help menu. Use Input line 1 for tuning.
-
Page 51: Dataman 360 Series Image Filtering
DataMan 360 Series Image Filtering You can define a stack of filters to be applied to each image acquired by your DataMan 360 series reader. To select the following filters in DataMan Setup Tool, click the Optimize Image pane, select the Advanced tab, click the triangle next to Image filtering, click "..."... -
Page 52: Training The Reader
Using Your DataMan 360 5. Go to the Displayed Image Settings pane and change the Images to Use according to what you want to see on Live Display: the original or the filtered image. 6. You can compare the original and filtered results on the Results Display if you choose the images from the Read Result History. -
Page 53: Incremental Training For Multiple Symbologies
Using Your DataMan 360 Connect the reader to the DataMan Setup Tool to untrain it and allow it to recognize other enabled symbologies. Incremental Training for Multiple Symbologies If you want to train the reader to recognize multiple symbologies, you can present a single image showing all the desired symbologies and perform the training procedure previously described. - Page 54 Using Your DataMan 360 1. Connect your package detection device to one of the Inputs of your reader. 2. On the Inputs/Outputs pane, check Allow Buffered No-Read Images on the input you connected your reader to. 3. On the Inputs/Outputs pane, click Buffering and Transfer, and in the Image Buffering pane, change What Results to Buffer under Buffering Settings to All, or No Read.
-
Page 55: Connections, Optics, And Lighting
Connections, Optics, and Lighting Connections, Optics, and Lighting This section contains descriptions about the external light control, I/O Cables, high-speed outputs, high-speed output wiring, Ethernet M12 to RJ45 cable, and acquisition trigger. External Light Control (CCB-M12XFLY-05) A 4-pin cable is provided for the external light control. The External Light cable is used to connect to an external lighting device, providing power and strobe control. -
Page 56: Breakout Cable (Ccbl-05-01)
Connections, Optics, and Lighting 5m Breakout Cable (CCBL-05-01) The Breakout cable provides access to trigger and high-speed outputs. You can clip unused wires short or use a tie made of non-conductive material to tie them back. For RS-232, use the Power Supply return path for ground. The figure on the left shows the plug on the device. -
Page 57: Breakout Cable (Ccb-M12X12Fy-Xx)
Connections, Optics, and Lighting 5m Breakout Cable (CCB-M12x12Fy-xx) The Breakout cable provides access to trigger and high-speed outputs. You can clip unused wires short or use a tie made of non-conductive material to tie them back. The figure on the left shows the plug on the device. -
Page 58: Breakout Cable (Ccb-Pwrio-15)
Connections, Optics, and Lighting 15m Breakout Cable (CCB-PWRIO-15) The Breakout cable provides access to trigger and high-speed outputs.You can clip unused wires short or use a tie made of non-conductive material to tie them back. For RS-232, use the Power Supply return path for ground. The figure on the left shows the plug on the device. -
Page 59: High-Speed Outputs
Connections, Optics, and Lighting High-Speed Outputs Specification Description Voltage 26.4V maximum through external load Current 50mA maximum sink current OFF state leakage current 100µA External load resistance 240 Ohms to 10K Ohms Each line rated at a maximum 50mA, protected against over-current, short circuits and transients from switching inductive loads. -
Page 60: High-Speed Output Wiring
Connections, Optics, and Lighting High-Speed Output Wiring To connect to an NPN-compatible PLC input, connect High-Speed Output 0, Output 1, Output 2, or Output 3 directly to the PLC input. When enabled, the output pulls the PLC input down to less than 3V. To connect to a PNP-compatible PLC input, connect High-Speed Output 0, Output 1, Output 2 or Output 3 directly to the PLC input. -
Page 61: Rs-232 Connection Cable (Ccb-M12Xdb9Y-05)
Connections, Optics, and Lighting 5m RS-232 Connection Cable (CCB-M12XDB9Y-05) You can clip unused wires short or use a tie made of non-conductive material to tie them back. The figure on the left shows the plug on the device. -
Page 62: Ethernet M12 To Rj45 Cable (Ccb-84901-Y00X-Xx)
Connections, Optics, and Lighting Ethernet M12 to RJ45 Cable (CCB-84901-y00x-xx) The Ethernet cable provides Ethernet connection for network communications. The Ethernet cable can be connected to a single device or provide connections to multiple devices via a network switch or router. P1 Pin# Signal Name Wire Color... -
Page 63: Connecting The Encoder To A Dataman Reader
Black common- can be connected to either +24V (NPN) or ground (PNP) White the output connected to the input line of the DataMan 360 series reader Bare ground According to the speed of the line, set the number of pulses per revolution on the wheel by using the switches on the encoder (for more information, see the encoder documentation). - Page 64 Connections, Optics, and Lighting You must construct your own cable that meets the requirements of your system configuration. The cable must provide a DB-15 connector for each DataMan 360 and a DB-9 connector for the PC serial port. Each DB- 15 connector must provide Tx Data, Rx Data, Trigger (Input 0), ground, and DC power.
- Page 65 Connections, Optics, and Lighting 3. Switch to the Standard tab and enter text in the Leading Text field. 4. You can also add trailing text by entering text in the Terminating Text field. Keep the following guidelines in mind as you design your system: Make sure that the maximum cable length between any two DataMan 360 readers or between the PC and any DataMan reader is no greater than 15 meters.
-
Page 66: Cleaning And Maintenance
Cleaning and Maintenance Cleaning and Maintenance Cleaning the Reader Housing To clean the outside of the reader housing, use a small amount of mild detergent cleaner or isopropyl alcohol on a cleaning cloth. Do not pour the cleaner directly onto the reader housing. CAUTION: Do not attempt to clean any DataMan product with harsh or corrosive solvents, including lye, methyl ethyl ketone (MEK) or gasoline. -
Page 67: Compliance Information, Warnings And Notices
CAUTION - Use of controls or adjustments or performance of procedures other than those specified herein may result in hazardous radiation exposure. Do not attempt to service or repair this product -- return it to Cognex for service. Do not permit anyone other than Cognex Corporation to service, repair, or adjust this product. -
Page 68: Laser Safety Statement
No further labeling is required. For European Community Users Cognex complies with Directive 2012/19/EU OF THE EUROPEAN PARLIAMENT AND OF THE COUNCIL of 4 July 2012 on waste electrical and electronic equipment (WEEE). This product has required the extraction and use of natural resources for its production. It may contain hazardous... -
Page 69: Reader Programming Codes
Compliance Information, Warnings and Notices In order to avoid the dissemination of those substances in our environment and to diminish the pressure on the natural resources, we encourage you to use the appropriate take-back systems for product disposal. Those systems will reuse or recycle most of the materials of the product you are disposing in a sound way. - Page 70 Copyright © 2019 Cognex Corporation. All Rights Reserved.
Need help?
Do you have a question about the DataMan 360 Series and is the answer not in the manual?
Questions and answers