Summary of Contents for Levolor Real Wood Blind Series
Page 1
Real Wood & Faux Wood Blinds Persianas de madera real y madera de imitación Stores en bois véritable et simili bois INSTALLATION • OPERATION • CARE INSTALACIÓN • MANEJO • CUIDADO INSTALLATION • UTILISATION • ENTRETIEN 
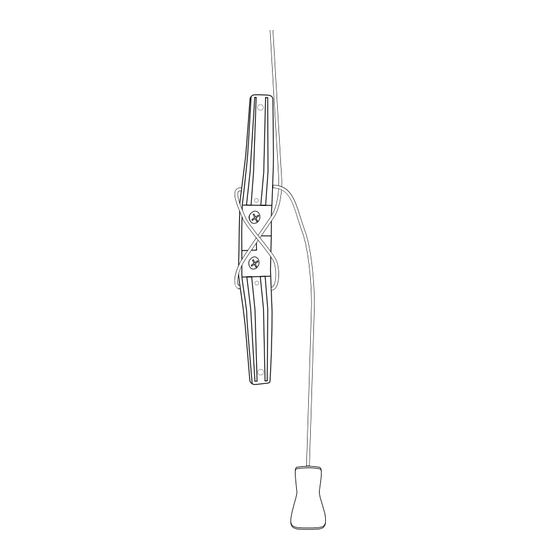
Motorized Tilt Operation Operación motorizada de inclinación Inclinaison motorisée...
CONTENTS Window and Blind Terminology Mounting Types and Window Terminology ..........4 Getting Started Installation Overview ................5 Components Included ................6 Tools and Fasteners You May Need ............7 Installation Inside Mount ..................8–9 Outside Mount .................. 10–11 Installation–Additional Components Satellite Battery Pack ................12 Extension Brackets ................12 Spacer Blocks ..................12 Hold-Down Brackets ................
WINDOW AND BLIND TERMINOLOGY Thank you for purchasing LEVOLOR Wood Blinds. With proper installation, ® operation, and care, your new blinds will provide years of beauty and performance. Please thoroughly review this instruction booklet before beginning installation. MOUNTING TYPES AND WINDOW TERMINOLOGY If the installation brackets are mounted correctly, the rest of the installation process follows easily.
GETTING STARTED INSTALLATION OVERVIEW • Confirm the blind for proper width and length. • If installing several sets of blinds, be sure to match them with the appropriate window. • Check the installation surface to ensure that you have suitable fasteners and tools. •...
GETTING STARTED COMPONENTS INCLUDED IN THE BOX Mounting Brackets Blind (L bracket only required on outside mount) Socket Hex Head Screws Standard Battery Motor Battery Clips Pack Tube (2 per Bracket) Satellite Battery Extension Cable Mounting Kit (optional) (optional) ⁄ "...
INSTALLATION TOOLS AND FASTENERS YOU MAY NEED (not included) The tools you will need for installing your blind will vary, depending on the installation surface and mounting bracket type. Tools typically used for installation include: ⁄ " Nutdriver Metal Tape Measure Screwdrivers (both flat and Phillips head) Pencil...
INSTALLATION INSIDE MOUNT (IM) Center support bracket(s) (if included) Box bracket STEP 1: MARKING THE BRACKET LOCATIONS • Position the box brackets at each end of the headrail to confirm the dimension. Depending on installation location, box brackets can be attached using the top, back, or the side holes.
INSTALLATION INSIDE MOUNT (IM) STEP 3: INSTALLING THE BLIND • Attach valance clips to valance. • Attach battery clips to valance and snap battery tube into place with the plug end facing to the right. • Clip valance and battery assembly onto headrail. Connect battery tube to motor in the headrail.
INSTALLATION OUTSIDE MOUNT (OM) Center support bracket(s) (if included) bracket STEP 1: MARKING THE BRACKET LOCATIONS IMPORTANT: The brackets must be flush against a flat mounting surface. Do NOT mount brackets on curved molding. • Position the box brackets at each end of the headrail •...
Page 11
INSTALLATION OUTSIDE MOUNT (OM) STEP 3: INSTALLING THE BLIND • Align the headrail with the brackets and slide the headrail straight back into the brackets. • If the headrail can slide from side to side in the box brackets, use a flat-head screwdriver to bend out the tabs on the ends of the headrail until it is snug.
INSTALLATION–ADDITIONAL COMPONENTS INSTALL SATELLITE BATTERY PACK (optional) • Mark position of satellite battery wall mount bracket. Wall Mount Bracket Wall Mount Bracket — The satellite battery may be mounted in any orientation. — Position the battery pack close to the power cable. —...
INSTALLATION–ADDITIONAL COMPONENTS HOLD-DOWN BRACKETS (optional) • Ideal for doors, hold-down brackets prevent blind from swaying. Assemble as shown to each side of bottom rail. Inside Mount Outside Mount Hold-down Starter hole ATTACH VALANCE Return clip "Top" or • arrow end Valance clip Locate the valance clip location (OM only) indicators on the backside of the...
• Cordless Lift: To raise the blind, firmly press and hold the LEVOLOR button located on the bottom rail and lift the blind to the desired height. Once the desired position is reached, release grip on the button to lock blind in place.
UNINSTALL REMOVING THE BLIND • Fully raise the blind. • Unplug battery pack from the blind. • Unlock and lift the front clips of each end box bracket and slide the headrail out of the brackets. • If center support brackets are used, lift the front of the headrail up to clear the channel of the bracket and slide out forward.
CLEANING AND CARE CLEANING PROCEDURES Keep your LEVOLOR Wood and Faux Wood blinds looking their best by periodically ® wiping them with a soft cloth, a duster, or the brush attachment from a vacuum cleaner. NOTICE: mproper cleaning may Avoid contact with window cleaning products. I void warranty.
1-800-LEVOLOR or 1-800-538-6567. CONTACTING US To contact LEVOLOR Customer Service regarding any questions or concerns you may have about your new shades, you may reach us at: 1-800-LEVOLOR (8:30 am – 6:30 pm EST) www.LEVOLOR.com ADDITIONAL PARTS AND SERVICES Additional or replacement parts can be ordered, or shades can be repaired or restrung through our repair center.
Need help?
Do you have a question about the Real Wood Blind Series and is the answer not in the manual?
Questions and answers