AccuTemp Evolution Service Manual
Hide thumbs
Also See for Evolution:
- Service manual (40 pages) ,
- Installation & operator's manual (29 pages)

Related Manuals for AccuTemp Evolution


Summary of Contents for AccuTemp Evolution
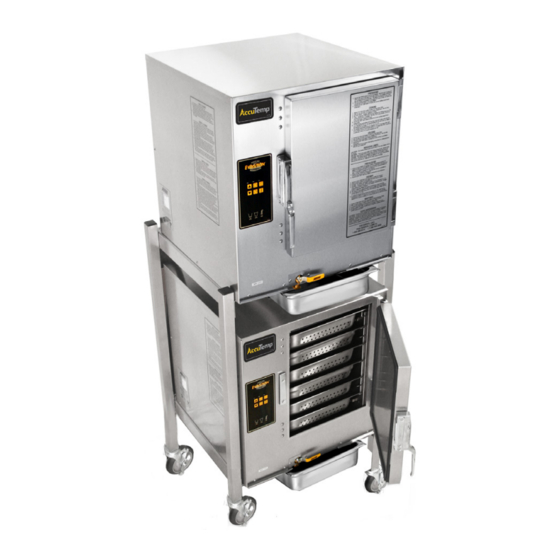
- Page 1 EVOLUTION ELECTRIC SERVICE MANUAL ACCUTEMP PRODUCTS INC 8415 N. CLINTON PARK DR, FORT WAYNE, IN 46825 - 800 480-0415 - www.accutemp.net Email: service@accutemp.net SP8026-1909...
- Page 2 Prior Revision:1203 Date: 09/18/2019 Date: 03/31/2012 Change: Revision and update 1. Exceeding the temperature limits can cause nuisance lockouts and premature electrode failure. 2. Alteration to Cast Heater Replacement and Removal instructions 3. Updated Troubleshooting flowchart. EVOLUTION ELECTRIC STEAMER SP8026-1909...
-
Page 3: Table Of Contents
4.4 R&R of Cast Heater 4.5 R&R of Door Assembly 4.6 R&R of Temperature Sensors 4.7 Steam Vent Components 5.0 Wiring Schematics 5.1 Wiring Schematic for SN 36980 and Below 5.2 Wiring Schematic for SN 36981 and Above EVOLUTION ELECTRIC STEAMER SP8026-1909... -
Page 4: Warnings And Cautions
NOTE Advises the reader of information or instructions, vital to the operation or maintenance of the equipment. CAUTION - HOT SURFACE DANGEROUS VOLTAGE EARTH GROUND EVOLUTION ELECTRIC STEAMER SP8026-1909... - Page 5 Always use 2 people and proper lifting techniques when picking-up, moving, or inverting heavy equipment. SLIP & FALL HAZARD WHILE WORKING ON WATER HOLDING EQUIPMENT. Keep the floor in front of the equipment clean and dry. If spills occur, clean them up immediately to avoid potential injuries. EVOLUTION ELECTRIC STEAMER SP8026-1909...
- Page 6 • DO NOT use abrasive or steel materials, such as wire brushes or metal scouring pads to clean the Water Sensors. • DO NOT manually fill water above the Water Level Mark on the left side of steam chamber above the High Limit Level Sensor (connection-less only). EVOLUTION ELECTRIC STEAMER SP8026-1909...
-
Page 7: Sequence Of Operation
PWR Button Pushed & Low Water Level Sensor Is Satisfied - MANUAL & AUTO-FILL • The Low Water Light Indicator and Alarm (only manual fill units use an alarm for low water condition), will be OFF. EVOLUTION ELECTRIC STEAMER SP8026-1909... -
Page 8: Heat Generation
• The Water Sensor Control Board’s K2 Relay will close, sending power to the Contactor’s coil; closing the contacts and allowing Line Voltage to be sent to the normally open Solid State Relay(s). EVOLUTION ELECTRIC STEAMER SP8026-1909... -
Page 9: Temperature Sensor And Control
• In COOK mode, the 24VAC output from the Control/Keypad Board is continuously on, so that the unit’s temperature is controlled by the Chamber Pressure Switch, which opens at 1/2 inch of water column or higher. EVOLUTION ELECTRIC STEAMER SP8026-1909... -
Page 10: Main Component Information
Water Board will open the Auto- Probe Fill Valve for 30 seconds to raise the water level back above the High Limit Water Sensor. • This process will repeat as long as the water level stays above the Low Water Sensor. EVOLUTION ELECTRIC STEAMER SP8026-1909... - Page 11 Solid State Relay AT0E-2059-3 • The relay(s) are only activated if the Door Switch & Chamber Pressure Switch are closed. • The number of Solid State Relays used, depends on the phase and wattage needs of the unit. EVOLUTION ELECTRIC STEAMER SP8026-1909...
- Page 12 Part # Component Part # Pilot Lamp, 24V Red AT0E-1800-2 Inner Door Assembly AT1A-3647-1 Fuse, Slo-Blo 1.25A AT0E-2731-1 Door Hinge (Pair) AT1H-2058-3 Door Latch Assy, Ceramic AT1H-3609-1 Door Latch Mounting Plate AT1M-3046-1 Magnet Gasket, Door AT1G-2633-1 EVOLUTION ELECTRIC STEAMER SP8026-1909...
-
Page 13: Troubleshooting Flowchart
DO NOT OPEN (Over-Fill) Light DOOR- SEE I Food Component Under Voltages Cooked Correct Float Ball Installed Different Call DONE Problem AccuTemp Float Ball WITH With Ball Service Present Steamer CHART Operations Call AccuTemp Call Service AccuTemp Service EVOLUTION ELECTRIC STEAMER SP8026-1909... -
Page 14: Troubleshooting Table
TROUBLESHOOTING STEPS LETTER Power cord disconnected. Confirm proper voltage is present at receptacle. Plug-in Power Cord. Power cord damaged/ Call Accutemp to confirm power to unit and secure broken. correct part # for cord/plug assembly. Breaker is tripped. Reset breaker. Transformer Confirm supply has correct phase and incoming voltage on primary side. - Page 15 If water board has three second interval and low water light is illuminated, remove pink wire at J9 on the water board. If the low water light goes out - replace water board. If light remains - call AccuTemp for assistance at 800-480-0415 EVOLUTION ELECTRIC STEAMER SP8026-1909...
- Page 16 Autofill Solenoid Valve FIG 3.1D Remove wires from the solenoid and test for 24VAC. If voltage is present, replace valve. If there is no voltage, see above to troubleshoot water board. EVOLUTION ELECTRIC STEAMER SP8026-1909...
- Page 17 FIG 3.1A FIG 3.1B FIG 3.1C FIG 3.1D EVOLUTION ELECTRIC STEAMER SP8026-1909...
- Page 18 - refer to reference letter K - pressure switch. If unit over-temps before it reaches cook: inspect bottom of cooking chamber (remove Steam Collector Pan first). Any scale build up should be cleaned away. FIG 3.1E EVOLUTION ELECTRIC STEAMER SP8026-1909...
- Page 19 Confirm Float ball is in place and both it and the peg it sits on are clean. If there is another AccuTemp Steamer at the location, switch the float balls between the units. If the issue follows the float ball, replace the float ball.
- Page 20 Terminal #7 and the yellow wire attached to Terminal #8. Disconnect wires to test (FIG 3.1G). If voltage is present - replace the control relay. If voltage is not present, replace the reed switch FIG 3.1G FIG 3.1F EVOLUTION ELECTRIC STEAMER SP8026-1909...
- Page 21 Cast Heater Check that the correct Amps (based on KiloWatts of unit) are being drawn from each Element. Ensure that all the required voltages (based on required phase needs of the unit) are present to each Element. EVOLUTION ELECTRIC STEAMER SP8026-1909...
- Page 22 FIG 3.1H EVOLUTION ELECTRIC STEAMER SP8026-1909...
- Page 23 4. Retighten screws. Pressure Switch Check that the Chamber Pressure Switch opens and closes. Checking the Ohms reading while blowing into its input hose. (Disconnect the hose from the chamber inlet hole.) Steam Vent Blocked See L EVOLUTION ELECTRIC STEAMER SP8026-1909...
- Page 24 (See Owners Manual) Ensure that the Drain Ball-Valve is shut tightly or possible loss of heating efficiency. Refer to the Installation/Operator Manual for cooking tips if no mechanical reason is found for this symptom. EVOLUTION ELECTRIC STEAMER SP8026-1909...
-
Page 25: Troubleshooting Notes
Ensure that the water pressure being supplied to the Auto-Fill Valve should not be greater than 60 psi. If water pressure is to high, then a larger volume of water will be added to the steam chamber during the auto-fill cycle; causing the steamer to overfill with water. EVOLUTION ELECTRIC STEAMER SP8026-1909... -
Page 26: Modifying Control Settings
TEMP Probe Offset = Neg/Pos Diff NEG = 1 POS = 0 Blink Blink Blink Hysteresis Blink Blink TEMP Regulating Mode On/Off = 0 PID = 1 Blink Blink Proportioning BAND TIME Blink Blink Proportioning BAND WIDTH EVOLUTION ELECTRIC STEAMER SP8026-1909... - Page 27 4. Press S1 again to access ‘default timer value = minutes’. Press either S3 (cook/hold) or S6 (temp display) to increase or decrease the number of minutes. 5. Press S2 to save the input. To exit without saving push S5 (power). EVOLUTION ELECTRIC STEAMER SP8026-1909...
-
Page 28: Location Of Electrical Components
Relays Door Switch wire (can be on left or right of unit) Fill Water Solenoid Sensors (auto-fill) Control Contactor Relay Transformer Water Sensor Fuses Control Board 2x 1.25A Cast Heater Alarms under Terminal Strip control plate EVOLUTION ELECTRIC STEAMER SP8026-1909... -
Page 29: Recommended Tools
1. Multimeter capable of reading: VDC & VAC DCμA Ω & k Ω 2. Digital Clamp Meter 3. Phillips Screwdriver 4. Flat Screwdriver 5. Torque Wrench with Imperial socket set 6. Manometer capable of reading Inches Water Column EVOLUTION ELECTRIC STEAMER SP8026-1909... -
Page 30: Removal And Replacement Of
2. Remove the Left-Side Panel by removing the Sheet Metal Screws holding it in place. 3. Pry the Fuse(s) out of the Fuse Block with a flat-head screwdriver or fuse puller. 2 x 1.25A 4. Re-install in reverse order. FIG 4.1B EVOLUTION ELECTRIC STEAMER SP8026-1909... - Page 31 4. Remove the 2 mounting nuts and then remove the Transformer (FIG 4.1C). 5. Re-install in reverse order. Primary Primary 240V Tap 480V Tap Primary 208V Tap Primary COM Tap FIG 4.1C Secondary Secondary 24V Tap 24V COM Tap EVOLUTION ELECTRIC STEAMER SP8026-1909...
-
Page 32: R&R Of Water Level Control
4 mounting screws securing the Auto- Fill Valve bracket on the inside of the steamer. 7. Remove the Auto-Fill Valve. 8. Re-install in reverse order. Ensure Sealant is re-applied to all pipe threading. AT1A-5192-1 - Previous design EVOLUTION ELECTRIC STEAMER SP8026-1909... - Page 33 Connected and Connection-less units utilize different wiring. to its location pin). 4. Remove the 2 mounting screws and then remove the correct voltage type Control Relay. 5. Re-install in reverse order. AT1A-5185-1 FIG 4.2D EVOLUTION ELECTRIC STEAMER SP8026-1909...
- Page 34 3. Remove the Float Ball off of the High Water Reed Switch Sensor Post. Handle the float ball carefully as 4. Re-install in reverse order. Ensure dropping can damage it. Sensor Post & Float Ball hole are clean before re-installing. EVOLUTION ELECTRIC STEAMER SP8026-1909...
- Page 35 4. Re-install in reverse order. CONDENSATE TRAY 1. Power Unit off and allow to cool 2. Wipe condensate tray out with a cloth. 3. Pull Condensate tray out from pan rails. 4. Re-install in reverse order. EVOLUTION ELECTRIC STEAMER SP8026-1909...
- Page 36 B. WATER SYSTEM - Blue and Yellow wires 4. Remove the phillips round-head machine screw(s) from the component bracket and lift bracket out. 5. Unscrew Enunciator from component FIG 4.3C Round head bracket Enunciators machine screw 6. Reinstall in reverse order. EVOLUTION ELECTRIC STEAMER SP8026-1909...
- Page 37 (the wires to the location pins are enter-changeable). 4. Remove the insulation on the right side, to access the Door Switch to be removed (4.3E). EVOLUTION ELECTRIC STEAMER SP8026-1909...
-
Page 38: R&R Of Cast Heater
OverTemp Switch ( X = 3 or 4 based on Kit ordered) AT0F-3401-1 Nut, Special Locking 1/4 -20UNC-2B AT0H-5176-1 Pocket Comb Fine Tooth Thermal Paste Overtemp Cast Heater Switch Installation 1/4-20# Instructions Locking Nuts FIG 4.4A EVOLUTION ELECTRIC STEAMER SP8026-1909... - Page 39 • An additional person is required when performing this repair. • If the heater wires do not have braided insulation, it is not a cast heater. Contact AccuTemp Service at 800-480-0415 • Use the included instruction booklet in conjunction with this manual to complete the repair.
- Page 40 If Heater Studs are Discovered Broken While Removing the Cast Heater If a Heater Stud Breaks-Off While Removing or Installing the Cast Heater Call AccuTemp Service Dept (800) 480-0415. 4.4E 4.4B 4.4C 4.4D 4.4A 14. Clean the studs so thread locker will adhere to them.
- Page 41 37 inch pounds per the tightening sequence in FIG 4.4F Do not over-tighten the nuts. Repeat the tightening procedure with the torque wrench to check that each nut is at 37 inch pounds. FIG 4.4F EVOLUTION ELECTRIC STEAMER SP8026-1909...
- Page 42 • Bellevelle Washers should look like mini-volcanos when placed on heater stud. • The HEX Locking Nut Needs to be Torqued Between 37 IN-LBS. Tighten Starting with Nut #1 and Follow the Numbered Layout Pattern to Nut #24. Tighten Twice in This Pattern. EVOLUTION ELECTRIC STEAMER SP8026-1909...
-
Page 43: R&R Of Door Assembly
Ensure That the Inner Door is Reinstalled with its Middle Brace Bar Behind the Door Latch Tab FIG 4.5D Also, Ensure That the Screw Retainer Openings are Lined-Up with the Door’s Hinge Side FIG 4.5E EVOLUTION ELECTRIC STEAMER SP8026-1909... - Page 44 The door switch MUST be relocated to match the orientation of the latch. Follow the instructions in Section 4.3 ‘DOOR SWITCH’ to transfer the switch Door strike 8 x sheet plate and metal screws spacer FIG 4.5F EVOLUTION ELECTRIC STEAMER SP8026-1909...
- Page 45 (Note the orientation of the Hinge Spacer Bars as they relate to the Hinge orientation.) 9. Remove the Door Hinge or Hinges. 10. Re-install in reverse order. Ensure Anti-seize is re-applied to all hinge screws. EVOLUTION ELECTRIC STEAMER SP8026-1909...
- Page 46 Ensure That the Inner Door is Reinstalled with its Middle Brace Bar Behind the Door Latch Tab FIG 4.5D. Also, Ensure That the Screw Retainer Openings are Lined-Up with the Door’s Hinge Side FIG FIG 4.5K 4.5E. EVOLUTION ELECTRIC STEAMER SP8026-1909...
-
Page 47: R&R Of Temperature Sensors
9. Connect the wires to the high-limit thermostat. Push the wires into the slit in the insulation so they don’t rub on the bottom cover. Push the thermostat connectors down so they don’t rub either. 10. Reassemble the steamer and test the unit operation Overtemp Switch tap in Cast Heater Overtemp Switch EVOLUTION ELECTRIC STEAMER SP8026-1909... -
Page 48: Steam Vent Components
4. Use compressed air to blow out the vent assembly. 5. A brass bore brush can be used to clean the fittings also. 6. Reinstall in reverse order. EVOLUTION ELECTRIC STEAMER SP8026-1909... - Page 49 No loops in hose servicing. - preventing condensation 5. Total length of extended vent piping should not exceed 15 feet. Ends of hose must be open to air and not submerged FIG 4.7D EVOLUTION ELECTRIC STEAMER SP8026-1909...
-
Page 50: Wiring Schematics
5.0 Wiring Schematics 5.1 Wiring Schematic for SN 36980 and Below (Further voltage schematics are available - please call 800-480-0415) EVOLUTION ELECTRIC STEAMER SP8026-1909... -
Page 51: Wiring Schematic For Sn 36981 And Above
5.2 Wiring Schematic for SN 36981 and Above EVOLUTION ELECTRIC STEAMER SP8026-1909... - Page 52 EVOLUTION ELECTRIC STEAMER SP8026-1909...
- Page 53 EVOLUTION ELECTRIC STEAMER SP8026-1909...
- Page 54 EVOLUTION ELECTRIC STEAMER SP8026-1909...
- Page 55 EVOLUTION ELECTRIC STEAMER SP8026-1909...
- Page 56 EVOLUTION ELECTRIC STEAMER SP8026-1909...
- Page 57 EVOLUTION ELECTRIC STEAMER SP8026-1909...
- Page 58 Blank Page EVOLUTION ELECTRIC STEAMER SP8026-1909...
- Page 59 UNMATCHED EFFICIENCY . UNDENIABLE QUALITY. UNBEATABLE SERVICE. AccuTemp Products Inc. Tel.: (800) 210-5907 www.accutemp.net...
Need help?
Do you have a question about the Evolution and is the answer not in the manual?
Questions and answers