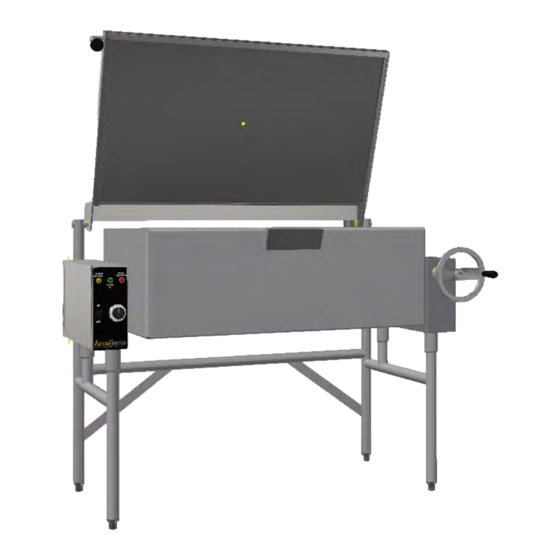
Summary of Contents for AccuTemp EDGE
- Page 1 ELECTRIC SKILLET with MANUAL TILT - ALTES OWNERS MANUAL AND INSTALLATION INSTRUCTIONS Made in U.S.A.
-
Page 2: Table Of Contents
TABLE OF CONTENTS Uncrating and Inspecting the Equipment Important Warranty Information Section II: Startup & Operation Initial Cleaning Control Functions How to Start Cooking Section III: Service & Maintenance Servicing Replacing Primary Thermostat Hi-Limit Thermostat Replacement Heating Elements Actuator Maintenance and Adjustment Actuator Replacement Main &... -
Page 3: Uncrating And Inspecting The Equipment
Careful inspection of the packaging and the appliance should be completed before acceptance from the transportation company. CONTACT INFORMATION: Toll Free 800 480-0415 Office 260 469-3040 Fax 260 469-3045 Email - Service service@accutemp.net Email - Parts parts@accutemp.net Web Site www.accutemp.net... -
Page 4: Important Warranty Information
Important Warranty Information The Accutemp Limited Warranty is valid in the Continental 13.Moving other equipment to gain access to the unit. United States and Hawaii and is void elsewhere. A complete 14.Damages to any part of the unit as a result of cleaning statement of warranty terms and conditions is included with high-pressure water or steam. -
Page 5: Section Ii: Startup & Operation
Section II: Startup & Operation surface of the unit may be polished with any reputable Warning: commercial stainless steel cleaner or polish. Do not use any Always disconnect power before cleaning (or servicing) abrasive materials or metal implements that might scratch the unit. -
Page 6: How To Start Cooking
Section II: Startup & Operation Summary of Control Functions: Rocker Switch (On - Off). Energizes the unit for operation. Primary Thermostat Dial (Temperature). Allows the user to set the cooking temperature of the unit. Unit Power On Indicator Light (Green). Illuminates upon depressing the rocker switch to the ON position. -
Page 7: Section Iii: Service & Maintenance
(without breaking 13. Replace control console panel and secure in place. the seal) and returned to Accutemp. The warranty is voided if the seal is broken or any attempt is made to Hi-Limit Thermostat Replacement recalibrate a thermostat. -
Page 8: Heating Elements
Section III: Service & Maintenance 3. Remove the self-locking 1/2-13 hex nut on the slotted screw. actuator rod. 6. Carefully uncoil the capillary tube. Re-insert the 4. If the components inside the actuator sleeve do capillary tube and thermobulb through the access port not slide out easily, remove the bolt, which secures from which the old tube and bulb was removed and re- the actuator sleeve to the frame lug. -
Page 9: Main & Worm Gear
Section III: Service & Maintenance 7. After the new actuator(s) are installed, adjust the tension using the procedure described earlier in this section. Main and Worm Gear Monthly, check the tilt mechanism (main and worm gear) along with the trunnion support bearings for adequate lubrication. -
Page 10: Section Iv: Caring For Stainless Steel
Section V: Caring For Stainless Steel This section provides specific guidelines for cleaning Sanitizing and protecting the stainless steel surface of your Suggested Tools: equipment. a. Cleaner, such as Klenzade HC-10 or HC-32 from Important! ECOLAB, Inc. Always disconnect power before cleaning (or b. - Page 11 Section V: Caring For Stainless Steel 10. If there is difficulty removing mineral deposits or a film left behind by hard water or food residues, clean the unit thoroughly and use a deliming agent, like Lime-Away® from Ecolab, in accordance with the manufacturer’s directions.
-
Page 12: Section V: Troubleshooting
Section V: Troubleshooting Troubleshooting - General Problems The braising pan is designed to operate smoothly and efficiently if properly maintained. However, in the event of a problem, the following is a list of checks to be made by qualified personnel. The wiring diagram for the unit is located behind the removable panel of the control console. -
Page 13: Electrical Ratings & Field Wiring Requirements
Electrical Ratings and Field Wiring Requirements Supply Wiring to Junction AWG Size Unit Electrical Ratings Heating Element Contactors No. Of Elements Min. Box Size Rating Heating & Pigtail Knockout Amps Model Volts Phase Amps Elements Volts Number Min. AWG Min. AWG Inches Size (in.) *ALTES-... -
Page 14: General Parts List
Part No. Description 2424 2430 2440 407567-1 Thermostat, primary control 176 – 400°F (mechanical) 407567D Thermostat Knob 407770-B Bezel primary thermostat 407568-1 Thermostat, automatic high limit 407793 Grommet, primary control thermostat shaft 408497 Timer 120/240v (knob included) (optional) 407615 Rocker switch 407451 Indicator light red 240v 407452... - Page 15 Part No. Description 2424 2430 2440 456973-240 Heater 240V x 1500 Watts 456973-254 Heater 254V x 1500 Watts 456973-277 Heater 277V x 1500 Watts 460101 Trunnion gear large 460102 Worm gear 404141-7 Assembly yoke & gear 7” deep pan 404141-9 Assembly yoke &...
-
Page 16: Maintenance And Service Log
Maintenance & Service Log Model No.: Purchased From: Serial No.: Date Purchased: Purchase Order No.: Location Installed: Date Installed: Date Maintenance Performed: Performed By:... -
Page 17: Wiring Diagrams
HIGH LIMIT CONTROL TO POWER SUPPLY... -
Page 18: 208-240 Volt /3Ph Delta Models Altes-2440
HIGH LIMIT CONTROL TO POWER SUPPLY... -
Page 19: 208-240 Volt /1Ph Delta Models Altes-2440
HIGH LIMIT CONTROL TO POWER SUPPLY... -
Page 20: 440, 460 & 480 Volt/3Ph Wye Model Altes-2430
HIGH LIMIT CONTROL TO POWER SUPPLY... -
Page 21: 440, 460 & 480 Volt/3Ph Wye Model Altes-2440
HIGH LIMIT CONTROL TO POWER SUPPLY... -
Page 22: Product Warranty (Us & Canada Only)
One Year Parts and LaborOne Year Parts and Labor AccuTemp Products, Inc. ( AccuTemp ) warrants that your AccuTemp equipment will be free of defects in material and workmanship under normal use for a period of twelve (12) months from installation or fifteen (15) months from date of shipment from AccuTemp, whichever date first occurs (the Warranty Period ). - Page 24 IMPORTANT SERVICE INFORMATION AccuTemp Product, Inc. Technical & Customer Support Technician is available Monday thru Sunday, 7:00am to 7:00pm EST.


Need help?
Do you have a question about the EDGE and is the answer not in the manual?
Questions and answers