
Related Manuals for Bionet Oxy9Wave Vet


Summary of Contents for Bionet Oxy9Wave Vet
- Page 1 Oxy9Wave Vet Operation manual Oxy9Wave Vet Operation Manual Ver. 1.52 www.ebionet.com...
-
Page 2: Table Of Contents
2-7. How to Use the Sensor and Precautions ........ 16 3. SETUP ..................17 3-1. LIST OF COMPONENTS ............. 18 3-2. CONNECTING Oxy9Wave Vet TO DC POWER ....... 18 3-3. CONNECTING A SENSOR TO Oxy9Wave Vet ......19 3-4. CONNECTING a Clamp .............. 20... - Page 3 Oxy9Wave Vet Operation manual 4. OPERATION ................21 4-1. Introduction ................. 22 4-2. Symbol and Icon Description ........... 23 4-3. Basic operation ................24 4-3-1. Introduction ......................24 4-3-2. Basic Setup ......................24 4-4. Details of USE................25 4-4-1. Turning On the Monitor ................25 4-4-2.
- Page 4 Oxy9Wave Vet Operation manual 7. References and Others ............43 7-1. Cleaning and Maintenance ............44 7-2. Warranty Period ................44 7-3. How to Contact Us ..............45 Due to continuing product innovation, ⚫ specifications in this manual are subject to change without notice.
-
Page 5: Safety Information
Oxy9Wave Vet Operation manual 1. SAFETY INFORMATION 1.1. CE Standard Information 1-2. Warning 1-3. Caution 1-4. Note 1-5. SAFETY INFORMATION, WARNINGS, CAUTIONS, AND NOTES Ver. 1.52 1.SAFETY INFORMATION... -
Page 6: Ce Standard Information
Oxy9Wave Vet Operation manual 1-1. CE Standard Information ▷ The following electromechanical safety standards have been met: EN/IEC 60601-1 edition 3.0 Medical electrical equipment — Part 1: General requirements for basic safety and essential performance EN/IEC 60601-1-2 edition 4.0 Medical electrical equipment —... - Page 7 Oxy9Wave Vet Operation manual MEDDEV 2.12/1 rev.8 Guidelines on a Medical Devices Vigilance System(January 2013) EN ISO 13485 :2012 Medical devices — Quality management systems— Requirements for regulatory purposes (ISO13485:2003) EN/IEC 62366 edition 1.0 Medical devices-Application of usability engineering to medical devices IEC 62471:2006 Photobiological safety of lamps and lamp systems.
-
Page 8: Warning
NOTE is provided when extra general information is applicable. 1-5. SAFETY INFORMATION, WARNINGS, CAUTIONS, AND NOTES Oxy9Wave Vet is designed to minimize the possibility of hazards due to errors in the software program by following sound engineering design processes, Risk Analysis, and Software Validation. - Page 9 ⚫ of the Handheld unit. Only a qualified operator may perform the maintenance procedures specifically described in this manual. Refer the servicing to Bionet for repair of this equipment. As with all medical equipment, carefully route the patient cabling to reduce the possibility ⚫...
-
Page 10: Product Description
Oxy9Wave Vet Operation manual 2. Product description 2-1. Introduction 2-2 Product Configuration 2-3. Product Specifications 2-4. GENERAL DESCRIPTION 2-5. PRINCIPLE OF OPERATION 2-6. SYSTEM DESCRIPTION 2-7. How to Use the Sensor and Precautions Ver. 1.52 2.Product description... -
Page 11: Introduction
2-1. Introduction • Intended Use Oxy9Wave Vet is a veterinary pulse oximetery that measures blood oxygen saturation from Canine and feline. This device is for use by trained veterinary personnel in veterinary centers. The device is restricted to be used on one patient at a time. -
Page 12: Product Specifications
Oxy9Wave Vet Operation manual 2-3. Product Specifications Performance • ⊙SpO₂(blood oxygen saturation) ⊙BPM(Pulse rate) - Range : 40 to 100% - Range : 30 to 250 bpm - Accuracy : 70~100%, ±2% - Accuracy : ±2bpm 0~69% unspecified Display •... -
Page 13: General Description
Operation manual 2-4. GENERAL DESCRIPTION Oxy9Wave Vet(Pulse oximetry) is a continuous, non-invasive method of measuring the level of arterial oxygen saturation in blood. The measurement is taken by placing a sensor on a patient – usually on the animals tongue. The sensor is connected to the pulse oximetry instrument with... -
Page 14: System Description
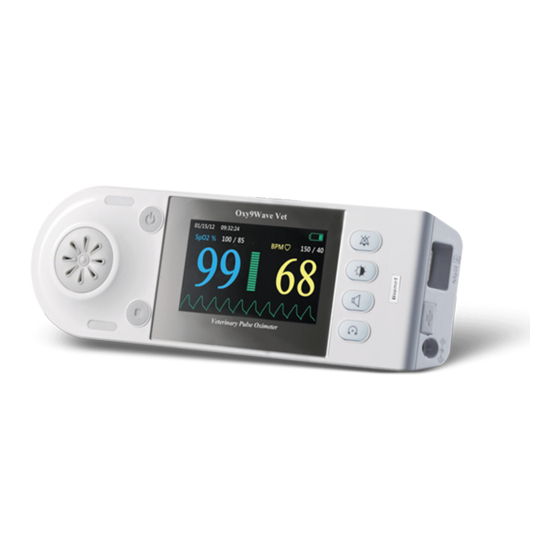
Oxy9Wave Vet Operation manual 2-6. SYSTEM DESCRIPTION ▣ Front View 1. Speaker 1. ALARM Silence Indicator 2. ALARM LED 2. BATTERY Charging Indicator 3. POWER ON/OFF Button 3. POWER Indicator 4. DISPLAY Monitor 4. Alarm Silence Setting Button 5. PULSE RATE LED 5. - Page 15 Oxy9Wave Vet Operation manual ▣ Slide View ▣ Back View Ver. 1.52 2.Product description...
-
Page 16: How To Use The Sensor And Precautions
Oxy9Wave Vet Operation manual 2-7. How to Use the Sensor and Precautions WARNING : Our SPO₂ Sensor is a medical product and should be used accordingly. Improper use or use of other sensors may cause harm to the user. How to use Place the probe on the animal’s tongue as indicated in the illustration. -
Page 17: Setup
Oxy9Wave Vet Operation manual 3. SETUP 3-1. LIST OF COMPONENTS 3-2. CONNECTING Oxy9Wave Vet TO DC POWER 3-3. CONNECTING A SENSOR TO Oxy9Wave Vet 3-4. CONNECTING a Clamp Ver. 1.52 3.Setup... -
Page 18: List Of Components
• Pole Clamp ……………………………………………………………………………………………. • Manual ………………………………………………………………………………………………….. • Power Cord …………………………………………………………………………………………… 3-2. CONNECTING Oxy9Wave Vet TO DC POWER WARNING : The AC-DC adaptor (BPM010S05N07) supplied is to be used for medical purposes only. Never use other DC adaptors with this product. -
Page 19: Connecting A Sensor To Oxy9Wave Vet
CAUTION : Check the electrodes of the batteries before charging them. Connect the DC adaptor when changing the battery. 3-3. CONNECTING A SENSOR TO Oxy9Wave Vet WARNING : Our SpO₂ Sensor is a medical product and should be used accordingly. -
Page 20: Connecting A Clamp
Oxy9Wave Vet Operation manual 3-4. CONNECTING a Clamp Ver. 1.52 3.Setup... -
Page 21: Operation
Oxy9Wave Vet Operation manual 4. OPERATION 4-1. Introduction 4-2. Symbol and Icon Description 4-3. Basic operation 4-3-1. Introduction 4-3-2. Basic Setup 4-4. Details of USE 4-4-1. Turning On the Monitor 4-4-2. Sensor Attached 4-4-3. Button Description 4-4-4. How to use the monitor 4-4-5. -
Page 22: Introduction
Oxy9Wave Vet Operation manual 4-1. Introduction The parameters of the Oxy9Wave Vet monitor are preset to factory default. The factory/default setting for the parameters may be changed to institutional default setting by following the procedures in the Oxy9Wave Vet service manual. -
Page 23: Symbol And Icon Description
Oxy9Wave Vet Operation manual 4-2. Symbol and Icon Description Warning Type BF Connect DC power Class Ⅱ equipment Power button on/off Menu button Alarm silence Alarm OFF Screen brightness Adjusted as one of 5 levels based on the brightness Pulse beep Volume... -
Page 24: Basic Operation
Oxy9Wave Vet Operation manual 4-3. Basic operation 4-3-1. Introduction To operate the Oxy9Wave Vet Pulse Oximeter effectively, the device must be set up properly, and the operator must: Know how the pulse oximeter derives its readings. ⚫ Familiarize himself/herself with its controls, components, and operation. -
Page 25: Details Of Use
Before using Oxy9Wave Vet in a clinical setting, toy must verify whether the monitor is working properly and is safe to use. Proper working condition will be verified each time Oxy9Wave Vet is turned on as described in the following procedure: CAUTION : If any indicator or display element does not light up when the pulse oximeter is turned on, do not use the pulse oximeter. -
Page 26: Sensor Attached
When a sensor is attached to the monitor, the sensor status is displayed on the monitor. The monitor displays a bar in the %SpO₂ and the Pulse Rate while Oxy9Wave Vet is searching for a valid pulse. Once a valid pulse is detected, the monitor shifts to Monitoring Mode and displays the patient parameters. -
Page 27: Button Description
Oxy9Wave Vet Operation manual 4-4-3. Button Description (Alarm Silence, Brightness Adjustment, Pulse beep Volume Adjustment, Screen Rotation) Description of 4 buttons on the right in the patient monitoring mode [ Alarm Silence ] The user can adjust the period of alarm silence duration. -
Page 28: How To Use The Monitor
Oxy9Wave Vet Operation manual [ Setting the Pulse Beep Volume ] ③ 1. Press the Pulse Beep setting button. 2. Each step is displayed on the upper part of the screen. The Button is used to change the sound level, Five levels of volume are available. -
Page 29: Menu Setup
Oxy9Wave Vet Operation manual 4-4-5. MENU SETUP In menu setup, you can adjust the alarm setting, screen composition, data save, time and date display, etc. The menu screen consists of ANIMAL TYPE, ALARM, GENERAL, CLOCK, and ABOUT 1. Press the menu button to go to the corresponding menu setup screen. - Page 30 Oxy9Wave Vet Operation manual MENU TREE ▣ This section gives an overview of the menu selections that are available. To navigate through the menus, press the menu button on the right side using the touch keys. The icons of the menu items that can be set appear on the screen.
-
Page 31: Animal Type
Oxy9Wave Vet Operation manual ▣ ANIMAL TYPE Set the Animal type. [ How to set the Type ] 1. Press the button to go to the desired value. 2. Press to set the value. 3. Press the button to return to the Menu. - Page 32 Oxy9Wave Vet Operation manual [ Description ] Setup Menu Description Max SpO₂ for alarm can be 41-100%. It can be adjusted by 1% Max SpO₂ (UPPER) ( Menu ) ( Alarm setup Screen ) ( Adjust Max Limit ) Min SpO₂ for alarm can be 40~99%. It can be adjusted by 1% Min SpO₂...
-
Page 33: General Setup
Oxy9Wave Vet Operation manual ▣ General Setup Menu for setting the screen display and saving and deleting data [ General Setup Screen ] [ Procedure for General Setup ] 1. Press the button to go to the desired value. 2. Press to set the value. -
Page 34: Clock Setup
Oxy9Wave Vet Operation manual ▣ Clock Setup Set the current time and date. [ Clock Setup Screen ] [ Procedure for Clock Setup ] 1. Press the button to go to the desired value. 2. Press to set the value. -
Page 35: About
Oxy9Wave Vet Operation manual ▣ ABOUT Menu for checking the version and resetting the system and other settings. [ ABOUT Screen ] [ Procedure for About Setup ] 1. Press the button to go to the desired value. 2. Press to set the value. -
Page 36: Alarms/Messages
Oxy9Wave Vet Operation manual 5. Alarms/Messages 5-1. Introduction 5-2. Alarm 5-3. Alarm operation 5-4. System messages Ver. 1.52 5.Alarms/Messages... -
Page 37: Introduction
Familiarize yourself thoroughly with this information before operating the pulse oximeter 5-2. Alarm Oxy9Wave Vet visually and audibly indicates the alarm conditions detected by the system. In particular, the integrated loud speaker indicates the alarm conditions audibly. The LCD screen and the LED lights indicate the visual alarms. -
Page 38: System Messages
Oxy9Wave Vet Operation manual 5-4. System messages The chart below alphabetically lists all system messages displayed on the LCD screen (the cause of the message and action(s) to be taken are also shown) The operator should thoroughly familiarize himself/herself with this information before using the oximeter for patient monitoring. -
Page 39: Standard Power Supply Application
Oxy9Wave Vet Operation manual 6. Standard Power Supply Application 6-1. Power 6-2. Battery Power Supply Application 6-3. When to Replace the Battery 6-4. How to Recycle the Battery Ver. 1.52 6.Standard Power Supply Application... -
Page 40: Power
Oxy9Wave Vet Operation manual 6-1. Power ❶ ❷ The Power LED lights up when Power is plugged into the inlet at the back of the product. Pressing the power key makes the machine ready for use. CAUTION : This Product is intended for indoor use only. -
Page 41: Battery Power Supply Application
5. When the remaining battery power is only 10%, power is automatically cut off after 5 minutes. The machine will no longer operate when the battery icon flahes. Charge the batteries with the power adaptor provided by BIONET WARNING : Check the electrodes of the batteries before charging them. -
Page 42: When To Replace The Battery
Oxy9Wave Vet Operation manual 6-3. When to Replace the Battery WARNING : Be sure to replace the old battery with a new battery of the same type. Once you start using the battery, be sure to use it continuously until it is completely discharged. -
Page 43: References And Others
Oxy9Wave Vet Operation manual 7. References and Others 7-1. Cleaning and Maintenance 7-2. Warranty Period 7-3. How to Contact Us Ver. 1.52 7.References and Others... -
Page 44: Cleaning And Maintenance
Oxy9Wave Vet Operation manual 7-1. Cleaning and Maintenance Check the items below before operating the equipment. We do not provide free repair even if the warranty is still valid if the product is contaminated or damaged due to the use of non-approved dangerous material for washing. -
Page 45: How To Contact Us
• E-mail: Sales@ebionet.com Service@ebionet.com • URL: http://www.ebionet.com ※ In the event of a malfunction or failure, contact Service Dept. Of Bionet Co., Ltd. along with the model name, serial number, date of purchase and explanation of failure. Ver. 1.52 7.References and Others... - Page 46 ※ Hospital Name : ※ Address : ※ Name : ※ Phone : ◼ Distributor ◼ Manufacture Thank you for purchasing Oxy9Wave Vet This product is manufactured based on – and has passed – strict quality control and through inspection. Ver. 1.52...
- Page 47 Oxy9Wave Vet Operation manual Ver. 1.52...
- Page 48 Toll Free: 1-877-924-6638 / Fax: 1-714-734-1761 / e-mail: support@bionetus.com Website: www.bionetUS.com European sales & service representative MGB Endoskopische Geräte GmbH Berlin : Schwarzschildstraße 6 D-12489 Berlin, Germany Tel: +49(0)-30-6392-7000 / Fax: +49(0)-30-6392-7011 / e-mail: sales@mgb-berlin.de Website: www.mgb-berlin.de Bionet Co., Ltd Model Name: Oxy9Wave Vet Ver. 1.52...
Need help?
Do you have a question about the Oxy9Wave Vet and is the answer not in the manual?
Questions and answers