
Related Manuals for Digital Acoustics IP7-SE8


Summary of Contents for Digital Acoustics IP7-SE8
- Page 1 IP Intercom/Paging IP7-SE8 Getting Started Guide...
- Page 3 Introduction The IP7-SE8 IP Intercom/Paging endpoint provides high quality 2-way audio from TalkMaster™ software over an IP network. The internal audio amplifier can drive a maximum of 8 watts to one or more speakers. It supports a Talk switch and includes a Relay, a Door Sensor and an integrated 2-port switch.
-
Page 4: Important Installation Guidelines
IP7-SE8 Installation Please refer to the IP7-SE8 Reference Manual available on the TALKMASTER SOFTWARE CD for additional information on installation and setup Important Installation Guidelines • Choose 18-22 AWG wire for speaker connections. Select wire gauge suited to minimize power loss for specific distribution method and wire run distances •... - Page 5 IP7-SE8 Installation (2-way Intercom/Paging mode) Optional 12VDC - 15VDC 6 Conductor Wire 18-22 AWG Twisted Shielded (No Connection) Relay Output (Optional) Cat-5 Cable to Cat-5 Cable to 2 Conductor Wire PoE Hub/Switch PoE Hub/Switch Sensor Input (Optional) 2 Conductor Wire •...
- Page 6 IP7-SE8 Wiring (2-way Intercom/Paging mode) Microphone Speaker Talk Button Connection IP7-SE8 Installation (Paging Mode Only, 8 Ohm Speaker) Optional 12VDC - 15VDC* 2 Conductor Wire 18-22 AWG Cat-5 Cable to Cat-5 Cable to PoE PoE Hub/Switch Hub/Switch • Connect SPKR 8Ω+ and SPKR 8Ω- (J2-6 and J2-7) to the...
- Page 7 Relay Options • An integrated Relay uses J3-2, with J3-1 (Normally Open) or J3-3 (Normally Closed). Use TalkMaster™ to configure the options Sensor Options • The integrated Sensor can be used to monitor the status of a door by connecting J3-5 and J3-6 to a contact closure sense switch.
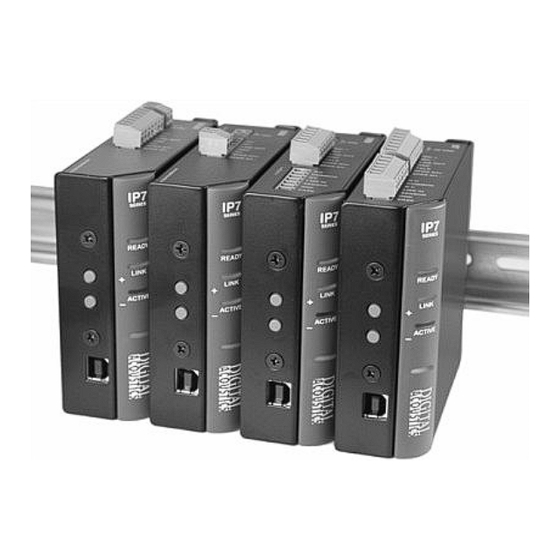
- Page 8 • DIN Rail Clip – Tilt top of unit (J1, J2 connectors facing up with Volume buttons facing forward) back towards the DIN Rail until the IP7-SE8 DIN clip catches the top of the rail. Press in at the bottom of the IP7-SE8 to snap into place.
- Page 9 TalkMaster ™ TalkMaster™ LE Software is a Windows® application used to configure and manage Digital Acoustics IP7™ and ii3™ Intercoms and Paging endpoints. Primary functions include user controls for inbound/outbound calls and paging. An integrated configuration utility is also included to set Options...
- Page 10 IP7 series device to the network. • Record the unique ID# from the bottom of the Intercom (or Paging) endpoint(s) and note the location where it will be installed • Install the TalkMaster Software using the Digital Acoustics’ Software CD, or online at www.digitalacoustics.com...
- Page 11 Configure the devices • Start TalkMaster and click menu option Admin Enable Admin • Enter the default password admin • To verify the latest version is being used optional click Admin Check for new versions online • Click menu option Admin Configure Intercoms A new screen is displayed while TalkMaster searches...
- Page 12 • Check the Assign IP automatically with DHCP box, or uncheck it to assign the device a static IP Address, Subnet Mask and Gateway • Enter a descriptive name for the Intercom into the Location Name field. This name should be unique to help easily identify the Intercom or Paging endpoint •...
- Page 13 Additional IP7 Configuration options Input Source (IP7 series only) • Microphone – Assigns a Microphone as audio source • Line In -Assigns Line In connector as audio source Remote Listen Disable - Used for Paging endpoints to disable Taskmaster’s™ Listen button operation Call Button - Changes the default action of the Intercom’s Talk switch.
- Page 14 Using TalkMaster LE • Intercom (and paging) endpoints will automatically appear in the main display listing of TalkMaster (active on the computer specified in Server IP) • The PC microphone is used to send audio to an intercom. The audio from an intercom can be heard on the PC’s speakers •...
- Page 15 • Click and hold the Talk button, or press and hold the Space Bar to speak to the Intercom • Release the Talk button or Space Bar to listen • Click the Listen button, or press the Escape key to end the call •...
- Page 16 • TalkMaster™ Software Users Guide Digital Acoustics Technical Support esupport@digitalacoustics.com www.digitalacoustics.com U.S.A. +1 (847) 604-9256 SE8-GSG0806-6621.docu TalkMaster, IP7 and Digital Acoustics® are trademarks of Digital Acoustics LLC. Other trademarks are the property of their respective owners. All Rights Reserved ©2008 p/n 6621...
Need help?
Do you have a question about the IP7-SE8 and is the answer not in the manual?
Questions and answers