
Related Manuals for Keysight U5855A


Summary of Contents for Keysight U5855A
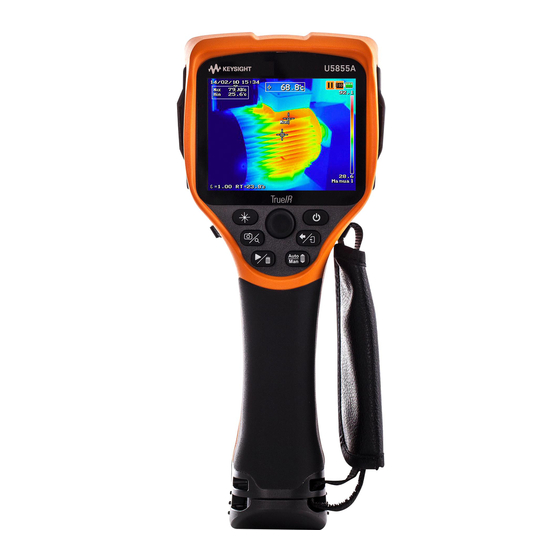
- Page 1 Test Equipment Depot - 800.517.8431 - 99 Washington Street Melrose, MA 02176 - TestEquipmentDepot.com Keysight U5855A TrueIR Thermal Imager User’s Guide...
- Page 3 U5855A User’s Guide...
- Page 4 U5855-90000 ity and fitness for a particular purpose. age to the product or loss of impor- Keysight shall not be liable for errors or for Edition tant data. Do not proceed beyond a incidental or consequential damages in...
- Page 5 The following symbols on the instrument and in the documentation indicate precautions which must be taken to maintain safe operation of the instrument. Caution, risk of danger (refer to this manual for specific Warning or Caution information) Laser radiation U5855A User’s Guide...
- Page 6 Failure to comply with these precautions or with specific warnings elsewhere in this manual violates safety standards for design, manufacture, and intended use of the instrument. Keysight Technologies assumes no liability for the customer’s failure to comply with these requirements.
- Page 7 • This measuring device is intended for professional use and is not suitable for general use. Use of controls or adjustments or performance of procedures other than those C A U T I O N specified herein may result in hazardous radiation exposure. Laser beam Laser control key U5855A User’s Guide...
- Page 8 • Always use a dry cloth to clean the device. Do not use ethyl alcohol or any other volatile liquid to clean the device. • Do not permit any blockage of the ventilation holes of the device. U5855A User’s Guide...
- Page 9 Storage condition • 95% RH at 40 °C Altitude Up to 2000 m Pollution degree Regulatory Information The U5855A complies with the following safety and Electromagnetic Compatibility (EMC) requirements: Safety compliance • Laser safety: IEC 60825-1:2001/EN 60825-1:2001 (Laser Class 2) •...
- Page 10 EMC Declaration. This is a Class A substance elements are expected to instrument suitable for professional leak or deteriorate during normal use. use and in electromagnetic Forty years is the expected useful life environment outside of the home. of the product. VIII U5855A User’s Guide...
- Page 11 Product Category: With reference to the equipment types in the WEEE directive Annex 1, this instrument is classified as a “Monitoring and Control Instrument” product. The affixed product label is as shown below. U5855A User’s Guide...
- Page 12 Declaration of Conformity (DoC) The Declaration of Conformity (DoC) for this instrument is available on the Keysight Web site. You can search the DoC by its product model or description at the Web address below. http://regulations.products.keysight.com/DoC/search.htm If you are unable to search for the respective DoC, contact your local Keysight N O T E representative.
-
Page 13: Table Of Contents
Preparing the U5855A Check the shipment Install the hand strap Install and charge the battery Insert the SD memory card Turn on the U5855A Set up the U5855A The U5855A in Brief Display screen Image Capture, Processing, and Measurement Functions... - Page 14 Configure the Quick Start Tutorial Save/recall instrument setups Turn on/off visible image auto-save Configure the display items Configure the main key press functions Set the power saving mode Set the LCD brightness Set the temperature unit (°C or °F) U5855A User’s Guide...
- Page 15 Set the date and time Set the video out format Set the language Display the system and owner information Reset the U5855A to factory default settings Characteristics and Specifications Product Characteristics Specifications Performance specifications Laser specifications Supplemental characteristics U5855A User’s Guide...
- Page 16 THIS PAGE HAS BEEN INTENTIONALLY LEFT BLANK. U5855A User’s Guide...
- Page 17 List of Figures Figure 1-1 The front and side panels at a glance 13 Figure 1-2 The rear panel at a glance 14 Figure 1-3 The display at a glance 17 U5855A User’s Guide...
- Page 18 THIS PAGE HAS BEEN INTENTIONALLY LEFT BLANK. U5855A User’s Guide...
- Page 19 List of Tables Table 1-1 Rear panel descriptions 14 Table 1-2 Display descriptions 17 Table 2-1 Emissivity table 64 U5855A User’s Guide XVII...
- Page 20 THIS PAGE HAS BEEN INTENTIONALLY LEFT BLANK. XVIII U5855A User’s Guide...
-
Page 21: Introduction
U5855A TrueIR Thermal Imager User’s Guide Introduction About This Manual 2 Preparing the U5855A 3 The U5855A in Brief 13 This chapter guides you to set up the U5855A for the first time. A summary of all the U5855A features is also given. -
Page 22: About This Manual
About This Manual About This Manual The descriptions and instructions in this manual apply to the Keysight U5855A TrueIR Thermal Imager (hereafter referred to as the U5855A or the instrument). Documentation map The following manuals and software are available for your instrument. -
Page 23: Preparing The U5855A
Sales Office. Keep the original packaging in case the U5855A has to be returned to Keysight in the future. If you return the U5855A for service, attach a tag identifying the owner and model number. Include also a brief description of the problem. - Page 24 Introduction Preparing the U5855A Standard shipped items Keysight U5855A TrueIR Thermal Imager SD memory card Li-Ion rechargeable Power cord Power adapter Hard carrying case battery Certificate of Calibration USB Standard-A to Mini Video RCA to RCA Keysight U5855A Certificate of...
-
Page 25: Install The Hand Strap
Introduction Preparing the U5855A Install the hand strap U5855A User’s Guide... -
Page 26: Install And Charge The Battery
Introduction Preparing the U5855A Install and charge the battery Press to lock firmly in place Allow at least 4 hours for the battery to fully charge U5855A User’s Guide... -
Page 27: Insert The Sd Memory Card
Introduction Preparing the U5855A Indicates charging status Refer to “LED status indication” on page 15 “Battery status indication ” on page 18 N O T E for more details. Insert the SD memory card U5855A User’s Guide... -
Page 28: Turn On The U5855A
DO NOT REMOVE the battery or the SD memory card before power is turned off and the C A U T I O N LED light goes off entirely. Otherwise it may damage the U5855A or destroy files saved in the SD memory card. -
Page 29: Set Up The U5855A
Pressing the power key will turn it back on. This • If Auto Sleep is enabled, the U5855A automatically goes to sleep if a key is not pressed for 10 minutes (default). Pressing any key except the power key will turn it back on. - Page 30 Introduction Preparing the U5855A Set the date, time, and temperature unit U5855A User’s Guide...
- Page 31 Introduction Preparing the U5855A • Year: 00 to 99 (00: year 2000) • Date: 01 to 31 • Month: 01 to 12 Push left/right to move the indicator. Push up/down to increase/decrease the digits. • Hour: 00 to 23 • Minute: 00 to 59 •...
- Page 32 Introduction Preparing the U5855A U5855A User’s Guide...
-
Page 33: The U5855A In Brief
Introduction The U5855A in Brief The U5855A in Brief Front Right Left Laser pointer Visible image camera Torch light Infrared (IR) image USB Mini-B camera lens port Video out port (with shutter) SD memory DC power inlet card slot Focus... - Page 34 Push the sides of the key for up/down/left/right navigation. The left/right sides can be pushed to open or close sub-menus. Power on/off key (with LED Press for 2 seconds to turn the U5855A on or off. status indicator) Press briefly to return to the previous menu.
- Page 35 Adjust temperature span: Adjust temperature level: Press for 1 second to switch from manual to auto scaling. [1] Torch light and laser pointer are not functional when the U5855A is in the power-saving mode. LED status indication Unit turned on/off...
- Page 36 Introduction The U5855A in Brief Camera mode switching flow IR image (with Fine Resolution enabled) Visible image Picture-in-picture (fusion) image Blend (fusion) image U5855A User’s Guide...
-
Page 37: Display Screen
Introduction The U5855A in Brief Display screen Figure 1-3 The display at a glance Table 1-2 Display descriptions Description Date/time Measurement results and tools Info bar (selectable up to four items to display) Auto/manual scaling Temperature scale/color bar with upper and lower temperature limits... - Page 38 Introduction The U5855A in Brief Battery status indication Full 1 to 2.5 hours remaining 15 to 60 minutes remaining Empty (flashing) (~2.5 to 5 hours remaining) Fully charged No battery Charge error (flashing) Charging (with adapter connected) (with adapter connected) (with adapter connected) [1] Typical operating time of a new battery.
-
Page 39: Image Capture, Processing, And Measurement Functions
U5855A TrueIR Thermal Imager User’s Guide Image Capture, Processing, and Measurement Functions Camera Controls 20 Image Saving 23 Image Playback 36 Measurement Controls 42 Imaging Controls 53 Digital Zoom 59 Parameter Controls 61 This chapter guides you on how to operate the main functions of the... -
Page 40: Camera Controls
Image Capture, Processing, and Measurement Functions Camera Controls Camera Controls Capture images Adjust the focus on the target image Slide to open the shutter Near-end focus Far-end focus To select a camera mode U5855A User’s Guide... - Page 41 Image Capture, Processing, and Measurement Functions Camera Controls Select a camera mode: The U5855A provides two fusion camera modes: • Picture in Picture • Blend These modes enable you to identify abnormalities easily with a fusion of both IR and visible images...
- Page 42 FR indicator To set the transparency of fusion images Set a value (with a 10% step): Transparency can only be set when the Picture in Picture or Blend mode is selected Push up/down to increase/decrease the digits U5855A User’s Guide...
-
Page 43: Image Saving
Image Saving Image Saving After capturing the images, you can save them into the SD memory card inserted in the U5855A. You can also add tags and edit the images. Preview and save an image The Image menu is displayed: (You need to set to the Preview/Save mode for the Trigger key press in order to display the Image menu. - Page 44 Image Capture, Processing, and Measurement Functions Image Saving To save the image: To preview the IR/visible image, select Infrared/Visible respectively: Wait for 500 ms U5855A User’s Guide...
- Page 45 • If the auto save visible image setting is enabled, both the IR and visible images will be saved • If the auto save visible image setting is disabled, only the IR image will be saved Refer to “Turn on/off visible image auto-save” on page 88 for more details U5855A User’s Guide...
-
Page 46: Add Tags
Image Capture, Processing, and Measurement Functions Image Saving Add tags You can include photo tags (up to three visible images) and note tag that correspond to your IR image analysis. To add photo tags The Image menu is displayed: U5855A User’s Guide... - Page 47 Image Capture, Processing, and Measurement Functions Image Saving 3 3 4 To capture the photo tag: Visible image is displayed: Repeat the same to add more photo tags (up to three) U5855A User’s Guide...
- Page 48 Select YES to proceed with adding tags or NO to return to If there is already an existing photo tag and you the previous screen: want to add a new tag, a message prompts you to overwrite the existing tag: U5855A User’s Guide...
- Page 49 Repeat steps 1 to 2 from “To add photo tags” on page 26 Select and enter the character Move the character cursor Confirm the cursor position If there is no character input, a blank character is inserted Press for 1 second U5855A User’s Guide...
- Page 50 Image Capture, Processing, and Measurement Functions Image Saving Note tag indicator will be added: Save the note tag with the IR and visible images, and return to the run mode: To preview the note tag: Wait for 500 ms U5855A User’s Guide...
-
Page 51: Edit Tags
Image Saving To add a note tag from a template file You can download the note tag template file from the Keysight Web site to the SD memory card. To ensure proper use of this template file, use the following guidelines: •... -
Page 52: Delete Tags
Select YES to delete all photo tags, note tag, or all photo and note tags. Select NO to return to the previous screen. When a tag is deleted, the respective tag indicator will be removed from the Image menu U5855A User’s Guide... -
Page 53: Save An Image Directly
Image Capture, Processing, and Measurement Functions Image Saving Save an image directly Press for 1 second to save Edit an image The Image menu is displayed: U5855A User’s Guide... - Page 54 Image Capture, Processing, and Measurement Functions Image Saving Edit mode indicator You can then proceed to edit the image or access the Main Menu for more operations To exit the Edit mode: U5855A User’s Guide...
- Page 55 • Select Save and exit to overwrite the existing image and save your new edits, and then exit the Edit mode • Select Exit without saving to exit the Edit mode without saving your edits • Select CANCEL to return to the current operation U5855A User’s Guide...
-
Page 56: Image Playback
This feature allows you to play back saved images. Full screen/Thumbnail playback mode operation summary: Legend Full screen to thumbnail playback operation Run mode Thumbnail/full screen playback switching operation Full screen playback mode Press for 1 second Thumbnail playback mode Press for 1 second U5855A User’s Guide... - Page 57 It will be hidden if idle for 3 seconds To display the To display the next image: previous image: In the playback mode, you can perform the same Image menu operations N O T E as described in the previous sections of this chapter. U5855A User’s Guide...
- Page 58 Image Capture, Processing, and Measurement Functions Image Playback Thumbnail playback mode operation summary: Set to the Thumbnail mode (refer to Run mode “Configure the main key press functions” on page Thumbnail playback mode Full screen playback mode Press for 1 second U5855A User’s Guide...
- Page 59 Image Capture, Processing, and Measurement Functions Image Playback Thumbnail playback mode overview: Photo tag icon Note tag icon Thumbnail display scroll bar. To scroll: Visible image icon U5855A User’s Guide...
-
Page 60: Delete Multiple Images (Thumbnail Playback Mode)
Image Capture, Processing, and Measurement Functions Image Playback Delete multiple images (Thumbnail playback mode) Press for 1 second Indicator for the selected image Toggle to check/uncheck U5855A User’s Guide... - Page 61 Image Capture, Processing, and Measurement Functions Image Playback Every deleted image will be updated with another thumbnail image. If an IR image is deleted, its related visible image, photo tag, and note tag are also deleted. U5855A User’s Guide...
-
Page 62: Measurement Controls
Image Capture, Processing, and Measurement Functions Measurement Controls Measurement Controls The U5855A measurement controls enable you to identify hot/cold spots and to perform thermal analysis on the move, directly on the camera. Set the temperature range You can set auto range or manual range (–20 to 120 °C or 0 to 350 °C) for temperature measurement. - Page 63 Image Capture, Processing, and Measurement Functions Measurement Controls To enable/disable auto range U5855A User’s Guide...
-
Page 64: Set The Center Spot
Set the center spot You can enable or disable the center spot cursor which measures the temperature at the center of the IR image. Follow steps 1 to 2 from “Set the temperature range” on page 42 U5855A User’s Guide... -
Page 65: Set The Max/Min Tracking
Set the max/min tracking This function tracks the maximum and minimum temperature within the full IR image. Follow steps 1 to 2 from “Set the temperature range” on page 42 Max/Min measurements Max point cursor Min point cursor U5855A User’s Guide... -
Page 66: Set The Moveable Spots And Boxes
IR image to perform max, min, and average temperature measurements within the areas. The box size can be adjusted. To set a measurement spot Follow steps 1 to 2 from “Set the temperature range” on page 42 Select any spot or disable all existing spots: U5855A User’s Guide... - Page 67 Image Capture, Processing, and Measurement Functions Measurement Controls For example, to enable spot 1: Spot 1 measurement Spot 1 point cursor To enable spot 1 moving mode: To move spot 1: To confirm spot 1 location: To exit spot 1 moving mode: U5855A User’s Guide...
- Page 68 Follow steps 1 to 2 from “Set the temperature range” on page 42 Select any box or disable all existing boxes: For example, to enable box 1: Box 1 cursor Box 1 max, min, and average readings U5855A User’s Guide...
- Page 69 Image Capture, Processing, and Measurement Functions Measurement Controls To enable box 1 moving mode or adjust the size: To move box 1: To adjust the size of box 1: To exit box 1 moving mode or size adjustment: To confirm box 1: U5855A User’s Guide...
-
Page 70: Set The Delta Temperature
You can measure the difference between two temperature readings — you can select from the spot readings or specify your own reference value. Follow steps 1 to 2 from “Set the temperature range” on page 42 Δ Temp indicator U5855A User’s Guide... - Page 71 Select the center spot, spot 1, 2, or 3, or a reference value for Temp 1: If you want to enter a reference value: Push left/right to move the indicator. Push up/down to increase/decrease the digits. Repeat the same procedure for Temp 2 U5855A User’s Guide...
-
Page 72: Turn Off All Measurements
Image Capture, Processing, and Measurement Functions Measurement Controls Turn off all measurements Follow steps 1 to 2 from “Set the temperature range” on page 42 All measurement indicators are removed: U5855A User’s Guide... -
Page 73: Imaging Controls
The imaging feature allows you to perform a more comprehensive thermal analysis by configuring the IR image display for different environments. Set the color palette You can apply a specific color palette for your IR image to improve contrast and clarity when identifying hot/cold areas. U5855A User’s Guide... - Page 74 Image Capture, Processing, and Measurement Functions Imaging Controls Select a color palette: For example, the Hot Iron color palette is applied: U5855A User’s Guide...
-
Page 75: Set The Color Alarm
In the manual scaling mode, you need to set Level 1 and Level 2 within the temperature N O T E span to ensure accurate color display. To turn on/off the color alarm Follow steps 1 to 2 from “Set the color palette” on page 53 U5855A User’s Guide... - Page 76 Image Capture, Processing, and Measurement Functions Imaging Controls Color alarm indicator when enabled U5855A User’s Guide...
- Page 77 Image Capture, Processing, and Measurement Functions Imaging Controls To set the alarm threshold Select the threshold type: To set the alarm threshold level U5855A User’s Guide...
- Page 78 Push left/right to move the indicator. Push up/down to increase/decrease the digits. If you have selected the Inside or Outside threshold, repeat the same procedure to enter the value for Level 2 To set the image background Select the background type: U5855A User’s Guide...
-
Page 79: Digital Zoom
To set the zoom ratio Press for 1 second To change and confirm the zoom ratio: In run mode, the zoom area is always at the center of the image Zoom area To exit: Zoom ratio value U5855A User’s Guide... - Page 80 Image Capture, Processing, and Measurement Functions Digital Zoom To pan (move) the zoom area To pan and confirm the zoom area: To disable zoom U5855A User’s Guide...
-
Page 81: Parameter Controls
Below illustrates a model of the IR emission energy received by the U5855A. Ambient compensation Transmissivity compensation Reflective compensation Object Reflected temperature (RT) temperature Reflected IR Atmospheric temperature (AT) Sensor Humidity (Hum) Emitted IR Emissivity (ε) External window transmission (τ), if applicable Object distance (OD) U5855A User’s Guide... -
Page 82: Set The Emissivity (Ε)
You will need to adjust the emissivity values to compensate for the measurement accuracy of objects with low emissivity. Emissivity setting is not supported during image logging. N O T E To enter an emissivity value U5855A User’s Guide... - Page 83 Image Capture, Processing, and Measurement Functions Parameter Controls Enter a value from 0.10 to 1.00: Push left/right to move the indicator. Push up/down to increase/decrease the digits. Emissivity parameter indicator To select a common emissivity value U5855A User’s Guide...
- Page 84 0.90 Stainless steel (polished) 0.20 Clay 0.92 Stainless steel (oxidized) 0.80 Graphite (carbon) 0.95 Copper (oxidized) 0.40 Glass 0.90 Nickel (oxidized) 0.37 Rubber 0.90 Brass (oxidized) 0.64 Concrete 0.92 Snow 0.85 Skin 0.98 Cloth 0.90 Water 0.96 U5855A User’s Guide...
-
Page 85: Set The Reflected Temperature (Rt)
For example when the object inside a furnace is measured, the inside of the furnace is the source of reflection. RT Cal cannot be executed during freeze mode and image logging. N O T E U5855A User’s Guide... - Page 86 Image Capture, Processing, and Measurement Functions Parameter Controls To enter an RT value Follow steps 1 to 2 from “To enter an emissivity value” on page 62 Push left/right to move the indicator. Push up/down to increase/decrease the digits. RT parameter indicator U5855A User’s Guide...
- Page 87 Parameter Controls To run RT Cal for environmental reflection correction Close the lens shutter and select OK RT Cal will then execute and return to the Reflected Temp (RT) menu once completed RT Cal value RT indicator updated U5855A User’s Guide...
- Page 88 If you know the temperature of the reflection source, you may enter the value. If not, select YES to run the calibration to obtain the temperature. Push left/right to move the indicator. Push up/down to increase/decrease the digits. U5855A User’s Guide...
-
Page 89: Set The Object Distance (Od), Ambient Temperature (At), And Humidity (Hum)
Ambient parameter settings are not supported in the freeze, playback, and image logging N O T E modes. Follow steps 1 to 2 from “To enter an emissivity value” on page Select Object Distance (OD)/Ambient Temp (AT)/Humidity (Hum): U5855A User’s Guide... -
Page 90: Set The Transmissivity (Τ)
Transmissivity setting is not supported in the freeze, playback, and image logging modes. N O T E Follow steps 1 to 2 from “To enter an emissivity value” on page 62 U5855A User’s Guide... - Page 91 Image Capture, Processing, and Measurement Functions Parameter Controls Enter a value from 0.10 to 1.00: Push left/right to move the indicator. Push up/down to increase/decrease the digits. Transmissivity parameter indicator U5855A User’s Guide...
- Page 92 Image Capture, Processing, and Measurement Functions Parameter Controls THIS PAGE HAS BEEN INTENTIONALLY LEFT BLANK. U5855A User’s Guide...
-
Page 93: Data Management And System-Related Functions
U5855A TrueIR Thermal Imager User’s Guide Data Management and System-Related Functions Data Management Controls 74 System-Related Settings 84 This chapter guides you on how to configure data and system settings for the U5855A. -
Page 94: Data Management Controls
SD memory card to store the images. The folder created at the first logging interval will be named LOG_0001, then LOG_0002 at the next interval, and will increase subsequently. To enable/disable image logging U5855A User’s Guide... - Page 95 Data Management and System-Related Functions Data Management Controls Log indicator Press for 1 second to start logging Interval and image count indicators U5855A User’s Guide...
- Page 96 Data Management and System-Related Functions Data Management Controls To exit logging: To set the logging interval Enter a value from 7 to 3600 seconds: Push left/right to move the indicator. Push up/down to increase/decrease the digits. U5855A User’s Guide...
- Page 97 Data Management and System-Related Functions Data Management Controls To set the image count Enter a value from 1 to 1000: Push left/right to move the indicator. Push up/down to increase/decrease the digits. To enable/disable logging of visible images U5855A User’s Guide...
-
Page 98: View The Sd Card Memory Status
Data Management and System-Related Functions Data Management Controls View the SD card memory status This function is not supported during image logging. N O T E Follow steps 1 to 2 from “To enable/disable image logging” on page 74 U5855A User’s Guide... -
Page 99: Manage Image Folders
To select a folder Follow steps 1 to 2 from “To enable/disable image logging” on page 74 Select an existing folder to use: To return to the previous folder list display: To return to the Data menu: U5855A User’s Guide... - Page 100 Data Management and System-Related Functions Data Management Controls To rename a folder Select an existing folder to rename: Push left/right to move the indicator. The new folder name will be reflected in the list: Push up/down to increase/decrease the digits. U5855A User’s Guide...
- Page 101 This will lead you to add another Push left/right to move the indicator. new folder. To exit, Push up/down to increase/decrease the digits. You can view the new folders under the Select Folder menu. To delete a folder U5855A User’s Guide...
- Page 102 Data Management and System-Related Functions Data Management Controls Select an existing folder to delete: U5855A User’s Guide...
-
Page 103: Format The Sd Card
This function is not supported during image logging. N O T E Follow steps 1 to 2 from “To enable/disable image logging” on page 74 Select YES to proceed and return to the Data menu once completed U5855A User’s Guide... -
Page 104: System-Related Settings
System-Related Settings System-Related Settings These settings allow you to make general system configurations for the U5855A. Configure the Quick Start Tutorial This function is not supported during image logging. N O T E To display the tutorial U5855A User’s Guide... - Page 105 Data Management and System-Related Functions System-Related Settings To navigate the tutorial pages: To exit: U5855A User’s Guide...
- Page 106 Data Management and System-Related Functions System-Related Settings To enable/disable the tutorial at power-on U5855A User’s Guide...
-
Page 107: Save/Recall Instrument Setups
This function is not supported during image logging. N O T E Follow steps 1 to 2 from “To display the tutorial” on page 84 Select Save Setup or Recall Setup: Select a setup storage to save/recall: U5855A User’s Guide... -
Page 108: Turn On/Off Visible Image Auto-Save
This is only applicable for the IR camera mode. Visible images will always be auto saved in N O T E the Visible Camera, Picture in Picture, and Blend modes. Follow steps 1 to 2 from “To display the tutorial” on page 84 U5855A User’s Guide... -
Page 109: Configure The Display Items
Configure the display items You can set the items that you want to display on the screen. Follow steps 1 to 2 from “To display the tutorial” on page 84 Select Date/Time, Color Bar, or Info Bar: U5855A User’s Guide... - Page 110 Data Management and System-Related Functions System-Related Settings To select the info bar items to display: Select the items (only the first four items selected will be displayed): Toggle to check/uncheck To confirm and exit: U5855A User’s Guide...
-
Page 111: Configure The Main Key Press Functions
“To display the tutorial” on page 84 Select Trigger/Camera/Playback: For example, if you select Trigger, you can set to preview and save the image, preview the image only, or save an image directly when you press the key: U5855A User’s Guide... -
Page 112: Set The Power Saving Mode
• Auto sleep and auto power-off functions are disabled during image logging. N O T E • Auto-power off functions are disabled in the image playback mode. This Follow steps 1 to 2 from “To display the tutorial” on page 84 Select Auto Sleep or Auto Off: U5855A User’s Guide... - Page 113 To set the auto sleep or auto power-off timer, select Auto Sleep Timeout Period or Auto Off Timeout Period: • Auto Sleep: 1 to 15 mins (10 mins by default) • Auto Off: 5 to 60 mins (20 mins by default) Push left/right to move the indicator. Push up/down to increase/decrease the digits. U5855A User’s Guide...
-
Page 114: Set The Lcd Brightness
Follow steps 1 to 2 from “To display the tutorial” on page 84 Set the temperature unit (°C or °F) Refer to “Set up the U5855A” on page Set the date and time Refer to “Set up the U5855A” on page... -
Page 115: Set The Video Out Format
TV/projector/monitor screen is truncated, switch its OVERSCAN function to OFF. • Video out is disabled in the power-saving mode. Follow steps 1 to 2 from “To display the tutorial” on page 84 Set the language Refer to “Set up the U5855A” on page U5855A User’s Guide... -
Page 116: Display The System And Owner Information
System-Related Settings Display the system and owner information To display the system information Follow steps 1 to 2 from “To display the tutorial” on page 84 To display the owner information To display the information at power-on: U5855A User’s Guide... - Page 117 • Maximum line: 8 lines • Maximum characters per line: 18 characters When you load the owner information from the template file, the contents of the file are read and registered with the U5855A memory. To load the owner information:...
-
Page 118: Reset The U5855A To Factory Default Settings
Select YES to load the info file and return to the Owner Info menu: If the info file does not exist on the SD card, an error message is displayed Reset the U5855A to factory default settings Follow steps 1 to 2 from “To display the tutorial”... -
Page 119: Characteristics And Specifications
U5855A TrueIR Thermal Imager User’s Guide Characteristics and Specifications Product Characteristics 100 Specifications 102 This chapter specifies the characteristics and specifications of the U5855A. -
Page 120: Product Characteristics
“Environmental Conditions” on page VII STORAGE COMPLIANCE Refer to “Environmental Conditions” on page VII SAFETY AND EMC COMPLIANCE Refer to “Regulatory Information” on page VII SHOCK Tested to IEC 60068-2-27 Ed. 3.0 VIBRATION Tested to IEC 60068-2-6 DROP TEST U5855A User’s Guide... - Page 121 Characteristics and Specifications Product Characteristics PROTECTION CLASS IP RATING IP54 DIMENSIONS (W × H × D) 95 × 250 × 85 mm WEIGHT 0.746 kg (with battery) CALIBRATION CYCLE 1 year U5855A User’s Guide...
-
Page 122: Specifications
Spectral range Frame rate 9 Hz 28° (H) × 21° (V) Field of view (FOV) Fine resolution OFF: 3.1 mrad Spatial resolution (IFOV) Fine resolution ON: 2.1 mrad Focal distance 10 cm to infinity Focus mechanism Manual focus U5855A User’s Guide... - Page 123 Center spot, 3× moveable spots, max/min tracking, delta temperature, Measurements 3× moveable boxes (with min/max/avg) High/low temperature in all areas Color alarm Alarm zones: Above/below/inside/outside [1] Minimum distance with accuracy, 10 cm to 50 cm: ±4 °C or ±4% U5855A User’s Guide...
-
Page 124: Laser Specifications
Parameter Specification Class Class 2 (1 mW maximum) Wavelength 655 nm (red) Output 0.7 mW (CW) Laser beam spot shape Ellipse Laser beam spot size 15 mm or less at 10 m Beam divergence angle 1.2 mrad U5855A User’s Guide... -
Page 125: Supplemental Characteristics
• Video RCA to RCA interface cable, 2 m (U5761A) • USB Standard-A to Mini Type-B interface cable, 1 m (U5762A) • Rugged hard carrying case (U5771A) • Hand strap, adjustable for right-handed and left-handed use (U5772A) U5855A User’s Guide... - Page 126 Characteristics and Specifications Specifications THIS PAGE HAS BEEN INTENTIONALLY LEFT BLANK. U5855A User’s Guide...
- Page 128 This information is subject to change without notice. © Keysight Technologies 2014 Edition 2, August 2014 *U5855-90000*...
Need help?
Do you have a question about the U5855A and is the answer not in the manual?
Questions and answers