
Subscribe to Our Youtube Channel
Related Manuals for LUCCI GRENADA Series


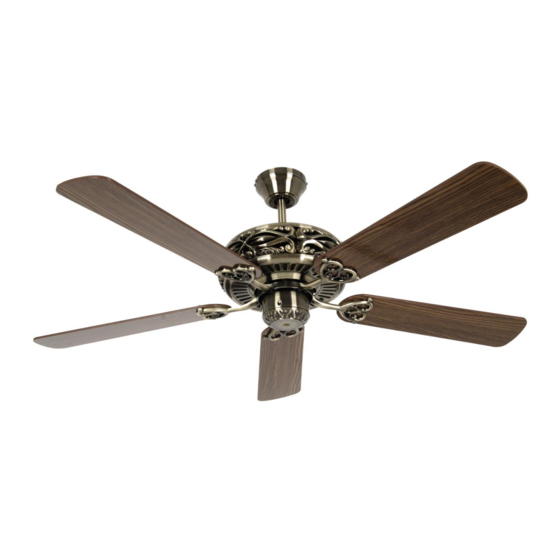
Summary of Contents for LUCCI GRENADA Series
- Page 1 LUCCI GRENADA SERIES CEILING FANS INSTALLATION OPERATION MAINTENANCE WARRANTY INFORMATION CAUTION READ INSTRUCTIONS CAREFULLY FOR SAFE INSTALLATION AND FAN OPERATION.
- Page 2 Installation Instructions CONTENTS Page 2 Important information Fan control Fan installation Fault finder Warning Page 3 Safety precautions Page 4-5 Parts list Page 6 Fan assembly Page 7 Installing the fan Page 8 Electrical wiring diagram Page 9-10 Using your ceiling fan wall controller Trouble shooting –...
- Page 3 Installation Instructions IMPORTANT INFORMATION-PLEASE READ PRIOR TO INSTALLATION Thank you for purchasing this quality Lucci product. To ensure correct function and safety, please read and follow all instructions carefully before using the product. Please keep instructions for future reference. FAN CONTROL Your warranty will be void if a solid-state dimmer type fan controller or other brand wall controller is used.
-
Page 4: Safety Precautions
Installation Instructions SAFETY PRECAUTIONS The information contained in the following pages has been prepared to ensure the operation of your ceiling fan is trouble free. To ensure the success of the installation, be sure to read the instructions and study the diagrams thoroughly. For your safety, all electrical connection and disconnection must be performed by a licensed electrician. -
Page 5: Parts List
Installation Instructions PARTS LIST • Unpack your ceiling fan carefully. Remove all parts and hardware. Place fan motor on a cloth or soft surface to avoid damaging the finish. • Do not lay motor housing on its side –the decorative housing may become bent or damaged. •... - Page 6 Installation Instructions Part Mounting bracket Ball joint Ball pivot bolt Down rod Canopy Screws Plate Hanger bolt Upper motor housing Motor Blade screws Blade Blade bracket Motor screw Reverse switch Light kit screw Mounting bracket screw Ground wire Ball joint screw Canopy screw Hanger screw R pin...
- Page 7 Installation Instructions INSTALLATION INSTRUCTIONS - FAN ASSEMBLY NOTE: Unlike most ceiling fans, you must attach the blades to the motor housing BEFORE mounting the motor to the ceiling. When installing more than one fan, ensure that the blades sets are not mixed up as each set is dynamically balanced.
- Page 8 Installation Instructions INSTALLATION INSTRUCTIONS – INSTALLING THE FAN 1. The ceiling fan must be installed in a location so that the blades are at least 2.1 meters above the floor, and 300mm spacing from the tip of the blade to the nearest object or wall. 2.
-
Page 9: Electrical Wiring Diagram
Installation Instructions ELECTRICAL WIRING DIAGRAM WARNING: FOR YOUR SAFETY ALL ELECTRICAL CONNECTIONS MUST BE UNDERTAKEN BY A LICENCED ELECTRICIAN. NOTE: AN ADDITIONAL ALL POLE DISCONNECTION SWITCH MUST BE INCLUDED IN THE FIXED WIRING. Fig.6 Wiring diagram NOTE: The light switch wiring diagram is omitted for models that do not have the light feature. Fig. - Page 10 Installation Instructions USING YOUR CEILING FAN WALL CONTROLLER FAN WALL CONTROL Your ceiling fan is controlled via the rotary switch (fan) and rocker switch (light) via the wall controller. Refer to Fig.12 SWITCH POSITION DESCRIPTION OFF – FAN IS OFF 1 –...
- Page 11 Installation Instructions REVERSING SWITCH Your ceiling fan can operate either in fan mode or reverse fan mode. SUMMER Mode: The reverse switch shall be in “down” (SUMMER) position to make the fan rotate in an anticlockwise direction. The airflow will be directed downwards, for cooling in summer. WINTER Mode: The reverse switch shall be in “up”...
- Page 12 Installation Instructions TROUBLE SHOOTING – FAN WOBBLE Please note that not all ceiling fans are the same, even in the same model—some may move more or less than others. Movement of a couple of centimetres is quite acceptable and does not suggest the fan will fall down. Even though all blades are weighted and grouped by weight, it is impossible to eliminate wobble altogether and this should not be considered a problem.
- Page 13 Installation Instructions CARE & CLEANING • Periodic cleaning of your ceiling fan is the only maintenance required. Use a soft brush or lint free cloth to avoid scratching the paint finish. Please turn off electricity when you do so. • Do not use water when cleaning your ceiling fan.
- Page 14 Installation Instructions RIPPLE CONTROL (abstract from Hunter Pacific International) Throughout Australia, but in particular Sydney and other parts of NSW and Queensland, electricity distributors use a remote control and switching system that is commonly called ripple control. Ripple control has existed for many years and is used for controlling demand and implementing different customer tariffs.
-
Page 15: Troubleshooting Checklist
Installation Instructions TROUBLE-SHOOTING CHECKLIST TROUBLE PROBABLE CAUSES SUGGESTED REMEDY 1. Fan will not start A. Fuse or circuit breaker blown. Check main and branch circuit fuses or circuit breakers. (Warning: The ceiling fan must be switched OFF B. Loose power line connections to Check line wire connections to fan. -
Page 16: Technical Information
Installation Instructions TECHNICAL INFORMATION GRENADA Rated power Lamp type Rated Voltage Rated power lamp SERIES models (motor) SKU# 210287 240VAC Light not included Light not included LD-21286/AB SKU#210286 240VAC Light not included Light not included LD-21286/MB SKU#210283 240VAC Light not included Light not included LD-21286/BC 15 | P a g e... -
Page 17: Warranty Conditions
Installation Instructions WARRANTY CONDITIONS This product is guaranteed against electrical defects in material or manufacturing workmanship for faults when under normal domestic/residential conditions for a certain period of time from the date of purchase. This warranty covers parts and labour costs for the motor subject to the following conditions: 1. - Page 18 Installation Instructions 7. The warranty applies to actual faults which may develop. Minor running noises are not covered. All electrical motors have some audible noise. Allow at least eight hours of operation to allow the bearings to properly seat. The fan, especially when set on low, may feel warm to touch –...
- Page 19 LUCCI WARRANTY HOTLINE- 1800 602 243 In the event of service being required, please call the Lucci fan warranty hotline on 1800 602 243 between 9am & 5pm (EST) Monday to Friday. Please make sure you have all the ceiling fan details filled out at the end of the manual before making the call.
- Page 20 Installation Instructions CEILING FAN WARRANTY INFORMATION LUCCI WARRANTY HOTLINE- 1800 602 243 Please complete the details below and keep this installation manual for future reference. You will need to provide proof of purchase and installation by a licensed electrician. Customer Name:...
Need help?
Do you have a question about the GRENADA Series and is the answer not in the manual?
Questions and answers