
Related Manuals for LUCCI FIJIAN II


Summary of Contents for LUCCI FIJIAN II
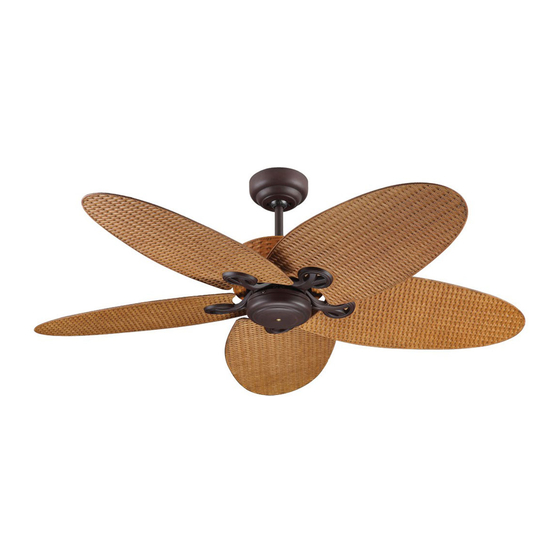
- Page 1 FIJIAN II CEILING FAN INSTALLATION OPERATION MAINTENANCE WARRANTY INFORMATION CAUTION READ INSTRUCTIONS CAREFULLY FOR SAFE INSTALLATION AND FAN OPERATION.
- Page 2 Fijian II Installation Instructions CONTENT Installation Instruction Manual ..................2 Installationsanleitung ......................12 Guide d’installation......................21 Manual de instrucciones de instalación................30 Manuale delle istruzioni di installazione................39 Installatiehandleiding......................48 1 | P a g e...
-
Page 3: Safety Precautions
Fijian II Installation Instructions SAFETY PRECAUTIONS The information contained in the following pages has been prepared to ensure you of trouble-free operation for your ceiling fan. To ensure the success of the installation, please read the instructions and study the diagrams carefully. -
Page 4: Parts List
Fijian II Installation Instructions PARTS LIST • Unpack your ceiling fan carefully. Remove all parts and hardware. Place the fan motor on a cloth or soft surface to avoid damaging the finish. • Do not lay the motor housing on its side –the decorative housing may become bent or damaged. -
Page 5: Installing The Mounting Bracket
Fijian II Installation Instructions INSTALLING THE MOUNTING BRACKET This ceiling fan must be installed in a location so that the blades are at least 2.1 meters above the floor, and 300mm spacing from the tip of the blade to the nearest objects or walls. -
Page 6: Hanging The Fan
Fijian II Installation Instructions HANGING THE FAN INSTALLING THE DOWN ROD 1. Loosen the ball joint. 2. Feed the down rod through the ceiling canopy. 3. Insert the motor wires through the down rod and secure the ball joint back to the down rod. -
Page 7: Electrical Wiring Diagram
Fijian II Installation Instructions ELECTRICAL WIRING DIAGRAM WARNING: FOR YOUR SAFETY ALL ELECTRICAL CONNECTIONS MUST BE UNDERTAKEN BY A LICENSED ELECTRICIAN. NOTE: AN ADDITIONAL ALL POLE DISCONNECTION SWITCH MUST BE INCLUDED IN THE FIXED WIRING. Fig. 8 NOTE: Wiring diagram includes the light kit wiring. The light wiring diagram and switch is omitted when no light kit is used with the ceiling fan. -
Page 8: Finishing The Installation
Fijian II Installation Instructions FINISHING THE INSTALLATION • After completing the electrical connection at the mounting bracket terminal block, connect the ceiling fan wiring via the quick connector plug. • Cover the mounting bracket with the canopy. Ensure all electrical wiring is tucked inside the canopy and that they are not damaged during this step. - Page 9 Fijian II Installation Instructions USING YOUR CEILING FAN WALL CONTROLLER FAN WALL CONTROL Your ceiling fan is controlled via the rotary switch (fan) and rocker switch (light) via the wall controller. Refer to below figures: SWITCH POSITION DESCRIPTION OFF – FAN IS OFF 1 –...
- Page 10 Fijian II Installation Instructions REVERSING SWITCH Your ceiling fan can operate in either summer or winter mode. SUMMER Mode: The reverse switch shall be in the “down” (SUMMER) position to make the fan rotate in an anticlockwise direction. The airflow will be directed downwards, for cooling in summer.
- Page 11 Fijian II Installation Instructions BALANCING KIT A balancing kit is provided to balance the ceiling fan on initial installation. Please refer to the instruction on how to use the balancing kit. The balancing kit can be used to assist re-balancing should the ceiling fan become un-balanced again.
-
Page 12: Technical Information
Fijian II Installation Instructions TECHNICAL INFORMATION FIJIAN II SERIES Rated power Lamp type Rated Voltage Rated power lamp models (motor) LD-051979-PLASTIC 220-240VAC Light kit not included Light kit not included WARRANTY INFORMATION IN AUSTRALIA / NEW ZEALAND – Please refer to the separated WARRANTY STATEMENT. - Page 13 Fijian II Installation Instructions WIR GRATULIEREN ZUM KAUF DIESES GERÄTES Wir gratulieren zum Kauf dieses Qualitätsproduktes von Lucci. Bitte lesen Sie die Sicherheitshinweise vollständig und sorgfältig durch, um den ordnungsgemäßen und sicheren Einsatz des Gerätes zu gewährleisten. SICHERHEITSHINWEISE Die Hinweise auf den nachfolgenden Seiten erklären den sicheren und störungsfreien Betrieb Ihres Deckenventilators.
-
Page 14: Vor Der Installation Zu Beachten
Fijian II Installation Instructions VOR DER INSTALLATION ZU BEACHTEN Bitte packen Sie das Gerät aus, und stellen Sie sicher, dass alle Teile im Versandkarton enthalten sind. Bitte beachten Sie Abb. 1. Abb. 1 Hängestange x 1 Ventilatorflügelschrauben x 16 Ventilatorflügelhalterung x 5 Motorschrauben x 11 Ventilatorflügel x 5... - Page 15 Fijian II Installation Instructions INSTALLATION DER DECKENHALTERUNG • Der Deckenventilator muss an einem Ort so installiert werden, dass die Spitzen der Ventilatorflügel mindestens 300mm vom nächsten Gegenstand oder der Wand entfernt sind. • Befestigen Sie die Deckenhalterung nur an Decken oder Deckenverschalungen und anderen Deckenstrukturen, die ein Gewicht von mindestens 40KG sicher halten können;...
- Page 16 Fijian II Installation Instructions AUFHÄNGEN DES VENTILATORS Montage des Hängerohrs 1. Kugelgelenk lockern. 2. Das Hängerohr durch die Deckenhalterung führen. 3. Den Kabelstrang des Motors in das Hängerohr schieben und das Kugelgelenk wieder am Hängerohr befestigen 4. Das Hängerohr in die Aufhängestange schieben ( siehe Abb.4) die Löcher der Aufhängestange auf die Löcher des Hängerohrs...
- Page 17 Fijian II Installation Instructions ELEKTRISCHE VERSCHALTUNG - DIAGRAM WARNHINWEIS: IM INTERESSE IHRER PERSÖNLICHEN SICHERHEIT MÜSSEN ALLE ELEKTRISCHEN ANSCHÜSSE VON EINEM ZUGELASSENEN ELEKTRIKER AUSGEFÜHRT WERDEN. HINWEIS: EIN ZUSÄTZLICHER, ALLPOLIGER TRENNSCHATER MUSS IN DER INSTALLATION DER WANDVERKABELUNG ENTHALTEN SEIN. Abb. 8 HINWEIS: Das Verkabelungsdiagramm zeigt die Verschaltung des Kabelsatzes für die den Schalter und das Licht.
-
Page 18: Abschluss Der Installation
Fijian II Installation Instructions ABSCHLUSS DER INSTALLATION • Nach Abschluss der elektrischen Anschlüsse am Kabelblock der Halterung schließen Sie die Verkabelung des den Deckenventilator über den Verbindungsstecker an der Netzstromversorgung an. • Decken Sie die Halterung mit der Abdeckung ab. Die Verkabelung befindet sich nun unter der Abdeckung und Sie sollten darauf achten, dass diese in diesem Schritt nicht beschädigt wird. - Page 19 Fijian II Installation Instructions DER EINSATZ DES DECKENVENTILATORS VENTILATOR WANDREGLER Sie können die Geschwindigkeit Ihres Deckenventilators über den Drehschalter (Ventilator) regeln, und das Licht mittels des Kippschalters (Licht) ein- und ausschalten. Beachten Sie die nachfolgende Abbildung: SCHALTERSTELLUNG BESCHREIBUNG (PFEILRICHTUNG) AUS – VENTILATOR IST AUS 1 –...
-
Page 20: Nach Der Installation
Fijian II Installation Instructions RÜCKLAUFFUNKTION Der Ventilator kann sowohl im Vorlauf als auch im Rücklauf betrieben werden. SOMMERBETRIEB: Wenn der Schalter für die Rücklauffunktion auf “down” (SOMMER) steht, dreht der Ventilator sich gegen den Uhrzeigersinn. Die Luftbewegung wird nach unten gelenkt und bringt im Sommer den gewünschten Abkühlungseffekt. -
Page 21: Technische Daten
Fijian II Installation Instructions Außer gelegentlicher Reinigung bedarf dieser Ventilator keiner Wartung. Verwenden Sie hierfür eine weiche Bürste oder einen fusselfreien Lappen, damit die Oberfläche nicht verkratzt wird. Der Ventilator sollte zur Reinigung ausgeschaltet werden. Den Ventilator nicht mit Wasser reinigen. Wasser kann den Motor oder die Flügelblätter beschädigen und zu Stromschlägen führen. - Page 22 Fijian II Installation Instructions MERCI POUR VOTRE ACQUISITION Merci d’avoir acheté ce produit de qualité de LUCCI. Pour garantiser la securité et le fonctionnement correct, lire et sauver soigneusement tous les instructions avant d’utiliser le produit. PRECAUTIONS à PRENDRE L’information que les pages suivantes contiennent a été préparée pour assurer l’operation rapide de votre ventilateur au plafond.
-
Page 23: Avant L'installation
Fijian II Installation Instructions AVANT L’INSTALLATION Déballer le ventilateur et identifier les pièces avec prudence. Veuillez référer à Fig 1. Fig. 1 Tige de bas x 1 Vis des pales x 16 Porte-lame x 5 Moteur à vis x 11 Lame x 5 Vis à... - Page 24 Fijian II Installation Instructions INSTALLATION DE SUPPORT DE FIXATION • Le ventilateur doit être installé dans une position où les pales sont 300mm en espace de chaque point de pale même au mur le plus proche. • Assurer le support de suspension à la solive de plafond ou structure qui est capable de transporter une charge de 40KG au moins avec l’utilisation de deux vis longues.
- Page 25 Fijian II Installation Instructions PENDAISON DU VENTILATEUR Installer la tige de bas 1. Desserez le joint sphérique 2. Insérez la tige de bas à travers l’auvent du plafond 3. Insérez les câbles de moteurs à travers la tige de bas et puis fixez à nouveau le joint sphérique à la tige de bas.
- Page 26 Fijian II Installation Instructions PLAN DE CÂBLAGE ÉLECTRIQUE AVERTISSEMENT: POUR VOTRE SÉCURITÉ, IL FAUT CONTACTER UN ELECTRICIAN AUTHORISÉ POUR TOUS LES CONNEXIONS ELECTRIQUES. REMARQUE: Il FAUT AVOIR UNE INTERRUPTEUR À COUPURE OMNIPOLAIRE DANS LE CÂBLAGE FIXÉ. Fig. 8 REMARQUE: Il est inclus au plan de câblage le kit de câblage à lumière. Le plan de câblage à lumière et l’interrupteur sont éteints lorsqu’il n y a pas de lumière activée pour le ventilateur.
- Page 27 Fijian II Installation Instructions COMPLÈTEMENT DE L’INSTALLATION • Après avoir complété la connexion électrique au bornier du support de montage, connecter le câblage de ventilateur au plafond en utilisant le connecteur libre. • Couvrir le support de montage avec la voile. Assurer que tous les câblages électriques soient dans la voile et qui ne soient pas endommagés pendant cette procédure.
- Page 28 Fijian II Installation Instructions UTILISER VOTRE VENTILATEUR AU PLAFOND Contrôle de ventilateur au mur Votre ventilateur est contrôlé à l’aide de l’interrupteur rotatif (ventilateur) et le contact basculant (lumière) à l’aide du contrôleur de mur. Veuillez référer les figures de sous: POSITION de L’INTERRUPTEUR...
-
Page 29: Après L'installation
Fijian II Installation Instructions FONCTIONNEMENT INVERSÉ Votre ventilateur peut être opéré en mode ventilateur et en mode ventilateur inversé. Mode ÉTÉ: Positionner l'interrupteur inverseur sur “down” (SUMMER) afin de faire tourner le ventilateur dans le sens inverse des aiguilles du montre. Le jet d'air orienté vers le bas crée un courant d'air frais. -
Page 30: Information Technique
Fijian II Installation Instructions brosse à poils doux ou un chiffon non pelucheux afin d’éviter d’égratigner la finition. Veuillez couper l’électricité lorsque vous procédez à cette opération. Ne nettoyez pas votre ventilateur de plafond avec de l’eau. Cela pourrait endommager le moteur ou les pales et poser un risque de choc électrique. -
Page 31: Felicitaciones Por Su Compra
Fijian II Installation Instructions FELICITACIONES POR SU COMPRA Felicitaciones por la compra de este producto de calidad de Lucci. Para garantizar el funcionamiento y seguridad, por favor antes de utilizar el producto, lea detalladamente todas las instrucciones y guárdelas para futura referencia. -
Page 32: Antes De Instalar
Fijian II Installation Instructions ANTES DE INSTALAR Desempaque el ventilador e identifique las piezas cuidadosamente. Por favor, referirse a la figura 1. Fig. 1 Varilla descendente x 1 Tornillos para aspas x 16 Soporte de aspas x 5 Tornillos para motor x 11... - Page 33 Fijian II Installation Instructions INSTALAR EL SOPORTE DE MONTAJE • El ventilador deberá instalarse en una ubicación de forma que las aspas está alejadas a una distancia de 300mm desde el extreme del aspa al objeto mas cercano o paredes.
-
Page 34: Colgar El Ventilador
Fijian II Installation Instructions COLGAR EL VENTILADOR Instalar la varilla vertical 1. Afloje la junta esferica. 2. Inserte la varilla vertical a traves del dosel de techo. 3. Inserte los cable del motor a traves de la varilla vertical y seguidamente vuelva a asegurar la junta esférica a la varilla vertical. - Page 35 Fijian II Installation Instructions DIAGRAMA DE CABEADO ELÈCTRICO ADVERTENCIA: PARA SU SEGURIDAD TODAS LAS CONEXIONES ELECTRICAS DEBERÁN SER LLEVADAS A CABO POR UN ELECTRICISTA AUTORIZADO. NOTA: DEBERÁ INCLUIRSE UN INTERRUPTOR OMNIPOLAR EN EL CABLEADO FIJO. Fig. 8 NOTA: El diagrama de cableado incluye el cableado para juego de luces. Cuando el ventilador no incluya luces, el diagrama de cableado de luces y el interruptor serán omitidos.
- Page 36 Fijian II Installation Instructions FINISHING THE INSTALLATION • Después de finalizar la conexión eléctrica en le bloque de terminales del soporte de montaje, conecte el cableado del ventilador de techo a través del enchufe de conexión rápida. • Cubra el soporte de montaje con el dosel. Asegúrese de que todo el cableado eléctrico está dentro del dosel y de que no ha sido dañado durante esta operación.
- Page 37 Fijian II Installation Instructions UTILIZAR SU VENTILADOR DE TECHO MANDO DE PARED DEL VENTILADOR Su ventilador de techo está controlador por un interruptor giratorio (ventilador) y un interruptor basculante (luz) através del mando de pared. Ver las figuras a continuación: POSICIÓN DEL INTERRUPTOR...
- Page 38 Fijian II Installation Instructions Funcionamiento reversible Su ventilador puede girar en dirección de reloj o en la contraria. Modo VERANO: Si el interruptor para dirección del giro está hacia “abajo” (SUMMER) el ventilador girará en dirección de reloj. El flujo de aire estará dirigido hacia abajo para enfriar con una brisa directa.
-
Page 39: Información Técnica
Fijian II Installation Instructions La limpieza periódica de su ventilador de techo es la única medida de mantenimiento necesaria. Use un cepillo blando o un trapo sin pelusa para no rayar el acabado. Al hacerlo, desconecte la alimentación eléctrica. -
Page 40: Precauzioni Di Sicurezza
Fijian II Installation Instructions CONGRATULAZIONI PER L’ACQUISTO Congratulazioni per l'acquisto di questo prodotto di qualità Lucci. Per assicurare la corretta funzionalità e la sicurezza, si prega di leggere con attenzione e salvare tutte le istruzioni prima di utilizzare il prodotto. -
Page 41: Prima Dell'installazione
Fijian II Installation Instructions PRIMA DELL’INSTALLAZIONE Disimballare il ventilatore e identificare con attenzione le parti. Si prega di fare riferimento alla Fig. 1. Fig. 1 Barra di giù x 1 Vite di pale x 16 Porta lame x 5 Mototre della vite x 11... - Page 42 Fijian II Installation Instructions INSTALLAZIONE DELLA STAFFA DI MONTAGGIO • Il ventilatore deve essere installato in una posizione tale da avere uno spazio libero di 300 mm tra la punta della pala e l'oggetto o parete più vicina. • Fissare la staffa di sostegno al travetto o altra struttura del soffitto che sia in grado di sostenere un carico di almeno 40KG, con le due viti lunghe in dotazione.
- Page 43 Fijian II Installation Instructions APPENDERE IL VENTILATORE Installazione della barra discendente 1. Allentare il giunto a sfera. 2. Fate passare l’asta discendente attraverso la calotta a soffitto. 3. Inserite i cavi del motore all’interno dell’asta, e quindi assicurate il giunto a sfera di nuovo al giunto a sfera.
- Page 44 Fijian II Installation Instructions SCHEMA DI CABLAGGIO ELETTRICO ATTENZIONE: PER RAGIONI DI SICUREZZA, TUTTI I COLLEGAMENTI ELETTRICI DEVONO ESSERE EFFETTUATI DA UN ELETTRICISTA AUTORIZZATO. NOTA: UN INTERRUTTORE DI DISCONNESSIONE ONNIPOLARE AGGIUNTIVO DEVE ESSERE INCORPORATO NEL CABLAGGIO FISSO. Fig. 8 NOTA: Lo schema di cablaggio include il cablaggio del kit luce. Lo schema di cablaggio dell'illuminazione e il relativo interruttore sono omessi quando il ventilatore a soffitto non utilizza illuminazione.
-
Page 45: Completamento Dell'installazione
Fijian II Installation Instructions COMPLETAMENTO DELL’INSTALLAZIONE • Dopo aver completato il collegamento elettrico al blocco terminale della staffa di montaggio, collegare il cavo del ventilatore a soffitto tramite il connettore rapido. • Coprire la staffa di montaggio con la calotta. Assicurarsi che tutti i cavi elettrici siano nascosti all'interno della calotta e che non siano stati danneggiati durante questa operazione. - Page 46 Fijian II Installation Instructions UTILIZZO DEL VENTILATORE A SOFFITTO CONTROLLER A PARETE DEL VENTILATORE Il ventilatore a soffitto è comandato tramite l'interruttore rotativo (ventilatore) e l'interruttore basculante (luce) del controller a parete. Fare riferimento alle figure seguenti: POSIZIONE INTERRUTTORE DESCRIZIONE (INDICAZIONE FRECCIA) OFF –...
-
Page 47: Dopo L'installazione
Fijian II Installation Instructions FUNZIONE DI RITORNO Il ventilatore può essere azionato in senso orario e antiorario. MODO ESTIVO: se l'interruttore della funzione di ritorno si trova su “down” (ESTATE), significa che ventilatore gira in senso antiorario. In questo caso l'aria viene deviata in basso rinfrescando il locale in estate. - Page 48 Fijian II Installation Instructions CURA E PULIZIA Il ventilatore a soffitto richiede solo una pulizia periodica. Utilizzare una spazzola a setole morbide o un panno non lanoso per non graffiarne la superficie verniciata. Disattivare l’alimentazione prima di pulirlo. ...
- Page 49 Fijian II Installation Instructions GEFELICITEERD MET UW AANKOOP Gefeliciteerd met de aankoop van dit kwaliteitsproduct van Lucci. Lees en bewaar alle instructies aandachtig voordat u het product gebruikt, om een juiste werking en veiligheid te garanderen. VEILIGHEIDSVOORSCHRIFTEN De informatie in de volgende pagina’s is voorbereid om u te verzekeren van een probleemloze bediening van uw plafondventilator.
-
Page 50: Voor De Installatie
Fijian II Installation Instructions VOOR DE INSTALLATIE Pak de ventilator uit en identificeer de onderdelen nauwkeurig. Raadpleeg aub fig. 1. Fig. 1 Neerhangende stang x 1 Vleugelschroef x 16 Vleugelhouder x 5 Motorschroef x 11 Vleugel x 5 Houten schroef x 2... - Page 51 Fijian II Installation Instructions INSTALLATIE VAN DE MONTAGEBEUGEL • De plafondventilator dient dusdanig geïnstalleerd te worden dat de bladen 300 mm verwijderd zijn vanaf de punt van het blad tot aan het dichtstbijzijnde object of de muur. • Maak de hangbeugel stevig vast aan de steunbalk of het betreffende frame dat geschikt is om een lading van tenminste 40kg te dragen met de twee lange, bijgesloten schroeven.
- Page 52 Fijian II Installation Instructions DE VENTILATOR OPHANGEN Installatie van de ophangstaaf 1. Maak de balkoppeling los. 2. Plaats de staaf in de plafondkap. 3. Steek de motordraden door de staaf en bevestig de balkoppeling weer op de staaf. 4. Plaats de ophangstaaf in de ophangbeugel (zie fig.4), lijn de gaten in de ophangbeugel uit met de gaten in de ophangstaaf en plaats de bout.
- Page 53 Fijian II Installation Instructions DIAGRAM VAN DE ELEKTRISCHE BEDRADING WAARSCHUWING: VOOR UW VEILIGHEID DIENEN ALLE ELEKTRISCHE AANSLUITINGEN GEMAAKT TE WORDEN DOOR EEN GEAUTORISEERDE ELECTRICIEN. NOTITIE: EEN EXTRA MEERPOLIGE AFKOPPELSCHAKELAAR DIENT INBEGREPEN TE ZIJN IN DE VASTE BEDRADING. Fig. 8 NOTITIE: Het bedradingsdiagram is inclusief de bedrading van de lamp. Het diagram voor de lichtbedrading en de schakelaar kunnen worden overgeslagen als er geen licht gebruikt wordt in de plafondventilator.
-
Page 54: De Installatie Afronden
Fijian II Installation Instructions DE INSTALLATIE AFRONDEN • Sluit de plafondventilator-bedrading aan via de snelaansluitingsplug na voltooiing van de elektrische aansluiting bij het montagebeugel-aansluitblok. • Bedek de montagebeugel met de overkapping. Zorg ervoor dat alle elektrische bedrading onder de overkapping gestopt is en dat ze niet beschadigd raken tijdens deze stap. - Page 55 Fijian II Installation Instructions UW PLAFONDVENTILATOR GEBRUIKEN MUURBEDIENING VAN DE VENTILATOR Uw plafondventilator wordt bediend met de draaischakelaar (ventilator) en de tuimelschakelaar (licht) via de muurbediening. Raadpleeg onderstaande afbeeldingen: SCHAKELAARPOSITIE BESCHRIJVING (WIJZEN VAN DE PIJL) UIT – VENTILATOR STAAT UIT 1 –...
- Page 56 Fijian II Installation Instructions OMKEERFUNCTIE De ventilator kan zowel voorwaarts als ook achterwaarts worden toegepast. ZOMER-toepassing: Wanneer de schakelaar voor de omkeerfunctie op “down” (ZOMER) staat, draait de ventilator tegen de klok in. De luchtbeweging wordt naar beneden gericht en zorgt in de zomer voor het gewenste koelende effect.
-
Page 57: Technische Informatie
Fijian II Installation Instructions • Gebruik geen water bij het reinigen van uw plafondventilator. Hierdoor kunnen de motor of de bladen schade oplopen en kan het risico van een elektrische schok ontstaan. • De motor heeft permanent gesmeerde kogellagers. Oliën is niet nodig.
Need help?
Do you have a question about the FIJIAN II and is the answer not in the manual?
Questions and answers