LUCCI AIRFUSION QUEST II Installation Operation & Maintenance
Hide thumbs
Also See for AIRFUSION QUEST II:
- Installation, operation & maintenance instructions manual (65 pages) ,
- Installation instructions manual (15 pages)
Advertisement
Table of Contents
- 1 Ceiling Fan
- 2 Safety Precautions
- 3 Before Installation
- 4 Installing the Mounting Bracket
- 5 Hanging the Fan
- 6 Fan Installation
- 7 Electrical Wiring Diagram
- 8 Finishing the Installation
- 9 Using Your Ceiling Fan
- 10 After Installation
- 11 Technical Information
- 12 Warranty Information
- Download this manual
Advertisement
Table of Contents

Related Manuals for LUCCI AIRFUSION QUEST II


Summary of Contents for LUCCI AIRFUSION QUEST II
-
Page 1: Ceiling Fan
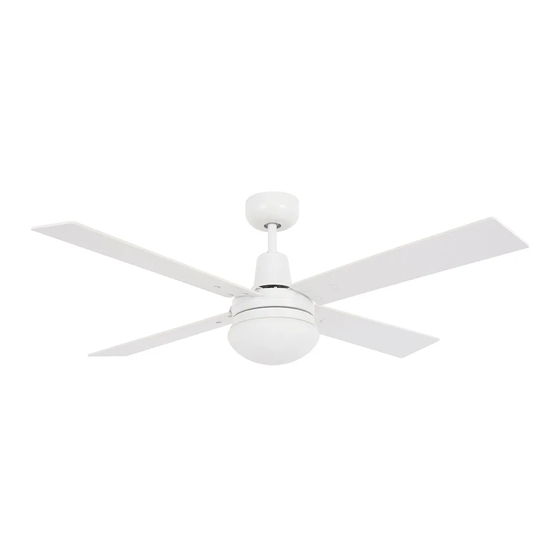
LUCCI AIRFUSION QUEST II CEILING FAN WITH IR REMOTE • INSTALLATION • OPERATION • MAINTENANCE • WARRANTY INFORMATION CAUTION READ INSTRUCTIONS CAREFULLY FOR SAFE INSTALLATION AND FAN OPERATION. V1.0 – QUEST II IR EN –2015-9-10... -
Page 2: Safety Precautions
Airfusion QUEST II Installation Instructions THANK YOU FOR PURCHASING Thank you for purchasing this quality Lucci product. To ensure correct function and safety, please read and save all instructions before using the product. SAFETY PRECAUTIONS The information contained in the following pages has been prepared to ensure you of trouble-free operation of your ceiling fan. -
Page 3: Before Installation
Airfusion QUEST II Installation Instructions BEFORE INSTALLATION Unpack the fan and carefully identify the parts. Please refer to Fig 1. Wall plugs (1) for screw (6) x 2 ● Canopy screw (2) x 4 ● Mounting bracket (3) x 1 ●... -
Page 4: Installing The Mounting Bracket
Airfusion QUEST II Installation Instructions INSTALLING THE MOUNTING BRACKET • The ceiling fan must be installed in a location so that the blades are a minimum 300mm spacing from the tip of the blade to the nearest objects or walls. -
Page 5: Hanging The Fan
Airfusion QUEST II Installation Instructions HANGING THE FAN • Lift the fan assembly onto the mounting bracket. Ensure the registration slot of the hanger ball is positioned on the stopper of the mounting bracket to prevent the fan from rotating when in operation. - Page 6 Airfusion QUEST II Installation Instructions LIGHT KIT INSTALLATION Fig. 6 Fig. 7 Remove the decorative cover from the shaft. Pull the L and N wire out from the shaft. Insert wires through the light connector (1). Tighten the light connector into the shaft firmly with a spanner.
-
Page 7: Electrical Wiring Diagram
Airfusion QUEST II Installation Instructions ELECTRICAL WIRING DIAGRAM WARNING: FOR YOUR SAFETY ALL ELECTRICAL CONNECTIONS MUST BE UNDERTAKEN BY A LICENSED ELECTRICIAN. NOTE: AN ADDITIONAL ALL POLE DISCONNECTION SWITCH MUST BE INCLUDED IN THE FIXED WIRING. • Connect “LIVE” supply wire to the “L” of terminal block on the mounting bracket. -
Page 8: Finishing The Installation
Airfusion QUEST II Installation Instructions FINISHING THE INSTALLATION • After completing the electrical connection at the mounting bracket terminal block, connect the ceiling fan wiring via the quick connector plug. • Cover the mounting bracket with the canopy. Ensure all electrical wiring is tucked inside the canopy and that the wires are not damaged during this step. - Page 9 Airfusion QUEST II Installation Instructions OPERATING THE REMOTE: Before you start using the remote, take the time to read through this section and get familiar with the buttons and function of each button (Fig. 11). 1. IR TRANSMITTER 2. HI button: Press this button to set the fan to run at High speed.
-
Page 10: After Installation
Airfusion QUEST II Installation Instructions REVERSING SWITCH Your ceiling fan can operate in either summer or winter mode. SUMMER Mode: The reverse switch shall be in the “down” (SUMMER) position to make the fan rotate in an anticlockwise direction. The airflow will be directed downwards, for cooling in summer. -
Page 11: Technical Information
Airfusion QUEST II Installation Instructions with a new fan disappear during this time. The manufacturer’s warranty covers actual faults that may develop and NOT minor complaints such as hearing the motor run – All electric motors are audible to some extent.
Need help?
Do you have a question about the AIRFUSION QUEST II and is the answer not in the manual?
Questions and answers