Subscribe to Our Youtube Channel
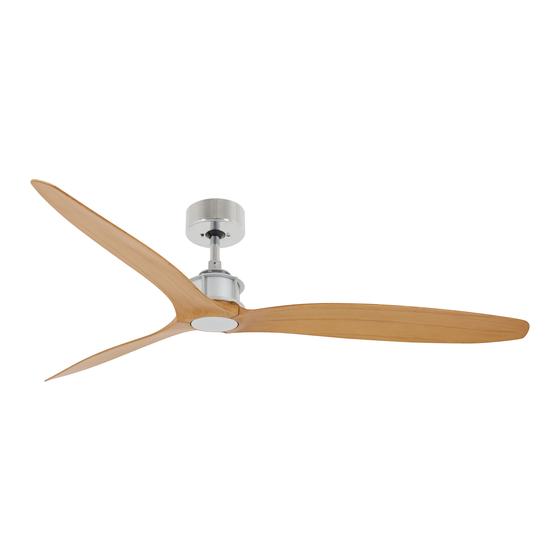
Summary of Contents for LUCCI Viceroy
- Page 1 LUCCI VICEROY DC CEILING FAN INSTALLATION OPERATION MAINTENANCE WARRANTY INFORMATION CAUTION READ INSTRUCTIONS CAREFULLY FOR SAFE INSTALLATION AND FAN OPERATION. V 1 . 0 P u b l i s h e d o n 0 8 . 2 0 1 6...
-
Page 2: Congratulations On Your Purchase
Viceroy Installation Instructions CONGRATULATIONS ON YOUR PURCHASE Congratulations on purchasing the latest in energy saving ceiling fans. This fan runs on DC (direct current) power which gives it the benefit of being super energy efficient whilst still maintaining high volume air-movement and silent operation. - Page 3 Viceroy Installation Instructions Example: If a fan is connected to a circuit that can be isolated via an all-pole safety switch at the switchboard, then this is considered to be an all-pole disconnection to the ceiling fan electrical circuit, meeting the requirements of clause 7.12.2 of AS/NZS 60335.1.
-
Page 4: Parts List
Viceroy Installation Instructions PARTS LIST Unpack your fan and check the contents. You should have the following: Fig. 1 Mounting bracket x 1 Wooden screw x 2 Fan assembly with hanger cover, down rod, Motor screw x 10 canopy cover and canopy x 1... - Page 5 Viceroy Installation Instructions INSTALLING THE MOUNTING BRAKCET The ceiling fan must be installed in a location so that the blades are 300mm spacing from the tip of the blade to the nearest objects or walls. Secure the hanging bracket to the ceiling joist or structure that is capable of carrying a load of at least 30kg, with two long screws provided.
-
Page 6: Hanging The Fan
Viceroy Installation Instructions HANGING THE FAN Lift the fan assembly onto the mounting bracket. Ensure the registration slot (A) of the hanger ball is positioned on the stopper (B) of the mounting bracket (C) to prevent the fan from rotating when in operation. -
Page 7: Finishing The Installation
Viceroy Installation Instructions FINISHING THE INSTALLATION • Loosen the 2 screws from the bottom of the mounting bracket. • Slide the canopy up to the mounting bracket and place the key hole on the canopy over the screw on the mounting bracket. -
Page 8: Using Your Ceiling Fan
Viceroy Installation Instructions USING YOUR CEILING FAN Pairing Transmitter and Receiver – when 2 or more DC ceiling fans are installed in one location When two or more fans are located near each other, you may want to have the receiver/transmitter for each fan set to a different code, so that the operation of one fan does not affect the operation of the other fan/s. - Page 9 Viceroy Installation Instructions Note: The pairing of the transmitter and receiver is required if only one ceiling fan is installed. When more than two ceiling fans are installed near each other, please refer to the instruction above. Fig. 9 Remote Control Buttons 1 - FAN SPEED CONTROL BUTTON: There are 6 available speeds.
-
Page 10: After Installation
Viceroy Installation Instructions REPAIRING THE FAN RECEIVER & REMOTE PAIRING Should the remote and receiver lose control after installation or during use, the pairing of the remote and the receiver must be repaired. Below are the operating symptoms and method to repair the pairing of the DC ceiling fan remote and receiver. -
Page 11: Technical Information
Viceroy Installation Instructions TECHNICAL INFORMATION FAN models Rated Voltage Rated power (motor) Battery for remote VICEROY FAN 220-240VAC 1 x 12V 23AE 10 | P a g e... - Page 12 THIS WARRANTY IS VALID IN AUSTRALIA ONLY In the event of service being required, please call the Lucci Fan Warranty Hotline on 1800 602 243 between 9am & 5pm (EST) Monday to Friday. Please make sure you have all the ceiling fan details filled out at the end of the manual before making the call.
- Page 13 Viceroy Installation Instructions CEILING FAN WARRANTY INFORMATION LUCCI WARRANTY HOTLINE- 1800 602 243 Complete and retain this form for your personal records and warranty purposes. NAME………………………………………………………………………………… ADDRESS…………………………………………………………………………… ……………………………………………………POSTCODE…………………… MODEL NUMBER…………………………………………………………………… (PO# + DATECODE Sticker here) PO NUMBER or DATECODE ………………………………………………………...


Need help?
Do you have a question about the Viceroy and is the answer not in the manual?
Questions and answers