Stadler Form Peter Operating Instructions Manual
Hide thumbs
Also See for Peter:
- Operating instructions manual (52 pages) ,
- Operating instructions manual (20 pages)

Subscribe to Our Youtube Channel
Related Manuals for Stadler Form Peter


Summary of Contents for Stadler Form Peter
- Page 1 Peter Operating instructions Mode d‘emploi Manual de instrucciones READ AND SAVE THESE INSTRUCTIONS LISEZ ET CONSERVEZ CES INSTRUCTIONS LEA Y GUARDE ESTAS INSTRUCCIONES...
- Page 2 Peter...
- Page 4 Descargue el manual de instrucciones: www.stadlerform.com/Peter/manual Watch the video of Peter: Regardez la video du Peter : Mire el vídeo de Peter: www.stadlerform.com/Peter/video Stadler Form Aktiengesellschaft, Chamerstrasse 174, 6300 Zug, Switzerland Phone +41 41 720 48 48, Fax +41 41 720 48 44, www.stadlerform.com/contact...
- Page 6 • Stadler Form refuses all liability for loss or damage which arises as a result of failure to follow these operating instructions.
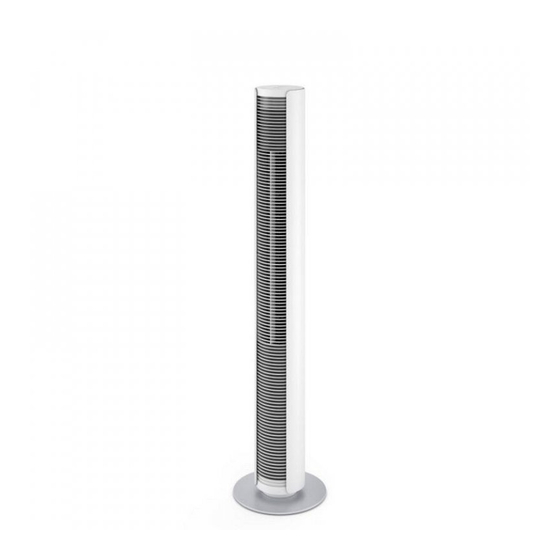
- Page 7 Make sure the screws are firmly tightened. Setting up / operation 1. Place Peter in the desired location on a flat surface. Connect the mains cable (3) to a suitable power outlet. 2. Switch on the appliance by pressing the on/off button (4). The blue LEDs on the control panel (5) will then turn on.
- Page 8 5. By pressing the button for the timer (9) you can set the operating time for between 1 and 7 hours (for example, 3 h = 1 h and 2 h LEDs lit, 7 h = 1 h, 2 h and 4 h LEDs lit). The selected time is displayed below the timer button (9) with blue LEDs.
-
Page 9: Specifications
• If electrical appliances are disposed of thoughtlessly, exposure to the elements may cause hazardous substances to find their way into the groundwater and from there into the food chain, or to poison the flora and fauna for many years to come. Specifications Rated voltage 120 V / 60 Hz... - Page 10 Français Félicitation ! Vous venez d‘acheter le superbe ventilateur PETER. Nous espé- rons que cet appareil vous donnera entière satisfaction et améliorera l’air intérieur pour vous. Comme pour tous les appareils ménagers électriques, il est important d‘entretenir cet appareil correctement afin d’éviter les blessures, les incen- dies ou les dommages.
- Page 11 Assurez-vous que les vis sont bien serrées. Mise en marche / utilisation 1. Posez Peter à l’endroit souhaité, sur un sol plat. Connectez le câble d’ali- mentation (3) à une prise de courant adéquate. 2. Mettez en marche l’appareil en appuyant sur l’interrupteur marche/arrêt (4).
- Page 12 turelle. La vitesse du ventilateur de cette brise varie automatiquement en fonction du niveau de vitesse sélectionnée. 5. En appuyant sur le bouton du minuteur (9), vous pouvez régler les heures de fonctionnement entre 1 et 7 heures (par exemple, 3 h = 1 h et 2 h de DEL allumées, 7 h = 1 h, 2 h et 4 h de DEL allumées).
-
Page 13: Caractéristiques Techniques
Elimination • Ne jetez pas vos appareils électriques avec les ordures ménagères, utilisez les points de collecte municipaux. • Veuillez consulter vos services municipaux pour connaître les points de collecte. • La mise au rebut incontrôlée des appareils électriques peut entraîner, lors de précipitations, la filtration de matières dangereuses dans les eaux souterraines pouvant contaminer la chaîne alimentaire ou intoxiquer durablement la flore et la faune. - Page 14 Español ¡Enhorabuena! Acaba de adquirir el extraordinario ventilador PETER. Que- dará encantado con sus beneficios y mejorará la calidad del aire ambiente. Como con todos los aparatos electrodomésticos también este aparato exi- ge un especial cuidado para evitar heridas, daños causados por incendios o daños en el aparato.
- Page 15 Asegúrese de que los tornillos estén bien apretados. Puesta en funcionamiento / manejo 1. Coloque a Peter en el lugar deseado sobre una superficie plana. Conecte el cable principal (3) a una toma de corriente adecuada. 2. Pulse el botón de encendido/apagado (4) para encender el aparato. Se encenderán los LED azules del panel de control (5).
- Page 16 dable, que simula una brisa natural. La velocidad del ventilador de esta brisa varía automáticamente según el nivel de velocidad seleccionado. 5. Al presionar el botón del temporizador (9), puede configurar el tiempo de operación entre 1 y 7 horas (por ejemplo, 3 h = 1 h y 2 h con los LED encendidos, 7 h = 1 h, 2 h y 4 h con los LED encendidos).
- Page 17 • Una vez llegado el aparato al final de su vida útil, inutilizarlo inmediata- mente (separar el cable) y entregarlo en el centro de recogida previsto a tal efecto. Eliminación • No elimine los aparatos electrodomésticos como basura doméstica. Llé- velos al servicio de recogida de estos aparatos de su municipio.
- Page 18 Retailer’s stamp / Cachet du point de vente / Sello del establecimiento de venta...
- Page 20 Bob Hong for the coordination, Alan Ai and Johnson Xia for the main engineering and CAD work, Mario Rothenbühler for the photos, Fabian Bernhard and Thomas Burkard for the cool design, Matti Walker for the graphic work. Martin Stadler, CEO Stadler Form Aktiengesellschaft www.stadlerformusa.com...
Need help?
Do you have a question about the Peter and is the answer not in the manual?
Questions and answers