Table of Contents
Advertisement
Installation & Maintenance Instructions
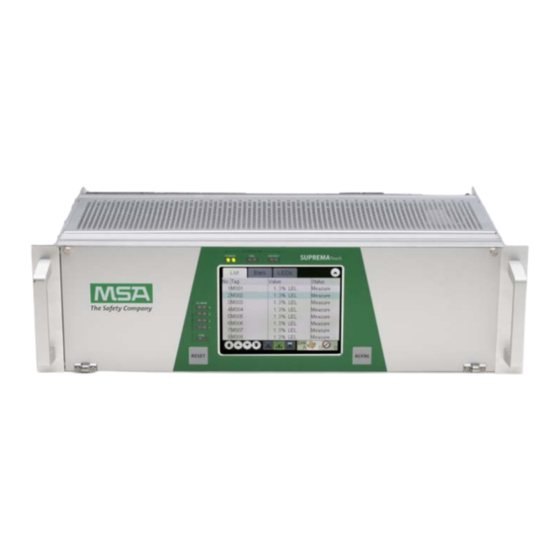
SUPREMATouch
Fire and Gas Warning Unit
Registered Address
ABLE Instruments & Controls Ltd
Cutbush Park, Danehill, Lower Earley,
Reading, Berkshire, RG6 4UT. UK.
Reading
Tel: +44 (0)118 9311188 | Email: info@able.co.uk
Aberdeen
Tel: +44 (0)1224 725999 | Email: ab@able.co.uk
Web
able.co.uk
E-commerce
247able.com
Advertisement
Table of Contents

Related Manuals for MSA SUPREMATouch


Summary of Contents for MSA SUPREMATouch
- Page 1 Installation & Maintenance Instructions SUPREMATouch Fire and Gas Warning Unit Registered Address Reading Tel: +44 (0)118 9311188 | Email: info@able.co.uk able.co.uk ABLE Instruments & Controls Ltd Cutbush Park, Danehill, Lower Earley, Aberdeen E-commerce Reading, Berkshire, RG6 4UT. UK. Tel: +44 (0)1224 725999 | Email: ab@able.co.uk...
- Page 2 Manual SUPREMATouch Fire and Gas Warning Unit Order No. 10126972/00...
- Page 3 © MINE SAFETY APPLIANCES COMPANY 2012 - All Rights Reserved This manual is available on the Internet at: www.msasafety.com Manufactured by MSA NORTH AMERICA 1000 Cranberry Woods Drive, Cranberry Township, PA 16066...
-
Page 4: Table Of Contents
MSA AUER Contents Contents Safety Regulations ........................9 Correct Use ........................9 Product Warranty......................10 Sensors Which Can Be Connected to the Unit..............11 Software Status ....................... 12 System Concept ........................13 Features of the System ....................13 Construction of the Unit ....................15 Safety Concept ....................... - Page 5 12.1 Connection of a PC/Laptop.................... 225 12.2 Protocol Printer ......................227 12.3 Bus Connection ......................228 Redundant Systems ......................233 13.1 Application/Function Safety ................... 233 13.2 Function of Redundant Systems..................234 13.3 Design of the Redundant System .................. 236 13.4 Startup ........................... 241 SUPREMATouch...
- Page 6 Contents MSA AUER Technical Data ........................243 14.1 System Data ........................243 14.2 Module Data ........................244 SUPREMA Sensor Data Sheets ................... 260 15.1 SUPREMA Sensor Data Sheet Contact ................ 260 15.2 SUPREMA Sensor Data Sheet Fire Detector Apollo Series 65 (not explosion-proof) Internal Power Supply (without safety barrier)....................
- Page 7 Contents SUPREMATouch...
- Page 8 User Instruction Manual SUPREMATouch Fire and Gas Warning Unit...
- Page 9 Mine Safety Appliances Company 1000 Cranberry Woods Drive Cranberry Township, PA 16066 © MSA AUER GmbH. All rights reserved...
-
Page 10: Safety Regulations
Safety Regulations Correct Use The SUPREMATouch is a stationary gas warning system with multiple measurement sites, which operates continuously to monitor work sites for the presence of combustible, explosive, and toxic mixtures of gas and/or vapour with air and to monitor the ambient air for oxygen content. The sys- tem supplies power to the sensors, displays the measured concentrations, and monitors the limit values, but it also actuates alarm devices. -
Page 11: Product Warranty
Alternative use, or use outside this specification will be considered as non-compliance. This also applies especially to unauthorised alterations to the product and to commissioning work that has not been carried out by MSA or authorised persons. Product Warranty Warranty- Seller warrants that this product will be free from mechanical defect or faulty work-... -
Page 12: Sensors Which Can Be Connected To The Unit
Fire Switch [EX: Explosive gases or vapours; TOX: Toxic gases; OX: Oxygen; Fire Detection: Smoldering Fire Detection; Flame: Flame Detector] NOTE: Other types of sensors may be operated in conjunction with the SUPREMATouch only af- ter consulting with MSA. SUPREMATouch... -
Page 13: Software Status
MCP 20 3.01.02 — MDO 20 3.01.02 — MDA 20 2.01.02 — MAO 10 2.02.01 MAO MA01 MGO 20 3.01.02 — MAI 20 MAI EA03 MAI MA01 MAR 10 — MAI MA01 Software status ATEX and TÜV SIL 3 SUPREMATouch... -
Page 14: System Concept
System Concept MSA AUER System Concept Features of the System Modular system. Compact construction. High flexibility. 19” rack system for the connection of up to 256 sensors. NEMA 4 wall mount cabinet Complete system for up to 64 sensors with common alarm in one 19” rack. - Page 15 1 x USB + 1 x RS232 or 2 x RS 232 interfaces for data transfer to an industrial PC/laptop/print- RS 232 interfaces are electrically isolated. RS 232/RS 485 converters used for longer transmission distances. The 8 MRO Module common alarm relays supplied by the rack power supply unit. External relays are supplied with power separately. SUPREMATouch...
-
Page 16: Construction Of The Unit
MSA AUER Construction of the Unit The modules of the SUPREMATouch are mounted in a rack. For expanded systems, additional modules can be placed in a second rack or installed on top hat rails in a switch box. Data is ex- changed between the modules over a CAN bus, which makes it possible to transmit data over dis- tances of up to 1,000 m. - Page 17 System Concept Fig. 1 Block circuit diagram of a system layout [non-redundant] SUPREMATouch...
-
Page 18: Safety Concept
System Concept MSA AUER Safety Concept The individual functional modules are connected to each other by a CAN bus. The CAN bus is designed to be virtually error-proof. Every module can detect errors on the bus and handle them appropriately. The probability of an undiscovered communications error on the bus is 4.7 * 10 Error statuses on the CAN bus are indicated on the DISPLAY + OPERATION unit [MDO module]. -
Page 19: Operation Of The System
PC permits a more user friendly operator interface with additional features. Both the PC program and the SUPREMATouch system use window based operating platforms. The input fields are set up as selection fields as much as possible, with all known inputs displayed. - Page 20 Operation of the System MSA AUER LED Indicators and Alarms The 8 LED indicators provide system and signal status information. SYSTEM: POWER [green] power supply on/off FAIL [yellow] system specific error [e.g. defective CPU] INHIBIT [yellow] inputs are inhibited or a calibration is pending...
- Page 21 Selection Fields Selection fields contain a list of possible values that can be selected. By tapping an item, a new window pops up and shows all available values. To select a new value, tap it and press the “OK” button. SUPREMATouch...
- Page 22 Operation of the System MSA AUER Fig. 4 Selection mask Number Fields Number fields can contain integers or decimal numbers that can be changed. By tapping the field, a new window pops up that allows a new value to be entered. To store a new value, press the “OK”...
- Page 23 Lists simply display information. No parameters can be entered. To scroll the list, move it while kept touched or use the scrollbar. In some lists [e.g. SystemEventList], additional information about the selected item can be dis- played by double-tapping it. SUPREMATouch...
-
Page 24: Operation Menu
Operation of the System MSA AUER Operation Menu The operation menu is divided into four submenus: Measure Setup Maintain Diagnosis These submenus can be selected by tapping the corresponding menu item. The “Measure” sub- menu is automatically activated at system start-up. - Page 25 Operation of the System The system is delivered with the default password “AUER” for all three password levels. MSA rec- ommends to change the passwords immediately. All of the user functions are available through the integral operation/display unit and the PC, if con- nected.
- Page 26 Operation of the System MSA AUER All Inputs Mode In this mode, all the measured inputs in the system are displayed. The inputs are arranged by their input number. This mode is indicated with a green background for the bell symbol.
- Page 27 Fig. 9 Measuring information List Window In this window, the current input data is displayed in as a text list. Fig. 10 List display [with a measuring point in Alarm] SUPREMATouch...
- Page 28 Operation of the System MSA AUER The following input data is shown in this display: The number of the measured input in the system. This number is set by the sys- tem and cannot be changed by the user. The customer defined input description is displayed here.
- Page 29 In redundant systems, the information is shown separately for each CAN bus. LED off [grey]: not inhibited, no alarm, no failure LED on: inhibited, alarm, failure If an input is not configured no LEDs are displayed in that column. SUPREMATouch...
- Page 30 Operation of the System MSA AUER Fig. 12 LED Display Setup Menu Using the “Setup” menu, the operator can set parameters for sensor inputs and relay outputs, as well as other system parameters. Although data can be retrieved and displayed, changing and ac- tivating of actions is possible only after entering the parameterisation password or operating the key switch.
- Page 31 All parameter changes using the window items described below apply to the inputs se- lected in that field. Inhibit Field type: Check box If this check box is enabled, the selected input cannot trigger alarms. SUPREMATouch...
- Page 32 Operation of the System MSA AUER DO [Inhibit Digital Outputs] Field type: Check box If this checkbox is enabled, assigned outputs will not be activated in the event of an alarm or failure of selected measuring points! During a multiple assignment [Voting], the corresponding measuring point is ignored when assessing the status .
- Page 33 The field contains a list of supported measurement dimensions . Set the measurement dimension for the selected input. Range Field type: Selection The field contains a list of supported measurement ranges. Set the measurement range that ap- plies for the selected input. SUPREMATouch...
- Page 34 Operation of the System MSA AUER Meas. Gas Field type: Selection The field contains a list of supported gases. Set the gas that will be measured with the sensor for the selected input. Zero Gas Field type: Selection The field contains a list of ‘Zero’ gases that are used to calibrate the zero-point of the gas sensors.
- Page 35 These fields contain a list of available relay outputs. The relay outputs that will be used for the individual alarms at the selected input can be set here. After selecting a relay output, the relay output assignment window opens up. SUPREMATouch...
- Page 36 Operation of the System MSA AUER Relay output assignment window This is not a subwindow of the Measure Point menu, but an independent window that can only be reached from the Measure Point menu. It is used to assign relay outputs to the input selected in the Measure Point menu.
- Page 37 Voting link: [n-out-of-m] If ‘m’ conditions are set, and the value of ‘n’ is entered as the voting, then the selected relay output will only be switched if ‘n’ out of the ‘m’ conditions are met. SUPREMATouch...
- Page 38 Operation of the System MSA AUER Normal [energised] Field type: Selection Set the operating mode for the selected relay output: Normally energised [“closed circuit”]: The relay coil is energised in the no alarm status and is de-energised in the alarm status.
- Page 39 This makes it easy to copy the settings from one output to another. All parameter changes using the menu items described below apply to the selected re- lay outputs in that field. SUPREMATouch...
- Page 40 Operation of the System MSA AUER Normally energised/Normally de-energised Field type: Selection Set the operating mode for the selected relay output: Normally energised [closed circuit]: The relay coil is energised in the no alarm status and is de-energised in the alarm status.
- Page 41 If the settings are valid, they become part of the system’s parameter set. If they are not valid, a warning appears. Cancel Field type: Button Tapping this button discards the settings entered for the selected relay output. SUPREMATouch...
- Page 42 Operation of the System MSA AUER Clear Field type: Button Tapping this button deletes all of the parameters for the selected relay output. The output then returns to the status it was before it was set up the first time. Default values are used as the pre- liminary settings for the input of certain fields.
- Page 43 Operating Mode: Field type: Display This field shows the current operating mode of the SUPREMATouch system. Only two operating modes are available ‘Standard’ for all countries except China and ‘GB16808-2008’ which is only for use in China. All information, including the approval information in this manual refer to the “Standard”...
- Page 44 Operation of the System MSA AUER Time Window This window displays the date and time of the system. Fig. 19 Date/Time The functions of the individual window elements are described below: Date/Time Field type: Date/Time input The date and time are set by tapping the input field and entering the new date and time in the date/ time field.
- Page 45 Fig. 20 “Head parameter” This window displays the significant parameters of the remote sensing heads. During normal op- eration the SUPREMATouch software permanently checks the detector output signal sent by to the SUPREMATouch. In case the detector output signal falls below UA...
- Page 46 Operation of the System MSA AUER Status [Status of this data cell] Field type: Display This field displays the status of the cell used for data saving. If this status is “protected”, then no data can be changed and the following input fields are simply display fields.
- Page 47 However, the signal ranges must not overlap. The functions of the individual fields are described below: Sensor Field type: Selection The head, on which status texts should be put or for which it should be changed can be selected with this field. SUPREMATouch...
- Page 48 Operation of the System MSA AUER Status [Status of this cell] Field type: Display This field displays the status of the data cell used for data saving. If the status is “protected”, no ranges can be defined or changed and the related following input fields are display fields.
- Page 49 The English gas name can be entered here. Name [local] Field type: Text The gas name in local language can be entered here. Field type: Button By tapping this button, the completed settings for the selected gas name are applied. SUPREMATouch...
- Page 50 Operation of the System MSA AUER Cancel Field type: Button By tapping this button, the completed settings for the selected gas name are discarded. Measuring ranges Fig. 23 “Measuring ranges” This menu makes it possible to view the measuring ranges provided and to adjust some change- able predefined changeable ranges.
- Page 51 Dimensions can be selected arbitrarily. Identical names are not allowed and will be rejected with the message: “Error: Name not unique!” The functions of the individual fields are described below: ID [ID of this Dimension] Field type: Choice A dimension can be selected by means of its ID. SUPREMATouch...
- Page 52 Operation of the System MSA AUER Status [Status of this cell] Field type: Display This field displays the status of the cell used for data saving. If the status is “protected”, then no data can be changed and the following input fields are simply display fields.
- Page 53 An assignment entry can be selected by means of its cell through this field. Status [Status of this cell] Field type: Display This field displays the status of the cell used for data saving. This status shall always be “protect- ed” and so no data can be changed. SUPREMATouch...
- Page 54 Operation of the System MSA AUER Head ID and assignment Field type: Display This field displays the remote sensing head used in the selected assignment. Gas ID and assignment Field type: Display This field displays the gas name used in the selected assignment.
- Page 55 Operation of the System Printer This window makes it possible to change the paper feed format in a printer connected to the SUPREMATouch printer port. There is the possibility to activate and format a printer alive-mes- sage. Fig. 28 “Printer” window...
- Page 56 Operation of the System MSA AUER Time interval Field type: Selection The time interval/repetition rate of the alive-message [never, annually, monthly, daily, …, every second etc.] can be set here. Base time Field type: Date/time input The base time for the alive-message can be set here.
- Page 57 NOTE: The presetting is applied immediately and cannot be cancelled or discarded. Calibration parameters for the individual inputs can be set in the calibration menu. From that point on the calibration is controlled by the SUPREMATouch. The window is divided into two subwindows: “Start calibration”...
- Page 58 Operation of the System MSA AUER Field type: Display The field shows the designation of the selected input. Fig. 29 “Start calibration” Zero Gas [concentration] Field type: decimal number Enter the zero gas concentration [in the defined measuring dimension] in this field. This value can be set in a range between 0 and the range value defined in the measuring point parameters, but should be the same as the measurement range zero, i.e.
- Page 59 The fields in this line display the data from the last calibration, if the input has already been cali- brated. CAL-ZERO: Measurement value and internal signal UA for zero gas CAL-SPAN: Measurement value and internal signal UA for test gas The dimensions of the values are shown directly above the values. SUPREMATouch...
- Page 60 Operation of the System MSA AUER Field type: Display These fields display the data for the current calibration process similar to the values in the “Old” line. The current measurement value is captured and placed in the corresponding field when the “Store”...
- Page 61 The test can be completed using the “End” button. The regular, input dependent value is dis- played again in the output thereafter. SUPREMATouch...
- Page 62 Fig. 32 Test of the serial interfaces From the list of interfaces in the SUPREMATouch, an interface can be selected. As soon as this interface has been selected, its normal function is inhibited. Therefore, this test can not be carried out via PC/laptop for all serial interfaces.
- Page 63 3rd test screen must be completely white. Fig. 35 Test screen IBR [bridge current] window This window makes it possible to automatically set the sensor bridge current [I NOTE: A setting that has been started or carried out cannot be cancelled or discarded! SUPREMATouch...
- Page 64 Operation of the System MSA AUER Fig. 36 “IBR” The functions of the individual fields are described below: Measuring point Field type: Selection The measuring point, for which the sensor current should be set can be selected in this field.
- Page 65 Entries of the first calibration and pre-setting are not overwritten. Selecting an item in the Logbook displays the corresponding history. History entries are shown as list views. To scroll through the list content, just touch and slide. The scroll bar can also be used to scroll vertically. SUPREMATouch...
- Page 66 Operation of the System MSA AUER Calibration history This history saves the calibration process data for each input. Up to four entries can be stored for each input, and older entries are overwritten, except for the first calibration and pre-settings.
- Page 67 Date/Time that the event occurred Brief description of the event type Additional hexadecimal description of event. [For use by MSA service personnel.] By double-tapping an entry a window opens containing a detailed error description in plain text. Alarm events history In this history, alarm events, acknowledge and reset are saved.
- Page 68 Operation of the System MSA AUER Signal events history In this history, signal events, acknowledge and reset of signal failures and the switchover of the primary system [only in redundant systems] are saved. An entry is made up of the following data:...
- Page 69 When active sensors and MCI modules are used, these fields are empty. Calc. UX + offset: Field type: Display These fields show the calculated UX value including an offset. These values are calculated based on the measured UY values. SUPREMATouch...
- Page 70 Operation of the System MSA AUER Modules Menu From the “Module” menu, the user can recall information about the system modules. Fig. 40 “Modules” The functions of the individual fields are described below: Module ID Field type: Selection This field contains the CAN node IDs of all system modules which are connected to the CAN bus.
-
Page 71: Pc Operation
Version and Article Number see chapter 8. CAUTION All parameters and configuration made with a PC must be checked for correctness on the SUPREMATouch, or they must be checked for correctness on the PC after they have been read back to the PC. SUPREMATouch... -
Page 72: Special Conditions To Comply With The Requirements Of Iec 61508
Special conditions to comply with the requirements of IEC 61508 MSA AUER Special conditions to comply with the requirements of IEC 61508 for SIL 1–3 according to TÜV Certificate Conditions for configuration, installation, operation and maintenance Common Conditions for safety operation The following criteria have to be considered for all safety-related applications The Locking [Inhibit] of measuring inputs is only allowed during maintenance and repair. - Page 73 A and B have to be interconnected serially or processed safety-related. [By using the MRO 16 TS modules this interconnecting is already internally realized.] Permitted system expansions over CAN BUS ≤ Fig. 41 System expansions with CAN BUS and single-channel-configuration SUPREMATouch...
- Page 74 Special conditions to comply with the requirements of IEC 61508 MSA AUER SUPREMA central SUPREMA central SUPREMA satellite CAN A ≤ CAN B SUPREMA central SUPREMA satellite CAN A CAN bridge CAN B SUPREMA central SUPREMA satellite CAN A Fibre Optic...
- Page 75 Special conditions to comply with the requirements of IEC 61508 Configuration 2 Fig. 44 Configuration without MLE 10 Modules Fig. 45 Configuration with MLE 10 Modules SUPREMATouch...
- Page 76 Special conditions to comply with the requirements of IEC 61508 MSA AUER Configuration 3 Fig. 46 Configuration without MLE 10 Modules Fig. 47 Configuration with MLE 10 Modules SUPREMATouch...
-
Page 77: Listing Of The Permitted Hardware Modules And Software Versions
MGT 40 TS 10026772 General Terminal [item number] MLE 10 Logic Extension Modules SUPREMA Rack-Type 20/E 20 [with or without internal 150 W power supply] SUPREMA CAN BRIDGE CBM SUPREMA CAN-LWL Konverter - Fibre Optics Converter MDC 20 Display Connection Module SUPREMATouch... - Page 78 Special conditions to comply with the requirements of IEC 61508 MSA AUER For non safety-related applications [e.g. analog output, data communication to a PLC] the follow- ing components can also be used: Module PCB Rev Description MAO 10 Analog Output Unit...
- Page 79 Except Inputmodules [MCI, MPI, MFI, MSI]; → HFT = 0! Concerning the configuration variations it has to be considered, that the sensors were not part of the test and their suitability for the respective Safety Integrity Level [SIL] has to be proven seper- ately. SUPREMATouch...
-
Page 80: Tuev-Certificate
Special conditions to comply with the requirements of IEC 61508 MSA AUER TUEV-Certificate Fig. 48 TUEV-Certificate SUPREMATouch... -
Page 81: Modules Tested According To Dmt 03 Atex G 003 X
10026772 SUPREMA CAN LWL Converter 10052948 MDC 20 Display Connection Module MRO 20-8-TS Relay Output [8 Relays] MRO 20-16-TS Relay Output [16 Relays] MRO 10-16-TS-SSR Solid State Relay Output [16 Relays] MRO20-8-TS SSR Solid State Relay Output [8 Relays] SUPREMATouch... -
Page 82: Maintenance And Service
If the expected values [0% of the measuring range for a signal current of 4 mA and 100 % of the measuring range for a signal current of 20 mA] do not appear on the SUPREMATouch, the cali- bration on the SUPREMATouch must be checked and corrected if necessary. - Page 83 Then detach the cable connections of the sensor to the MAT module. Connect the variable power source to the MAT module as follows: NOTE: MAT module terminal 1: + pole of the power source [signal] MAT module terminal 4: – pole of the power source [GND] SUPREMATouch...
- Page 84 Maintenance and Service MSA AUER Set the output current of the power source to 4 mA. Unlock the measure point in question in the “Setup/Measure Points” menu to allow a calibra- tion. Select the “Maintain/Calibration” menu. Select the measure point to be calibrated in the “Measure Point” field.
- Page 85 SUPREMATouch [4 mA = 0 % of the measuring range, 20 mA = 100 % of the measuring range]. The deviations in the current should not exceed ± 0.5 mA, however, or otherwise the error evaluation [leaving the measuring range in one direction or the other] will be impaired.
- Page 86 The appropriate span value is then processed by the SUPREMATouch based on the data from the last calibration completed. The steps for zero ad- justment are to be carried out as described in the previous section. After storage of the zero value [„Store”...
-
Page 87: Sensor Simulation Modules
Maintenance and Service Sensor Simulation Modules For function test of the SUPREMATouch sensor inputs, simulation modules can be used inde- pendently from the sensor type. Description of Function of Sensor Simulation Module 4 ... 20mA, Catalytic Combustion, Semiconductor Design Signal-LED Switch Position Fig. - Page 88 Maintenance and Service MSA AUER Examples for MCI – Check 4 ... 20 mA Sensor type: PrimaX Measuring gas: Carbon monoxide Zero gas: Reference gas: Carbon monoxide Ua at open switch [Normal operation]: 400 mV Ua at closed switch [Alarm] : 1.9 V...
-
Page 89: Replacement Of Sensors
MGT 40 TS module. Perform a first calibration as described in Chapter 6.1 , under consideration of the required sensor recovery time. Check the configuration of the sensors in the “Setup/Measure Points” menu. Unlock the measure point. SUPREMATouch... -
Page 90: Replacement Of Modules
Replacement of Modules When a module is found to be defective, it must be replaced. NOTE: An MSA service technician must be called in to help with the diagnosis and to help decide whether the module has to be replaced. - Page 91 Replacement of MRO 8/MRO 8 TS Modules It is not necessary to turn off the system to replace MRO 8/MRO 8 TS modules. Alarm devices which are connected to the modules must be deactivated, however [especially when the relays are operating Normally energised]. SUPREMATouch...
-
Page 92: Changing The Password
Maintenance and Service MSA AUER Changing the Password If a currently valid password is to be changed, a new password can be entered in the following way: Select the corresponding password field in the “Setup/System” menu. You will be asked to enter the current password or to actuate the key switch. -
Page 93: Plug-In Modules- Status Led
If the failure LED [LED No. 4] is on, you should contact an MSA service technician. If this cannot be done right away, the module can be replaced if a spare unit is available [→ Installation and Start-Up Guide]. -
Page 94: Diagnostic Functions
Maintenance and Service MSA AUER MAI Module Fig. 52 MAI Module, Function Status LEDs Colour Function green The external voltage supply is selected by the module. green The internal voltage supply is selected by the module. green The battery voltage supply is selected by the module. - Page 95 System Events History System events are recorded for service purposes. These serve as a source of information for the MSA service personal. Alarm Events History Crossings of the alarm threshold, confirmations and resets of alarms are stored in this history. The date/time of the incident, the measure point involved and a short description are given.
- Page 96 Maintenance and Service MSA AUER The message “signal failure” is transmitted when: the signal is outside the measuring range; an interruption or short-circuit has occurred in the sensor cable; an MAI module is being replaced without the associated measure points having been inhibited first;...
- Page 97 Maintenance and Service Measure Points This menu displays the current data of the measure points present in the system. Modules This menu displays the current data of the modules present in the system. SUPREMATouch...
-
Page 98: System Failure Messages
Maintenance and Service MSA AUER System Failure Messages Failure Mes- Appears in Disappears Error Fail Info 1 Info 2 Module Remarks/ Remedial action sage Text case of in case of [BYTE] [DWORD] dynamic mem- Stack overflow Restart Task ID Memory ad-... - Page 99 Outputs short circuited or tion error be- nication re- number of er- diagnosis open or module defect. tween MDA and spectively roneous out- code MAI or at digital outputs all put block FF → hard- outputs [MGO] right again ware defect SUPREMATouch...
-
Page 100: Id Rack Assignment In Decimal And Hexadecimal Figures
Maintenance and Service MSA AUER ID Rack Assignment in decimal and hexadecimal figures Rack 1 Slot dec. hex. Rack 2 Slot dec. hex. Rack 3 Slot dec. hex. Rack 4 Slot dec. hex. Rack 5 Slot dec. hex. Rack 6 Slot dec. -
Page 101: Display Of Digital Messages
SUPREMATouch and does not affect the mode of operation of the SUPREMATouch. To carry out this test, press the button shown in the illustration. The front panel LEDs should now be illuminated [System – power, fail, inhibit and Signal – 1st to 4th alarm, fail]. -
Page 102: Instructions For System Configuration
6.12 Instructions for system configuration Configuration during initial installation If there is no configuration in the SUPREMATouch during transfer of the configuration and the first MCP is not plugged into Slot1 of the rack, the PC program "SUPREMA Manager" displays an error message "transmission failed". - Page 103 Touch the desired configuration to select it. Press OK to copy the selected configuration to other MDO and/or MCP modules. NOTE: If a configuration is transferred to the SUPREMATouch with the "SUPREMA Manager", this configuration is always saved in the MDO. If you are not sure that the configuration was dis- tributed to the system, the configuration of MDO is to be selected.
- Page 104 Service and Maintenance Guide SUPREMATouch Fire and Gas Warning Unit...
- Page 105 Mine Safety Appliances Company 1000 Cranberry Woods Drive Cranberry Township, PA 16066 © MSA AUER GmbH. All rights reserved...
-
Page 106: System Expansions
MSA AUER System Expansions Up to 256 inputs can be connected to a SUPREMATouch system. Up to 512 digital outputs can be given. A complete system for up to 64 inputs can be installed in one 19” rack. Depending on the size of the current system already in place, various additional modules will be required to ex- pand the system. -
Page 107: Connection Of Additional Relay Driver Outputs
Connection of Additional Relay Driver Outputs Additional Relay Connections One SUPREMATouch system can provide a maximum of 512 relay driver outputs. One MGO module makes 40 relay driver outputs available. A maximum of 10 MGO modules can be plugged into one rack. This number, however, is based on the use of at least one additional rack containing the appropriate MAI modules, which make it possible to connect the sensors. -
Page 108: Connection Of Additional Analogue Outputs
Start-Up Guide]. Connection of Additional Analogue Outputs A maximum of 256 analogue outputs are provided by the SUPREMATouch, corresponding to the maximum number of sensors that can be connected. One MAO module makes 8 analogue outputs available. Up to 10 MAO modules can be plugged in per rack. - Page 109 CAN bus baudrate and CAN node number. NOTE: Whenever you connect additional sensors, always make sure that the voltage supply to the system is still adequate [→ Installation and Start-Up Guide]. If necessary, install a voltage sup- ply which meets the new requirements. SUPREMATouch...
-
Page 110: Ordering Information
SUPREMA MST 10 System Terminal 10109638 SUPREMA MDO 20 10105306 SUPREMATouch Rack [w/o pw sup,w MDO] 10097135 SUPREMATouch Rack 150 W [w pw sup,w/o MDO] 10097147 SUPREMATouch Rack [w/o pw sup,w/o MDO] 10105307 SUPREMATouch Rack [150 W] [w pw sup,w MDO] 10069677... - Page 111 SUPREMA Sensor Simulations Module WT 10030264 SUPREMA Sensor Simulations Module HL 10052880 SUPREMA Dummy Relay 10060041 SUPREMA Gateway CAN/MODBUS TCP 10110482 SUPREMA MDC 20 10105277 SUPREMA MBC 20-AdvEl 10105279 SUPREMA MBT 20 10088569 Touch pen Fig. 58 Order No., Modules and Accessories SUPREMATouch...
- Page 112 Installation and Start-Up Manual SUPREMATouch Fire and Gas Warning Unit...
- Page 113 Mine Safety Appliances Company 1000 Cranberry Woods Drive Cranberry Township, PA 16066 © MSA AUER GmbH. All rights reserved...
-
Page 114: Description Of The System
Description of the System MSA AUER Description of the System Structure of the System (module descriptions) The modular control system contains two different types of modules. Each type is equipped with a microcomputer and is connected to the CAN bus. -
Page 115: Expansion Stages
Redundant systems for higher safety classes are realised by adding one more CENTRAL PROCESSING unit (MCP module), a double set of the appropriate data acquisition (MAR and MDA) and alarm control modules (MGO), a second CAN bus and a second or third voltage supply. (→ Chapter 13). SUPREMATouch... -
Page 116: System Design Variants
System modules installed in racks. Bus Protocol The SUPREMATouch uses the CAN bus protocol. On the Interconnection Board (MIB module), the DIL switch can be used to set the transfer speed to 10, 20, 50, 125, 250, 500 or 1,000 kBits/s for all of the connected modules. - Page 117 Current limitation for the 0 ... 20 mA signal input (approximately 30 mA). • Multiplier resistor, 100 Ohm (0 ... 20 mA = 0.0 ... 2.00 V). • Signal input, 0 ... 20 mA, contact, or 0 ... 24 V. SUPREMATouch...
- Page 118 Description of the System MSA AUER MFI Module (FIRE INPUT UNIT) One MFI module must be plugged into the MAI module for each automatic or manual fire detector being monitored. The module must be configured for the relevant application. (Chapter 10.3) Functions: •...
- Page 119 Data is transmitted to the MCP module over the CAN bus. • All supply voltages are monitored (EXT, INT and BAT) and sent to the MCP for evaluation. • System Failure relay is activated when a processor error occurs. • Euro card with a 96-way connector. SUPREMATouch...
- Page 120 Description of the System MSA AUER Data Processing/MCP Module (Central Processing Unit) The data is processed by the Central Processing Unit (MCP Module). This module controls all system functions. The CPU communicates with the other system modules over one or more CAN buses. The measurement values are acquired via the MDA module, and the results of the signal evaluation are output via the MGO module (relay driver outputs) and the MDO module (Display).
- Page 121 MRC TS Module (Relay Connection) / MRO TS Module (Relay Output) The output signals of the MGO module are sent over a 40-way ribbon cable from the MUT module to the MRC TS module and from there over 20-way ribbon cables to the MRO TS relay modules. SUPREMATouch...
- Page 122 Description of the System MSA AUER MAO Module (Analog Output) This module is used when analog outputs (max. 256) are installed in the system. Each MAO mod- ule has 8 analog signal outputs for 0(4) ... 20 mA current loops. The assignment between the out- puts and the signal inputs can be configured.
- Page 123 This module is used to connect modules which are separate from the rack (MRC TS module, MAT TS module, etc.) to the module inserted in the rack by means of a 40-way ribbon cable. (Adapter plug, 96-way to 40-way.) SUPREMATouch...
- Page 124 Description of the System MSA AUER Relay Outputs Up to 512 switching outputs can be controlled by the system via MGO modules (40 open collector drivers each). These switching outputs can be used to drive relays, magnetic valves, contactors, lamps, LEDs (24 VDC/0.3 A). If relay outputs are required, various relay modules can be used: •...
- Page 125 8 relays for alarms or control functions. • 1 changeover contact per relay connected to terminals. • The relays can be inhibited by the LOCK function (no alarm). The LOCK function can be controlled via the MRC TS module. SUPREMATouch...
- Page 126 Description of the System MSA AUER MRO 8 TS Module: Relay Assignment The first 8 outputs of the system are allocated to the common alarm signals. The other outputs can be assigned to any desired signal. Relay 1: Alarm Relay 2:...
-
Page 127: System Power Supply
BAT Terminals (Backup Battery Power Supply) • Backup battery power supply for all units of a rack (21 ...28 VDC). • If the internal and/or the external power supply fails, the system receives its power here. • Maximum supply current of 20 A. SUPREMATouch... - Page 128 Description of the System MSA AUER Features of the System Power Supply • The customer is responsible for providing a safety cut-out (maximum rack power, 480 W/ 20 A). • The 85 ... 256 VAC is supplied via screw terminals directly on the power supply unit.
- Page 129 The electronic components of the card and possibly the sensors connected to it are supplied with this voltage. Functions: • If all the voltages are present, EXT is passed through. • If EXT fails, INT is connected. • If INT fails, BAT is connected. The voltage change over is delay free. SUPREMATouch...
-
Page 130: Installation
10.1 General Information Installation Instructions for Following the EMC Directives The devices of MSA have been developed and tested in accordance with the EMC Directives 2004/108/EG and 93/68/EEC and the corresponding standards EN 50270. The requirements of the EMC Directives can only be met by following the manufacturer’s installation instructions. This applies only to tested devices and systems of the manufacturer. - Page 131 The remote measuring cables for passive/active sensors must be screened (>80 % coverage), and the cable screen is to be connected to the terminals provided. The SUPREMATouch was performance evaluated at CSA for use with combustible gas detectors only. (24) By means of the MAT TS module in the service cabinet (40-way ribbon cable):...
- Page 132 Installation MSA AUER The maximum length for 40-way ribbon cables is 5 meters. MUT Module connected to MAT TS Module Passive/active sensor cables and analog output cables are usually screened. The cable screen is to be connected directly, over the shortest possible distance, to the screening terminal provided.
-
Page 133: Installation, Step By Step
Sensor installation at the SUPREMA must be carried out according to Guideline EN 60079-14. 10.2 Installation, Step by Step Unpack and inspect the device or its components. NOTE: Follow the instructions for components subject to damage from static electricity! SUPREMATouch... - Page 134 Installation MSA AUER Check the suitability of the installation site and the cabling requirements. Check the current and voltage supply and make sure it is suitable. Depending on the type of system shipped, install the switch cabinet, or the 19” mounting rack.
- Page 135 Universal Terminal Module (MUT module) are connected by means of a 40-way screened rib- bon cable. The Relay Connection Module (MRC TS module) is connected to the Relay Output Modules (MRO 8 TS, MRO 16 TS) by a 20-way ribbon cable. SUPREMATouch...
- Page 136 Installation MSA AUER Module Conductor Cross Section MAT/MAT TS Module 0.2 mm - 1.5 mm MRO 8/MRO 8 TS/MRO 16 TS Module 0.2 mm - 2.5 mm MRC TS Module (Supply Voltage, Relay Lock) 0.2 mm - 2.5 mm MGT 40 TS Module 0.2 mm...
-
Page 137: Module Configuration
Configuration of MIB Module A DIL switch is provided on the back of the MIB module. This switch is used to set the CAN bus parameters. SUPREMATouch... - Page 138 Installation MSA AUER c 1 a X 15 X601 Fig. 64 MIB Module, DIL Switch (BGT = Rack No.) MIB as from layout version 2 has 2 system failure relays (X601) for SIL 3 applications. CAN Bus Bit Rate Setting The bit rates intended for the various expansion stages are listed in the following table.
- Page 139 For a “multi-rack” system, the DIL switch contacts 1 and 2 (CAN-A, CAN-B) of the last rack – by which the CAN BUS is ending - must be set to the lower position, all DIL switch contacts 1 and 2 (CAN-A, CAN-B) on the intermediate racks must be set to the upper position. SUPREMATouch...
- Page 140 Installation MSA AUER FREE Baud Rack Switch No. In the case of alternative assembly Terminating Resistor Closed (Standard) ON Terminating Resistor Open OFF OFF Fig. 67 CAN Bus Terminating Resistors Explanation of the symbols = Any switch Turn-on Behaviour and Failure Behaviour of the MGO Module...
- Page 141 0.2 ... 1.5 mm. NOTE: During installation, it is essential to verify for each input that the type of adapter module provided for the sensor is plugged into the correct slot on the MAI module (Chapter 10.3) SUPREMATouch...
- Page 142 Installation MSA AUER Fig. 70 MAI Module, position of adapter modules 1-8 MAR = Analog Redundant only with redundant systems MCI = Current Input depending on type of sensor (active/passive) MPI = Passive Input MFI = Fire Input MSI = Switch Input The co-ordination of inputs at the appropriate MAT module is described in the following figure: Fig.
- Page 143 BR1, BR2 input 1 BR3, BR4 input 2 BR5, BR6 input 3 BR7, BR8 input 4 BR9, BR10 input 5 BR11, BR12 input 6 BR13, BR14 input 7 BR15, BR16 input 8 SUPREMATouch...
- Page 144 Installation MSA AUER Fig. 72 Configuration of MAT Module Configuration of MAT TS Module On top of the circuit board, next to the ribbon cable plug, 2 solder bridges for each input are pro- vided for the 3 or 5 wire operation of the sensors:...
- Page 145 NOTE: Because the common alarms are normally energised and this is fixed in the system and cannot be changed, solder bridge BR1 should never be closed under any circumstances (unless an alarm is to be triggered when the relays are inhibited). SUPREMATouch...
- Page 146 Installation MSA AUER Configuration of the MRC TS Module A solder bridge (BR1), which is used to determine the function of the relay inhibit (Chapter 10.7) for the connected relay modules, is provided on the module: Solder bridge BR1 = OPEN = relays are energised when the relay inhibit is turned on Solder bridge BR1 = CLOSED = relays are de-energised when the relay inhibit is turned on Fig.
- Page 147 BR1 + BR3 = OPEN & BR2 + BR4 = CLOSED Fig. 76 Configuration of the MAO Module As of layout version 6, the operating modes for CAN-A or CAN-B buses and the turn-on behaviour must be configured with the S3 and S4 DIL switches. SUPREMATouch...
- Page 148 Installation MSA AUER FREE-A-/B settings Switch S3 Function Function FREE-A/B by switches on the MIB module Function by switch FREE-A/B on the MAO module Turn-on behaviour Behaviour at CAN failure All analog outputs at 2 mA. All analog outputs at 2 mA.
- Page 149 = OFF activates the bootloader mode. NOTE: The normal function of the module is deactivated in the bootloader mode. This mode should therefore be used only by the MSA service personnel! Configuration of turn-on and failure behaviour of the MGO module is effected via the DIL switch on the MIB module (FREE A + FREE B).
- Page 150 The module MCP-20 is furnished with a bootloader for installing new firmware. The switch S700-1 = ON activates the bootloader mode. NOTE: The normal function of the module is deactivated in the bootloader mode. This mode should therefore be used only by the MSA service personnel! SUPREMATouch...
- Page 151 Installation Fig. 79 MCP Module, standard configuration SUPREMATouch...
- Page 152 The switch S200-1 = ON activates the bootloader mode. NOTE: The normal function of the module is deactivated in the bootloader mode. This mode should therefore be used only by the MSA service personnel! Configuration of the MDC20 Module No configuration.
- Page 153 The switch S1-1 = OFF activates the bootloader mode. NOTE: The normal function of the module is deactivated in the bootloader mode. This mode should therefore be used only by the MSA service personnel! The switch S2 is not used.
- Page 154 The switch S500-1 = ON activates the bootloader mode. NOTE: The normal function of the module is deactivated in the bootloader mode. This mode should therefore be used only by the MSA service personnel! Fig. 82 Configuration of the MBC20 Module Configuration of the MBT20 Module No configuration.
- Page 155 4 = ON The module is configured for applications with a zener barrier. 4 = OFF The module is configured for applications without a zener barrier. Configuration in the SUPREMA menu Settings/Measure points/Sensor data Sensor Measuring range 0 ... 100 Units SUPREMATouch...
- Page 156 Installation MSA AUER Settings/Measure points/Alarms 1st alarm/level 30.00 Above alarm level Alarm Below alarm level No Alarm Latching Alarm latching 2nd to 4th alarm de-activated 2nd 4th level de-activated Configuration of the MSI Module S101 Code Switch Fig. 84 View of the MSI Module...
- Page 157 Failure message. Contact type N.C.:Only one contact can be monitored.A short circuit of the con- necting wires will cause a Failure message.A serial connection of that type of contact can not monitored. SUPREMATouch...
- Page 158 Installation MSA AUER MRD Dummy Relay Module application/function Up to 5 relay modules can be connected (MRO 8/MRO 16) to the MRC module. If not all 5 relay modules are connected, an MRD module must be plugged into each of the unused relay module connectors.
- Page 159 Installation Fig. 86 View of MRD Module LED 1 - 8 = Driver outputs channel A LED 9 - 16 = Driver outputs channel B NOTE: Note the correct polarity of the modules, see illustration 85. SUPREMATouch...
-
Page 160: System Configuration (Hardware)
Installation MSA AUER 10.4 System Configuration (Hardware) Slot Assignments After all the modules have been configured (or after their configuration has been checked), all the required modules should be inserted into the racks or pushed from behind onto the contacts and fastened in place mechanically by means of the retainers provided. - Page 161 8 racks) (non-redundant design). The MDC module must be properly connected by ribbon cable to the MDO module mounted in the front panel. Exactly one MDA module is required for a rack (non-redundant design) if MAI modules are also present in the rack. SUPREMATouch...
- Page 162 Installation MSA AUER The numbering of the measurement channels of the MAI modules is determined by the selected slot. Channels 1–8 are assigned to slot 6 (POS 1), channels 9–16 to slot 7 (POS 2), etc. NOTE: In the standard design with a MAT module installed in the rack, the first MAI module must be inserted into slot 7 (POS 2), the 2nd MAI module into slot 9 (POS 4), etc.
- Page 163 NOTE: A cooling fan must be installed and operated to prevent overheating in the installation framework if more than 64 measuring points are fitted with MPI modules. Configuration Examples Standard System with 8 Inputs/8 Common Alarm Relays Fig. 92 Configuration example 1 SUPREMATouch...
- Page 164 Installation MSA AUER Standard System with 32 Inputs/8 Common Alarm Relays Fig. 93 Configuration example 2 Standard System with 64 Inputs/8 Common Alarm Relays Fig. 94 Configuration example 3 Standard System with 32 Measurement Sites, Redundant Design Fig. 95 Configuration example 4...
-
Page 165: Systems Consisting Of Several Racks
NOTE: For reason of clarity, only one CAN bus is described, the other CAN buses are connected the same way. Signification: St = Plug B = Socket (stands for plug connectors at the respective line) For connections and terminal assignment see Chapter 10.10. NOTE: The system fault relay must be wired up for all racks! SUPREMATouch... - Page 166 Installation MSA AUER MST Module G Status A: Connection of 2 racks: Fig. 96 The CAN terminating resistor at Rack 1 is not set, at Rack 2 it is set. Connection of 3 racks: Fig. 97 The CAN terminating resistor at Rack 1 and Rack 2 is not set, at Rack 3 it is set.
- Page 167 Connection of 4 racks: Fig. 101 The CAN terminating resistor at Rack 1, Rack 2 and Rack 3 is not set, at Rack 4 it is set. For every further rack, a T-piece, ribbon cable and a CAN line socket/plug is needed. SUPREMATouch...
- Page 168 Installation MSA AUER Listing CAN Bus Connection Elements: Description Order-No. SUPREMA CAN cable plug/socket, 5 m 10030083 SUPREMA CAN cable plug/socket, 0.5 m 10030084 SUPREMA CAN T-piece 10030080 SUPREMA CAN ribbon cable D-SUB 10030087 SUPREMA CAN terminating resistor socket 10030078...
- Page 169 If a satellite is operated with a cable length > 20 metres, a SUPREMA CAN BRIDGE CBM must be provided. It is necessary for galvanic isolation, the matching of bit rates and the filtering of CAN Identifiers (data reduction). SUPREMATouch...
- Page 170 Installation MSA AUER Fig. 106 SUPREMA CAN-Bridge CBM The SUPREMA CAN BRIDGE is supplied with 24V DC (X101). The CAN Bus of the Basic Rack is connected to NET 0 (X400), and the satellite rack is connected to NET1 (X400) (Exact connec- tion assignments are to be seen from the CAN Bridge hardware manual).
- Page 171 Message Purpose (dec) (hex) Range NMT-Start/Stop 0 Start and Stop of nodes SYNC Synchronisation EMERGENCY 128+NID 80+NID Failure message 81-FF (128+Node-ID) TIME STAMP Time Stamp PDO1(rx) 384+NID 100+NID Digital Input 181-1FF (256+Node-ID) PDO1(tx) 512+NID 200+NID Digital Output 201-27F (512+Node-ID) SUPREMATouch...
- Page 172 Installation MSA AUER COB-ID (Module) COB-ID (module) COD-ID (hex) Message Purpose (dec) (hex) Range PDO2(rx) 640+NID 280+NID Analog Input 281-2FF (640+Node-ID) PDO2(tx) 768+NID 300+NID Analog Output 301-37F (768+Node-ID) SDO(rx) 1408+NID 580+NID Reading from object 581-5FF directory (1408+Node-ID) SDO(tx) 1538+NID 600+NID...
- Page 173 {START/STOP} I0:80 I1:80 {Sync Byte} I0:100 I1:100 {Time stamp} I0:614 I1:614 {SDO tx MDA (SAT1)} I0:714 I1:714 {Nodegard for MDA (SAT1)} I0:21E I1:21E {Data for MGO (SAT1)} I0:61E I1:61E {SDO tx MGO (SAT1)} I0:71E I1:71E {Nodegard for MGO (SAT1)} SUPREMATouch...
- Page 174 Installation MSA AUER Net 1 are the satellites Fiter for NET1 to NET0: B1:9 {Bit rate = 50kB} M1:0:0xxxxxxxxxxxxxxxxxxxxx xx {Mask for NET1 to NET0} With help of a text editor, a *.txt file is generated, which only contains the data required:...
- Page 175 Programming is carried out with the help of a terminal program which can send *.txt files. Connection Line: For the data transfer, a Null modem line is needed. Modulation of the Terminal Program: Baudrate: 9600 Bits per second Data bits: Stop bits: Parity: SUPREMATouch...
- Page 176 Installation MSA AUER Example of the Hyperterminal for Windows: The Null modem line must be connected to the CAN bridge CBM (X100), and the Computer COM Port. The terminal program must be started with the a.m. settings. After switching on the CAN bridge, the start screen on the terminal display looks like that shown below, or similar.
- Page 177 M1 : 0 :0xxxxxxxxxxxxxxxxx The parameters have now been successfully set. NOTE: The parameter setting of a CAN bridge for the CAN Bus B is carried out the same way as the parameter setting for the CAN Bus A. SUPREMATouch...
- Page 178 Installation MSA AUER Technical Data: Supply voltage Nominal voltage 24 VDC±10 % Current consumption (at 20 °C): typ. 85 mA Plug connector X 100 (DSUB9, plug) - serial interface X 101 (6-pin screw connector UEGM) - 24 V supply voltage X 400-SIO331 (Combicon design, 5-pin MSTB2.5/5-5.08) - CAN or De-...
- Page 179 SUPREMA satellite n Fibre Optic ≤ 2000m CAN bridge CAN/Fibre Optic CAN/Fibre Optic converter converter Fig. 112 System with multiple satellites and LWL converters Here, only CAN A is displayed, CAN B is assembled in the same way. SUPREMATouch...
- Page 180 Installation MSA AUER Connection advice: Satellite Base station Rack 2 Rack 1 Plug Jack LWL cable CAN Line NET 0 NET 1 CAN Bridge LWL Converter LWL Converter Fig. 113 LWL converter connection scheme The terminator at rack 1 must be de-activated, and a 120 ohms resistor has additionally to be clamped under the terminal (2 to 4) NET 0 of the CAN connection.
- Page 181 CAN connection: C_High (onlybase module) CAN connection: C_Low (onlybase module) LED: Ready for operation/Redundancy-Standby operation LED: Bus activity LED: Bus error LED field: Qualitiy of LWL Signal LED: LWL error LWL connection: Sending path LWL connection: Receive path Backplane SUPREMATouch...
-
Page 182: Connection Of The Sensors
2.5 dB/Km 2000* * Other line lengths after consultation with MSA AUER. For use with the SUPREMATouch, multi mode firbes are required. For further technical data and operating conditions, see the LWL Converter Manual. 10.6 Connection of the Sensors General Instructions WARNING Always turn off the voltage to the system before connecting the sensors. - Page 183 Silicone, Silane compounds, Hydrogen Sulfide, Sulfur compounds. In the case of doubt a MSA-Auer employee must be contacted to judge on the spot the possible appear- ance of sensor poisons and suggest alternative measurement procedures.
- Page 184 Installation MSA AUER MAT Module/MAT TS Module/Sensor Connections The function of the terminal connections of the MAT/MAT TS module depends on the module card plugged into the rack. Module Type Sensor Terminal 1 Terminal 2 Terminal 3 Terminal 4 Terminal 5...
- Page 185 +24 V signal signal +24 V +24 V signal signal +24 V +24 V signal signal +24 V +24 V signal signal +24 V +24 V Fig. 118 MGT 40 TS Module, Terminal Assignments for Connection of the Sensors SUPREMATouch...
- Page 186 Installation MSA AUER MGT 40 TS Module/Allocation MAT – MGT connections MAI Module Measurement Point MGT 40 TS-Module Terminal No. Terminal No. Fig. 119 MGT 40 TS Module/Allocation MAT - MGT connections SUPREMATouch...
-
Page 187: Connection Of The Relay Outputs
In addition, two system failure relays are available on the MIB module, which are controlled in the event of a system failure (SYSTEM FAIL, LED is lightened). The following table provides informa- tion on the contact load capacity of MRO modules: SUPREMATouch... - Page 188 Installation MSA AUER Maximum Switching Voltage 400 VAC 300 VDC Maximum Switching Power, ac: 1500 VA Nominal Current 3 ADC Maximum Switching Power, dc: 24 VDC/3 A (from the load limit curve) 50 VDC/0.3 A 100 VDC/0.1 A Fig. 121 MRO Module, Contact Load Capacity...
- Page 189 Installation MRO 8 Module Relay Assignment Relay No. Terminal No. Contact Fig. 123 MRO 8 Module, Terminal Assignment Fig. 124 MRO 8 Module, Terminal Assignment SUPREMATouch...
- Page 190 Installation MSA AUER Additional Relay Outputs If more relay outputs are required, MRO 8 TS modules are used together with the MRC TS module (mounting rail installation). Remember that the first 8 switching outputs of the first MGO module in the system are permanently assigned to the common alarms. Thus the first MRO 8 TS module which is connected by way of the MRC TS module to the first MGO module in the system is always assigned to the 8 common alarms.
- Page 191 The first 8 outputs of the system are assigned to the common alarm messages. The outputs of additional modules can be assigned to any message desired. Relay No. Assignment Alarm Alarm Alarm Alarm Signal Failure (Sensor) Horn Inhibit Power Supply Failure Fig. 126 MRO 8 TS Modules, Common Alarm Relay Assignment SUPREMATouch...
- Page 192 Installation MSA AUER MRO10 8 TS Module The terminals are assigned as follows: Relay No. Terminal No. Contact Fig. 127 MRO 8 TS Module, Terminal Assignment MRO20 8 TS Module The terminals are assigned as follows: Relay Number Terminal Contact...
- Page 193 Installation Relay Number Terminal Contact Fig. 128 Terminal assignment MRO 20-8-TS SUPREMATouch...
- Page 194 Installation MSA AUER MRO10/MRO20 16 TS Module The terminals are assigned as follows: Relay Number Terminal Contact NO 1 NO 2 NO 3 NO 4 NO 5 NO 6 NO 7 NO 8 NO 9 NO 10 NO 11 NO 12...
- Page 195 There are two system failure relays on the MIB module, designed as changeover contacts. They are operated according to the normally energised principle. Both relays are de-energised when a failure occurs. The terminal contacts are directly next to the relays on the MIB module. SUPREMATouch...
-
Page 196: Connection Of The Switching Outputs
Installation MSA AUER c 1 a X 15 X601 Fig. 131 MIB Module, connection terminals for the system failure relay Terminal Assignment: X 601 Terminal No. Contact Break contact relay 1 Centre contact relay 1 Make contact relay 1 Break contact relay 2... - Page 197 NOTE: The load limits, described at chapter must be meet! (Chapter10.4) Switching outputs are run as "open-collector" outputs, that is, an internal transistor of SUPREMA switches the negative connection of the demand while the positive connection of the load is to be connected directly to the 24V supply. SUPREMATouch...
- Page 198 Installation MSA AUER MGO Driver Output Terminal No. (Switching Output) (MGT 40 TS) Fig. 134 MGT 40 TS Module, Terminal Assignments of the Switching Outputs SUPREMATouch...
- Page 199 The MHD module is connected to the rack by 40-pin ribbon cable, and thus makes 40 outputs available (24V/0.3 A). 40-pin ribbon cable connection at MUT (of MGO). 24 V supply and load connections (20 A maximum) Mounting on C or standard rail Outputs short-circuit-proof Redundant supply must be realised externally. SUPREMATouch...
-
Page 200: Connection Of The Analog Outputs
Installation MSA AUER Fig. 136 MHD TS Module Connection (Switching outputs inverted) Fig. 137 MHD TS Module 10.9 Connection of the Analog Outputs Analog outputs can be used to generate external records of the sensor signals using the MAO module that supplies an electrically isolated 0 ... 20 mA output current. Each MAO module offers 8 analog outputs that follow the level of the sensor signal. - Page 201 When a 100-Ohm resistor is used, a voltage range of 0 ... 2 V is obtained for a 0 ... 20 mA signal. NOTE: Maximum load 500 ohms. The accuracy of the measured voltage depends on the toler- ance of the resistor used. SUPREMATouch...
-
Page 202: System Ports (Mst Module)
Installation MSA AUER 10.10 System Ports (MST Module) The system expansions and system connections described in the following can be realised by us- ing the MST module, plugged into the rear of the rack. Fig. 141 MST Module Connections as from Module version 8 Fig. - Page 203 The terminal assignment of the RS 232A connection is given in the following table (see figure 142). Connect the screening to the pin housing. Socket No. Assignment T x D R x D Fig. 144 RS 232A Terminal Assignment SUPREMATouch...
- Page 204 Installation MSA AUER Printer Port (Printer, RS 232 B) Using this port, the alarm messages can be sent to a printer so that records can be kept. - Connecting cable: RS 232 extension (do not use a null-modem cable!) - RS 232 configuration: 19200 kBits/sec., 8 data bits, 1 stop bit, Parity none The pin assignment of the RS232B port is given in the following table (see also figure 142).
- Page 205 The input of the configuration password can be replaced via terminals 1 and 2 by closing a contact (key switch). If the current password has been forgotten, this terminal can be used to enter a new password (Chapter 10.5). MST Terminal 2: PSW MST Terminal 1: GND SUPREMATouch...
-
Page 206: Connection For The System Power Supply
Installation MSA AUER 10.11 Connection for the System Power Supply Before beginning installation, make sure that chapter 10.7, has been read and understood. Care must also be taken to ensure that the complete system, including the sensors and relay modules, does not exceed the maximum load of the selected supply voltage. - Page 207 = BAT. The changeover from one power source to another is accom- plished on the system modules. CAUTION The input voltage range (19.2 … 32 VDC) must not be exceeded! Higher voltage values can lead to the destruction of the unit! SUPREMATouch...
- Page 208 Installation MSA AUER Fig. 149 MIB Module, supply voltage terminals When an external power supply or a battery is used, the supply voltages must be operated via an appropriate EMC filter. The requirements of the EMC and Low Voltage Directive must be complied with.
-
Page 209: Labelling Concept
The customer is free to mark them in any way deemed fit except the MPI and MCI modules that are an exception due to the lack of space. In the following, the labelling fields and a possible plan for marking them is presented. This plan is mere- SUPREMATouch... - Page 210 Installation MSA AUER ly a suggestion and the customer is free to label the fields in correspondence with his own concept of the system. Plug-In Modules The labelling field for the plug-in modules (MCP, MDA, MAI, MGO and MAO modules) is located on the front, on the release lever for the module.
- Page 211 Position: Posi tion No. of the slot in the rack to which the module is connected via a ribbon cable and a MUT module (or a MRC TS and a MUT module). 1-40 Serial Nos. of the connected inputs and outputs Fig. 156 Labelling of the rail-mounted connection and terminal Modules SUPREMATouch...
- Page 212 Installation MSA AUER MAT (TS) Connector Plug A free labelling field is provided on the bottom of the connector plug of the MAT and MAT TS mod- ules. Figure 157 shows a possible labelling system. Rack: No. of the rack on which the MAT (TS) module is mounted Position: No.
-
Page 213: Startup
MAI modules is displayed in the “Measure/List” menu. NOTE: If this process is not completed in 5 minutes, the installation should be checked again. If necessary, an MSA service technician should be called in to correct the problem. SUPREMATouch... -
Page 214: System Configuration
Startup MSA AUER 11.2 System Configuration The SUPREMA requires accurate data about the system structure for system control and error detection. This includes information such as the used modules and their locations in the system, connected power supplies as well as the number and location of the measuring points and Alarm outputs. - Page 215 "SUPREMA Data Selection" area. After storing the new data, close the "Data Management" page and select your new working dataset in the "SUPREMA Data Selection" area. Fig. 159 Data management Select the "Configuration > System" node in the tree view. The "Configuration > System > Overview" page will be opened. SUPREMATouch...
- Page 216 Startup MSA AUER Fig. 160 System overview Select here the "Configuration" button to open the configuration page. Fig. 161 Configuration overview Here you have the following options: Adding a rack: Select the "Add rack" button. You can choose the rack number with- in the button control.
- Page 217 Fig. 162 System overview Press the "Upload Configuration" button to send the configuration to the SUPREMA. After upload completion the connection is closed automatically. To activate the uploaded configuration the SUPREMA must be restarted by shutting the SUPREMA OFF and ON again. SUPREMATouch...
- Page 218 Startup MSA AUER Configure the Sensors Note: The basic operation, the menu design, and the menu structure are described in detail in the user instruction manual. Operation of the System for both the integrated operating unit, i.e., the MDO module, and also for the PC operating software "SUPREMA Manager". Knowledge of this section is assumed in the following explanations.
- Page 219 Here is where information specific to the sensor and to measurement gas is entered. Option field: “Sensor Type” (“Sensor”): Select the MSA sensor type connected to the input. NOTE: A sensor database is assigned to each type of sensor. This database contains information such as noise level, minimum signal, etc.
- Page 220 Startup MSA AUER Alarms Menu Up to four alarms per input can be configured. Per alarm, a limit value can be set, which is mon- itored to determine whether it is crossed in one direction or the other. Each alarm can be set to be either latching or non-latching.
-
Page 221: Configure The Relay Driver Outputs (Switching Outputs)
MAI modules appears in the “Measure/List” menu. NOTE: If this procedure is not over in 5 minutes, check the installation again and, if necessary, call in an MSA service technician to correct the problem. Configure the Relay Driver Outputs Up to 40 relay driver outputs can be actuated per each plugged-in MGO module. - Page 222 Startup MSA AUER switching direction set via the bridge BR1 on the MRC TS module. Remember that the relays can be inhibited via the LOCR connection only as a block of 40, whereas the “open circuit/closed cir- cuit” field makes it possible to select a value for each individual relay. (see section 10.3) Check box “new Alarm”...
- Page 223 The output changes to “normal” status, regardless of whether the alarm has been acknowl- edged or not. For non-latching alarms, the RESET key has no effect. Latching alarm: The signal is within the alarm limits: The output is at “normal” status. The signal is outside the limits: SUPREMATouch...
-
Page 224: First Calibration
NOTE: Under certain conditions, some of the maintenance and service functions described here can be nonfunctional when older versions of the hardware and software of the SUPREMA system are being used. For detailed information on this, please contact the MSA Customer Service office in your area. -
Page 225: Completing Startup
To guarantee the unambiguity of catalytic combustion sensor operation it must be made sure (e.g. by check with hand-held test instruments) each time before turning on the sensors and the system that the environmental atmosphere to be monitored by the sensors is free of combustible gases. SUPREMATouch... -
Page 226: Connection Of Peripherals
Connection of Peripherals MSA AUER Connection of Peripherals To simplify the operation (especially the configuration) of the SUPREMA, a PC or laptop with op- erating software can be connected using different connectors. A protocol printer can be connected via the RS 232-B interface on the MST. - Page 227 Connection of Peripherals Fig. 164 MST Module, RS 232-port The PC/laptop is connected via the serial interface (RS 232). The necessary settings for the inter- face are described in the following sections. Operating Software PC operating software "SUPREMA Manager” is available as an option to improve the conven- ience of the operation and configuration of the SUPREMA system.
-
Page 228: Protocol Printer
Connection of Peripherals MSA AUER Display Software On request, display software customized to customer specifications can be provided. The program is made available on CD-ROM. How to use the software is described in detail at the enclosed operation instructions. 12.2 Protocol Printer For the continuous recording of events, a protocol printer can be connected to the RS 232-B port on the MST module. -
Page 229: Bus Connection
Connection of Peripherals reset manually (status no longer exists). The current status of the sampling point with the data structure shown in Figure 166: Protocol printer, Data Structure is printed out along with the date and time of the most recent change of status. NOTE: This formatting can be changed by the user! 12.3 Bus Connection To connect the SUPREMA system to existing industrial control systems, it is necessary to com-... - Page 230 Mode 3 contains the measuring value as a decimal number, measuring point No., measuring point status, dimension and measuring range. * Basic setting (See Bridge manual Transfer CANopen Slave to MSA AUER at the PKV30-COS) Parameter setting is made by the comPro program enclosed on a floppy disc. (See operation man- ual “Project planning and diagnostic program”...
- Page 231 Connection of Peripherals Truth Table For the status register from address 10001 on, the following truth table (10001–10008) is valid for measure point MS 1 (at version 1.02.07 and PKV Firmware 1.101). Event Memory address Data value 10001 1st alarm 10002 2nd alarm 10003...
- Page 232 Connection of Peripherals MSA AUER Technical Data: Supply voltage 18 ... 30 V at 24 V, the supply current is: 200 mA max. Plug connector X 1: COMBICON for supply voltage X 2: 9-pin D-SUB for CANopen Interface X 3: 9-pin D-SUB for RS 232, 458 and 422 Interface...
- Page 233 Connection of Peripherals Connection to the SUPREMA: Fig. 171 Connection Suprema Gateway CAN/Profibus DP The CAN terminating resistor of BGT 1 has not been set. At the CAN Bus terminal (from 2 to 4), a 120 Ohm resistor is connected together with the CAN cable. Technical Data: Supply voltage Nominal voltage: 24 V/DC ±...
-
Page 234: Redundant Systems
Redundant Systems MSA AUER Redundant Systems 13.1 Application/Function Safety For the safety functions of gas warning measuring instruments, the European standards EN 60 079-29-1, EN 50 104, EN 50 271 , and EN 50 402 have been prepared for the monitoring of explosive gas and vapours as well as oxygen. -
Page 235: Function Of Redundant Systems
Redundant Systems 13.2 Function of Redundant Systems The circuit diagram of the redundant system shows its design and function: The signal from the sensors connected to the MAT modules is amplified by the sensor modules (MCI, MPI) to give a voltage of approx. - Page 236 Redundant Systems MSA AUER Fig. 173 Circuit Diagram Rack System (redundant) SUPREMA...
-
Page 237: Design Of The Redundant System
Redundant Systems 13.3 Design of the Redundant System Components of the Rack In the non-redundant version, the system is consists of only one channel (channel A). By retrofit- ting modules for channel B, the system can be designed to be redundant in one rack for up to 64 measuring points. - Page 238 Redundant Systems MSA AUER Installation of the MAR Module This module is used for redundant evaluation of the input signals together with a second, redun- dant MDA module. It is plugged on the MAI module. The analog output signals of the MPI module or MCI module are digitised in parallel to the MAI module by a 12 bit ADC, and are transferred to the second MDA module via its own SPI Bus.
- Page 239 Redundant Systems NOTE: The layout of the circuit connected to the MRO 8 TS resp. MRO 16 TS modules depends on the requirements of the respective application. It is completely up to the users responsibility to observe the valid standards and guidelines. NOTE: The MRO 16 TS modules do not have changeover contacts.
- Page 240 Redundant Systems MSA AUER If for non ATEX or SIL-3 relevant purposes (e.g. indicator tablet) only 1 set of output relays or driv- ers (usually only of CAN A) are needed, then a MSO module can be attached to the not occupied outputs (usually CAN B) directly to the MIB without use of a MUT module.
- Page 241 Redundant Systems Relays specified are connected in series to effect hardware redundancy. The relays 1–8 are se- lected by CAN A (MCP A), the relays 9–16 by CAN B (MCP B). Fig. 179 MRO 16 TS Module MAO Module The MAO module is not made with redundancy, therefore retrofitting of MAO modules is not nec- essary.
-
Page 242: Startup
Redundant Systems MSA AUER 13.4 Startup The data stored in every MCP and MDO module contains information on system configuration, i.e. the modules used, supply voltages, measuring points and alarm outputs. Also included is the measuring point parameters (sensor type, calibration etc.) and switching out- put parameters (switching direction etc.) stored in additional maps in every MCP and MDO mod-... - Page 243 Redundant Systems Displays of the MAI Modules Function Required LED 1-8 MS 1-8 = ON LED EXT EXT = ON LED INT INT = ON LED BAT BAT = ON LED IBR IBR ON SOCKETS LED ZER UY ON SOCKETS LED SIG UA ON SOCKETS LED of connector strip...
-
Page 244: Technical Data
Technical Data MSA AUER Technical Data 14.1 System Data Racks per system: Number of inputs - per system: 1-256 - per rack; up to 64 Switching output/relay outputs: 0-512 Analog outputs 0 - 20 mA: 0-256 Operation and Display: 320 x 240 pixel colour display... -
Page 245: Module Data
Technical Data 14.2 Module Data MCP Module: Central Processing Unit Order No.: 10087413 Function Monitoring and control of all system functions, signal evaluation for up to 256 sampling points actuation of up to 512 relay driver outputs parameter storage Technical Data Operating voltage feed (3 x 24 VDC): 14 ... - Page 246 Technical Data MSA AUER MDO Module: Display + Operating Unit Order No.: 10087412 Function 320 x 240 pixel backlit graphics display system operation via touch screen individual function keys for horn acknowledgement and alarm reset plain-text messages for alarms and errors at the sampling points...
- Page 247 Technical Data MBC Module: Bus Communication Order No.: Software dependent Function connection to external busses (function is software dependent) Technical Data Operating voltage feed (3 x 24 VDC): 14 ... 32 VDC Operating current: 100 mA Temperature range: 5 °C ... 55 °C Humidity: 0 ...
- Page 248 Technical Data MSA AUER MHD TS Module: Modular High Driver Order No.: 10038420 The MHD uses 10 IC drivers for driving 40 capacitive or inductive outputs (output 1–4, 5–8, 9–12 etc.). The drivers are over-temperature- and over-voltage-safe. The maximum power loss per driv- er is limited, the more outputs are active the less must be the current per output.
- Page 249 Technical Data MCI/MCI BFE Module: Current Input Unit Order No.: 10043997 / 10044020 Function current/voltage source for active 4 ... 20 mA sensors (24 VDC) maximum current load for sensor supply ≤ 400 mA current limitation for sensor power supply (0.7 ... 2 A) voltage output short circuit-resistant current limitation for 4 ...
- Page 250 Technical Data MSA AUER MRC TS Module: Relais Connector Order No.: 10021676 Function connection module for 5 MRO 8 TS/MRO 16 TS modules on MUT module divides 2 x 40-channel FRC ribbon cables over 5 x 20-channel MRO ribbon cables...
- Page 251 Technical Data MRO 10-16-TS Module: Redundant Relais Output Unit (Rail-Mount Installation) Order No.: 10021430 Function relay module, installed on mounting rail actuated by 2 MGO modules relays locked via the MRC module (LOCK) switching status display (green LED, made = ON) series connection of 2 contacts connection across 2 terminals contacts closed = status good...
- Page 252 Technical Data MSA AUER MRO 20-8-TS Order No.: 10112807 Function relay module, installed on mounting rail actuated by the MGO module relays locked via the MRC TS module (LOCK) switching status display (green LED, made = ON) 2 change over contact per relay...
- Page 253 Technical Data MRO 20-16-TS Order No.: 10112805 Function Relay module, installed on mounting rail Actuated by 2 MGO modules Relays locked via the MRC module (LOCK) Switching status display (green LED, made = ON) Series connection of 2 contacts Connection across 2 terminals Contacts closed = status good Technical Data Relay operating voltage:...
- Page 254 Technical Data MSA AUER MRO 20-8-TS SSR Order No.: 10115115 relay module, installed on mounting rail actuated by the MGO module relays locked via the MRC TS module (LOCK) switching status display (green LED, made = ON) galvanic isolated Technical Data Relay operating voltage: 19 ...
- Page 255 Technical Data MAO Module: Analog Output Unit Order No.: 10021050 Function 4 ... 20 mA output driver, measurement signal outputs optionally with electrically isolated outputs data transmission via the CAN bus Technical Data Operating voltage feed: 19 ... 32 VDC Operating current: 150 mA (maximum) Temperature range:...
- Page 256 Technical Data MSA AUER MIB Module: Interconnection Board Order No.: 10032525 Function rack rear-panel wiring for 2 x MCP, 2 x MDA, 8 x MAI, 2 x MGO modules power supply for all modules (INT, EXT, BAT) connection for 3 x 24 VDC feed, screw terminals...
- Page 257 Technical Data MAT Module: Analog Terminal Unit Order No.: 10015759 Function connecting terminals for remote measuring heads Technical Data Number of measuring head connections: Number of terminals per sampling point: Allowable wire cross section: 1,5 mm Temperature range: 5 °C ... 55 °C Humidity: 0 ...
- Page 258 Technical Data MSA AUER MST Module: System Terminals Order No.: 10020133 Function connection module for system expansions installation at rear of rack connection ports: CAN A, CAN B, RS 232 (IPC), RS 232 (printer) alarm reset, horn reset Technical Data Allowable wire cross section: 1.5 mm...
- Page 259 Technical Data MSI Module: Switch Input Unit Order No.: 10048284 Function Power supply for external switches Evaluate status of the switches The operation with an external power supply is optional Technical Data Internal supply voltage: 19.2 ... 32 VDC External supply voltage: 19.2 ...
- Page 260 Technical Data MSA AUER MAR Module: Analog Redundant Order No.: 10022152 Function This module is used for the redundant processing of input signals. The measurement values are digitised in parallel with the MAI module by a 12-bit ADC and transferred to the second MDA (B).
-
Page 261: Suprema Sensor Data Sheets
SUPREMA Sensor Data Sheets SUPREMA Sensor Data Sheets The individual sensor connections are illustrated below. For active sensors, the input current sig- nal is monitored, so that each failure is detected and reported by the SUPREMA system. There are also lists containing details of the operating current, power requirement of the sensors, the maximum allowable cable lengths (maximum allowable cable resistance) and the screening. - Page 262 SUPREMA Sensor Data Sheets MSA AUER Confuguration data: Settings/Measuring points/Sen- Sensor Pressure button sor data Measuring range 0 ... 100 Unity Units any alarm/level 30.00 Above alarm level Alarm contact is shut Below alarm level Alarm contact is opened Latching...
-
Page 263: Suprema Sensor Data Sheet Fire Detector Apollo Series 65 (Not Explosion-Proof) Internal Power Supply (Without Safety Barrier)
SUPREMA Sensor Data Sheets 15.2 SUPREMA Sensor Data Sheet Fire Detector Apollo Series 65 (not explosion-proof) Internal Power Supply (without safety barrier) Fig. 181 The cable screen is only connected to the SUPREMA. *1 Apollo Fire Detector Series 65 Connect according to Apollo Mounting support 45681-200 Series 60/65 connection diagram Max. - Page 264 SUPREMA Sensor Data Sheets MSA AUER Conditions Mounting Wall mounting for use: Ingress protection IP 42 according to DIN 400 50 Explosion protection Certificate Temperature Type SMOKE detector -20 °C to +60 °C Type HEAT detector -20 °C to +90 °C Humidity 0 ...
-
Page 265: Suprema Sensor Data Sheet Fire Detector Apollo Series 65 (Not Explosion-Proof) External Power Supply (Without Safety Barrier)
SUPREMA Sensor Data Sheets 15.3 SUPREMA Sensor Data Sheet Fire Detector Apollo Series 65 (not explosion-proof) External Power Supply (without safety barrier) Fig. 182 The cable screen is only connected to the SUPREMA. *1 Apollo Fire Detector Series 65 Connect according to Apollo Mounting support 45681-200 Series 60/65 connection diagram Max. - Page 266 SUPREMA Sensor Data Sheets MSA AUER Conditions Mounting Wall mounting for use: Ingress protection IP 42 according to DIN 400 50 Explosion protection Certificate Temperature Type SMOKE detector -20 °C to +60 °C Type HEAT detector -20 °C to +90 °C Humidity 0 ...
-
Page 267: Suprema Sensor Data Sheet For Push-Button Detector (Not Explosion-Proof) Internal Power Supply (Without Safety Barrier)
SUPREMA Sensor Data Sheets 15.4 SUPREMA Sensor Data Sheet for Push-Button Detector (not explosion-proof) Internal Power Supply (without safety barrier) Fig. 183 The cable screen is only connected to the SUPREMA. *1 Push-button detector Se Tec DKM-KR42 with LED max. 20 pieces Connect according to diagram inside the push-button detector *2 End of Line Resistor 2K2 / 0.5 W according to connection diagram inside the detector Connection module:... - Page 268 SUPREMA Sensor Data Sheets MSA AUER Conditions Mounting Wall mounting for use: Ingress protection IP 42 according to DIN 400 50 Explosion protection Certificate Temperature Humidity Pressure Weight Dimensions 125 x 125 x 36 mm Housing material Plastic Simulation of normal operation / Alarm / RESET / Open or short-circuit fault indication:...
-
Page 269: Suprema Sensor Data Sheet For Push-Button Detector (Not Explosion-Proof) External Power Supply (Without Safety Barrier)
SUPREMA Sensor Data Sheets 15.5 SUPREMA Sensor Data Sheet for Push-Button Detector (not explosion-proof) External Power Supply (without safety barrier) Fig. 184 The cable screen is only connected to the SUPREMA. *1 Push-button detector Se Tec DKM-KR42 with LED max. 20 pieces Connect according to diagram inside the push-button detector *2 End of Line Resistor 2K2 / 0.5 W according to connection diagram inside the detector Connection module:... - Page 270 SUPREMA Sensor Data Sheets MSA AUER Conditions Mounting Wall mounting for use: Ingress protection IP 42 according to DIN 400 50 Explosion protection Certificate Temperature Humidity Pressure Weight Dimensions 125 x 125 x 36 mm Housing material Plastic Simulation of normal operation / Alarm / RESET / Open or short-circuit fault indication:...
-
Page 271: Suprema Sensor Data Sheet Explosion-Proof
SUPREMA Sensor Data Sheets 15.6 SUPREMA Sensor Data Sheet Explosion-proof Push-Button Detector with Barrier Z 787 Fig. 185 The cable screen is only connected to the SUPREMA. *1 Connect push-button detector according to manufacturer’s specification; MEDC NG16 6JF Type BGI WIRING DIAGRAM BGE/I/W + PBE/IW Contact type: NORMALLY OPEN (terminal 2–3 inside the detector) Carry out installation according to NFPA 72... - Page 272 SUPREMA Sensor Data Sheets MSA AUER Conditions Mounting Wall mounting for use: Ingress protection IP 54 according to DIN 400 50 Explosion protection Certificate BASEEFA 03ATEX0084X Temperature -20 °C to +55 °Cv Humidity Pressure Weight approx. 1100 g Dimensions 120 x 125 x 75 mm...
- Page 273 SUPREMA Sensor Data Sheets Simulation Effect Normal operation Normal operation External power supply 23 ... 32 V connected according to circuit diagram END OF LINE resistor 2K2 connected according to circuit diagram Connect resistor 10 K 0.5 W Voltage of terminal 1–2 shall be <0.1 V between terminal 1 and 2 Alarm Alarm message...
-
Page 274: Suprema Sensor Data Sheet Ex-Fire Detector
SUPREMA Sensor Data Sheets MSA AUER 15.7 SUPREMA Sensor Data Sheet Ex-Fire Detector Apollo Series 60 with Barrier Z 787 Fig. 186 The cable screen is only connected to the SUPREMA. *1 Connect according to manufacturer´s specification for Apollo Series 60: SERIES 60 INTRINSICALLY SAFE SYSTEM DRAWING Z209883. - Page 275 SUPREMA Sensor Data Sheets Conditions Mounting Wall mounting for use: Ingress protection IP 42 according to DIN 400 50 Explosion protection Certificate BASEEFA EX97D2054 BAS02ATEX1288 Temperature SMOKE detector -20 °C to +60 °C HEAT detector -20 °C to +105 °C Humidity 0 ...
- Page 276 SUPREMA Sensor Data Sheets MSA AUER Simulation of normal operation / Alarm / RESET / Open or short-circuit fault indication: Simulation Effect Normal operation Normal operation External power supply 23 ... 32 V connected according to circuit diagram END OF LINE resistor 2K2 connected according to circuit diagram Connect resistor 10 K 0.5 W...
-
Page 277: Suprema Sensor Data Sheet Explosions-Proof Fire Detector
SUPREMA Sensor Data Sheets 15.8 SUPREMA Sensor Data Sheet Explosions-Proof Fire Detector CERBERUS DO1101EX/DT1101EX with Barrier Z 787 Fig. 187 The cable screen is only connected to the SUPREMA. *1 Connect according to manufacturer´s specification. CERBERUS DO1101EX / DT1101EX: Document No. e1469. Only the mounting support Order No. 45681-207 specified in the data sheets must be used. - Page 278 SUPREMA Sensor Data Sheets MSA AUER Conditions Mounting Wall mounting for use: Ingress protection IP 42 according to DIN 400 50 Explosion protection EEXib IICT4 Certificate DO 1101A-EX PTB 02 ATEX 2135 DT1101A-EX: PTB 02 ATEX 2097 Temperature DO1101: -25 °C to +50 °C DT1101: -25 °C to +70 °C...
- Page 279 SUPREMA Sensor Data Sheets Simulation of normal operation / Alarm / RESET / Open or short-circuit fault indication: Simulation Effect Normal operation Normal operation External power supply 23 ... 32 V connected according to circuit diagram END OF LINE resistor 2K2 connected according to circuit diagram Connect resistor 10 K 0.5 W Voltage of terminal 1–2 shall be <0.1 V...
-
Page 280: Suprema Sensor Data Sheet Explosion-Proof Push-Button
SUPREMA Sensor Data Sheets MSA AUER 15.9 SUPREMA Sensor Data Sheet Explosion-Proof Push-Button Detector with Barriers MTL 728 and MTL 710 Fig. 188 The cable screen is only connected to the SUPREMA. *1 Connect push-button detector according to manufacturer´s specification. - Page 281 SUPREMA Sensor Data Sheets Conditions Mounting Wall mounting for use: Ingress protection IP 54 according to DIN 400 50 Explosion protection Certificate BASEEFA 03ATEX0084X Temperature -20 °C to +55 °C Humidity Pressure Weight approx. 1100 g Dimensions 120 x 125 x 75 mm Housing material Aluminium, pressure-resistant SUPREMA...
- Page 282 SUPREMA Sensor Data Sheets MSA AUER Simulation of normal operation / Alarm / RESET / Open or short-circuit fault indication: Simulation Effect Normal operation Normal operation External power supply 23 ... 32 V connected according to circuit diagram END OF LINE resistor 2K2 connected according to circuit diagram Connect resistor 10 K 0.5 W...
-
Page 283: Suprema Sensor Data Sheet Explosion-Proof Fire Detector Apollo Series 60 With Barriers Mtl 728 And Mtl 710Pressure-Resistant
SUPREMA Sensor Data Sheets 15.10 SUPREMA Sensor Data Sheet Explosion-Proof Fire Detector Apollo Series 60 with Barriers MTL 728 and MTL 710pressure-resistant Fig. 189 The cable screen is only connected to the SUPREMA. *1 Connect according to manufacturer´s specification Apollo Series 60: SERIES 60 INTRINSI- CALLY SAFE SYSTEM DRAWING Z209883. - Page 284 SUPREMA Sensor Data Sheets MSA AUER Conditions Mounting Wall mounting for use: Ingress protection IP 42 according to DIN 400 50 Explosion protection Certificate BASEEFA EX97D2054 BAS02ATEX1288 Temperature SMOKE detector -20 °C to +60 °C HEAT detector -20 °C to +105 °C Humidity 0 ...
- Page 285 SUPREMA Sensor Data Sheets Simulation of normal operation / Alarm / RESET / Open or short-circuit fault indication: Simulation Effect Normal operation Normal operation External power supply 23 ... 32 V connected according to circuit diagram END OF LINE resistor 2K2 connected according to circuit diagram Connect resistor 10 K 0.5 W Voltage of terminal 1–2 shall be <0.1 V...
-
Page 286: Cerberus Do1101Ex/Dt1101Ex With Barriers Mtl 728 And Mtl 710
SUPREMA Sensor Data Sheets MSA AUER 15.11 SUPREMA Sensor Data Sheet Explosion-Proof Fire Detector CERBERUS DO1101EX/DT1101EX with Barriers MTL 728 and MTL 710 Fig. 190 The cable screen is only connected to the SUPREMA. *1 Connect according to manufacturer´s specification. CERBERUS Document No. e1469 Tyco M600 Series smoke and heat detectors. - Page 287 SUPREMA Sensor Data Sheets Conditions Mounting Wall mounting for use: Ingress protection IP 42 according to DIN 400 50 Explosion protection EExib IICT4 Certificate DO 1101A-EX PTB 02 ATEX 2135 DT1101A-EX: PTB 02 ATEX 2097 Temperature DO1101: -25 °C to +50 °C DT1101: -25 °C to +70 °C Humidity DO1101: 0 ...
- Page 288 SUPREMA Sensor Data Sheets MSA AUER Simulation of normal operation / Alarm / RESET / Open or short-circuit fault indication: Simulation Effect Normal operation Normal operation External power supply 23 ... 32 V connected according to circuit diagram END OF LINE resistor 2K2 connected according to circuit diagram Connect resistor 10 K 0.5 W...
-
Page 289: Suprema Sensor Data Sheet Contact
SUPREMA Sensor Data Sheets 15.12 SUPREMA Sensor Data Sheet Contact Fig. 191 The cable screen is only connected to the SUPREMA. Connection Maximum nominal current 8 mA data: Maximum nominal voltage 15 V ≤1.0 W (including cable length) Power consumption Cable type 2-core, 80 % screened Maximum loop resistance... - Page 290 SUPREMA Sensor Data Sheets MSA AUER Open or short-circuit fault indication at the following configuration: S101: 1 and 2 = ON; 3 and 4 = OFF (External power supply) S102: 1 and 2 = ON; 3 and 4 = OFF (Contact type NO)
-
Page 291: Suprema Sensor Data Sheet Series 47K-Ht (3-Wire)
SUPREMA Sensor Data Sheets 15.13 SUPREMA Sensor Data Sheet Series 47K-HT (3-wire) Order No.: according to order sheet Fig. 192 The cable screen is only connected to the SUPREMA. Alternatively, the bridges -X1/1 -X1/2 and -X1/4 -X1/5 can be set as solder bridges on the MAT- 10-TS module. - Page 292 SUPREMA Sensor Data Sheets MSA AUER Constant cable length of sen- 2.0 m Conditions Mounting Wall mounting for use: Explosion protection/Sensor II 2 G EEx d IIC T3 (-40 °C ... +160 °C) – Certificate/Sensor INERIS 03 ATEX 0208 Dimensions W x D x H...
- Page 293 SUPREMA Sensor Data Sheets Open or Short Circuit Fault Indication: Signal failure (FAIL-LED) Alarm LED‘s, Signal exceeded, Signal failure (FAIL-LED) XXX= only alarms XXXX= no change of indication Open-circuit Wire Wire Wire Bridge Bridge Disconnect plug at the MAT -X1/2 -X1/2 -X1/4 -X1/1/ -X1/2...
-
Page 294: Suprema Sensor Data Sheet Series 47K-Ht (5-Wire)
SUPREMA Sensor Data Sheets MSA AUER 15.14 SUPREMA Sensor Data Sheet Series 47K-HT (5-wire) Order No.: according to ordering information Fig. 193 The cable screen is only connected to the SUPREMA. Alternatively, the bridges -X1/1 -X1/2 and -X1/4 -X1/5 can be set as solder bridges on the MAT- 10-TS module. - Page 295 SUPREMA Sensor Data Sheets Connection Bridge current 280 mA data: Maximum nominal current 350 mA Power consumption 1.0 W typical (without cable length) Cable type 35 -core, 80 % screened Maximum loop resistance 36 ohms Maximum cable length 1500 m (at 1.5 mm cross section per wire Cable diameter 6 ...
- Page 296 SUPREMA Sensor Data Sheets MSA AUER Startup: Presetting required —> before first calibration and when changing sensor Presetting: Connect digital voltmeter to MAI card jacks. Bridge current setting —> 280 mA Zero adjustment by zero gas —> Zero setting to Ua = 400 … 450 mV Sensitivity adjustment with measuring gas ->...
-
Page 297: Suprema Sensor Data Sheet 4-20 Ma [2-Wire]
SUPREMA Sensor Data Sheets 15.15 SUPREMA Sensor Data Sheet 4-20 mA [2-wire] Fig. 194 The cable screen is only connected to the SUPREMA. Connection module: MCI (active; 2-wire; 4 ... 20 mA; current sink) Sensor simulation module: 4 ... 20 mA (Order No.: 10030262) Connection data: Supply current max. - Page 298 SUPREMA Sensor Data Sheets MSA AUER Open-circuit at the MAT (TS) Wire -X1/1 Wire -X1/2 Disconnect plug of MAT (TS) Module Failure indication Open-circuit at max. cable Wire -X1/1 Wire -X1/2 length Failure indication Short-circuit at the MAT (TS) Wire -X1/1/ -X1/2...
-
Page 299: Suprema Sensor Data Sheet 4-20 Ma [3-Wire]
SUPREMA Sensor Data Sheets 15.16 SUPREMA Sensor Data Sheet 4-20 mA [3-wire] Fig. 195 The cable screen is only connected to the SUPREMA. Connection module: MCI (active; 3-wire; 4 ... 20 mA; current source) Sensor simulation module: 4 ... 20 mA (Order No.: 10030262) Connection data: Supply voltage 19 ... - Page 300 SUPREMA Sensor Data Sheets MSA AUER Short-circuit at max. Wire -X1/1/ -X1/2 Wire -X1/1/ - Wire -X1/2/ - cable length X1/4 X1/4 Failure indication CSA certification of the 4-20 mA input does not include or imply approval of the gas detection ap- paratus such as sensors, transmitters, or devices connected to the system.
-
Page 301: Suprema Sensor Data Sheet 4-20 Ma With Ext. Power Supply
SUPREMA Sensor Data Sheets 15.17 SUPREMA Sensor Data Sheet 4-20 mA with ext. power supply Fig. 196 The cable screen is only connected to the SUPREMA. Connection module: MCI (active; 2-wire; 4 ... 20 mA; current supply) Sensor simulation module: 4 ... - Page 302 SUPREMA Sensor Data Sheets MSA AUER Open-circuit at the MAT Wire -X1/1 Wire -X1/4 Disconnect plug (TS) Module of MAT (TS) Failure indication Open-circuit at max. ca- Wire -X1/1 Wire -X1/4 ble length Failure indication Short-circuit at the MAT Wire -X1/1/ -X1/4...
-
Page 303: Dimensions
Dimensions Dimensions 16.1 Rack SUPREMA... -
Page 304: Rail-Mounted Modules
Dimensions MSA AUER 16.2 Rail-mounted Modules MRO 8 TS Module MRO 16 TS Module SUPREMA... - Page 305 Dimensions MRO20-8-TS SSR Module MRO10-16-TS SSR Module SUPREMA...
- Page 306 Dimensions MSA AUER MRO20-8-TS Module SUPREMA...
- Page 307 Dimensions MRO20-16-TS Module SUPREMA...
- Page 308 Dimensions MSA AUER MRC TS Module MGT 40 TS Module SUPREMA...
- Page 309 Dimensions MHD TS Module MAT TS Module SUPREMA...
Need help?
Do you have a question about the SUPREMATouch and is the answer not in the manual?
Questions and answers