Table of Contents
Advertisement
Quick Links
Advertisement
Table of Contents

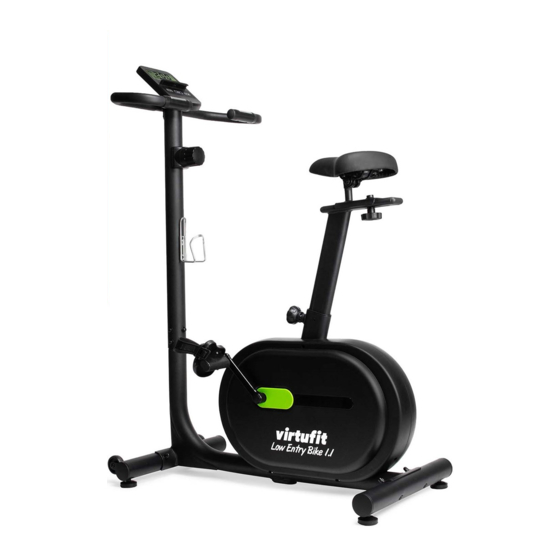
Summary of Contents for VIRTUFIT Low Entry Bike 1.1 Hometrainer
- Page 1 Low Entry Bike 1.1 Hometrainer User manual...
- Page 2 CHECKLIST 7 - 10 ASSEMBLY INSTRUCTIONS ADJUSTMENTS GUIDE MOVING THE BIKE 13 - 14 MAINTENANCE TROUBLE SHOOTING 16 - 17 CONTROL PANEL 18 - 19 EXPLODED DRAWING 20 - 21 PARTS LIST TRAINING INSTRUCTIONS VirtuFit Low Entry Bike 1.1 Hometrainer...
-
Page 3: Safety Instructions
– Before using the equipment, check that the nuts and bolts are securely tightened. – The safety of the equipment can only be maintained if it is regularly examined for damage and/or wear and tear. VirtuFit Low Entry Bike 1.1 Hometrainer... - Page 4 Maintenance assembly and repair work not carried out by an official dealer. • In the event of improper use, neglect and / or poor maintenance. • Failure to maintain the fitness equipment in accordance with the manufacturer’s instructions (see the enclosed manual). VirtuFit Low Entry Bike 1.1 Hometrainer...
- Page 5 When you open the carton, and you will find the below parts in the carton: NUMBER DESCRIPTION SHAPE Cover Knob M8*30 Bolt M8*73 Arc Washer D8*Φ20 Cap Nut M8*H16 Bolt M8*20*S5 Spring washer D8 Knob M12 VirtuFit Low Entry Bike 1.1 Hometrainer...
- Page 6 CHECKLIST TOOLKIT NUMBER DESCRIPTION SHAPE Knob M16 Washer D12 Spanner S5 Wrench S13-14-15 VirtuFit Low Entry Bike 1.1 Hometrainer...
- Page 7 #21 M8*H16*S13 4PCS #B S13-14-15 1PC • Secure front bottom tube(17) to main frame(16) with bolts(20), arc washers(14) and cap nuts(21). • Secure rear bottom tube(28) to main frame(16) with bolts(20), arc washers(14) and cap nuts(21). VirtuFit Low Entry Bike 1.1 Hometrainer...
- Page 8 Connect trunk wire 1(15) with trunk wire 2(59); Connect tension knob(37) with tension lower wire(47) well. • Insert postbar(2) into main frame(16), then secure them with bolts(12), spring washers(13) and arc washers(14); • Secure pedal(27L/R) to crank(41L/R) by wrench(B). VirtuFit Low Entry Bike 1.1 Hometrainer...
- Page 9 1(15) with computer wire(1a), then cover end cap(10); • Secure computer(1) on the postbar(2) with screws(11) by wrench(B); • Unlock bolts(94) from postbar(2), then secure bottler holder(93) to postbar(2) with bolts(94) by wrench(B). VirtuFit Low Entry Bike 1.1 Hometrainer...
- Page 10 #B S13-14-15 1PC • Insert saddle tube(34) into main frame(16), then secure with knob(35). • Secure saddle plate(30) in the saddle tube(34) with knob(33) and washer(32). • Secure saddle(29) in the saddle plate(30) by wrench(B). VirtuFit Low Entry Bike 1.1 Hometrainer...
-
Page 11: Adjusting The Balance
ADJUSTING THE RESISTANCE Rotate tension knob (37)clockwise to increase the level of resistance, rotate the tension control counter-clockwise to decrease the level of resistance. Level 1 is the lowest and level 10 is the highest. VirtuFit Low Entry Bike 1.1 Hometrainer... -
Page 12: Moving The Bike
To move the machine, push the handlerbar(3) until the transportation wheels(19) on the front bottom tube touch the ground. With the wheels on the ground, you can transport the bike to the desired location with ease. VirtuFit Low Entry Bike 1.1 Hometrainer... -
Page 13: Daily Maintenance
• Inspect all bolts and nuts in connection with moving parts of the device, tighten as required. • Check the mobility of moving parts and components of the use equipment, silicone spray if necessary. VirtuFit Low Entry Bike 1.1 Hometrainer... -
Page 14: Changing The Batteries
1. If you see an improper display on the monitor, please replace the batteries to have a good result. 2. Please use 2pcs of 1.5v AAA batteries as a power supply. (See step 5). VirtuFit Low Entry Bike 1.1 Hometrainer... -
Page 15: Troubleshooting
If this still does not work, you can move the sensor slightly. Hometrainer beeps Check that all bolts and nuts are tightened securely. Spray silicone spray if necessary. Also check the wheels. VirtuFit Low Entry Bike 1.1 Hometrainer... -
Page 16: Control Panel
In setting With this key you can select a function. Start status: Switch screen; MODE SPEED or RPM. Stop status: Go to settings and choose which settings must be set. mode adjusted the value of TIME - DISTANCE - CALORIE. Adjust the TIME, DISTANCE, CALORIE values. VirtuFit Low Entry Bike 1.1 Hometrainer... - Page 17 If any of these are setting The corresponding value will be inverted in motion status 。 When any of setting value count to 0, the motion will be “DI DI” Voice Prompt. WIRELESS PLUSE (OPTIONAL) • Supports the standard 5.3Khz wearing heart rate detector. VirtuFit Low Entry Bike 1.1 Hometrainer...
-
Page 18: Exploded Drawing
EXPLODED DRAWING VirtuFit Low Entry Bike 1.1 Hometrainer... - Page 19 EXPLODED DRAWING VirtuFit Low Entry Bike 1.1 Hometrainer...
-
Page 20: Parts List
Washer d8*Φ16*1.5 Spacer Φ22*Φ18*4 Nylon nut M8*H7.5*S13 Bolt M6*16 Adjustable footpad φ52*18 Spring washer D6 Nut M8*H5.5*S14 Nylon nut M6 Pedal (L/R) Shaft Rear bottom tube Round magnet Saddle Sensor Saddle plate Arc washer d5*φ20*1.2*R30 VirtuFit Low Entry Bike 1.1 Hometrainer... - Page 21 Magnetic plate axle Magnetic plate Square magnet Spring Φ1.6*Φ14.5*61*N20 Bolt M6*10 Washer D6*Φ16 Bearing 6001 Idler Φ39*24 Wave washer D12 Idler rod Washer D12*φ17*0.5 Bolt M8*12 Spring Φ2.0*Φ12.2*62*N20 Bolt M6*45 Nut M6*H5 Washer D6 VirtuFit Low Entry Bike 1.1 Hometrainer...
-
Page 22: Training Instructions
The purpose of cooling down is to return the body to its normal or near normal, resting state at the end of each exercise session. A proper cool-down slowly lowers your heart rate and allows blood to return to the heart. VirtuFit Low Entry Bike 1.1 Hometrainer... - Page 23 For questions or missing parts please contact your dealer.


Need help?
Do you have a question about the Low Entry Bike 1.1 Hometrainer and is the answer not in the manual?
Questions and answers