Table of Contents
Advertisement
Advertisement
Table of Contents

Related Manuals for NCR P1535 POS (7761)


Summary of Contents for NCR P1535 POS (7761)
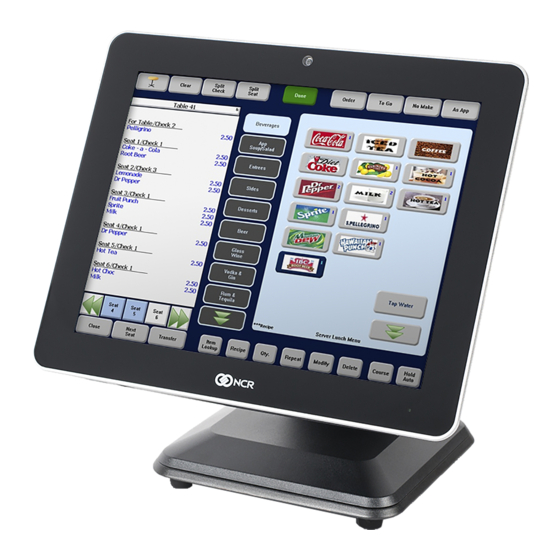
- Page 1 SITE PREPARATION GUIDE NCR P1535 POS ( 7761 ) Release 1.0 BCC5-0000-5053 Issue B...
- Page 2 NCR, therefore, reserves the right to change specifications without prior notice. All features, functions, and operations described herein may not be marketed by NCR in all parts of the world. In some instances, photographs are of equipment prototypes. Therefore, before using this document, consult with your NCR representative or NCR office for information that is applicable and current.
- Page 3 Audience This publication is written for hardware installer/service personnel, system integrators, and field engineers. Notice: This document is NCR proprietary information and is not to be disclosed or reproduced without consent. Safety Requirements The NCR P1535 POS conforms to all applicable legal requirements. To view the...
- Page 4 Warning: DO NOT connect or disconnect any serial peripherals while the terminal is connected to AC power. This can result in system or printer damage. Grounding Instructions In the event of a malfunction or breakdown, grounding provides a path of least resistance for electric current to reduce the risk of electric shock.
- Page 5 If you do not have access to a computer, you may leave a voice message at: 1-800-528- 8658 (USA), or (International) +1-770-623-7400. When leaving a message, please provide a phone number and/or an email address so NCR can contact you if additional details are needed.
- Page 6 • Description of the problem, including any system error codes, error condition, or guidance to the area of failure. The NCR Agent will provide you with a work order number, which serves as your Return Material Authorization (RMA). Please provide the RMA on the outside of the shipping box.
-
Page 7: Table Of Contents
Table of Contents NCR P1535 POS Site Preparation Introduction Customer Responsibilities LAN Communications Environmental Requirements Barometric Pressure Temperature Humidity POS Dimensions 7761 Terminal with MSR and Sidecar 7761 Terminal with MSR and No Sidecar 7761 Terminal with Dallas Key and No Sidecar... - Page 8 Revision Record Issue Date Remarks Feb 2016 First Issue May 2016 Update for Release 1.1...
-
Page 9: Ncr P1535 Pos Site Preparation
NCR P1535 POS Site Preparation Introduction The Site Preparation Guide provides the information necessary to prepare a site to NCR specifications prior to installing an NCR P1535 POS terminal. Prepare the site properly before installing the terminal. This is a contractual document. It contains important warnings and confers important legal rights and obligations. - Page 10 • a customer has been notified that a full or partial consultancy service is available and/or that NCR is willing to undertake a preliminary or final site survey and • the customer shall have entered into a formal contract with NCR for provision of the same.
-
Page 11: Customer Responsibilities
• Provide and install floor coverings and environment systems that limit or control static electricity build-up and discharge In general, keep the NCR equipment area free from dust, smoke, lint, and other particles. Avoid locating the equipment near other machines that generate ink, carbon, and paper dust particles. -
Page 12: Environmental Requirements
Site Preparation Environmental Requirements Barometric Pressure The terminal operates within the following barometric pressure conditions: • Maximum operating altitude: 3,000 m (9,843 ft.) • Operating range of pressure: 105 to 69 kPa (15.2 to 10.0 lb./in.) Temperature The terminal operates over the temperature ranges shown below. Avoid continuous operation at, near the indicated temperature extremes, or in locations where the temperature changes beyond the restrictions. -
Page 13: Pos Dimensions
Site Preparation POS Dimensions 7761 Terminal with MSR and Sidecar 7761 Terminal with MSR and No Sidecar... -
Page 14: 7761 Terminal With Dallas Key And No Sidecar
Site Preparation 7761 Terminal with Dallas Key and No Sidecar 7761 Terminal with Expansion and on the P-Series Stand... -
Page 15: 7761 Terminal With No Expansion And On The P-Series Stand
Site Preparation 7761 Terminal with No Expansion and on the P-Series Stand 7761 Terminal with Expansion and on the X-Series Stand... -
Page 16: 7761 Terminal With No Expansion And On The X-Series Stand
Site Preparation 7761 Terminal with No Expansion and on the X-Series Stand 2x20 LCD Customer Display on the P-Series Stand (7761-F460) -
Page 17: Xd10 Lcd Customer Display On The P-Series Stand (7761-F461)
Site Preparation XD10 LCD Customer Display on the P-Series Stand (7761-F461) 2x20 LCD Customer Display on the Extension Arm (7761-K460) -
Page 18: Xd10 Lcd Customer Display On The (7761-K462) Extension Arm
1-10 Site Preparation XD10 LCD Customer Display on the (7761-K462) Extension Arm... -
Page 19: Wall Mount Dimensions
Site Preparation 1-11 Wall Mount Dimensions... - Page 20 1-12 Site Preparation Mounting Height The mounting height of the terminal should be appropriate for the majority of users. Based on the recommendation of the ADA (America Disability Association), It is recommended that the system is approximately 1220 mm (48 in.) from the floor to the center of the display when the user is in the standing position.
-
Page 21: Power Supply Dimensions
Site Preparation 1-13 Power Supply Dimensions... -
Page 22: Power Supply Bracket
1-14 Site Preparation Power Supply Bracket Note: To ensure the power cables do not get disconnected accidentally, a Wall Mount Power Supply Bracket (7761–K002) can be used. -
Page 23: Terminal Weight
Site Preparation 1-15 Terminal Weight Component lbs. 15" 7761 Terminal with MSR/Stand 7.39 16.3 Shipping Weight and Dimensions Component lbs. Length x Width x Height 15" 7761 Terminal 381 x 229 x 813 mm (15.0 x 9.0 x 32.0 in.) 15"... -
Page 24: Airflow Requirements
1-16 Site Preparation Airflow Requirements Do not block the air vents on the terminal or peripherals. These vents are necessary for cooling. Do not place the terminal in an enclosed area where sufficient ventilation is not available. Leave at least 100 mm (4 inches) of clearance from air vents. When the terminal is wall-mounted, the rear cover must have at lease 6 mm (0.25 in.) clearance from the wall. -
Page 25: Electrical Requirements
AC Store Wiring Requirements The customer must provide suitable AC power for the terminals, associated equipment, and devices. We recommend a dedicated unswitched power line dedicated to the NCR equipment installation. Refer to the NCR Workstation and Peripherals AC Wiring Guide (BSTO-2115-53) for store AC wiring requirements. -
Page 26: Cable Routing
1-18 Site Preparation Cable Routing Peripheral cable connectors are located in an opening on the bottom of the terminal. The cables are routed into the opening through the Terminal Stand. 1. Pivot the display toward the back. 2. Remove the Upper Stand Cover by pivoting it away from the stand. The cover has a simple snap fit connection at the top. - Page 27 Site Preparation 1-19 3. Open the Cable Door (Thumbscrew). 4. Loosen the screw on the Terminal Cable Cover. To open, press down on the indentations in the Cable Cover to unlatch the cover and then pivot the cover open. Note: Ensure that the screw is disengaged from the threads.
- Page 28 1-20 Site Preparation 5. Route the cables up through the stand and out of the Terminal Cable Cover. 6. Connect the peripheral cables to the I/O Panel. Note: SIM cards must be inserted while the terminal is powered off.
- Page 29 Site Preparation 1-21 7. Install the Terminal Cable Cover and tighten thumbscrew to secure cover. 8. Close the Cable Door and tighten thumbscrew to secure cable door. 9. Install the Upper Stand Cover.
-
Page 30: Power Protection
NCR offers Power Conditioners and UPS Systems that will protect electronic equipment and reduce downtime and extend the life of the Hospitality POS Solution. These power stability systems combine a surge diverter and noise filter with a highly efficient low–...
Need help?
Do you have a question about the P1535 POS (7761) and is the answer not in the manual?
Questions and answers