Table of Contents
Advertisement
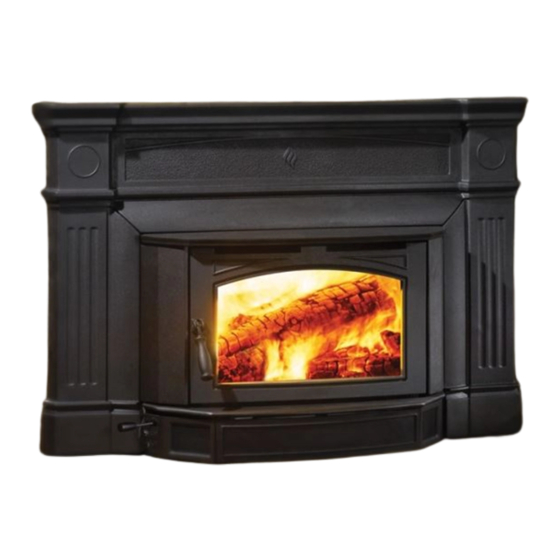
Hampton™
HI2450 Wood
Fireplace
Insert
Owners & Installation Manual
www.regency-fire.com
French Manual: http://ow.ly/Zvzjy
Manuel en Français: http://ow.ly/Zvzjy
MODEL:
HI2450
Tested & listed by:
Installer: Please complete the details on the back cover
and leave this manual with the homeowner.
Homeowner: Please keep these instructions for future reference.
0219WN026S
FPI FIREPLACE PRODUCTS INTERNATIONAL LTD. 6988 Venture St., Delta, BC Canada, V4G 1H4
920-084
08.20.19
Advertisement
Table of Contents

Related Manuals for Regency Hampton HI2450


Summary of Contents for Regency Hampton HI2450
- Page 1 Hampton™ HI2450 Wood Fireplace Insert Owners & Installation Manual www.regency-fire.com French Manual: http://ow.ly/Zvzjy Manuel en Français: http://ow.ly/Zvzjy MODEL: HI2450 Tested & listed by: Installer: Please complete the details on the back cover and leave this manual with the homeowner. Homeowner: Please keep these instructions for future reference.
- Page 2 Tested & listed to ASTM E3053. Model Regency HI2450 1.4g /hr. “This manual describes the installation and operation of the Regency HI2450 wood heater. This heater meets the 2020 U.S. Environmental Pro- tection Agency’s cord wood emission limits for wood heaters. Under specific test conditions this heater has been shown to deliver heat at rates ranging from 14,200 Btu/hr.
-
Page 3: Table Of Contents
Seasoned wood ............26 CAUTION: To avoid burns or wood splinters, when opening/closing the fuel door or adding wood to the fire, You should always wear appropriate protective gloves to protect your hands from the heat being emitted from this fireplace. Regency HI2450M... -
Page 4: Safety Label For Hi2450
Safety Label For HI2450 This is a copy of the label that accompanies your Regency Insert. We have printed a copy of the contents here for your review. NOTE: Regency units are constantly being improved. Check the label on the unit and if there is a difference, the label on the unit is the correct one. -
Page 5: Dimensions With Regular Faceplate
" 591mm " 800mm " " 1079mm 286mm " " 1019mm 161mm ALL PICTURES / DIAGRAMS SHOWN THROUGHOUT THIS MANUAL ARE FOR ILLUSTRATION PURPOSES ONLY. ACTUAL PRODUCT MAY VARY DUE TO PRODUCT ENHANCEMENTS. Regency HI2450M... -
Page 6: Dimensions With Oversize Faceplate
" 591mm " 800mm " " 1318mm 257mm " " 1229mm 186mm Regency HI2450M... -
Page 7: Before Installing Your Insert
Install Regency Inserts are designed to use either a jurisdiction." and use only in accordance with manufac- 5.5" (140mm) or 6" (152mm) flue. -
Page 8: Masonry And Factory Built Fireplace Clearances
Please check to ensure that your floor protection and hearth will meet the standards for clear- ance to combustibles. Your hearth extension must be made from a non-combustible material. Extending 16" for US and 18" for Canada—measured from the fuel loading door. Regency HI2450M... -
Page 9: Installing Your Insert
Be sure to leave the unit out at least 3 to 4 inches in order to make the necessary flue connections and to install the faceplate. Be sure to protect your hearth extension during the installation, ie. with a heavy blanket. Regency HI2450M... -
Page 10: Optional Flue Connector Kit
6" Flue Adapter 45 degree from your chimney system. In most cases the flue damper should also be 948-412/P 6" Flue Offset Adapter (offsets back 4") removed to allow passage of the liner. 846-527 Flue Connector Kit 10 | Regency HI2450M... -
Page 11: Stainless Steel Smoke Deflector Installation
To replace the deflector, loosen off both bolts and slide deflector upward and out. Install new deflector and hand tighten bolts. Ensure positive location of the deflector prior to hand tightening. WARNING: Operation of the unit with out proper installation of smoke deflector will void warranty. Ensure deflector is seated so bolts are situated at the top of the keyhole before tightening. Regency HI2450M... -
Page 12: Standard Cast Faceplate Installation
Mantel Top. If there is a gap present you will need to lower that side cast by loosening 2 bolts, see step 6 for bolt location (check to see if level). 12 | Regency HI2450M... - Page 13 Carefully slide the Mantel Top back into position. Slide Mantel Top back. Cast Cast adjustment mounting bolts bolts for height adustment. See Step 3 to identify side casts. See next page for recommended measurements. 12/23/10 918-300g Page 2 of 3 Regency HI2450M...
- Page 14 Important: Verify gap between cast and door did not change when rear adjustments have been made. Carefully open door slowly, to ensure that the door does not rub against cast sides. These are just recommended measurements. 12/23/10 918-300g 14 | Page 3 of 3 Regency HI2450M...
-
Page 15: Oversize Cast Faceplate Installation
Mantel Top Spacer and the underside cast of the Mantel Top. If there is a gap present you will need to lower that side cast by loosening 2 bolts, see side cast adjustment section for bolt location (check to see if level). Regency HI2450M 05/02/11 918-967... - Page 16 Gasket Location 11) The unit may now carefully be slid into fi nal position. See side cast adjustments if faceplate needs aligning. Right Side Face- Left Side Faceplate plate Backside of Unit & Faceplate Shown. 16 | Regency HI2450M 918-967 05/02/11...
- Page 17 Important: Verify gap between cast and door did not change when rear adjustments have been made. Carefully open door slowly, to ensure that the door does not rub against cast sides. These are just recommended measurements. Regency HI2450M 05/02/11 918-967...
-
Page 18: Cast Grill Installation
2. Remove the sides and top retainer and bolts highlighted in the diagram and carefully remove glass, it will fall towards you at the top. 3. Place the grill in the door, make sure that the glass gasketing Remove 6 - 7/16" Bolts on the left and right bracket is facing you. Avoid impact on glass doors such as striking or slamming shut. 4. Carefully place the glass (black strip up) into the bottom re- tainer. Keeping it in place, re-install the sides and top retainer and bolts. Do not tighten bolts, fi nger tight only. 5. Lift the bottom of the glass upwards till it stops, secure glass retainer using the 8 bolts. Do not wrench down on the bolts, as this may cause the glass to break. 04/19/12 919-151 18 | Regency HI2450M... -
Page 19: Fan Installation
Switch Plate. Neutral Green Manual/ Live Ground Auto 120V AC Switch Switch 60 Hz Fan Thermodisc (normally open) Black Black Black Ground Ashlip Blower/Fan Wiring Diagram Draft Control Support Clips S w i t c h Plate Regency HI2450M... -
Page 20: Power Outlet Conversion
8) Attach the green ground wire with the #8 x 3/8" Pan other side. Head Phillips steel self tapping screw, previously removed from the left side. 20 | Regency HI2450M 918-378 07/23/08... - Page 21 12) Attach the fan defl ector to the main fan body by replacing the Phillips screw on the top of the fan housing. Thermodisc Assembly Template (If required) Location of New Thermdisc Holes Thermodisc As- sembly Base Location of Old Thermdisc Holes Diagram 1 Regency HI2450M 918-378 07/23/08...
-
Page 22: Flue Collar Removal And Installation
Diagram 3. Ensure that the unit is centered in the existing fireplace and lined up with the flue adaptor. Front View 6. Manoeuver the baffle above the air tube and slide out. Diagram 3 Side View 22 | Regency HI2450M... - Page 23 (supplied in manual pack) and install them, tighten down using the 1/2" socket to ensure the adapter is positively secured to the unit. Once completed remove pull rod and place away for future re-install. Diagram 6 15. Reverse steps 6-3 to complete the installation. Regency HI2450M...
-
Page 24: Floor Protection
Smoke deflector 2. Slide the left baffle over the 2 remaining air tubes from the front and then push it to the back. 5. Reverse Step 1. Side View 24 | Regency HI2450M... -
Page 25: Brick Installation
Do not use a grate. LyTherm sheet 180-960 Firebrick - Complete Set Order of firebrick install: a) Rear Firebrick 70) 902-111 Brick Regular Full Size: 1-1/4" x 4-1/2" x 9" b) Firebox floor - install brick over LyTherm Sheet 75) * Brick Partial: 1-1/4 x 4-1/2" x 2" c) Right and left side Firebricks 76) * Brick Partial: 1-1/4" x 2" x 9" Regency HI2450M... -
Page 26: Seasoned Wood
Two dry pieces banged together sound hollow; wet pieces sound solid and dull. • Dry wood weighs much less than wet wood. • Split a piece of wood. If the exposed surface feels damp, the wood is too wet to burn. 26 | Regency HI2450M... -
Page 27: Operating Instructions
Regency Stove causing a draft down your closed. If doors are left partly open, gas a good updraft in the flue to establish the fire. -
Page 28: Fan Operation
Failure to do so can result in a serious chimney fire. Safety Precautions 7. Your Regency stove can be very hot. You may be 1. Do not allow ashes to build up to the loading seriously burned if you touch the stove while it is... -
Page 29: Maintenance
CAUTION: Things to remember in case of Glass Maintenance a chimney fire: Your Regency stove is supplied with 5mm Neoceram 1. Close all draft and damper controls. ceramic glass (Part #940-370/P) that will withstand the highest heat that your unit will produce. In the 2. - Page 30 FOR SUCH INSTALLATION. fumes. Burning coal, cardboard, or loose paper can produce soot, or large flakes of char or fly ash, causing smoke spillage into the room. Cleaning & Maintaining Your Wood Stove 30 | Regency HI2450M...
-
Page 31: Door Gasket
After re-installing the door, carefully swing open and check the clearance to the Right Hand Cast Side. If tight or rubbing, loosen the 7/16 nuts and adjust the clearance and then re-tighten. Cleaning & Maintaining Your Wood Stove Regency HI2450M... -
Page 32: Latch Adjustment
4) Re-secure Latch to Mounting Bracket using 2 bolts. 2 bolts. Latch Assembly re-assembled with spacers removed. M o u n t i n g Latch Bracket 5) Re-secure the Latch Assembly to the unit using 2 bolts. Cleaning & Maintaining Your Wood Stove 32 | Regency HI2450M... - Page 33 When cleaning the chimney system the air tubes, baffles should be removed for ease of cleaning. See manual for details on removal. We highly recommend that the chimney cleaning be done by a professional as they will have the necessary tools such as a proper sized brush and special vacuum cleaner designed to deal with fine particles. Regency HI2450M...
-
Page 34: Vertical Stainless Deflector Replacement
2. Loosen the two 7/16'' bolts + nuts to remove / replace vertical baffle. 3. Repeat steps to install new vertical deflector. NOTE: ENSURE BAFFLE IS PUSHED UP AS FAR AS POSSIBLE. TIGHT TO TOP OF FIREBOX. 34 | Regency HI2450M... -
Page 35: Main Assembly
42) 181-632/P Flue Adaptor 948-155 Bottom Door Hinge Pin 21) 948-179 Wooden Handle Black 948-178 Wooden Handle Dark Brown 181-045/P Vertical Stainless Deflector * Last digit of part number represents color: 1 = Metallic Black, 5 = Timberline Brown, Regency HI2450M... -
Page 36: Standard Cast Faceplate
Part # Description 300-921 Cast Faceplate - Metallic Black 300-925 Cast Faceplate - Timberline Brown 200) * Top Faceplate 201) * Left Side Faceplate 202) * Right Side Faceplate * Not available as a replacement part. 36 | Regency HI2450M... -
Page 37: Oversize Cast Faceplate
300) * Top Faceplate 301) * Left Side Faceplate 302) * Right Side Faceplate 303) 300-060 Mounting Plate LH 305) 300-061 Mounting Plate RH Not Shown in the Drawing 300-005 Top Retainer * Not available as a replacement part. Regency HI2450M... -
Page 38: Brick Panels - Hi2450
Brick Panels - HI2450 Part # Description 180-960 Firebrick - Complete Set 70) 902-111 Brick Regular Full Size: 1-1/4" x 4-1/2" x 9" 75) * Brick Partial: 1-1/4 x 4-1/2" x 2" 76) * Brick Partial: 1-1/4" x 2" x 9" 38 | Regency HI2450M... - Page 39 Regency HI2450M...
-
Page 40: Warranty
At all times FPI reserves the right to inspect reported complaints on location in the field claimed to be defective prior to processing or authorizing of any claim. Failure to allow this upon request will void the warranty. 40 | Regency HI2450M Revision Date: July 2019 Regency Wood Products Warranty... - Page 41 Freight damages for products or parts are not covered under the terms of the warranty. Products made or provided by other manufacturers and used in conjunction with the FPI appliance without prior authorization from FPI may void this warranty. Regency HI2450M Revision Date: July 2019 Regency Wood Products Warranty...
- Page 42 Product Registration and Customer Support: Thank you for choosing a Regency Fireplace. Regency strives to be a world leader in the design, manufacture, and marketing of hearth products. To provide the best support for your product, we request that you complete a product registration form at http://www.regency-fire.com/Customer-Care/Warranty-Registration.aspx...
- Page 43 Product Registration and Customer Support: Thank you for choosing a Regency Fireplace. Regency strives to be a world leader in the design, manufacture, and marketing of hearth products. To provide the best support for your product, we request that you complete a product registration form found on our Web Site under Customer Care within ninety (90) days of purchase.
- Page 44 44 | Regency HI2450M...
- Page 45 Regency HI2450M...
- Page 46 46 | Regency HI2450M...
- Page 48 Installer: Please complete the following information Dealer Name & Address: ______________________________________________ ___________________________________________________________________ Installer: ___________________________________________________________ Phone #: ___________________________________________________________ Date Installed: ______________________________________________________ Serial No.: __________________________________________________________ Printed in Canada Regency and Classic are trademarks of FPI Fireplace Products International Ltd. © Copyright 2019, FPI Fireplace Products International Ltd. All rights reserved.
Need help?
Do you have a question about the Hampton HI2450 and is the answer not in the manual?
Questions and answers