Table of Contents
Advertisement
Quick Links
Advertisement
Table of Contents

Related Manuals for Philips Video System Manager Pro Series


Summary of Contents for Philips Video System Manager Pro Series
- Page 1 Video System Manager Pro User Guide...
- Page 2 Chromacore, Chromasic, CK, the CK logo, Color Kinetics, the Color Kinetics logo, ColorBlast, ColorBlaze, ColorBurst, ColorGraze, ColorPlay, ColorReach, DIMand, EssentialWhite, eW, iColor, iColor Cove, IntelliWhite, iW, iPlayer, Light Without Limits, Optibin, and Powercore are either registered trademarks or trademarks of Philips Solid-State Lighting Solutions, Inc. in the United States and/or other countries.
-
Page 3: Table Of Contents
Key Features Overview About this Guide Using the Control Panel Related Documentation Control Panel Menus Contacting Philips Color Kinetics Accessing the VSM Pro User Interface Technical Support Connecting to the VSM Pro User Interface Chapter 2 Chapter 5 Planning Stages... - Page 4 Chapter 1 Display Frame Adjusting Brightness Network Optimization Features Synchronization Frame Rate Additional Features Log File File Backup Appendices Appendix A Test Patterns Index Index VSM Pro User Guide 3...
-
Page 5: Welcome To Video System Manager Pro
VSM Pro accepts direct input from external devices including media servers. To accommodate most sources, Philips offers two versions of hardware. The digital media version supports input via industry standard DVI and VGA connections; the analog version supports analog input via BNC composite and S-Video connections. -
Page 6: About This Guide
Flexible display capability — VSM Pro supports unconventional installation formats. Paired with • flexible lighting systems from Philips, VSM Pro can display video on curved and three- dimensional surfaces. Seamless upgrade from version 1 — VSM Pro system offers full backwards compatibility with •... -
Page 7: Related Documentation
® version of Adobe Reader from the web at: http://www.adobe.com/products/acrobat/. Contacting Philips Color Kinetics Technical Support Contact Philips Color Kinetics technical support for assistance with VSM Pro: Phone 888.Full.RGB, press option number 3 (toll free US, Canada and Mexico) 617.423.9999, press option number 3 (toll worldwide) Email technicalsupport@colorkinetics.com... - Page 8 Introduction 7 VSM Pro User Guide...
-
Page 9: Planning Stages
Planning Stages Planning the Layout VSM Pro is compatible with wide-ranging LED lighting systems from Philips, including direct view, linear, and surface-washing fixtures. Video installations typically use flexible and rigid linear direct view systems: Flex systems allow versatile installation •... -
Page 10: Fixture Installation Considerations
VSM Pro implementations are not constrained to grid formats. For these implementations, or for designs where the acceptable level of discernible video may be more or less demanding, contact Philips Color Kinetics Application Engineering Services for assistance. To determine the minimum viewing distance, multiply the node pitch by 100 distance units. -
Page 11: Working With Video Resolutions
Using made-to-order fixtures is another method for increasing pixel pitch. Philips offers custom lengths and node spacing for certain flexible fixtures, in many cases at no additional cost. -
Page 12: Working With Video Sources
VSM Pro does not store video files — the content is sent to VSM Pro from a media source. To accommodate most media source types, Philips offers two versions of hardware: the digital version accepts video input from media sources via DVI or VGA cable, and the analog version accepts video input via BNC composite or S-Video cable. -
Page 13: System Configuration
Chapter 2 System Configuration ™ VSM Pro communicates with lighting components via KiNET Ethernet, the network protocol engineered by Philips Color Kinetics specifically for lighting control in large-scale installations. KiNET is fully compatible with all Ethernet hardware. Media Playback Server... -
Page 14: Testing A Video Display Using Vsm Pro
System Overview VSM Pro accommodates a variety of lighting network designs by supporting both low-voltage lighting fixtures and Powercore fixtures. ® Low-voltage fixtures work in unison with Ethernet Power / Data Supplies. Ethernet Power / • Data Supplies blend power processing with data transmission capabilities. •... -
Page 15: Vsm Pro Installation Example
The architect’s preliminary concept called for LED strands to be mounted on the flexible steel net that partially covers the building. Philips evaluated the concept and proposed a solution based on laser-cut steel panels offering 85% transparency. The pattern in the steel panels is... -
Page 16: Network Details
System Overview VSE Pro 1 Gbit Switch Fiber optic cable Fiber optic cable 1 Gbit 1 Gbit 1 Gbit 1 Gbit 1 Gbit 1 Gbit 1 Gbit 1 Gbit 1 Gbit 1 Gbit 1 Gbit 1 Gbit 1 Gbit 1 Gbit 1 Gbit 1 Gbit 1 Gbit... -
Page 17: Prepare For The Installation
Chapter 3 Hardware and Software Installation Prepare for the Installation Verify that the lighting system network will be installed on a dedicated LAN using Gigabit Ethernet switches. Install and configure all lighting fixtures, Ethernet Power / Data Supplies, and Data Enabler devices. -
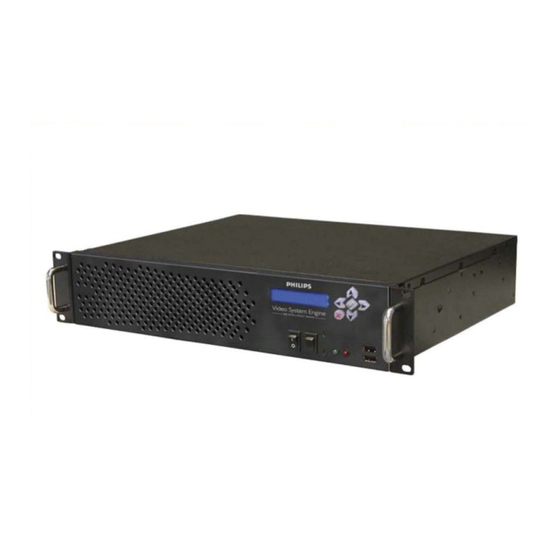
Page 18: Step 2: Mount In Rack
Hardware and Software Installation Step 2: Mount in rack Make sure the main power switch is OFF prior to connecting any cables. The main power • switch is located on the back of the device Select a convenient but unobtrusive rack location for mounting the controller that meets the •... -
Page 19: Step 3: Connect The Network, Video, And Power Cables
Chapter 3 Step 3: Connect the Network, Video, and Power Cables DVI input Composite Video input Connect a CAT-5e Ethernet cable from the lighting system network to the Ethernet input on • the back of the controller. Connect the source video input cable:. •... -
Page 20: Step 4: Turn On The Power
Hardware and Software Installation Step 4: Turn on the Power To power on the controller for the first time, turn on the master power switch on the back • of the device. Once powered on, you can connect to the VSM Pro User Interface from any computer •... -
Page 21: Automatic Ip Address Configuration For Windows Xp, Vista
Chapter 3 Once addressed, a computer can connect to the VSM Pro User Interface when you enter 10.1.3.101 in a web browser. If your computer is set up for dynamic addressing, but you cannot connect to the VSM Pro User Interface, the issue may be that your computer has multiple network adapters, for example a standard network adapter and a wireless adapter. -
Page 22: Automatic Ip Address Configuration For Mac Os X
Hardware and Software Installation Click the radio button to select Use the following IP Address. Enter 10.1.3.20 in the IP address field and 255.0.0.0 in the Subnet mask field, then click OK. To turn off firewall protection, click the Advanced tab from the Local Area Connection properties window. -
Page 23: Video Management Tool Software Installation
Chapter 3 Video Management Tool Software Installation VMT software comes factory loaded on the VSM Pro controller. To download software to any computer on the dedicated lighting network, connect to the VSE Pro User Interface by entering 10.1.3.101 in a web browser, then click on the software download link located on the main screen. - Page 24 Hardware and Software Installation 23 VSM Pro User Guide...
-
Page 25: Vsm Pro Basic Operation
Chapter 4 VSM Pro Basic Operation Overview VSM Pro offers two means of operation: the hardware Control Panel and the software User Interface. With the exception of the Brightness menu, all hardware-accessible menu options are available via the User Interface. This chapter describes how to properly power On and power Off hardware and access the menus in both interfaces. -
Page 26: Control Panel Menus
Control Panel Menus Message / Menu LCD Menu Description Option Startup Messages Philips The startup prompt. VSE Pro Status Running, Paused, or Displays the current operational status of the Shutting Down VSE Pro. Input Displays the selected media input type. -
Page 27: Accessing The Vsm Pro User Interface
Chapter 4 Interlacing Both Fields Configure video field interlacing to correct Even Field Only motion artifacts. Node Positions Map Positions Use the distribute nodes feature to expand a Distribute, Whole Input video map that doesn’t fill the entire display. Distribute, Aspect Ratio Distribute Fixed Size Use the distribute nodes feature to expand a... - Page 28 27 VSM Pro User Guide...
-
Page 29: Overview
Chapter 5 Working with Video Maps Overview Since the inception of intelligent color-changing LED lighting systems, most controllers have used the DMX512 protocol to control the nodes in an installation. The DMX control scheme is straightforward: each node receives three sequential channels of data, one channel each for the colors red, green, and blue. -
Page 30: Creating A Video Map
Creating a Video Map Use the following general steps to create a map in VMT (for complete details, refer to the Video Management Tool User Guide): (Optional) Upload a still image to VMT. The software displays the image on a 1024 x 768 grid. Data Enabler / PDS assignment. -
Page 31: Manually Load A Video Map Using The Vsm Pro User Interface
Chapter 5 Manually Load a Video Map using the VSM Pro User Interface Once you have created and saved a video map file using VMT, you can load the .FAP file into to the VSE Pro controller using the following steps: Start VSE Pro Access the VSM Pro User Interface from a computer connected to the dedicated lighting network (enter 10.1.3.101 in a web browser) -
Page 32: Automatically Load A Map To Vse Pro Using Vmt
Automatically Load a Map to VSE Pro using VMT You can upload a video map to VSE Pro directly from VMT: Start VSE Pro Launch VMT Open the VSE menu and confirm that the VSE Pro is connected in the Status: field Select Transfer Map to VSE Download a Video Map from VSE Pro using VMT You can also download a video map from VSE Pro back to VMT, for editing or backup:... -
Page 33: Selecting An Input
Chapter 6 Selecting an Input Overview VSM Pro accepts input from a video source, optimizes the content for use in an LED lighting environment, and then outputs the content to an LED lighting display. There are three types of inputs accepted by VSM Pro: digital video, analog video, and test patterns: Digital Inputs DVI video... -
Page 34: How An Input Is Displayed, Based On Resolution
Test patterns enable you to quickly check your installation for configuration issues. For example, you can display a fixed test pattern to identify any fixtures or nodes that are not functioning. Similarly, you can display a moving image test pattern to identify any network bandwidth issues with your installation. -
Page 35: Formatting Media Assets For Input
Chapter 6 Formatting Media Assets for Input For the best pixel reproduction, format source video inputs as follows: DVI or VGA Input 1024 x 768 resolution Analog Input 704 x 576 resolution (PAL) 704 x 480 resolution (NTSC) VSM Pro User Guide 34... -
Page 36: Selecting An Input Via The Vsm Pro User Interface
Selecting an Input via the VSM Pro User Interface Start VSE Pro Access the VSE Pro User Interface from a computer connected to the dedicated lighting network (enter 10.1.3.101 in a web browser) From the main page, select the Select Input screen Using the New Input drop-down menu, select one of the following: –... -
Page 37: Optimizing Video Output
Chapter 7 Optimizing Video Output Overview VSM Pro offers advanced features designed to enhance video output and optimize the Ethernet traffic on your lighting network: Video Output Enhancement Features Gamma Correction — Manage color intensity using a gamma correction file, or optimize •... -
Page 38: Video Output Enhancement Features
Video Output Enhancement Features Gamma Correction Gamma files are text-based files that correct color intensity disparities between video displays. For example, video displayed on an LCD computer monitor may appear different than video displayed on an LED video screen. VSM Pro accepts gamma files created by external software. Load a Gamma File From the User Interface main menu, select the Gamma Correction screen Browse for a gamma correction file (.GAM format), then select Load... - Page 39 Chapter 7 Configure a Black Level Cutoff Value Adjusting the video black level can enhance the appearance of your LED video output. A pure black tone, as it appears in the video input, may not match what appears on your LED display. For example, dark colors, which look correct on your media server, may appear lighter on the LED display.
-
Page 40: Video Smoothing
Video Smoothing Smoothing is a type of noise reduction filter designed to enhance video output. There are two levels of smoothing from which to choose: pixel smoothing and frame smoothing. Use one or both methods, as needed, until you are satisfied with the results. Pixel smoothing can correct noisy’... -
Page 41: Interlacing (Analog Inputs Only)
Chapter 7 Interlacing (Analog Inputs only) Interlacing is a method for displaying lines of pixels on a video screen. Each frame of interlaced video contains two fields: one field contains the odd lines of video, and second field contains even lines of video. The two fields, when alternately scanned on a video screen, create a seamless image. -
Page 42: Node Positions
Node Positions The source video typically has more pixels of video than there are nodes in an installation. With the distribute nodes feature you can sample a manageable portion of the source pixels to fill the display with video: You can distribute nodes, spreading them out over the incoming video source but maintaining •... -
Page 43: Display Frame
Chapter 7 Display Frame The display frame menu enables you to capture and review a single frame of video output. The image capture feature is useful for viewing distributed pixels, checking gamma correction, and identifying whether a display issue is due to an imperfect input signal or malfunctioning fixtures. Mark Node Positions in Image To fine-tune node distribution, use this setting to overlay bright green dots on top of the video image. -
Page 44: Adjusting Brightness
Adjusting Brightness The Brightness menu is only available from the hardware Control Panel. By default, the brightness level is 100%. Use the following steps to adjust brightness: Start VSE Pro Using the right menu navigation button, scroll to the Brightness menu Using the up and down navigation buttons, scroll to the desired brightness level Using the left navigation button, scroll back to the main menu Network Optimization Features... -
Page 45: Frame Rate
The frame rate menu offers two options for troubleshooting video display on a limited bandwidth network. Note: The frame rate optimization features are optional and used for troubleshooting purposes, when suggested by Philips Color Kinetics Technical Support. Use the default frame rate settings for most applications. Configure Max Frame Rate Limiting the frame rate is suitable for networks that can handle the initial data load of a video frame but struggle handling subsequent frames. -
Page 46: Additional Features
Additional Features Log File The Log File menu provides access to VSM Pro system logs. VSM Pro maintains a current version of the log and a saved version of the previous log. File Backup The File backup enables you to access the currently loaded video map and gamma file (if present) for backup purposes. -
Page 47: Test Patterns
Appendix A Test Patterns Black.png All black image Blue.png All blue image ColorWash.ogg One color, moving around the hue circle (video) Gradient LR.png White to black gradient, left to right across the image Gradient TB.png White to black gradient, top to bottom across the image Green.png All green image Horiz Fill.png... - Page 48 47 VSM Pro User Guide...
-
Page 49: Index
Index installation, hardware 16 analog media sources 18, 32 installation, software 16 interlacing 13, 26, 36, 40 IP address configuration 20 backup files 36 brightness adjustment 36, 43 key features 4 KiNET™ Ethernet 12 CAT-5e cable run 12, 15 control panel 5, 20, 24, 35 control panel menus 25 LAN, lighting network 12 correct reboot procedure 24... - Page 50 Index technical support contacts 6 test patterns 13, 32, 46 testing a video display 13 user interface 24, 26, 35 video maps 13, 28 video maps, compatibility 29 video maps, creating 29 video output 36 VMT system requirements 19 working with video sources 10, 11, 13, 16 49 VSM Pro User Guide...
Need help?
Do you have a question about the Video System Manager Pro Series and is the answer not in the manual?
Questions and answers