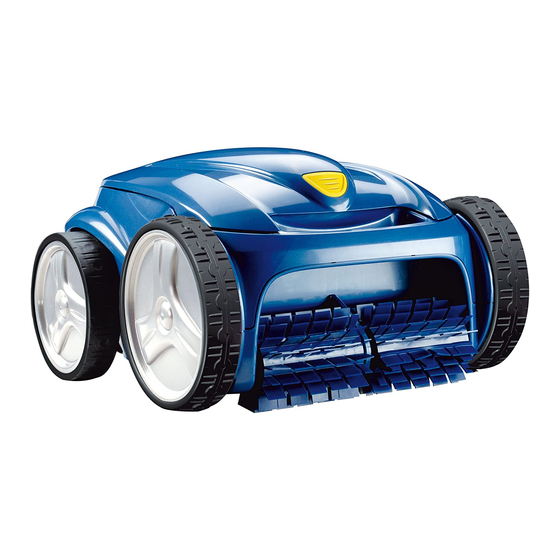
Zodiac VORTEX 3 Instructions For Installation And Use Manual
Hide thumbs
Also See for VORTEX 3:
- Instructions for installation and use manual (16 pages) ,
- Owner's manual (20 pages)
Table of Contents
Advertisement
Couv Vortex 3&4.qxd
22/09/10
18:17
Page 2
4
Notice de montage et d'utilisation
(à conserver précieusement)
Français : page
Instructions for installation and use
(to be kept in a safe place)
English : page
Instrucciones de montaje y de uso
(a guardar cuidadosamente)
Español : página
Montage- und Gebrauchsanleitung
(Bitte sicher aufbewahren)
Deutsch : seite
Istruzioni per il montaggio e per l'uso
(conservare accuratamente)
Italiano : pagina
Montage- en gebruikshandleiding
(zorgvuldig bewaren)
Nederlands : bladzijde
Instruções de montagem e de utilização
(guarde em lugar seguro)
Português : página
2
14
26
38
50
62
74
Advertisement
Table of Contents

Summary of Contents for Zodiac VORTEX 3
- Page 1 Couv Vortex 3&4.qxd 22/09/10 18:17 Page 2 Notice de montage et d’utilisation (à conserver précieusement) Français : page Instructions for installation and use (to be kept in a safe place) English : page Instrucciones de montaje y de uso (a guardar cuidadosamente) Español : página...
- Page 2 Les motifs effacés, l'usure ou l'égratignure des revêtements vinyle ne relèvent pas de la responsabilité de Zodiac et ne sont pas couverts par la garantie limitée.
-
Page 3: Table Of Contents
2-Notice CO ANG.qxd 13/09/10 9:12 Page 14 CONTENTS 1 / IMPORTANT SAFETY INSTRUCTIONS 2 / RECOMMENDATIONS 3 / USE 3.1. UNPACKING 3.2. ASSEMBLING THE CADDY 3.3. IMMERSING THE CLEANER 3.4. POWER SUPPLY 3.5. OPERATION 3.6. REMOTE CONTROLLED MODE (VORTEX 3.7. POWERED FROM THE MAINS (VORTEX 3.8. -
Page 4: Important Safety Instructions
They will be able to supply spare parts and will provide qualified After Sales service. Register your product on our website www.zodiac-poolcare.com: • You will be the first to be informed of new Zodiac products and special offers. • You can help us to constantly improve our product quality. -
Page 5: Use
2-Notice CO ANG.qxd 13/09/10 9:12 Page 16 3 / USE 3.1. UNPACKING The packaging should contain the following items: • The robot, a transport caddy, a control unit, a user manual, and a remote control unit (Vortex 4 robot only). Proceed as follows to unpack these items: •... -
Page 6: Power Supply
2-Notice CO ANG.qxd 13/09/10 9:12 Page 17 It is imperative that the cleaner sinks to the bottom and comes to rest without intervention from you. Spread the cable out over the pool. For optimum operation we recommend that you place the caddy with the control box midway down the length of the pool. - Page 7 2-Notice CO ANG.qxd 13/09/10 9:12 Page 18 VORTEX 4 ONLY: • Depending on the condition of the pool you may wish to modify the length of the cleaning cycle by pressing . You can increase this time by one hour or reduce it by 30 minutes by pressing the key a second time. Pressing a third time will reset to the initial predefined cleaning Diagram 8...
-
Page 8: Remote Controlled Mode
2-Notice CO ANG.qxd 13/09/10 9:12 Page 19 Before removing the cleaner from the pool, disconnect the power cable and disconnect the floating cable from the control box. Bring the cleaner towards you, by gently 10-1). As pulling on the cable (Diagram soon as the robot is within reach, take hold of it using the handle (10-2) and... -
Page 9: Recommendations
2-Notice CO ANG.qxd 13/09/10 9:12 Page 20 Procedure for activating this mode: 1- Connect the control unit to the main power supply. 2- If you want the robot to automatically run a bottom only cycle, press (more than 3 s). 3- If you want the robot to automatically run a bottom and walls only cycle, press (more than 3 s). -
Page 10: Cleaning And Storing The Cleaner
2-Notice CO ANG.qxd 13/09/10 9:12 Page 21 • Remove the filter from its holder (11-6). • Empty the filter and clean it using running water (Diagram 11-7). • Rinse the filter holder and remove any debris stuck inside it. • Fit the filter onto its holder and replace in the cleaner. -
Page 11: Replacing The Tires
2-Notice CO ANG.qxd 13/09/10 9:12 Page 22 6 / REPLACING THE TIRES 6.1. REMOVING THE OLD TIRES Pull on the rear side of the old tire (Diagram 15-1) to remove the tire lip from the wheel. Remove the old tire (15-2). Diagram 15 6.2. - Page 12 2-Notice CO ANG.qxd 13/09/10 9:12 Page 23 The programme I and programme II indicators flash alternately: Your cleaner has encountered a problem or a defect during its operation. • Disconnect the power supply and wait 20 seconds before reconnecting the control box. •...
-
Page 13: Compliance
Although the Vortex 3 & Vortex 4 cleaning robots have been tested in a large variety of swimming pools, Zodiac can not be held responsible in the case of a non-perfect adaptation of the robot to a particular swimming pool.


Need help?
Do you have a question about the VORTEX 3 and is the answer not in the manual?
Questions and answers
the 3 wires of plug of robot to control unit are disconnected. Do you have a drawing representing this wiring of 3 wires to the plug? I suppose that the red wire is connected to pin 1, brown cable to pin 3 and black to ground. Thanks a lot for your help.