Table of Contents
Advertisement
Quick Start Guide
GV-Fisheye IP Camera
Thank you for purchasing GV-Fisheye IP Camera. This guide is designed to
assist the new user in getting immediate results from the GV-Fisheye IP
Camera. For advanced information on how to use the GV-Fisheye IP Camera,
please refer to GV-Fisheye IP Camera User's Manual online.
© 2019 GeoVision Inc. All rights reserved.
FE-QG-Q
Advertisement
Table of Contents

Related Manuals for GeoVision GV-EFER3700-W


Summary of Contents for GeoVision GV-EFER3700-W
- Page 1 GV-Fisheye IP Camera. For advanced information on how to use the GV-Fisheye IP Camera, please refer to GV-Fisheye IP Camera User's Manual online. © 2019 GeoVision Inc. All rights reserved. FE-QG-Q...
- Page 2 GeoVision. Every effort has been made to ensure that the information in this manual is accurate. GeoVision, Inc. makes no expressed or implied warranty of any kind and assumes no responsibility for errors or omissions. No liability is assumed for incidental or consequential damages arising from the use of the information or products contained herein.
-
Page 3: Table Of Contents
Contents Caution ....................iii Creating GV-IP Camera’s Login Credentials ........iv Note for USB Storage and WiFi Adapter ..........v Note for Installing Camera Outdoor ............ vi Note for Silica Gel Bags..............vii Note for Waterproofing Failures (GV-UNFE2503) ......vii Optional Accessories ................. - Page 4 7. Restoring to Factory Default ............44 7.1 Using the Web Interface ..................44 7.2 Directly on the Camera…………………………………………………………………..44...
-
Page 5: Caution
Caution This caution is only for GV-EFER3700-W. This device complies with Part 15 of the FCC Rules. Operation is subject to the following two conditions: 1. This device may not cause harmful interference, and 2. This device must accept any interference received, including interference that may cause... -
Page 6: Creating Gv-Ip Camera's Login Credentials
Creating GV-IP Camera’s Login Credentials The default Administrator and Guest accounts are not supported by the latest firmware anymore . After purchasing a new camera or applying factory defaults, you need to set up a login username and password for that camera. 1. -
Page 7: Note For Usb Storage And Wifi Adapter
Note for USB Storage and WiFi Adapter Mind the following limitations and requirements for using USB storage and GV-WiFi Adapter 1. The USB hard drive must be of 2.5’’ or 3.5’’, version 2.0 or above. 2. The USB hard drive’s storage capacity must not exceed 2TB. 3. -
Page 8: Note For Installing Camera Outdoor
Note for Installing Camera Outdoor When installing GV-FER outdoor models, be sure that: 1. The camera is set up above the junction box to prevent water from entering the camera along the cables. 2. Any PoE, power, audio and I/O cables are waterproofed using waterproof silicon rubber or the like. -
Page 9: Note For Silica Gel Bags
4. An operating IR LED ring may reach high temperatures of up to 60°C (140°F). Disconnect the power supply and allow the IR LED ring to cool down before handling the device. IR LED Ring Note for Silica Gel Bags The silica gel bag loses it effectiveness when the dry camera is opened. -
Page 10: Optional Accessories
Optional Accessories Optional devices can expand the capabilities and versatility of your GV-Fisheye Camera. Contact your dealer for more information. Name Details GV-PA191 The GV-PA191 is a Power over Ethernet (PoE) adapter designed to provide power to the IP device through a single Power over Ethernet (PoE) Ethernet cable. -
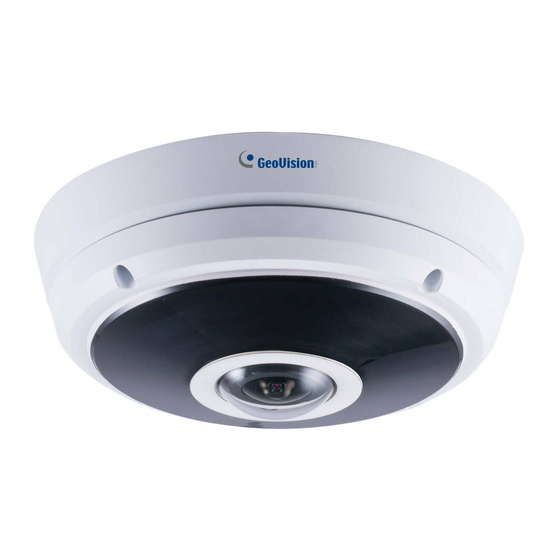
Page 11: Introduction
1. Introduction Welcome to the GV-Fisheye IP Camera Quick Start Guide. In the following sections, you will learn the basic installations and configurations of the GV-Fisheye IP Cameras listed below. For a detailed user manual, see the GV-Fisheye IP Camera User’s Manual. Note: Only GV-FER5700 / 5701 / 12203 and GV-UNFE2503 are for outdoor use. -
Page 12: Packing List
1.1 Packing List GV-FE5302 • • Fisheye Camera Support Bracket x 3 • • Camera Cover (Hard Ceiling Mount) Camera Cover (In-Ceiling Mount) • • Screw (Hard Ceiling Mount) x 3 Screw (In-Ceiling Mount) x 3 • • Torx Wrench Plastic Screw Anchor x 3 •... - Page 13 • Installation Sticker PoE Converter Device PoE Converter Device Device PoE Converter • Power Adapter • Download Guide • GV-Fisheye IP Dome Hardware Installation Guide • Warranty Card Note: The power adapter can be excluded upon request.
- Page 14 • H.265 Fisheye Camera Torx Wrench • • Screw x 2 Screw Anchor x 2 • • Silica Gel Bag x 2 Terminal Block (3-pin) • • Installation Sticker Power Adapter (only for GV-EFER3700-W) • Download Guide • Warranty Card...
- Page 15 GV-FER5700 / 5701 / 12203 • • Fisheye Camera Back Plate • • Plate Screw x 3 Plastic Screw Anchor x 3 • • Torx Wrench RJ-45 Connector • • Data Cable Terminal Block • Installation Sticker • Ruler • Silica Gel Bag x 2 •...
- Page 16 GV-UNFE2503 • GV-UNFE2503 • Installation Sticker • • Main Body Adhesive Tape Main Body Mount • M2 Screw • M3 Screw x 2 • Warning Label • Download Guide • Warranty Card...
-
Page 17: Overview
1.2 Overview GV-EFER3700 / EFER3700-W Name Function Indicates whether the camera is booted successfully or not. Status LED Flashes when the camera is loading default settings. Power LED Indicates whether the camera is powered on or off. Resets all configurations to default factory settings. See Default Button 6.3 Restoring to Factory Default Settings. - Page 18 To connect the camera to the WiFi router wirelessly, follow the steps below. 1. After powering on the GV-EFER3700-W, make sure the WiFi Power LED is lit up. 2. Keep pressing the WPS button on the camera. After 5 seconds, make sure the WiFi Status LED beside the WPS button flashes.
- Page 19 GV-FER5700 / 5701 Name Function Microphone Receives the sound from the camera. Green light indicates the camera is powered on. During the Status LED process of loading default setting, LED stays off. Resets all configurations to default factory settings. See 7. Default Button Restoring to Factory Default in the Quick Start Guide.
- Page 20 GV-FER12203 Name Function Microphone Receives the sound from the camera. Flashes when the camera is powering on and loading Status LED default settings. Data Cable Connector Waterproofs the data cable. Lens Receives image inputs. Inserts a micro SD memory card (SD / SDHC / SDXC / Micro SD Card Slot UHS-I) to store recorded data.
- Page 21 GV-UNFE2503 Name Function Lens Receives images. Microphone Receives sounds. IR LED Provides infrared illumination under low-light situations. RJ12 Cable Connects the camera lens and main body. IR LED Power Connects the IR LED power cable. Connector Camera Ring Fastens the camera to the desired surface.
-
Page 22: Installation
2. Installation The fisheye camera is designed to be mounted on the ceiling, wall or ground. There are two ways to mount the camera on the ceiling, Hard Ceiling Mount and In-Ceiling Mount. Make sure the ceiling has enough strength to support the fisheye camera. Note: For GV-FE5302 and GV-FER5700 / 5701 / 12203 only, to re-focus your camera when the live view is burry, manually adjust the focus ring with your fingers Focus Ring... -
Page 23: Hard-Ceiling Mount
2.1 Hard-Ceiling Mount In this section, we introduce two types of hard-ceiling mounts: General Hard-Ceiling Mount, GV-FER5700 / 5701 / 12203 and GV-EFER3700 / EFER3700-W. 2.1.1 General Hard-Ceiling Mount Without IR LED Ring With IR LED Ring Note: This hard-ceiling mount is not applicable to GV-FER5700 / 5701 / 12203 and GV-UNFE2503. - Page 24 4. Secure the fisheye camera with the 3 hard ceiling mount screws provided. 5. For GV-Fisheye Camera that does not come with an IR LED ring, place the camera cover (for hard ceiling mount) on top of the camera and tighten the screws with the supplied torx wrench.
- Page 25 Place the IR LED ring on top of the camera and tighten the screws with the torx wrench provided. Caution: An operating IR LED ring may reach high temperatures. Disconnect the power supply and allow the IR LED ring to cool down before handling the device.
-
Page 26: Gv-Fer5700 / 5701 / 12203
2.1.2 GV-FER5700 / 5701 / 12203 1. Paste the installation sticker to the ceiling board. 2. At the 3 dots, drill a hole slightly smaller than the plastic screw anchors provided. 3. Insert the 3 plastic screw anchors in the drilled holes. 4. - Page 27 5. Open the camera cover by unscrewing the indicated screws. 6. Connect the Ethernet cable. a. Unplug the LAN / PoE connector and prepare an Ethernet cable with only one RJ-45 connector. b. Thread the Ethernet cable through the opening into the camera and through the plug and cap as shown below.
- Page 28 e. Loosen the screw on the cable holder and thread the cable under the cable holder. 7. Connect the supplied data cable if needed. a. Unscrew the hexagon washer on the data cable opening. b. Thread the data cable through the black rubber ring, and then through the opening into the camera.
- Page 29 c. Slide the hexagon washer through the cable, and then tighten the washer. d. Plug the pins of the cable to the camera as shown below. 8. Secure the camera to the back plate by tightening the 4 screws as shown below. The cables can be threaded through the cable opening on the side or through the ceiling board.
-
Page 30: Gv-Efer3700 / Efer3700-W
2.1.3 GV-EFER3700 / EFER3700-W 1. Remove the back plate. 2. Paste the installation sticker to the ceiling board. 3. Drill holes in the indicated areas on the installation sticker. 4. Insert the 2 screw anchors in the drilled holes. 5. Secure the back plate onto the ceiling board with the 2 screws provided. If you want to thread the camera cables through the ceiling board, you can cut a cable opening as shown below. -
Page 31: Waterproofing The Cable
6. Open the camera cover by unscrewing the indicated screws. 7. Secure the camera to the back plate by tightening the 4 screws as shown below. The cables can be threaded through the cable opening on the side or through the ceiling board. - Page 32 2. Insert the cable into the RJ-45 plug. 3. Assemble the waterproof rubber set.
-
Page 33: In-Ceiling Mount
2.2 In-Ceiling Mount In this section, we introduce two types of in-ceiling mounts: General In-Ceiling Mount and GV-UNFE2503. 2.2.1 General In-Ceiling Mount In-Ceiling Mount allows the GV-Fisheye IP Camera to be mounted into the ceiling, revealing a small portion of the camera. In-Ceiling Mount requires the ceiling board to be between 0.5 – 3.0 cm (0.2 –... - Page 34 2. Align the 3 support brackets with the holes on the back of the camera and secure using the in-ceiling mount screws provided. 3. Place the fisheye camera into the ceiling opening. 4. On the back side, make sure the black plastic clips are slightly above the ceiling board and pointing outward.
- Page 35 5. From the front side of the camera, tighten the screws. 6. Connect the camera with power, network and other wires. For details, see 3. Connecting the Camera. 7. Place the cover on top of the camera and tighten the 3 screws or just put on the in-ceiling cover if it does not contain screws.
-
Page 36: Gv-Unfe2503
2.2.2 GV-UNFE2503 The GV-UNFE2503 is designed for outdoors. You can install the camera lens behind a ceiling. Note: It is recommended to have the camera lens installed behind a ceiling board with the thickness between 3 mm to 30 mm. 1. - Page 37 3. Using the 2 holes as the starting position, drill or cut out the shape of the template sticker with the tool of your choice. GV-UNFE2503 4. Remove the IR LED power cable from the camera lens by rotating the silver ring. Then remove the camera ring from the camera lens by rotating the ring.
- Page 38 6. Insert the camera lens into the wall or ceiling. 7. Assemble the camera ring to the camera lens by rotating the ring. Adjust the position of the lens before fully securing the ring. Fasten the Camera Ring Adjust the lens Note: The side of the camera ring with the protruding notches must face the wall or ceiling.
- Page 39 ⚫ Insert and tighten the two supplied M3 screws. ⚫ Paste the main body adhesive tape on the bottom side of the main body mount. 10. Align the main body with the mount as shown below and secure with the supplied M2 screw.
-
Page 40: Wall Mount And Ground Mount
2.3 Wall Mount and Ground Mount To mount the camera on a wall, follow the instructions in 2.1 Hard Ceiling Mount. For ground mount, simply place the camera on a flat surface such as a conference table. Hint: Mount the fisheye camera in the middle of the wall to have an excellent overview. Or ensure the camera is focused on the most important areas of the room as directly as possible to have the desired detailed recognition. -
Page 41: Connecting The Camera
3. Connecting the Camera The GV-Fisheye Camera comes with a data cable that allows you to connect to the power adapter, WiFi adapter or USB hard drive, microphone, speaker, and/or any I/O devices. GV-FER5700 / 5701 / 12203 Audio In Audio Out DC 12V / AC 24V Digital I/O... - Page 42 Connecting to Power There are two ways to power on the camera: ⚫ Use a Power over Ethernet (PoE) adapter to connect the camera to the network, and the power will be provided at the same time. ⚫ Plug the power adapter to the terminal block on the data cable. Connecting to I/O Devices The camera supports one digital input and one digital output of dry contact.
-
Page 43: Accessing The Gv-Fisheye Camera
4. Accessing the GV-Fisheye Camera 4.1 Web Browser Once installed, your GV-Fisheye IP Camera is accessible over the network. Make sure your PC has good network connection. The supported Web browsers are Microsoft Internet Explorer 7.x or later, Firefox, Google Chrome, Safari. Note: If you are using Microsoft Internet Explorer 8.0, additional settings are required. -
Page 44: Looking Up The Dynamic Ip Address And Logging In
4.2 Looking Up the Dynamic IP Address and Logging In By default, when GV-Fisheye Camera is connected to LAN with a DHCP server, it is automatically assigned with a dynamic IP address. Follow the steps below to look up this IP address. -
Page 45: Configuring The Ip Address
To configure the camera’s default IP address or to change the IP address from dynamic to static, follow the steps below. Note: If your camera is assigned with the default IP address 192.168.0.10, it is advisable to change this IP address to avoid IP conflict with other GeoVision IP devices. - Page 46 1. In the left menu, select Network and then LAN to begin the network settings. 2. Select Static IP address. Type IP Address, Subnet Mask, Router/Gateway, Primary DNS and Secondary DNS in the Configure connection parameters section. 3. Click Apply. The camera is now accessible by entering the assigned IP address on the Web browser.
-
Page 47: Configuring The Wireless Connection
1. To set up the wireless LAN for the first time, power on the camera, connect a standard network cable and insert a WiFi adapter. Note: GV-EFER3700-W has a built-in WiFi antenna and supports the WPS function. If your router doesn’t support WPS, follow the instructions below to set up the wireless connection. - Page 48 Note: 1. Your encryption settings must match those used by the Access Points or wireless stations with which you want to associate. 2. When Ad Hoc is used, only WEP encryption is supported. 3. When you lose the wireless access, you can still access the unit by connecting it to a LAN and using the GV IP Device Utility to search for the device.
-
Page 49: The Web Interface
5. The Web Interface No. Name Function Play Plays live video. Stop Stops playing video. Microphone Listens to the audio around the camera. Speaker Talks to the surveillance area from the local computer. Snapshot Takes a snapshot of live video. File Save Records live video to the local computer. -
Page 50: Fisheye View
5.1 Fisheye View To enable the fisheye options, right-click the live view image and select Geo Fisheye. Right-click the image again and select Fisheye Option to see the following options. ⚫ Image Alignment: By default, the image should be properly aligned already. If not, see 3.2.2 Fisheye View in GV-Fisheye Camera User’s Manual to align the image ⚫... - Page 51 ⚫ Camera Position: Select Ceiling, Wall or Ground according to where the camera is mounted. ⚫ Adjust AutoPan Speed At Top-Left Channel: Select low, medium, or high speed to enable Auto Pan for one PTZ view at the rotation speed of your choice. This option applies to Quad view, 360 degree and Single view.
-
Page 52: Upgrading System Firmware
6. Upgrading System Firmware GeoVision periodically releases updated firmware on the website. The new firmware can be simply loaded into the GV-IPCAM by using the Web interface or IP Device Utility. Before you Start ⚫ If you use the IP Device Utility for firmware upgrade, the computer used to upgrade firmware must be under the same network as the camera. - Page 53 7. Restoring to Factory Default If for any reason the camera is not responding correctly, you can reset it to its factory default setting by using the camera’s Web interface or by operating directly on the camera. 7.1 Using the Web Interface 1.
- Page 54 GV-EFER3700 / EFER3700-W System Status LED Default Button GV-FER5700 / 5701 GV-FER12203 Default button System Status LED...
Need help?
Do you have a question about the GV-EFER3700-W and is the answer not in the manual?
Questions and answers