Table of Contents
Advertisement
Advertisement
Table of Contents

Related Manuals for Zimmer Biomet Persona


Summary of Contents for Zimmer Biomet Persona
- Page 1 Persona ® The Personalized Knee Surgical Technique...
-
Page 2: Table Of Contents
Table of Contents Introduction ......................2 Constraint Options Preoperative Planning Surgical Approach Patient Preparation Magnet Usage Symbols Screw/Pin Information Resect Distal Femur ....................6 Assemble Adjustable Distal Resection Instrumentation Establish Femoral Alignment Resect Distal Femur Optional Instrument Optional Cutting Technique Resect Proximal Tibia ..................... - Page 3 Table of Contents (cont.) Tibial Articular Surface Provisional (TASP) Assembly ..........39 Implant Components ....................43 Tibial Plate Femoral Component Bearing Patellar Component All-Polyethylene Patella Close Incision ......................46 Surgeon Notes and Tips Appendix A ......................47 2 Degrees Valgus Recut Guide 2 Degrees Varus Recut Guide Appendix B ......................
-
Page 4: Introduction
MC or ultracongruent fixation, and adequate soft tissue balancing and (UC) bearing provisionals and components. stability. Persona The Personalized Knee is designed to Also, posterior stabilized (PS) femoral provisionals and help the surgeon accomplish these goals by combining... -
Page 5: Preoperative Planning
Persona The Personalized Knee Surgical Technique Introduction (cont.) Patient Preparation Note: The MC components can be used with or To prepare the limb for total knee arthroplasty, without the PCL present. The UC, PS, and CPS adequate muscle relaxation is required. The... -
Page 6: Magnet Usage
Persona The Personalized Knee Surgical Technique Introduction (cont.) Magnet Usage Warning: Some instruments in the Persona System contain magnets. All Persona Magnetic Instruments should be kept at a safe distance from a patient’s active implantable medical device(s) (i.e. pacemaker). These types of devices may be adversely affected by magnets. -
Page 7: Screw/Pin Information
Screw/Pin Information The chart below contains relevant information on various 3.2 mm screws/pins that are compatible with the Persona System. If these screws/pins are used during the procedure for instrument fixation, they should be removed prior to closure as they are NOT implantable. -
Page 8: Resect Distal Femur
Persona The Personalized Knee Surgical Technique 1. Pull Caution Marking 2. Insert Figure 3 Figure 1 Rotate Dial 2. Rotate 1. Press Shown at '0' setting Figure 2 Figure 4 Resect Distal Femur Assemble Adjustable Distal Resection Instrumentation Insert the IM rod into the adjustable valgus guide. -
Page 9: Resect Distal Femur
Persona The Personalized Knee Surgical Technique 2. Insert 1. Unlock Figure 6a Lock Figure 5 Figure 6b Resect Distal Femur (cont.) Assemble Adjustable Distal Resection Instrumentation (cont.) Insert the adjustable resection tower into the Note: The ‘0’ setting can be set to indicate a 1 mm through 9 mm resection depth, in 1 mm increments, adjustable valgus guide. - Page 10 Persona The Personalized Knee Surgical Technique Figure 7 Figure 8a Figure 8b Resect Distal Femur (cont.) Establish Femoral Alignment Drill the IM canal using the 8 mm IM step drill Set the orientation of the adjustable valgus guide by (Figure 7). Suction the canal to remove medullary placing it against the most prominent distal condyle contents.
- Page 11 Persona The Personalized Knee Surgical Technique Figure 9 Rotate Dial "Click" Figure 10 Figure 11 Resect Distal Femur (cont.) Establish Femoral Alignment (cont.) For additional fixation, or in lieu of using the lock knob, Technique Tip: If unsure of the adjustable...
-
Page 12: Optional Instrument
Persona The Personalized Knee Surgical Technique 10 | 1. Unlock 2. Pull Figure 12 Figure 13 Resect Distal Femur (cont.) Optional Instrument Resect Distal Femur (cont.) A fixed distal resection system exists for users who, for Insert a trocar tipped pin through each of the standard all patients, maintain a consistent valgus angle for their pin holes marked ‘0’... -
Page 13: Optional Cutting Technique
Persona The Personalized Knee Surgical Technique 11 | Figure 15a Figure 14 Figure 15b Resect Distal Femur (cont.) Optional Cutting Technique Optional Instrument (cont.) If desired, the bone resection can be made from the Insert the resection guide into the cut slot of the cut top (most distal) surface of the cut guide (Figure 15a). -
Page 14: Resect Proximal Tibia
Persona The Personalized Knee Surgical Technique 12 | 2. Translate 3. Push Down 5. Insert 1. Lift 4. Push 6. Release 2. Insert Rod 1. Push 3. Release Figure 16 Figure 17 Resect Proximal Tibia Assemble Extramedullary (EM) Alignment Guide... - Page 15 Persona The Personalized Knee Surgical Technique 13 | Clockwise Height Adjustment Shorten Lengthen Counter Varus/Valgus Adjustment Clockwise Slope Adjustment Figure 18 Figure 19 Resect Proximal Tibia (cont.) Assemble Extramedullary (EM) Alignment Guide (cont.) The buttons shown in Figure 18 are used to adjust...
-
Page 16: Position Alignment Guide
Persona The Personalized Knee Surgical Technique 14 | Figure 20a 5 mm AP Axis Figure 20b Figure 21a Figure 21b Resect Proximal Tibia (cont.) Position Alignment Guide Note: This pin will need to be removed to allow the To improve the exposure of the tibial surface, retract "+2"... -
Page 17: Set Resection Level
Persona The Personalized Knee Surgical Technique 15 | 2. Insert 1. Push 3. Release Figure 22 Figure 23 Resect Proximal Tibia (cont.) Set Resection Level Position Alignment Guide (cont.) Each tip of the stylus indicates a different resection Adjust the EM alignment guide in the sagittal plane level. - Page 18 Persona Tibial Stylus - 2/10 mm Persona Drop Rod Adapter 75 mm x 3.2 mm Trocar Resection Guide 42-5399-005-00 42-5399-006-00 Tipped Drill Pin (2.5 mm hex) 00-5977-084-00 00-5901-020-00 Pin/Screw Inserter Alignment Rod with Coupler Persona Tibial Cut Guide Right - 7° 00-5901-021-00 00-5785-080-00 42-5399-052-07...
-
Page 19: Optional Technique
(Figures 30a and 30b). If a pin or screw was inserted into the 12 mm vertical slot, then a pin through the oblique hole may not be needed for secure fixation. Persona Tibial Cut Guide Right - 7° 75 mm x 3.2 mm Trocar Tipped Pin/Screw Inserter Multi Pin Puller Drill Pin (2.5 mm hex) - Page 20 Persona The Personalized Knee Surgical Technique 18 | Figure 33 Figure 34 Figure 35 Resect Proximal Tibia (cont.) Optional Technique (cont.) Technique Tip: The patellar tendon may be located Remove oblique pins and the tibial cut guide. behind the lateral side of the cut guide due to the Technique Tip: If unable to complete the resection patellar tendon relief cutout on the cut guide.
-
Page 21: Size Femur And Establish External Rotation
Persona The Personalized Knee Surgical Technique 19 | Side Designation Figure 37 Figure 38 Figure 36 Size Femur and Establish External Rotation If the 3 degrees external rotation holes are to be used Rotate the feet of the anterior referencing femoral to set external rotation, the etched line on the sizer sizing guide so the appropriate “Left”... - Page 22 Persona The Personalized Knee Surgical Technique 20 | Figure 39a Figure 39b Size Femur and Establish External Rotation (cont.) Technique Tip: Lock boom after positioning to Slightly extend the knee and retract soft tissues to expose the anterior femoral cortex. Clear any soft reduce the toggle of the boom tip.
- Page 23 Persona The Personalized Knee Surgical Technique 21 | Figure 40 Figure 41 Size Femur and Establish External Rotation (cont.) Technique Tip: The multi pin puller cannot be used After the sizer is appropriately positioned on the femur, read the femoral size from the engraved lines on the to extract the screw(s).
-
Page 24: Complete Femoral A/P And Chamfer Resections
Persona The Personalized Knee Surgical Technique 22 | Figure 44b Figure 42 Figure 44a 3. Extract 2. Rotate 1. Insert Figure 45b Figure 43 Figure 45a Complete Femoral A/P and Chamfer Resections Technique Tip: If the 2 mm shift holes are to be... - Page 25 Persona The Personalized Knee Surgical Technique 23 | 3. Extract Figure 46 2. Rotate Figure 48b 1. Insert Figure 47 Figure 48a Complete Femoral A/P and Chamfer Resections (cont.) Optional Instrument (cont.) Use the slaphammer to remove the cut guide from the After final placement of the desired anterior femur.
-
Page 26: Establish Size And Rotation Of Tibia
Figure 50 Establish Size and Rotation of Tibia When the desired position has been attained, secure Use only Persona tibial sizing, broaching, and provisional the cemented tibial sizing plate by placing 25 mm x 3.2 instrumentation for preparation of Persona Implants. -
Page 27: Drill And Broach Tibia
Persona Cemented Tibial Drill, 15.7 mm Persona Cemented Tibial Drill Guide - 15.7 mm 42-5399-018-10 42-5399-020-00... -
Page 28: Optional Technique
Persona The Personalized Knee Surgical Technique 26 | Depress Slide Figure 52 Drill Stop Window Figure 53 Figure 54 Drill and Broach Tibia (cont.) Optional Technique Technique Tip: Verify that the cemented tibial drill If desired, the cemented tibial drill stop collar, may be used to aid in drilling to the correct depth. - Page 29 Persona The Personalized Knee Surgical Technique 27 | Insert Figure 55 Figure 56 Figure 57 Drill and Broach Tibia (cont.) Optional Technique (cont.) Technique Tip: Assure that no metallic debris is Insert the correct-sized cemented tibial broach into the cemented tibial broach inserter/extractor handle present on the magnetic feet of the cemented (Figure 55).
-
Page 30: Prepare The Patella
The geometry, depth, and the patella. length of the patella groove on the Persona Femoral Refer to the sizing chart for patella dimensions Component accommodates the unresurfaced patella. -
Page 31: Finish The Patella
Persona The Personalized Knee Surgical Technique 29 | 2. Depress 1. Squeeze Figure 62 Figure 63 Figure 64 Resect the Patella (cont.) Finish the Patella Apply the patella osteotomy guide medially and Using the NexGen ® Patella Sizing Template, select... - Page 32 Persona The Personalized Knee Surgical Technique 30 | Figure 65 Figure 67 2. Depress 1. Squeeze Figure 66 Figure 68 Finish the Patella (cont.) Use the NexGen 6.4 mm Patella/Femoral Drill to drill Insert the appropriately-sized NexGen Patella Peg Drill...
-
Page 33: Cr Femoral Finishing And Trialing
CR outer dimension representing the outer profile of the standard femoral implant (Figure 69b). femoral provisional (Figure 70). Persona Femoral Inserter/Extractor Persona Femoral CR Impactor Pad Persona CR Femoral Provisional Size 7 Right 42-5099-092-00 42-5099-094-00 42-5027-062-02... - Page 34 Persona The Personalized Knee Surgical Technique 32 | Pinch to release Figure 71 Figure 73 2. Rotate 3. Extract 1. Insert Figure 72 Figure 74 CR Femoral Finishing and Trialing (cont.) Place the correct CR femoral provisional onto the femur If the tibia has been prepared, a trial range of motion in the desired medial/lateral position.
-
Page 35: Ps Femoral Finishing And Ps Box Preparation
PS impactor pad, aligning the "PS" on the femoral PS impactor pad with the arrow on the femoral inserter/extractor (Figure 75a). Persona Femoral Inserter/Extractor Persona Femoral PS Impactor Pad Persona PS-CPS Femoral Provisional Size 7 Right 42-5099-092-00 42-5099-093-00 42-5047-062-02... - Page 36 Persona The Personalized Knee Surgical Technique 34 | Figure 78a Figure 76 Pinch to release Figure 77 Figure 78b PS Femoral Finishing and PS Box Preparation (cont.) Alternatively, if the PS femoral provisional is placed Technique Tip: Do not impact the anterior flange of the PS femoral provisional.
- Page 37 Persona The Personalized Knee Surgical Technique 35 | Figure 79a Figure 79b PS Femoral Finishing and PS Box Preparation (cont.) After completing the anterior-to-posterior box cut, Technique Tip: Do not impact the PS box cut guide into the provisional. make the vertical wall cuts for the PS notch cuts by...
- Page 38 Persona The Personalized Knee Surgical Technique 36 | Figure 80 PS Femoral Finishing and PS Box Preparation (cont.) Technique Tip: Keep blades against the support Technique Tip: If the appropriately sized PS box features of the cut guide and femoral provisional to provisionals does not easily seat into the PS femoral ensure adequate bone resection.
- Page 39 Persona The Personalized Knee Surgical Technique 37 | 1. Remove 3. Rotate 4. Extract 2. Insert Figure 81 Figure 82 PS Femoral Finishing and PS Box Preparation (cont.) Technique Tip: Ensure the shoulder of drill is Technique Tip: Ensure oval hole of the femoral...
-
Page 40: Perform Trial Reduction
Persona The Personalized Knee Surgical Technique 38 | Figure 83a Figure 83b Perform Trial Reduction Remove any posterior osteophytes or overhanging Remove the femoral inserter/exactor from the bone on the femur to ensure maximum knee flexion. provisional. With the knee in extension, ensure that the... -
Page 41: Tibial Articular Surface Provisional (Tasp) Assembly
Persona The Personalized Knee Surgical Technique 39 | Pin Slots Pins Figure 84a Figure 84b Tibial Articular Surface Provisional (TASP) Assembly The TASP consists of three parts: a TASP bottom, a Technique Tip: As shown on the anterior face of the TASP shim, and a TASP top. - Page 42 Persona The Personalized Knee Surgical Technique 40 | > 30 degrees 1. Depress 2. Insert 3. Release Figure 85a Figure 86a Figure 87a 5-15 degrees Figure 85b Figure 86b Figure 87b Tibial Articular Surface Provisional (TASP) Assembly (cont.) The shims are incremented by 1 mm to create TASP...
- Page 43 Persona The Personalized Knee Surgical Technique 41 | Lift (>30 degrees) then rotate. 10 mm 13 mm 11 mm 14 mm 12 mm TASP Shim/Construct Thickness Anterior divots in the shim correspond to the overall construct thickness as shown in the image above.
- Page 44 Persona The Personalized Knee Surgical Technique 42 | Consider resecting the PCL if the femur appears to book open. Figure 89 Tibial Articular Surface Provisional (TASP) Assembly (cont.) Check ligament stability in extension and in 30 The constrained posterior stabilized (CPS) TASP degrees, 60 degrees, and 90 degrees of flexion.
-
Page 45: Implant Components
Persona The Personalized Knee Surgical Technique 43 | 1. Unlock Collar 3. Release 2. Insert 4. Rotate Figure 90 Figure 91 Implant Components Tibial Plate Technique Tip: Prior to cementing implants Sublux the tibia anteriorly to allow adequate clearance remove provisionals and use pulse lavage to remove to insert the tibial implant into the prepared bone. -
Page 46: Femoral Component
Persona The Personalized Knee Surgical Technique 44 | Figure 94 1. Unlock Collar 3. Release Figure 92a 2. Insert 4. Rotate Figure 92b Figure 93 Figure 95 Implant Components (cont.) Bearing Femoral Component The articular surface inserter applies both downward With the knee in 70 degrees –... - Page 47 Persona The Personalized Knee Surgical Technique 45 | Figure 96a Figure 96b Figure 97 Implant Components (cont.) Bearing (cont.) Engage the hook on the articular surface inserter with Technique Tip: Only in vivo assembly of the the mating slot in the front of the base plate and close ultracongruent bearing is recommended because the lever with your index finger.
-
Page 48: Patellar Component
Persona The Personalized Knee Surgical Technique 46 | Figure 98 Implant Components (cont.) Close Incision Patellar Component Freely irrigate the wound with the solution of choice to Please refer to the appropriate surgical technique assure unwanted debris is removed from the joint space if other patella instrumentation is to be used to prior to closure. -
Page 49: Degrees Valgus Recut Guide
Figure 99 Figure 100 2 Degrees Valgus Recut Guide Insert the Persona Drop Rod Adapter into the tibial cut Technique Tip: The fixation holes for the valgus guide. Place the alignment rod with coupler into the recut guide are at oblique angles to improve fixation drop rod adaptor and assess the cut (Figure 99). -
Page 50: Degrees Varus Recut Guide
00-5901-075-00 00-5901-076-00 Technique Tip: The fixation holes for the varus Insert the Persona Drop Rod Adapter into the tibial cut recut guide are at oblique angles to improve fixation guide. Place the alignment rod with coupler into the of the guide. -
Page 51: Spacer Block Technique
3-12 and 8 mm for sizes 1-2. The posterior thickness between the resected surfaces of the femur and tibia of the Persona CR Component is 9 mm for sizes (Figure 103). If necessary, insert progressively thicker 3-12 and 8 mm for sizes 1-2. The posterior thickness... - Page 52 Persona The Personalized Knee Surgical Technique 50 | Appendix B (cont.) Extension Flexion Tight Loose Tight Loose Figure 105 Spacer Block Technique (cont.) Balance Flexion and Extension Gaps 2. If the knee is tight in flexion but acceptable in Technique Tip: Prior to addressing flexion/ extension, three options exist.
- Page 53 Persona The Personalized Knee Surgical Technique 51 | Appendix B (cont.) Extension Flexion Tight Loose Tight Loose Figure 106 Spacer Block Technique (cont.) Balance Flexion and Extension Gaps (cont.) 8. If the joint is loose in flexion and acceptable in 5.
-
Page 54: Appendix C: Optional Instruments
Persona The Personalized Knee Surgical Technique 52 | Appendix C: Optional Instruments Figure 108 1. Pull 2. Insert Figure 107 Figure 109 Resect Distal Femur – Fixed Distal Resection Instrument Assemble Fixed Distal Resection Instrumentation Insert the fixed resection tower into the face of the... - Page 55 Persona The Personalized Knee Surgical Technique 53 | Appendix C: Optional Instruments (cont.) Lock 2. Insert 1. Unlock Figure 110a Figure 110b Resect Distal Femur – Fixed Distal Resection Instrument (cont.) Assemble Fixed Distal Resection Instrumentation (cont.) Rotate the lock lever on the fixed resection tower to Flip the lock lever to the locked, or “vertical”, position...
- Page 56 Persona The Personalized Knee Surgical Technique 54 | Appendix C: Optional Instruments (cont.) Figure 111 Figure 112 Figure 113 Resect Distal Femur – Fixed Distal Resection Instrument (cont.) Establish Femoral Alignment Drill the IM canal using the 8 mm IM step drill Note: Setting rotation of the fixed valgus guide (Figure 111).
- Page 57 Persona The Personalized Knee Surgical Technique 55 | Appendix C: Optional Instruments (cont.) 1. Unlock 2. Pull Figure 114 Figure 115 Figure 116 Resect Distal Femur – Fixed Distal Resection Instrument (cont.) Resect Distal Femur Note: If the captured pin was deployed it may be...
-
Page 58: Size Femur - Anterior Referencing Sizer
Persona The Personalized Knee Surgical Technique 56 | Appendix C: Optional Instruments (cont.) Side Designation Figure 117 Figure 118 Size Femur – Anterior Referencing Sizer Size Femur and Establish External Rotation Note: Sizer geometry is rotated 3 degrees to align Rotate the feet of the anterior referencing sizer so the to the A/P and epicondylar axes of the femur. - Page 59 Persona The Personalized Knee Surgical Technique 57 | Appendix C: Optional Instruments (cont.) Figure 119 Size Femur – Anterior Referencing Sizer (cont.) Size Femur and Establish External Rotation (cont.) Slightly extend the knee and retract soft tissues to If the 5 degrees external rotation holes are to be expose the anterior femoral cortex.
- Page 60 Persona The Personalized Knee Surgical Technique 58 | Appendix C: Optional Instruments (cont.) Figure 121 Figure 120 Figure 122 Size Femur – Anterior Referencing Sizer (cont.) Size Femur and Establish External Rotation (cont.) Technique Tip: Positioning the anterior referencing A 3.2 mm pin may be placed in the first drilled hole to maintain an “index”...
-
Page 61: Shift Block
Figure 123 Figure 125 Shift Block Technique Tip: The Persona Shift Block is only to Prior to performing the four facet cuts with the 4-in-1 be used with the Persona 4-in-1 Cut Guides. cut guide, determine whether the position of the block anterior to posterior and external rotation is sufficient. - Page 62 Otherwise, place the 4-in-1 cut guide in the newly drilled holes (Figure 127) and perform bone resections. Persona Shift Block 3.2 mm Drill Persona Anterior Referencing 4-in-1 Cut Guide - Size 7 42-5099-085-10 00-5120-085-00 42-5099-085-62...
-
Page 63: Resect Distal Femur - Pri Distal Resection Instrument
Persona The Personalized Knee Surgical Technique 61 | Appendix C: Optional Instruments (cont.) Insert Figure 129 Unlock Figure 128 Figure 130 Resect Distal Femur – PRI Distal Resection Instrument Please refer to the appropriate surgical technique Insert the femoral IM rod into the modular T-handle... - Page 64 Persona The Personalized Knee Surgical Technique 62 | Appendix C: Optional Instruments (cont.) Optional Pinning Holes 2. Rotate 1. Retract 3. Release Retraction 5 degrees Right Valgus Setting Figure 131 Figure 133 Figure 132 Resect Distal Femur – PRI Distal Resection Instrument (cont.)
- Page 65 Persona The Personalized Knee Surgical Technique 63 | Appendix C: Optional Instruments (cont.) Oblique Hole Adjustment Figure 136a Dial Figure 134 Figure 136b Figure 135 Resect Distal Femur – PRI Distal Resection Instrument (cont.) Resect Distal Femur Verify the desired resection setting on the distal...
- Page 66 Persona The Personalized Knee Surgical Technique 64 | Appendix C: Optional Instruments (cont.) Squeeze to Unlock Remove Figure 137 Figure 138 Resect Distal Femur – PRI Distal Resection Instrument (cont.) Resect Distal Femur (cont.) Technique Tip: If more fixation is desired, insert the distal femoral resection guide at the same time.
- Page 67 Persona The Personalized Knee Surgical Technique 65 | Appendix C: Optional Instruments (cont.) Figure 139 Figure 140 Figure 141 Figure 142 Figure 143 Implant Components Attached Tibial Plate Inserter To release the inserter from the implant, depress Depress the lever of the tibial inserter to extend the metal distal tab (Figure 139).
- Page 68 Persona The Personalized Knee Surgical Technique 66 | Appendix D: Compatibility Charts Persona CR Femoral/Persona CR Bearing and Tibial Compatibility Femoral Size Tibial TASP Top & Size Bottom Color Orange 1-2 / A B 3-6 / A B Yellow 1-2 / C D...
- Page 69 Persona The Personalized Knee Surgical Technique 67 | Appendix D: Compatibility Charts (cont.) Persona PS Femoral/Persona PS Bearing and Tibial Compatibility Femoral Size Tibial TASP Top & Size Bottom Color Orange 1-2 / A B 3-5 / A B Yellow...
- Page 70 All compatibility above applies only to the following NexGen CR/CR-Flex Bearings: 90-5970-XXX-XX, 00/90-5952-XXXX-XX *The A-E Micro / 5-6 NexGen CR/CR-Flex Bearing is only available in Japan, and only in the 00-5952-041-XX family. This information is also available in the Persona Femoral Component package insert. Persona CR Femur Used On NexGen CR Monoblock Tibia (Trabecular Metal™...
- Page 71 All compatibility above applies only to the following NexGen LPS-Flex Bearings: 00-5960-XXX-XX, 00-5962-XXX-XX, 00-5964-XXX-XX *The E / 1-2 & G / 3-4 bearings are only available in the 00-5962-XXX-XX family. This information is also available in the Persona Femoral Component package insert.
- Page 72 EF / 6 GH / 6 EF / 7 GH / 7 GH / 8 All compatibility above applies only to the following NexGen Trabecular Metal Monoblocks: 00-5886-05X-XX, 00-5886-06X-XX, 00-5886-07X-XX This information is also available in the Persona Femoral Component package insert.
- Page 73 Persona The Personalized Knee Surgical Technique 71 | Notes...
- Page 74 Persona The Personalized Knee Surgical Technique 72 | Notes...
- Page 76 All content herein is protected by copyright, trademarks and other intellectual property rights, as applicable, owned by or licensed to Zimmer Biomet or its affiliates unless otherwise indicated, and must not be redistributed, duplicated or disclosed, in whole or in part, without the express written consent of Zimmer Biomet.
Need help?
Do you have a question about the Persona and is the answer not in the manual?
Questions and answers
what types of metal/components were used in 2017 zimmer persona knee replacement
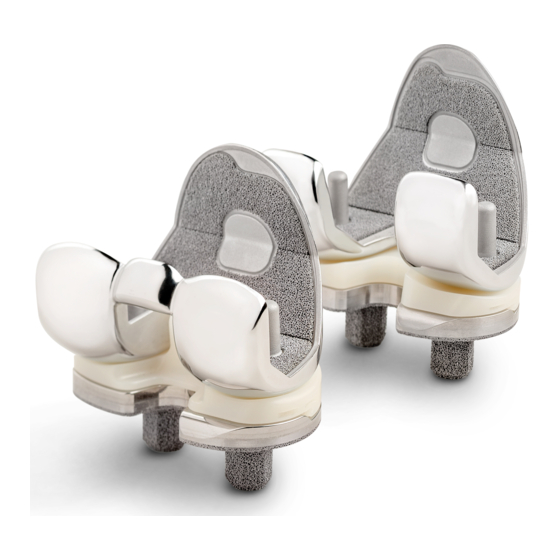
The 2017 Zimmer Biomet Persona knee replacement used a porous metal material for the tibial and femoral metal components. This porous metal was used instead of cement for bone fixation, providing excellent initial fit and the potential for long-term biological fixation. Additionally, the plastic insert in the knee replacement was infused with vitamin E for ultra-low wear and enhanced strength.
This answer is automatically generated
What metals are in this item that's used in total knee replacements: KNEE FEM CEM CR STD SZ 4 LT ZIMMER 65782534