Blodgett MARK V-100 Installation Operation & Maintenance
Hide thumbs
Also See for MARK V-100:
- Installation operation & maintenance (49 pages) ,
- Installation manual (18 pages) ,
- Installation and operation manual (72 pages)
Table of Contents
Advertisement
Quick Links
Advertisement
Table of Contents

Related Manuals for Blodgett MARK V-100


Summary of Contents for Blodgett MARK V-100
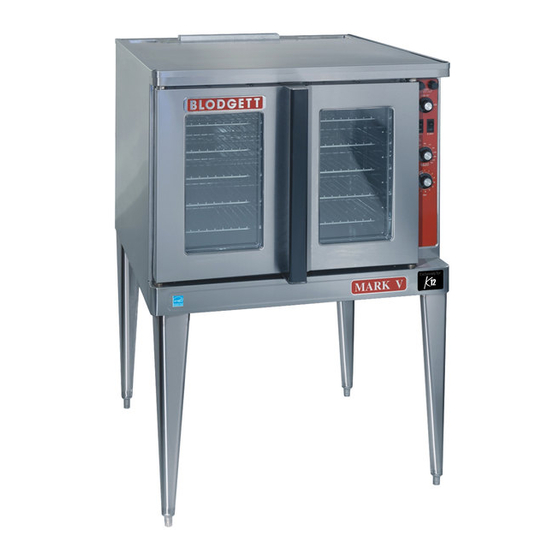
- Page 1 MARK V-100 AND MARK V-200 CONVECTION OVEN INSTALLATION - OPERATION - MAINTENANCE (Formerly MARK V) BLODGETT OVEN COMPANY www.blodgett.com 42 Allen Martin Drive, Essex Junction, Vermont 05452 USA Telephone: (802) 658-6600 Fax: (802)864-0183 PN 17561 Rev AC (9/19) © 2019 - G.S. Blodgett Corporation...
- Page 2 Your Service Agency’s Address: Model Serial number Oven installed by Installation checked by...
-
Page 3: Table Of Contents
TABLE OF CONTENTS IMPORTANT WARNING: Improper installa- INSTALLATION tion, adjustment, alternation, Oven Description and Specifications ........2 service or maintenance can cause property damage, in- Delivery and Location . -
Page 4: Installation
Heat normally lost, is recirculated within the cooking chamber before being vented from the oven: resulting in substantial reductions in energy consumption and en- hanced oven performance. Air Flow Pattern for Blodgett Electric Convection Ovens Figure 1 ELECTRICAL RATINGS- MARK V-100 AND MARK V-200 MAX LOAD (AMPS... -
Page 5: Delivery And Location
DELIVERY AND INSPECTION It is essential that an adequate air supply to the oven be maintained to provide a sufficient flow of combustion and All Blodgett ovens are shipped in containers to prevent ventilation air. damage. Upon delivery of your new oven: •... -
Page 6: Oven Assembly
Installation Oven Assembly NSF BOLTS These bolts are required by NSF to block any exposed 1. Locate the 5/16” bolts that were shipped with the hole on the back of an oven. This includes: oven. • any unit, single or stacked, without a back panel. 2. -
Page 7: Leg Attachment
Installation Oven Assembly LEG ATTACHMENT CASTER ASSEMBLY 1. Push the oven onto a lift with the bottom of the oven NOTE: Install the locking casters on the front of the down. oven. Install the non-locking casters on the back of the oven. 2. -
Page 8: Double Section Assembly
Installation Oven Assembly DOUBLE SECTION ASSEMBLY 3. Attach the stacking brackets using the remaining 5/16” bolts shipped with the ovens. NOTE: Old style ovens refer to units with painted ex- posed rear angle. New style ovens refer to units 4. Drill a clearance hole for a 5/16” bolt in the angle iron with rear angle iron enclosed in steel. -
Page 9: Utility Connections - Standards And Codes
If you have any questions regarding the having jurisdiction. proper installation and/or operation of your Blodgett oven, please contact your local distributor. If you do not have a local distributor, please call the Blodgett Oven Company... -
Page 10: Electrical Connection
Connect wires to Run supply line through heating elements when the blower is not operat- terminal block the knock-out ing. THE BLODGETT OVEN COMPANY CANNOT ASSUME Figure 7 RESPONSIBILITY FOR LOSS OR DAMAGE SUFFERED AS A RESULT OF IMPROPER INSTALLATION. -
Page 11: Intial Startup
Installation Intial Startup OVEN RESTRAINT ADJUSTMENTS ASSOCIATED WITH INITIAL INSTAL- LATION If casters are used in conjunction with a power supply cord for movable appliances, a fixed restraint should be Each oven, and its component parts, have been thorough- provided. ly tested and inspected prior to shipment. -
Page 12: Operation
Please take the time to read the following safety and op- erating instructions. They are the key to the successful • DO NOT remove the control panel cover unless the operation of your Blodgett oven. oven is unplugged. -
Page 13: Ssi-M Solid State Infinite Control With Manual Timer
Operation SSI-M Solid State Infinite Control with Manual Timer CONTROL DESCRIPTION 1. SELECTOR SWITCH - controls power to the oven for cook or cool down. 2. BLOWER SWITCH - controls blower speed, either HI or LO. 3. LIGHTS SWITCH - controls interior lights. 4. -
Page 14: Ssi-D Solid State Infinite Control With Digital Timer
Operation SSI-D Solid State Infinite Control with Digital Timer CONTROL DESCRIPTION 1. SELECTOR SWITCH - controls power to the oven for cook or cool down. 2. BLOWER SWITCH - controls blower speed, either hi or lo. 3. LIGHTS SWITCH - controls interior lights. 4. -
Page 15: Ssd Solid State Digital Control
1. Press PULSE KEY (11) to turn pulse mode on. DISCONNECT FROM THE SOURCE OF SUPPLY BEFORE SERVICING www.blodgett.com NOTE: Pulse light is on. 2. Rotate DIAL (6) to enter the pulse time. Pulse time is a portion of the pre-set cook time. - Page 16 Operation SSD Solid State Digital Control OPERATION Cook Only: Cook with Pulse: 1. Turn SELECTOR switch (1) to the desired position. NOTE: PULSE light is on when pulse mode is on and off when pulse mode is off. 2. Enter the cook time and temperature. 1. Turn the SELECTOR SWITCH (1) to the desired posi- 3.
-
Page 17: Simple Touch Control
Operation Simple Touch Control COMPONENT DESCRIPTION 1. TOUCHSCREEN - Interactive display for oven func- tioning and/or programming. 2. USB Port - Use to transfer recipes and data to/from the control. 3. HEAT CUTOFF - Used to turn heat source off. 4. - Page 18 Operation Simple Touch Control MANUAL MODE COOKING 1. Press POWER to turn on the oven. 2. Press MANUAL to proceed to the manual cook screen. Power Figure 13...
- Page 19 Operation Simple Touch Control MANUAL COOK SCREEN Add a Minute - Press +1 MIN to add 1 minute of time at any point during the cook cycle. Actual Temp – Press thermometer to display the actual cavity temperature. Light Activation - Press the LIGHT icon turn the cavity lights on.
- Page 20 Operation Simple Touch Control TO OPERATE TIMER 1. Press PLAY to initiate timer. The timer counts down,. The play button changes to pause. Play Press the PAUSE button to stop the timer at current value. The pause button changes back to play. Press play to resume timer.
- Page 21 Operation Simple Touch Control ADVANCED FUNCTIONS Cook & Hold The intent of Cook & Hold is to keep the product at a food safe temperature while not overcooking. Once the cook cycle is complete, the oven autmatically switches to the hold time and temperature.
- Page 22 Operation Simple Touch Control Fan Pulse Fan Delay 1. From the MANUAL COOK SCREEN, press the ADV. This feature delays the set fan speed to reduce pulling FUN icon. liquid batters at the beginning of the bake cycle. The fan resumes the set speed after the delay time has expired.
- Page 23 Operation Simple Touch Control MENU MODE 3. Select the ADD icon to add a new recipe Create a New Recipe 1. Press the service key icon, and then select the MAN- AGE RECIPES icon. NOTE: In the event of a lockout from MANAGE RECIPIES use passcode 6368.
- Page 24 Operation Simple Touch Control 5. To enter the settings for the first cooking step, select the icon of the variable you wish to edit. The icon of the selected variable will highlight in blue and the value in the currently selected stage will high- light in yellow.
- Page 25 Operation Simple Touch Control MENU MODE COOKING 3. The control enters the Menu Cooking screen. Press the START ICON to begin the cook cycle. 1. Press the power key then select the RECIPE icon. NOTE: If lockout is enabled START will not be selectable until the oven has reached the programmed set temperature.
- Page 26 Operation Simple Touch Control RACK TIMING 5. Select the recipes you would like to place in the group. Creating a Rack Timing Group The first selected recipe will define the group param- 1. Press the service key icon, and then select the MAN- eters.
- Page 27 Operation Simple Touch Control RACKTIMER COOKING 4. Turn the knob to cycle through the group recipes (left and right). The currently selected recipe is in high- 1. From the mode selection screen, select RACK TIM- lighted in blue. The next available recipe in either di- ING.
- Page 28 Operation Simple Touch Control TO STORE AND LOAD MENU DATA TO A USB 3. Select USB from the menu. NOTE: The following procedure may be used to store NOTE: The USB drive must be in the port. any type of data to a USB including HACCP, set- tings and fault logs.
- Page 29 Operation Simple Touch Control 5. To load a recipe from the USB, select LOAD RECIPE 7. Select the recipe(s) desired for download. When se- FROM USB. Select the recipe file desired for down- lected, the recipe(s) will have a blue checkmark next load.
- Page 30 Operation Simple Touch Control COOL DOWN 1. Press the POWER KEY. The display will ask if you would like to cool down prior to shut down. If the green check mark is selected - the display changes to a power screen with a prompt to have the door open.
-
Page 31: How Cook & Hold Works
Operation How Cook & Hold Works With the optional COOK & HOLD feature, meat is roasted at lower temperatures for longer periods of time. This pre- Oven switches from cook to hold serves flavor and tenderness and prevents over drying. Oven Temp Stored heat There are three phases in cook and hold roasting. -
Page 32: General Guidelines For Operating Personnel
Operation General Guidelines for Operating Personnel COOK TIMES AND TEMPERATURES OPERATING TIPS Preheating the oven Pans and Racks Always preheat the oven before baking or roasting. We Product or pan height determines how many racks are recommend preheating 50°F (28°C) above the cook tem- used. -
Page 33: Suggested Times And Temperatures
Operation Suggested Times and Temperatures PRODUCT TEMPERATURE TIME # SHELVES Meats Hamburger Patties (5 per lb) 400°F (205°C) 8-10 mins. Steamship Round (80 lb. quartered) 275°F (135°C) 2 hrs 45 mins. Standing Rib Choice (20 lbs, trimmed, rare) 235°F (115°C) 2 hrs 45 mins. -
Page 34: Maintenance
Heat tint and heavy discoloration If maintenance or repairs are required, contact your local may be removed with any non-toxic commercial oven Blodgett service company, a factory representative or the cleaner. Blodgett Oven company. 1. Apply cleaners when the oven is cold. Always rub with the grain of the metal. -
Page 35: Troubleshooting Guide
• Thermostat out of calibration. • *Denotes remedy is a difficult operation and should be performed by qualified personnel only. It is recommended, how- ever, that All repairs and/or adjustments be done by your local Blodgett service agency and not by the owner/operator. Blodgett cannot assume responsibility for damage as a result of servicing done by unqualified personnel. WARNING!! Always disconnect the power supply before cleaning or servicing the oven.
Need help?
Do you have a question about the MARK V-100 and is the answer not in the manual?
Questions and answers