Advertisement
Quick Links
Advertisement

Related Manuals for Echogear ECHO-GM1FC


Summary of Contents for Echogear ECHO-GM1FC
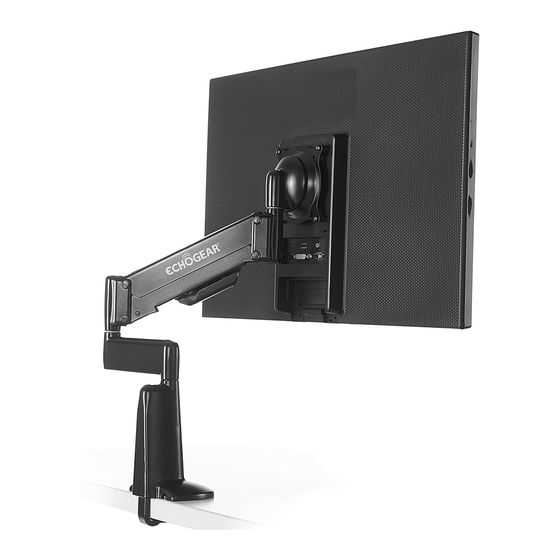
- Page 1 #YourGearUpgraded Single Screen Monitor Mount for Gaming INSTRUCTION MANUAL Model Echo-gm1Fc...
- Page 2 If you do not understand these instructions, are a noob or have doubts about the safety of the installation, assembly or use of this product, contact: The Echogear Pros @ 1-855-428-2490 or www.echogear.com. CAUTION: Manufacturer is not responsible for damage or injury caused by incorrect assembly or use.
- Page 3 Size up Your Mounting Surface 0.8 in. - 2.6 in. UUUUHHH ?!? Unsure? DESKTOP THICKNESS Contact The Echogear Pros: 1-855-428-2490 www.echogear.com Power up! Grab These Tools from Your arsenal BOnus Loot! 3 FREE Inside Every Box Yo Hands Refreshment Pump...
- Page 4 Why? Because we like to help and it’s our passion to provide authentic service. We won’t leave you hanging, no matter what. Our U.S. based Echogear Pros answer the phone in all days ending in Y. That means availability to try and stump our expert staff 7 days a week.
- Page 5 Here's your Loadout WARNINGS: DON'T ALLOW CHILDREN TO FEED ON CONTENTS AND NEVER USE DAMAGED GOODS! ► This product contains small items that are a choking hazard if swallowed. ► Before you start assembly, verify all parts are included and undamaged. If any parts are missing or damaged, do not return the damaged item to your dealer;...
- Page 6 Gear FOR Level 3 1 Cable 2 Screws Covers 8-32 x 3/8 in...
- Page 7 Level 1 Lock N' LOAD! Clamp Mount to Desk STAGE 1: Plaster Soft Bumpers on Desk Clamp...
- Page 8 STAGE 1: Loosen Screw on Mount to Lower Clamp USE HEX KEY TO LOWER CLAMP.
- Page 9 STAGE 2: Tighten Screw To Attach Clamp to Desk USE HEX KEY TO SECURELY CLAMP IT DOWN.
- Page 10 Level 2 Make The DROP! Attach Monitor to Mount STAGE 1: Determine Screw Length and Spacer Size NOT NEEDED NEEDED FOR Flat Inset Round Flat Monitor Cables Monitor Holes Monitor Select Spacers (if needed) Short Screw Long Screw Select Screws Bracket Bracket Spacer...
- Page 11 STAGE 2: Partially Insert Top Screws into Monitor...
- Page 12 STAGE 3: Hang Monitor by Top Screws onto Bracket...
- Page 13 STAGE 4: Insert Bottom Screws and Tighten All Four Screws YOU SHOULD TEST THE TENSION OF THE IMPORTANT: ROTATING BRACKET R TO ASSURE THE MONITOR MOVES WITH EASE AND STAYS IN POSITION BEFORE TIGHTENING ALL SCREWS. See page 17 to adjust brackets tension.
- Page 14 Level 3 Control the Melee! Route and Disguise Cables STAGE 1: Route All Cables Through Arm Bracket NOTE: FOR THICKER CABLES USE HEX TO LOOSEN SCREWS ON ARM BRACKET AND SLIDE Righty Lefty BRACKET OUT. Tighty Loosey...
- Page 15 STAGE 2: Secure Cables with Arm Cover "U R A BOSS" IM P O R T A N T : LEAVE ENOUGH SLACK IN THE CABLES TO ASSURE THE MONITOR AND ARMS MOVE WITH EASE.
- Page 16 Bonus Level! Adjustments /Modifiers Vertical Position - Adjust Monitor Up and Down TIP: INITIALLY, NEARLY ALL MONITORS WILL REQUIRE POSITIVE ADJUSTMENT (UP TO 20 TIMES). IF THE MONITOR IS NOT STAYING AT DESIRED HEIGHT OR NOT MOVING WITH EASE: • ADJUST TENSION SCREW ON THE TOP OF THE MOUNT. = MORE TENSION OR = LESS TENSION.
- Page 17 Tilt & Level - Tilt and Turn Monitor 360 WARNING: MONITOR MUST REMAIN OVER DESK SURFACE. IF MONITOR DOES NOT MOVE WITH EASE OR WILL NOT LOCK INTO DESIRED POSTION: Remove the monitor. Turn the screw on the tension bracket either counter-clockwise (loosen) or clockwise (tighten) .
- Page 18 Horizontal Position - Adjust Monitor Left or Right WARNING: MONITOR MUST REMAIN OVER DESK SURFACE. Top View Desk Desk...
- Page 19 How to remove Mount from Monitor and Surface 1. Remove Cables 2. Remove 3. Remove Mount Monitor...
- Page 20 Milestone makes no representation of warranty, expressed or implied, regarding the information contained herein. Milestone assumes no responsibility for accuracy, completeness or sufficiency of the information contained in this document. ©2018 Milestone AV Technologies. All rights reserved. ECHOGEAR is a Milestone brand. ECHOGEAR and the ECHOGEAR logo are trademarks of Milestone.
Need help?
Do you have a question about the ECHO-GM1FC and is the answer not in the manual?
Questions and answers