
Related Manuals for Huntleigh Nimbus 3


Summary of Contents for Huntleigh Nimbus 3
- Page 1 ® Nimbus 3 and ® Nimbus 3 Professional User Manual Pressure Area Care Products Division...
-
Page 3: Table Of Contents
About this Manual ........... 1 About Nimbus 3 and Nimbus 3 Professional ......1 Nimbus 3 Pump . - Page 4 Nimbus 3 Pump ........... . 24 Nimbus 3 and Nimbus 3 Professional Mattresses ......24 Serial Number Labels .
- Page 5 General Safety Before you connect the system pump to a mains socket, read carefully all the installation instructions in Section 3, Page 7 “Installation”. The system has been designed to comply with regulatory safety standards including: EN60601-1:1990/A13:1996. Safety Warnings • The cover of this product is vapour permeable but not air permeable and may present a suffocation risk.
- Page 6 • Store the pump and mattress in the protective bags supplied. • Only the pump and mattress combination as indicated by Huntleigh Healthcare should be used. The correct function of the product cannot be guaranteed if incorrect pump and mattress combinations are used.
-
Page 7: Introduction
Nimbus 3 Professional the system, and keep it as a reference for day-to-day routines and as a guide to maintenance. About Nimbus 3 and Nimbus 3 Professional are Dynamic Nimbus 3 and Nimbus 3 Professional Flotation Systems for the prevention, treatment and management of pressure ulcers. -
Page 8: Nimbus 3 Pump
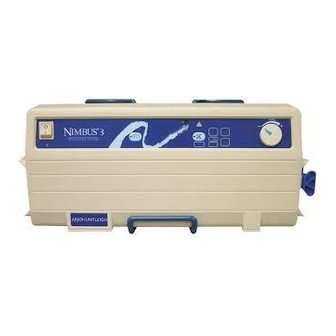
Nimbus 3 Pump The same pump is used on the Nimbus 3 Nimbus 3 systems. Professional The pump comprises a moulded case with non-slip feet on the base and rear, and an integral carry handle. Mains Power Switch Carry Handle... -
Page 9: Nimbus 3 Mattress
Nimbus 3 Mattress The mattress comprises the following Nimbus 3 components: Detachable Cover 3 Head Cells 4 Thigh Cells Head End 5 “Heelguard” Cells Drag Handle 8 Torso Cells Securing Strap Foot End Carry Handle CPR Control Pump Tubeset Transport Control... -
Page 10: Nimbus 3 Professional Mattress
Each end has a quick-lock system for easily connecting and disconnecting the air supply at the pump and mattress. Nimbus 3 Professional Mattress mattress is of similar Nimbus 3 Professional construction to the... - Page 11 The remaining 16 cells alternate. mattress has the same Cells Nimbus 3 Professional number of cells as the mattress (20 cells). The Nimbus 3 function of the first four cells at the head end of the...
-
Page 12: Clinical Applications
2. Clinical Applications Indications The systems are Nimbus 3 Nimbus 3 Professional indicated for patients weighing up to 250 kg (39 stones) and are suitable for the prevention and management of all grades of pressure ulcers. Contra-Indications The systems, both... -
Page 13: Installation
3. Installation The Nimbus 3 and Nimbus 3 Professional systems are very simple to install using the following guidelines. Refer to Section 4, Page 11 “Controls, Alarms and Indicators” for a comprehensive description of the controls and indicators on the pump and mattress. - Page 14 4. Check the sensor pad, as follows: AutoMatt • Unzip the cover on one side of the mattress only. • Pull the side of the mattress away from the cells. • The sensor pad is situated under the cells AutoMatt between the soft and hard foam sheets.
-
Page 15: Installing The Pump
1. Make sure that all 16 Vent Valves are closed. Additional Checks on the Nimbus 3 Professional Mattress Closed Open 2. Make sure that the Head Section Deflate Control is set to Dynamic (Normal) Mode TriCell Head Section Deflate Dynamic (Normal) Mode Installing the Pump 1. -
Page 16: Connecting The Tubeset
Connecting the To connect the tubeset to the mattress and pump: Tubeset 1. Locate the bottom of the tubeset connector onto the bottom of the pump/mattress connector. 2. Pull the top of the tubeset connector up and over the top of the pump/mattress connector, until the tubeset connector “clicks”... -
Page 17: Controls, Alarms And Indicators
4. Controls, Alarms and Indicators Power Switch Mute Control Alarm High Pressure Low Pressure & Alarm Reset & Indicator Indicator Indicator Indicator On/Reset Alarm Wait Service Comfort Indicator Indicator Indicator Control Static Control Power Fail Pump Fault & Indicator Indicator Indicator Pump Controls The pump front panel has the following controls: Switches the mains power to the pump on and off. -
Page 18: Pump Indicators
Pump Indicators The pump front panel has the following indicators: The green indicator below the ON / RESET ALARM ON / RESET ALARM switch is illuminated when the mains power is POWER connected and the pump switched on. The indicator on the button is illuminated when STATIC Mode STATIC... -
Page 19: Mattress Controls
The pump will continue to operate normally even when the symbol is illuminated. Mattress Controls All mattresses Nimbus 3 Nimbus 3 Professional have the following two controls, situated at the foot end of the mattress: NORMAL TRANSPORT CPR Control Transport Control... -
Page 20: Additional Controls On The Nimbus 3 Professional Mattress
The CPR control is used to deflate the mattress for packing and storage. Additional Controls on the Nimbus 3 Professional Mattress The following two controls are on the opposite side of the mattress to the CPR/Transport Control:... -
Page 21: Operation
Installing the System Before using the Nimbus 3 Nimbus 3 Professional system make sure: 1. The system has been installed correctly in accordance with Section 3, Page 7 “Installation”. -
Page 22: Deflating The Mattress
The battery may have become discharged or reached the end of its life. It is therefore recommended that the alarm is tested before the pump is used, as follows. 1. Connect the pump to the mains power supply, switch and allow it to run for 10-15 seconds. 2. -
Page 23: System Optimisation
System Optimisation The systems Nimbus 3 Nimbus 3 Professional automatically compensate for patient weight distribution and position, to optimise the pressure relieving performance. To make sure that the pressure relieving properties are not impaired, the mattress cover must not be pulled tight and covering sheets should fit loosely using the attached clips. -
Page 24: Silencing Audible Alarms
To change the operating mode: 1. To select mode from mode press the Static Dynamic button once. An audible tone will sound STATIC and the indicator on the button will illuminate to show that the system is in mode. Static 2. -
Page 25: Cpr Control
CPR Control IMPORTANT IN THE EVENT OF CARDIAC ARREST. In the event of a patient suffering cardiac arrest and CPR needing to be administered: 1. Lift the red CPR handle at the foot end of the To Activate the CPR mattress. -
Page 26: Patient Positioning Guidance For The Nimbus 3 Professional Mattress
Patient Positioning Guidance for the Nimbus 3 Professional Mattress mattress allows the patient to be placed in either the Nimbus 3 Professional Supine or Prone positions. WARNING A full patient assessment, as to the suitability for Prone Nursing, is essential before commencing the procedure. - Page 27 3. Prone Position. Head Section Cells Cell 4 (1 - 3) Fully Deflated 4. It is recommended that a minimum of four staff will be required to turn the patient from the Supine to the Prone position. • The anaesthetist or most senior member of the team should be positioned at the head end of the bed and will co-ordinate the turning procedure.
-
Page 28: Decontamination
The following guidelines have been established in accordance with good infection control practice. Should you have any questions regarding cleaning or if you require further information please contact your Huntleigh Healthcare service centre. WARNING Remove the electrical supply to the pump by disconnecting the mains power cord from the mains power supply before cleaning. -
Page 29: To Launder The Mattress Top Cover
To Launder the The top cover on Huntleigh Healthcare mattresses is manufactured from one of the following three materials, Mattress Top Cover each of which has different properties and laundering guidelines (refer to “Cover Options and Features” on page 32): •... -
Page 30: Routine Maintenance
7. Routine Maintenance Nimbus 3 and Nimbus 3 Professional Systems The equipment has been designed to be virtually Maintenance maintenance-free between service periods. Huntleigh Healthcare will make available on request Servicing service manuals, component parts lists and other information necessary for Huntleigh Healthcare trained personnel to repair the system. -
Page 31: Serial Number Labels
Serial Number Labels The serial number label for the pump is on the back of Pump the pump case. The serial number label for the mattress is on the top of Mattress the CPR/Transport Control, on the outside of the mattress at the foot end. -
Page 32: Troubleshooting
1. Vent Valves are open. 1. Close Vent Valves. (Nimbus 3 Professional only). a. If the pump has not been used for a long period, the internal battery which provides the Power Fail Alarm indication may be discharged. Run the pump for a few hours to recharge the internal battery, and the Power Fail Alarm indication will be provided as normal. -
Page 33: Fuse Replacement
Fuse Replacement If the system fails to operate when plugged in and switched on, the two fuses situated above the mains power cord on the pump should be checked. To do this, disconnect the pump from the main power supply and remove each fuse holder cap using a suitable flat-bladed screwdriver. -
Page 34: Warranty And Service
9. Warranty and Service Huntleigh Healthcare's standard terms and conditions apply to all sales. A copy is available on request. These contain full details of warranty terms and do not limit the statutory right of the consumer. Huntleigh Healthcare recommend that the... -
Page 35: Technical Description
10. Technical Description Pump 151028 Supply Voltage: 230 Vac Supply Frequency: 50 Hz Electrical Rating: 35 VA Size: Length: 508 mm (20 in.) Height: 220 mm (8.7 in.) Depth: 100 mm (4 in.) Weight: 5.7 kg (12.5 lb.) External Fuse Rating: 2 x F 500 mA, 250 V Operating Cycle 10 minutes... - Page 36 Tube Set 151200 151201 Length: 1000 mm (39.4 in.) 2500 mm (98.4 in.) Material: Tube: 5-way moulded PVC Connectors: Moulded Nylon Nimbus 3 Mattress Part Numbers: Standard Width Narrow Width Standard Cover 152010DAR 237010 ® 152010ADV (not applicable) Advantex...
- Page 37 Nimbus 3 Professional Mattress Part Numbers: Standard Width Narrow Width Standard Cover 412001DAR 412201DAR ® Advantex Cover 412001ADV 412201ADV ® eVENT Fabric Cover 412001EVE 412201EVE Size: Length: 2085 mm (82 in.) Height: 215 mm (8.5 in.) Width: 890 mm (35 in.) 800 mm (31.5 in.)
-
Page 38: Cover Options And Features
Cover Options and Features Standard Cover ® ® Feature Advantex eVENT Fabric ® (Dartex) Removable Cover Moisture Vapour 12 times higher Permeable Air Permeable Low Friction 18% lower 20% lower Water Resistant / Repellent Infection Bacteriostatic, Bacteriostatic, INERT MATERIAL Control fungistatic, fungistatic, does not support... - Page 40 © Huntleigh Healthcare Ltd 1998 151996AU_02...
Need help?
Do you have a question about the Nimbus 3 and is the answer not in the manual?
Questions and answers
spanner showing