Advertisement
Table of Contents
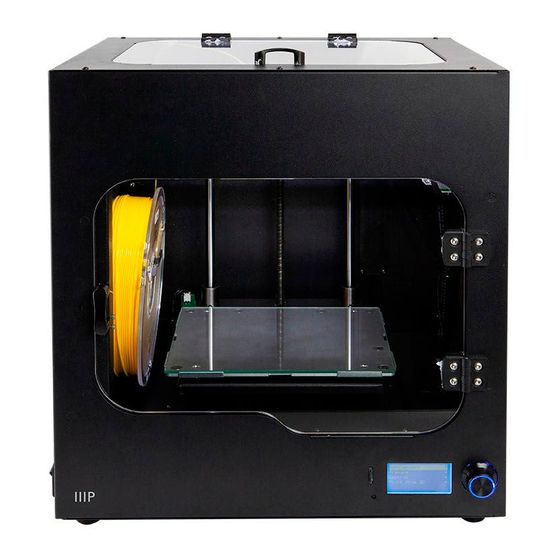
Maker Ultimate 2 3D Printer
P/N 36045
Quick Start Guide
INTRODUCTION
Thank you for purchasing this Maker Ultimate2 3D Printer! This printer uses the FFF (Fused
Filament Fabrication) method of printing. It features a metal frame, fully enclosed
structure, and heated build platform. It can print 1.75mm ABS, PLA, metal fill, wood fill, and
other filament types with melting points below 250°C. It has a 200 x 150 x 150 mm print
area and can print at speeds up to 150mm/sec. It can print from a computer using a USB
connection or from sliced gcode files stored on a microSD™ card. It supports auto leveling,
has a removable and a heated glass build plate.
CUSTOMER SERVICE
The Monoprice Customer Service department is dedicated to ensuring that your ordering,
purchasing, and delivery experience is second to none. If you have any problem with your
order, please give us an opportunity to make it right. You can contact a Monoprice
Customer Service representative through the Live Chat link on our website
www.monoprice.com or via email at support@monoprice.com. Check the website for
support times and links.
1
Advertisement
Table of Contents

Related Manuals for Monoprice maker Ultimate 2


Summary of Contents for Monoprice maker Ultimate 2
- Page 1 If you have any problem with your order, please give us an opportunity to make it right. You can contact a Monoprice Customer Service representative through the Live Chat link on our website www.monoprice.com or via email at support@monoprice.com.
-
Page 2: Package Contents
PACKAGE CONTENTS Please take an inventory of the package contents to ensure you have all the items listed below. If anything is missing or damaged, please contact Monoprice Customer Service for a replacement. 1x 3D printer 1x Set of Allen keys... -
Page 3: Getting Started
GETTING STARTED 1. Open the box and remove the printer from the protective foam. Set it on a flat, stable surface, then remove the plastic film. 2. Use a pair of scissors or side cutters to remove the zip tiers and silicon rubber sheets on the Z-axis. - Page 4 5. Remove the filament holder from the accessory box and install it inside the printer. Remove the spool of filament and hang it on the filament holder, then insert the end of the filament into the sensor until it comes out of the tube. 6.
Need help?
Do you have a question about the maker Ultimate 2 and is the answer not in the manual?
Questions and answers