Auriol 283736 Operation And Safety Notes
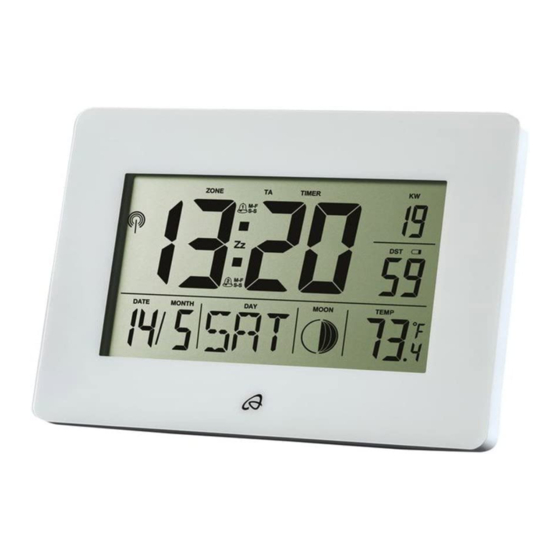
Radio-controlled lcd clock
Hide thumbs
Also See for 283736:
- Operation and safety notes (36 pages) ,
- Operation and safety notes (44 pages)
Table of Contents
Advertisement
Available languages
Available languages
Advertisement
Chapters
Table of Contents

Subscribe to Our Youtube Channel
Related Manuals for Auriol 283736


Summary of Contents for Auriol 283736
- Page 1 RADIO-CONTROLLED LCD CLOCK RADIO-CONTROLLED LCD CLOCK HORLOGE RADIOGUIDÉE LCD Operation and Safety Notes Instructions d‘utilisation et consignes de sécurité LCD-RADIOWEKKER LCD-FUNKUHR Bedienings- en veiligheidsinstructies Bedienungs- und Sicherheitshinweise IAN 283736...
- Page 2 GB / IE / NI Operation and Safety Notes Page FR / BE Instructions d‘utilisation et consignes de sécurité Page NL / BE Bedienings- en veiligheidsinstructies Pagina 21 DE / AT / CH Bedienungs- und Sicherheitshinweise Seite...
- Page 3 16 17 27 28...
-
Page 4: Table Of Contents
Introduction ...........................Page 6 Proper use ............................Page 6 Description of parts ..........................Page 6 Included items .............................Page 6 Technical data .............................Page 6 Safety ..............................Page 6 General safety information .........................Page 6 Safety instructions for batteries / rechargeable batteries ..............Page 7 Before initial use ........................Page 7 Setting up the product.........................Page 7 Inserting or replacing batteries......................Page 8... -
Page 5: Introduction
Radio-controlled LCD Clock WAVE button °C / °F button Battery compartment Introduction Battery compartment cover Folding stand We congratulate you on the purchase of your new DOWN button product. You have chosen a high quality product. UP button The instructions for use are part of the product. They SET button contain important information concerning safety, ALARM SET button... -
Page 6: Safety Instructions For Batteries / Rechargeable Batteries
WEAR PROTECTIVE GLOVES! understand the hazards involved. Children shall not play with the product. Cleaning and user Leaked or damaged batteries / maintenance shall not be made by children rechargeable batteries can cause without supervision. burns on contact with the skin. Wear suitable Do not use the product in protective gloves at all times if such an event hospitals or medical facilities, as otherwise this... -
Page 7: Inserting Or Replacing Batteries
Operation Do not place the product anywhere near to sources of interference such as televisions, Reception of DCF radio signal computers, thick walls, etc. These may hinder reception of the radio signal. The product automatically starts to search for the DCF radio signal. -
Page 8: Using The 12 / 24-Hour Display
The following languages are available: Press the ALARM SET button to confirm your GER = German setting. The minute display flashes. ENG = English Press the UP or DOWN button to set the desired = Italian minute value. = French Press the ALARM SET button to confirm your DUT = Dutch setting. -
Page 9: Activating / Deactivating The Schedule Alarm (Ta)
Moon phase 2. Press and keep pressed the ALARM SET button for approx. 3 seconds. The year display will flash. The product shows the current moon phase 3. Press the UP or DOWN button to set the LC display. the desired value. It uses the following symbols: 4. -
Page 10: Troubleshooting
Press the WAVE button again to continue the 1–7: plastics / 20–22: paper and fibre- count down. board / 80–98: composite materials. When the set time has elapsed, a signal tone will sound for a period of one minute. The product and packaging materials Press the WAVE button to stop the signal tone are recyclable, dispose of it separately from sounding. -
Page 11: Simplified Eu Declaration Of Conformity
Simplified EU declaration of conformity Hereby, OWIM GmbH & Co. KG, Stiftsbergstraße 1, DE-74167 Neckarsulm, GERMANY, declares that the product Radio-controlled LCD Clock HG02036A / HG02036B, is in compliance with Directives 2014/53/EU and 2011/65/EU. The full text of the EU declaration of conformity is available at the following internet address: www.owim.com Warranty... - Page 12 Introduction ...........................Page 14 Utilisation conforme ..........................Page 14 Description des pièces ........................Page 14 Contenu de la livraison ........................Page 14 Caractéristiques...........................Page 14 Sécurité .............................Page 14 Instructions générales de sécurité ......................Page 14 Consignes de sécurité relatives aux piles / aux piles rechargeables ..........Page 15 Avant la mise en service .....................Page 15 Installation du produit .........................Page 16...
-
Page 13: Introduction
Horloge radioguidée LCD Symbole Snooze Touche SNOOZE („sommeil“) Touche WAVE („onde“) Introduction Touche °C/°F Compartiment à piles Félicitations pour l‘acquisition de votre nouvel ap- Couvercle du compartiment à piles pareil ! Vous avez opté pour un produit de grande Pied rabattable qualité. -
Page 14: Consignes De Sécurité Relatives Aux Piles / Aux Piles Rechargeables
ou de connaissances, s‘ils sont surveillés ou radiateurs / exposition directe aux rayons du s‘ils ont été informés de l‘utilisation sûre du soleil. produit et comprennent les risques liés à son Lorsque les piles / piles rechargeables fuient, utilisation. Les enfants ne doivent pas jouer évitez tout contact du produit chimique avec la avec le produit. -
Page 15: Installation Du Produit
Retirez les bandes plastiques dépassant du La réception peut être considérablement limitée par compartiment à piles des obstacles (par ex. des murs en béton) ou des sources de parasites (par ex. d’autres appareils électriques). S‘il y a des problèmes de réception, Installation du produit changez l‘emplacement du produit (par ex. -
Page 16: Réglage De L'affichage 12 / 24 Heures
Réglage de l’affichage paramétrée clignote dans l‘affichage du jour 12 / 24 heures de la semaine 4. Appuyez sur la touche UP ou DOWN pour régler la langue souhaitée. L‘heure étant affichée sur l‘affichage de l‘heure 5. Validez votre sélection en appuyant sur la , appuyez sur la touche UP pour bascu- touche SET. -
Page 17: Paramétrer Le Rappel D'événement (Ta)
Appuyez une ou deux fois sur la touche ALARM 3. Rappuyez sur la touche ALARM ON/OFF. Le ON / OFF , afin de sélectionner le mode symbole d’alarme disparaît, et le rappel alarme M-F, S-S ou M-F S-S. Le symbole d‘événement est alors désactivé. -
Page 18: Régler Le Minuteur
Affichage de l’heure d’été Solution aux problèmes Q Q L‘horaire d‘été s‘affiche automatiquement sur Le produit contient des composants électro- l‘écran à cristaux liquides par le symbole horaire niques sensibles. Certaines interférences dues d‘été . Le produit établit automatiquement aux appareils à transmission radio placés à par l’intermédiaire du signal radio DCF, que l‘on proximité... -
Page 19: Déclaration De Conformité Ue Simplifiée
Votre mairie ou votre municipalité vous Le texte complet de la déclaration de conformité renseigneront sur les possibilités de mise est disponible à l'adresse Internet suivante : au rebut des produits usagés. www.owim.com Afin de contribuer à la protection de Garantie l’environnement, veuillez ne pas jeter votre produit usagé... - Page 20 Inleiding ............................Pagina 22 Doelmatig gebruik........................... Pagina 22 Onderdelenbeschrijving ......................... Pagina 22 Omvang van de levering ........................ Pagina 22 Technische gegevens ........................Pagina 22 Veiligheid ............................ Pagina 22 Algemene veiligheidsinstructies ...................... Pagina 22 Veiligheidsinstructies voor batterijen / accu‘s ................Pagina 23 Vóór de ingebruikname ....................
-
Page 21: Inleiding
LCD-radiowekker SNOOZE-knop („sluimeren“) WAVE-knop („golf“) °C / °F-knop Inleiding Batterijvak Batterijvakdeksel Hartelijk gefeliciteerd met de aankoop van uw nieuwe Uitklapbare voet product. U heeft voor een hoogwaardig product DOWN-knop („omlaag“) gekozen. De gebruiksaanwijzing is een deel van het UP-knop („omhoog“) product. -
Page 22: Veiligheidsinstructies Voor Batterijen / Accu's
DRAAG VEILIGHEIDSHAND- onder toezicht staan of geïnstrueerd werden SCHOENEN! Lekkende of bescha- met betrekking tot het veilige gebruik van het product en zij de hieruit voortvloeiende gevaren digde batterijen / accu‘s kunnen in begrijpen. Kinderen mogen niet met het product geval van huidcontact chemische brandwonden spelen. -
Page 23: Batterijen Plaatsen En Vervangen
Bediening Plaats het product niet in de buurt van storings- bronnen zoals televisies, computers, dikke muren, DCF-radiosignaal ontvangen enz. De ontvangst van het radiografische sig- naal kan hierdoor verminderd worden. Het product begint automatisch met het zoeken naar het DCF-radiosignaal. Op het LC-display wordt het Batterijen plaatsen en zoeken door een knipperend radiosymbool vervangen... -
Page 24: 24-Uurweergave Gebruiken
De volgende talen staan ter beschikking: Houd gedurende 2 seconden de ALARM SET- GER = Duits knop ingedrukt. De uurweergave knippert. ENG = Engels Druk dienovereenkomstig vaak op de UP- = Italiaans of DOWN-toets om de gewenste waarde = Frans in te stellen. -
Page 25: Termijnherinnering (Ta) Instellen
Temperatuur in °C / °F alarmsymbool resp. . De wekfunc- weergeven tie is gedeactiveerd. De actuele binnentemperatuur wordt op het Termijnherinnering (TA) LC-display weergegeven. instellen Druk op de °C / °F-knop om tussen de tem- peratuurscala’s Celsius en Fahrenheit heen en 1. -
Page 26: Verhelpen Van Storingen
Reiniging en onderhoud timersymbool TIMER Q verschijnt op het display. Druk op de UP-knop om de uren in te Gebruik in geen geval vloeistoffen en reinigings- stellen. Druk op de DOWN-knop om de middelen omdat deze het product beschadigen. minuten in te stellen. Reinig het product alleen aan de buitenzijde Tip: houd de UP- resp. -
Page 27: Vereenvoudigde Eu-Conformiteitsverklaring
batterijen / accu‘s en / of het product af bij de Wanneer binnen 3 jaar na de aankoopdatum van daarvoor bestemde verzamelstations. dit product een materiaal- of productiefout optreedt, dan wordt het product door ons – naar onze keuze Milieuschade door foutieve –... - Page 28 Einleitung ............................Seite 30 Bestimmungsgemäße Verwendung ....................Seite 30 Teilebeschreibung ..........................Seite 30 Lieferumfang ............................Seite 30 Technische Daten ..........................Seite 30 Sicherheit ............................Seite 30 Allgemeine Sicherheitshinweise ......................Seite 30 Sicherheitshinweise für Batterien / Akkus ...................Seite 31 Vor der Inbetriebnahme ....................Seite 31 Produkt aufstellen ..........................Seite 32 Batterien einlegen und wechseln .......................Seite 32 Bedienung ............................Seite 32...
-
Page 29: Einleitung
LCD-Funkuhr Alarm 1-Symbol Snooze-Symbol SNOOZE-Taste („schlummern“) Einleitung WAVE-Taste („Welle“) °C / °F-Taste Wir beglückwünschen Sie zum Kauf Ihres neuen Batteriefach Produkts. Sie haben sich damit für ein hochwertiges Batteriefachdeckel Produkt entschieden. Die Bedienungsanleitung ist Ausklappbarer Standfuß Teil dieses Produkts. Sie enthält wichtige Hinweise DOWN-Taste („abwärts“) für Sicherheit, Gebrauch und Entsorgung. -
Page 30: Sicherheitshinweise Für Batterien / Akkus
ten physischen, sensorischen oder mentalen Wenn Batterien / Akkus ausgelaufen sind, ver- Fähigkeiten oder Mangel an Erfahrung und meiden Sie den Kontakt von Haut, Augen und Wissen benutzt werden, wenn sie beaufsichtigt Schleimhäuten mit den Chemikalien! Spülen oder bezüglich des sicheren Gebrauchs des Sie die betroffenen Stellen sofort mit klarem Produkts unterwiesen wurden und die daraus Wasser und suchen Sie einen Arzt auf! -
Page 31: Produkt Aufstellen
Produkt aufstellen in die Nähe eines Fensters), falls es zu Problemen beim Empfang kommt. Stellen Sie das Produkt auf den Standfuß oder montieren Sie dieses an die Wand. Bedienung Stellen Sie das Produkt auf einer ebenen, waagerechten Fläche auf. DCF-Funksignal empfangen Stellen Sie das Produkt nicht in der Nähe von Störquellen wie Fernseher, Computer, dicken Mauern etc. -
Page 32: 24-Stundenanzeige Verwenden
Hinweis: Das PM-Symbol 5. Bestätigen Sie Ihre Wahl durch Drücken der im LC-Dis- SET-Taste. Das Uhrzeit-Display beginnt zu blinken. play steht im 12-Stundenformat für nachmittags. 6. Wiederholen Sie die Schritte 4 und 5, um das Jahr, den Monat, den Tag, die Stunde, Minute, Alarm einstellen Zeitzone und DCF-Funksignal EIN/AUS einzu- stellen. -
Page 33: Terminerinnerung (Ta) Einstellen
Alarmsignal ausschalten S-S-Modus: Alarm von Samstag bis Sonntag M-F S-S-Modus: Alarm von Montag bis Drücken Sie eine beliebige Taste außer der Sonntag SNOOZE-Taste , um das Alarmsignal zu stoppen. Sie müssen den Alarm nicht wieder Drücken Sie die ALARM ON- / OFF-Taste er- aktivieren. -
Page 34: Timer Einstellen
Hinweis: In Gebäuden aus Stahlbeton kann der solchen Funktionsstörungen kurzzeitig die Empfang des Funksignals stark beeinträchtigt werden. Batterien und setzen Sie sie erneut ein. Timer einstellen Reinigung und Pflege Drücken Sie die °C / °F-Taste und halten Sie Verwenden Sie in keinem Fall Flüssigkeiten und sie ca. -
Page 35: Vereinfachte Eu-Konformitätserklärung
Defekte oder verbrauchte Batterien / Akkus müssen gut auf. Diese Unterlage wird als Nachweis für den gemäß Richtlinie 2006/66/EG und deren Änderungen Kauf benötigt. recycelt werden. Geben Sie Batterien / Akkus und / oder das Produkt über die angebotenen Tritt innerhalb von 3 Jahren ab dem Kaufdatum Sammeleinrichtungen zurück. - Page 36 Model-No.: HG02036A / HG02036B Version: 01 / 2018 Last Information Update · Version des informations · Stand van de informatie · Stand der Informationen: 12 / 2017 · Ident.-No.: HG02036A / B122017-IE / NI / BE / NL IAN 283736...
Need help?
Do you have a question about the 283736 and is the answer not in the manual?
Questions and answers