Table of Contents
Advertisement
Quick Links
- 1 Wiring and Mounting the Equipment Touch
- 2 To Wire and Mount the Equipment Touch
- 3 To Set up Scheduling Functionality
- 4 Using the Equipment Touch's Temperature and Humidity Sensors to Control Equipment
- 5 To Edit Touchscreen Settings
- 6 Resetting the Equipment Touch
- Download this manual
See also:
User Manual
Advertisement
Table of Contents

Related Manuals for Carrier Equipment Touch

Summary of Contents for Carrier Equipment Touch
- Page 1 CARRIER CORPORATION ©2019 A member of the United Technologies Corporation family · Stock symbol UTX · Catalog No. 11-808-443-01 · 4/24/2019...
- Page 2 Verify that you have the most current version of this document from www.hvacpartners.com or your local Carrier office. Important changes are listed in Document revision history at the end of this document. CARRIER CORPORATION ©2019. All rights reserved throughout the world. i-Vu is a registered trademark of Carrier...
-
Page 3: Table Of Contents
To wire and mount the Equipment Touch ...................... 16 To set up scheduling functionality ..........................18 Using the Equipment Touch's temperature and humidity sensors to control equipment ........19 To edit touchscreen settings ............................. 21 To update the Equipment Touch's firmware ......................23 Resetting the Equipment Touch .......................... -
Page 5: What Is The Equipment Touch
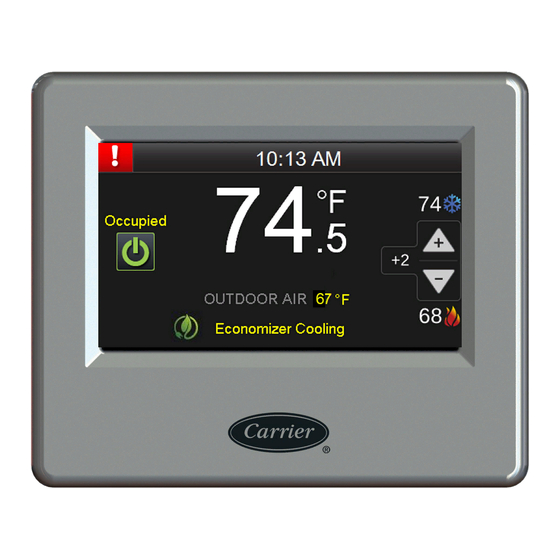
What is the Equipment Touch? The Equipment Touch is a touchscreen device with a 4.3 in. color LCD display that you connect to the Rnet port of one of the following controllers to view or change its property values, schedule equipment, view trends and alarms, and more, without having to access the system's server. -
Page 6: Specifications
NOTE The Equipment Touch cannot share the Rnet with SPT Sensors or a TruVu™ ET Display. You can install and run the Equipment Touch with only its built-in system screens, or you can create a customized touchscreen file in ViewBuilder. This requires that you: Create customs screens in ViewBuilder, and then save the touchscreen (.touch) file. -
Page 7: Equipment Touch Screens
The Equipment Touch's box contains a label with the product name and the serial number that begins with EQC. Remove the front of the Equipment Touch and turn it over to see the serial number on a label attached to the control board. - Page 8 Factory password No password Anyone NOTES • The default password for a new Equipment Touch is admin. • You can change passwords on the Touchscreen Setup (page 21) > Passwords screen. • You log out on the Setup screen. System Displays the BACnet device instance number, the controller's time, temperature read from the controller's prime variable, and zone color.
- Page 9 What is the Equipment Touch? Screen name Description Module Status Touch a button to see one of the following sections of a Module Status report: Device Data, Driver Data, Reset Counters, System Errors, Warnings, Information, Hardware, Database, Network. For example, the screens below show examples of the Driver Data and Reset Counters information.
- Page 10 What is the Equipment Touch? Screen name Description Alarms Lets you view alarms from the controller. See "Viewing alarms" in the Equipment Touch User Guide. Trends Lets you view trends for points that have trending enabled. See "Viewing trends" in the Equipment Touch User Guide.
- Page 11 What is the Equipment Touch? Screen name Description Setup Touch a button to jump to the Module Setup, Touchscreen Setup, or Login screen. Equipment Touch CARRIER CORPORATION ©2019 Installation and Setup Guide All rights reserved...
- Page 12 What is the Equipment Touch? Screen name Description Browser Touch a button to see that type of BACnet objects found in the controller. Each screen shows a list of network-visible BACnet objects with BACnet Object Name, Current Value, and BACnet Object Instance number.
- Page 13 What is the Equipment Touch? Screen name Description Module Setup Touch a button to jump to the Set Time and Date, Communication, Router, IP, or Time Master screen. NOTE A yellow value on a Module Setup screen indicates the value has been changed.
- Page 14 What is the Equipment Touch? Screen name Description Communication Lets you edit the information below for the controller. Touch a field to tap in new information. BACnet Device Instance number Auto Generate Device ID–Enter No or Yes You can edit the following fields that pertain to the controller's MS/TP network: Max Masters - Set this to the highest MAC address (up to 127) on the MS/TP network.
- Page 15 What is the Equipment Touch? Screen name Description Router Lets you view or edit the router's ARC156 or MS/TP network number. Touch a field to tap in the new number on the keypad. NOTE BACnet Ethernet network support will be adeed in a future release.
- Page 16 Description Time Master If the Equipment Touch is serving as the front-end for your system, you should designate a controller to be the BACnet Time Master. If a controller will be the BACnet Time Master, this screen lets you configure how it sends time synchronization broadcasts.
- Page 17 What is the Equipment Touch? Screen name Description Touchscreen Setup Lets you edit the touchscreen settings (page 21). Equipment Touch CARRIER CORPORATION ©2019 Installation and Setup Guide All rights reserved...
-
Page 18: Wiring And Mounting The Equipment Touch
Wiring • The Equipment Touch requires a 24 Vac power supply. It is not powered by the Rnet. CAUTION The Equipment Touch can share a power supply with the Carrier controller as long as you: Maintain the same polarity. ○... -
Page 19: Wiring Specifications
2-conductor wire 18 AWG for distances up to 100 feet. All transformer secondaries must be grounded. Wiring connections must be in accordance with NEC and local codes. Rnet wiring NOTE If you wire the Equipment Touch directly to the controller's Rnet port, you can use a 2-conductor cable instead of the standard 4-conductor Rnet cable. Description... -
Page 20: To Wire And Mount The Equipment Touch
Partially cut, then bend and pull off the outer jacket of the Rnet cable(s). Do not nick the individual wire insulation. If wiring 1 cable to the Equipment Touch, cut the shield wire off at the outer jacket, then wrap the cable with tape at the outer jacket to cover the end of the shield wire. - Page 21 Attach the Equipment Touch to the backplate: Place the bottom of the Equipment Touch onto the backplate by aligning the 2 slots on the Equipment Touch with the tabs on the backplate. Push the Equipment Touch onto the backplate until the tabs at the top of the Equipment Touch snap onto the backplate.
-
Page 22: To Set Up Scheduling Functionality
You can define BACnet schedules for each time clock microblock in the controller's control program(s). To allow a user to create schedules on the Equipment Touch: In the i-Vu® or Field Assistant tree, right-click the controller, and then select Driver Properties. -
Page 23: Using The Equipment Touch's Temperature And Humidity Sensors To Control Equipment
• Select the temperature sensor—You can use values from the Equipment Touch's internal temperature sensor. Or, you can wire an external (remote) thermistor to the Equipment Touch and use its temperature value instead of the internal temperature sensor's value. NOTE The Deg F and Deg C setting is determined by the controller's control program. - Page 24 Using the Equipment Touch's temperature and humidity sensors to control equipment Property to <control program instance>/<AV mb reference name>/present_value. NOTE The Units setting (°F or °C) affects only what you see in ViewBuilder, not the primary value shown on the Equipment Touch.
-
Page 25: To Edit Touchscreen Settings
About Displays information about the touchscreen firmware. Inactivity Timeout Lets you define how long the Equipment Touch can have no activity before returning to the Standby screen and logging out the user. Set to 0 to deactivate this feature. Sensor Setup Lets you set up the Equipment Touch's temperature and humidity sensors. - Page 26 Russian If optional languages were defined when the touchscreen file was created, this screen lets you select which language to use for Equipment Touch system screens. If custom screens were included in the touchscreen file, they will display in the language that they were created in.
-
Page 27: To Update The Equipment Touch's Firmware
To update the Equipment Touch's firmware To update the Equipment Touch's firmware The Equipment Touch has a USB port at the bottom that allows you to update the device's firmware from a USB flash drive. PREREQUISITE The USB flash drive must be formatted as FAT, FAT16, or FAT32. To verify, right-click the flash drive in Windows Explorer, then select Properties. -
Page 28: Resetting The Equipment Touch
Resetting the Equipment Touch Resetting the Equipment Touch You can create a reset.dat file and put it on a USB flash drive to reset some of the Equipment Touch's functionality. PREREQUISITE The USB flash drive must be formatted as FAT, FAT16, or FAT32. To verify, right-click the flash drive in Windows Explorer, then select Properties. -
Page 29: Compliance
Industry Canada Compliance This Class A digital apparatus complies with Canadian ICES-003. Cet appareil numérique de la classe A est conforme à la norme NMB-003 du Canada. Equipment Touch CARRIER CORPORATION ©2019 Installation and Setup Guide All rights reserved... -
Page 30: Appendix: External Sensor Resistance Requirements
Temp (°C) Temp (°F) Resistance (Ohms) 335,651 242,195 176,683 130,243 96,974 72,895 55,298 42,315 32,651 25,395 19,903 15,714 12,494 10,000 8,056 6,530 5,325 4,367 3,601 2,985 2,487 2,082 1,752 Equipment Touch CARRIER CORPORATION ©2019 Installation and Setup Guide All rights reserved... -
Page 31: Document Revision History
To update the Equipment Touch's Changed list of messages in step 5. X-D-CP firmware 9/10/14 Wiring and mounting the Equipment Changed Carrier part number 33ZCT57SPT to 33ZCT55SPT. C-TS-PH-E Touch 7/29/14 Equipment Touch screens Added note under Login screen that the default password for a X-TS-RB-E-RB new Equipment Touch is admin. - Page 34 CARRIER CORPORATION ©2019 A member of the United Technologies Corporation family · Stock symbol UTX · Catalog No. 11-808-443-01 · 4/24/2019...
Need help?
Do you have a question about the Equipment Touch and is the answer not in the manual?
Questions and answers