Table of Contents
Advertisement
Advertisement
Table of Contents
Troubleshooting

Subscribe to Our Youtube Channel
Summary of Contents for OutBack Power Alino TL Series
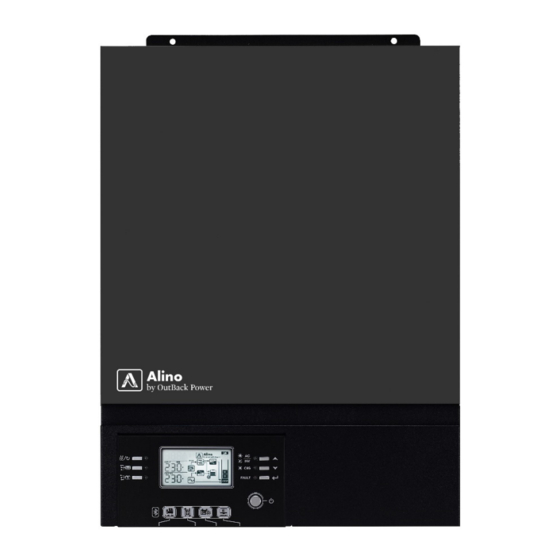
- Page 1 Alino TL Power Conditioning Unit Owner’s Manual...
- Page 2 Alino TL Power Conditioning Unit Owner’s Manual © 2019 by OutBack Power. All Rights Reserved. Trademarks Alino TL, Alino by OutBack, and the Alino logo are trademarks owned and used by OutBack Power, an EnerSys company. These trademarks may be registered in the United States and other countries.
-
Page 3: Table Of Contents
Table of Contents Symbols Used ........................... 5 General Safety .......................... 5 Introduction ....................7 Audience ........................... 7 Welcome to OutBack Power ..................... 7 Product Overview ........................7 Features ............................... 7 Example System ........................... 8 Components ..........................9 ... - Page 4 Table of Contents Output Source Priority Timer ....................36 Charger Source Priority Timer ....................37 Auxiliary Contact Settings ....................... 38 Troubleshooting ..................39 Errors and Warnings ....................... 39 Basic Troubleshooting ......................41 Specifications ..................... 43 Device Specifications ......................43 Regulatory Specifications .......................
-
Page 5: Symbols Used
Important Safety Instructions READ AND SAVE THESE INSTRUCTIONS! This manual contains important safety instructions for the Alino product. As with any electrical equipment, certain precautions must be observed when installing this equipment. To reduce the risk of personal injury and to ensure safe installation and operation, carefully read and follow all instructions, cautions and warnings in this manual. - Page 6 Important Safety Instructions CAUTION: Equipment Damage Only use components or accessories recommended or sold by OutBack Power or its authorized agents. Follow all wire and cable sizing specifications shown. All wiring and installation methods must comply with local codes and ...
-
Page 7: Introduction
AC and DC voltage up to 600 volts. This product is only serviceable by qualified personnel. Welcome to OutBack Power Thank you for purchasing the Alino TL power conditioning unit. This product combines the functions of an inverter, uninterruptible power supply (UPS), and charger that can operate from batteries, utility grid and solar (photovoltaic or PV) power. -
Page 8: Example System
Introduction Example System Figure 1 shows the basic components used in a complete Alino system. For the highest level of versatility, the system should be equipped with either utility grid or generator input as well as a PV array. Other system architectures are possible beyond those shown here. A system integrator can advise on the best design for a particular requirement. -
Page 9: Components
Introduction Components Display panel Removable lower cover Circuit breaker Auxiliary dry contacts USB communication port BMS communication port RS-232 communication port Display communication port AC input cable opening AC output cable opening Battery cable opening PV cable opening Figure 2 Components 900-0248-01-00 Rev A... -
Page 10: Display Components
Introduction Display Components LCD display Output source LED indicators Status LED indicator Charging LED indicator Fault LED indicator Function buttons On/Off button Figure 3 Display Components 900-0248-01-00 Rev A... -
Page 11: Installation
Installation Dimensions 40.0 cm (15.7”) 11.5 cm 30.0 cm (11.8”) (4.5”)4. Figure 4 Dimensions IMPORTANT: For proper ventilation, allow clearances of approximately 20 cm (8") to either side and 50 cm (20") above and below the product. 900-0248-01-00 Rev A... -
Page 12: Preparation
Installation Preparation Remove the lower cover as shown in Figure 1. On the underside of the unit, remove the screws holding the cover in place. 2. Loosen the lower cover. 3. Remove the two communication cables A. 4. Remove the lower cover. Figure 5 Removing Lower Cover 900-0248-01-00 Rev A... -
Page 13: Mounting
Installation Mounting IMPORTANT: Mount this product on a solid surface of concrete or similar non-combustible material. Install this product at eye level for easy reading of the display panel. This product will function most effectively if installed upright. ... -
Page 14: Connections
Installation Connections Battery To install batteries for this product: Assemble the batteries in series or parallel as needed for the system nominal voltage. Install all cables and interconnects. CAUTION: Hazard to Equipment Do not reverse the polarity of the positive (+) and negative (–) battery cables. This will destroy the product. - Page 15 Installation Battery Ring Terminal Stud Inverter Terminal Surface Figure 8 Battery Terminal Hardware Tighten all connections to the torque values required in Table Table 1 Battery Conductors Ring Terminal Maximum Terminal Model Cable Size Current Torque Diameter Length ATL3024E 142 Adc 38 mm (#2 AWG) 8.4 mm...
- Page 16 Installation Before making any connections, open all disconnect devices on both AC and DC sources. To install AC connections for this product: NOTE: AC wires should be sized according to Table Install a circuit breaker between the AC source and the input terminals. It is needed for overcurrent protection and also as a manual disconnect device.
-
Page 17: Selecting Modules
Installation Selecting Modules CAUTION: Hazard to Equipment Do not exceed the maximum V under any conditions. This will destroy the product. IMPORTANT: Only single-crystalline, multicrystalline (class A rated) or CIGS modules may be used. When selecting PV modules, observe the following parameters: Maximum permitted open-circuit voltage (V ) is 500 Vdc Maximum PV array power is 4000 watts... -
Page 18: Final Assembly
Installation Final Assembly Replace the lower cover to complete installation. 1. Place the lower cover near the Alino housing. 2. Install the two communication cables A. 3. Set the lower cover in place. 4. On the underside of the unit, attach the screws to secure the lower cover in place. -
Page 19: Remote Display Panel Installation
Installation Remote Display Panel Installation The display panel may be removed and installed at a distance. This may be performed either before or after the lower cover is replaced. 1. Remove screw A and retaining plate B. 2. Slide the display panel out of position. 3. -
Page 20: Other Communications
Installation Other Communications The display can perform several forms of communication. Figure 14 Communications Ports and Terminals Auxiliary (Dry Contact) For item A , see page 38. Item B is a Micro-USB B port. It is used for USB connection with a PC. Item C is an RJ45 port. -
Page 21: Operation
Operation Power ON/OFF When installation is complete and PV or the utility grid are the power source, the display will turn on automatically. When batteries are the only power source, press the On/Off button 1 to turn on the display. NOTE: This product can accept AC power from either the utility grid or a generator. -
Page 22: Buttons
Operation Buttons The display panel has six setting and function buttons. On/Off Button Figure 16 Buttons Escape — exits the present setting. 1 , 2 , and 3 are also function keys used to implement special functions: 1 — selects the USB OTG functions (see page 34). 2 —... - Page 23 Operation This display section shows the Setting screen mode option numbers. The Setting mode is RUN TIME EST SETTING icon. (See 9 and page 31.) This item also shows any warning or error followed by the SETTING ⚠ codes. A Warning code is followed by .
-
Page 24: Display Readings
Operation Display Readings The left side of the LCD display has three fields of readings. These readings can be switched to display different data. The and keys (see page 31) proceed through a series of items. In most cases only two of the three fields are used. Different markers appear to indicate unit or the type of data. - Page 25 Operation Load in percentage of PV energy and load output BATT inverter capacity. The energy in kilowatt-hours. lower field displays a % All three fields are used. marker. (See page 23 for The topmost field shows OUTPUT the load level display.) the selection of daily energy (depicted), monthly energy The upper field continues...
-
Page 26: Functions
Operation Functions The Alino can perform a number of functions, most of which work together. These functions, and their combinations, are represented on the LCD display by icons (as defined on page 22.) Figure 18 Icons and Functions MPPT The Alino can harvest energy from a photovoltaic (PV) array for several purposes. It harvests PV energy using maximum power point tracking (MPPT) technology. -
Page 27: Battery Charging
Operation Battery Charging The Alino can convert incoming power to charge the batteries. When charging from PV power, the process is represented by the A series of icons. When charging from the utility grid, it is represented by the B series of icons. Both are possible at once ( C ). MPPT MPPT BYPASS... -
Page 28: Equalization
Operation Equalization Equalization is a controlled overcharge for battery maintenance. It brings the batteries to a much higher voltage than usual and maintains them there for a time. This removes inert lead sulfate compounds from the battery plates. It reduces stratification by circulating the electrolyte. See items 30 through 36 on page 33 for setting and controlling equalization. -
Page 29: Inverting
Operation Inverting The Alino can convert DC power to AC output. In a battery-based system, to “invert” means to convert battery power to run loads. This is represented onscreen by the A series of icons. In a system without the use of batteries, the Alino can convert PV power to AC output, assisted by the utility grid. -
Page 30: Backup Duration
Operation Backup Duration This table estimates the operating time (in minutes) of a battery backup system based on inverter model, size of load, and battery bank capacity. Table 4 Estimated Backup Duration Time (min) Time (min) Load Load Model Model (VA) (VA) 100 Ah... -
Page 31: Settings
Settings General Settings Figure 25 General Setting Items To enter the Setting screen mode, press and hold button 6 for up to 3 seconds. In this mode, buttons 4 and 5 proceed up and down through the following table. Pressing 6 a second time allows the selected item to be set with 4 and 5 . - Page 32 Settings Table 5 General Settings Item Description Acceptable AC (utility) input voltage range. Selections: 90 to 280 Vac (A P L ) or 170 to 280 Vac (U P S ). A P L Battery type. Selections: A G n (AGM), F L d (flooded), U S E (user-defined). A G n If U S E is selected, battery charging and low DC cutoff voltages can be set in items 2 6 , 2 7 , and 2 9 .
- Page 33 Operation Table 5 General Settings Item Description Low battery cut-out voltage. This is the low battery voltage setting which shuts down the inverter. This is settable when item 0 5 is set to U S E . C O v NOTE : This item shuts down only the inverting function.
-
Page 34: Function Settings
Settings Function Settings USB OTG Functions Several aspects of the Alino can be controlled by inserting a USB device loaded with the appropriate firmware. See page 9 for the location of the port. If there is a problem with the USB device, the display may show errors U 0 1 , U 0 2 , or U 0 3 . See page 40 if this occurs. -
Page 35: Firmware Upgrade
Operation Firmware upgrade The Alino’s internal firmware can be upgraded by installing the new version from a USB device. To upgrade the firmware: Press button 1 to select the upgrade function. When the firmware upgrade is ready, item 9 will display r d Y (ready). Press button 1 again to confirm. -
Page 36: Output Source Priority Timer
Settings Output Source Priority Timer The Alino can switch between Output Source Priority settings (see 0 1 on page 31) on a timer. Figure 27 Output Priority Timer Setting Items When using multiple sources to support loads, the priority of the source usage (U S b , S U b , or S b U ) can be set to change automatically by time of day. -
Page 37: Charger Source Priority Timer
Operation Charger Source Priority Timer The Alino can switch between Charger Source Priority settings (see 1 6 on page 32) on a timer. Figure 28 Charger Priority Timer Setting Items When using multiple sources to support loads, the priority of the source usage (C S O , S N U , or O S O ) can be set to change automatically by time of day. -
Page 38: Auxiliary Contact Settings
Settings Auxiliary Contact Settings Figure 29 shows a set of dry contacts (3 ampere, 250 Vac) which are controlled by battery voltage and charging. These terminals can serve as a switch for auxiliary devices to indicate low voltage and other situations. Normally closed (NC) Common (C) Normally open (NO) -
Page 39: Troubleshooting
Troubleshooting Errors and Warnings The Alino has indications for fault (“error” or “warning”) conditions. An error is defined as a critical fault that shuts the unit down. A warning is a non-critical fault that allows the unit to continue operating. Some warnings may become errors if unattended. Faults are shown on the front panel. - Page 40 Troubleshooting Table 8 Error Codes (with unit failure and alarm) Code Reason for Failure Notes Both of the unit’s fans have failed. This may require service. The unit will recover after reaching the set Temperature is too high. point in item 07. (See page 32.) Battery voltage is too high.
-
Page 41: Basic Troubleshooting
Troubleshooting Basic Troubleshooting These is a list of common symptoms (including LED indications and fault codes). Possible causes and remedies are listed for each symptom. Note that many items indicate unit failure and require return to a service center. The error codes from Table 8 are also included here with additional explanation. Table 10 Troubleshooting Symptom... - Page 42 Troubleshooting Table 10 Troubleshooting Symptom Indications Possible Cause Possible Remedy Error code Check the wiring and output of the Battery voltage too high. battery bank with a voltmeter. Error code Both internal fans failed. Make service arrangements. F0 1 Error code High output voltage Make service arrangements.
-
Page 43: Specifications
Specifications Device Specifications Table 11 Electrical Specifications (Inverting) Specification TL3024E TL5048E Rated Output Power 3 kVA / 3 kW 5 kVA / 5 kW Output Voltage Waveform Pure Sine Wave Output Voltage Regulation 230 Vac ±5% Output Frequency 50 Hz Peak Efficiency Overload Protection 5 seconds @ ≥130% load;... -
Page 44: Regulatory Specifications
Specifications Table 13 Electrical Specifications (Charging) Specification TL3024E TL5048E Charging Algorithm Three-Stage AC Charging AC Charging Current (Max) 60 Aac (@V = 230 Vac) PV Charging Maximum PV Array Power 4000 W 5000 W Nominal PV Voltage 240 Vdc Start-up Voltage 150 Vdc +/- 10 Vdc PV Array MPPT Voltage Range 120 to 450 Vdc... - Page 45 Specifications This page intentionally left blank. 900-0248-01-00 Rev A...
- Page 46 Specifications This page intentionally left blank. 900-0248-01-00 Rev A...
- Page 47 Specifications This page intentionally left blank. 900-0248-01-00 Rev A...
- Page 48 Masters of the Off-Grid.™ First Choice for the New Grid. Corporate Headquarters 17825 – 59 Avenue N.E. Suite B Arlington, WA 98223 USA 900-0248-01-00 Rev A...
Need help?
Do you have a question about the Alino TL Series and is the answer not in the manual?
Questions and answers