
Related Manuals for Alfa Laval Contherm 6X3


Summary of Contents for Alfa Laval Contherm 6X3
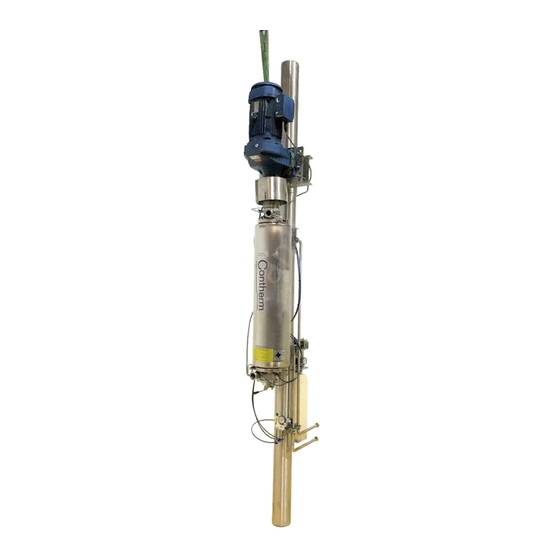
- Page 1 Instruction Manual ™ Contherm Single Wall Scrape Surface Heat Exchangers 100000820-EN01 2018-10 Original manual...
-
Page 3: Table Of Contents
Table of contents The information herein is correct at the time of issue but may be subject to change without prior notice 1. CE Declaration of Incorporation for Machinery ..........2. Safety Summary ..................2.1. Introduction ..................2.2. Safety Precautions ................2.3. - Page 4 Table of contents The information herein is correct at the time of issue but may be subject to change without prior notice 8.4. Seals ....................8.5. Scraping Blades .................. 8.6. Bearings ................... 8.7. Heat Exchanger Cylinder ................. 8.8. Hydraulic Pump and Stack Valve Assembly ...........
-
Page 5: Ce Declaration Of Incorporation For Machinery
Description of Machinery: Contherm, Contherm Core, Contherm HP, Contherm Max, Convap Model: Alfa Laval Inc. herewith declares that the following national technical standards and specifications have been used: ASME Section VIII, Division 1. Other Directives applied: 2014/68/EU, 1935/2004 & 2023/2006. - Page 6 Information contained in this manual is subject to change without notice and does not represent a commitment on the part of Alfa Laval Corporation. No part of this manual may be reproduced or transmitted in any form or by any means, electronic or mechanical, including photocopying and recording, for any purpose, without the express written permission of Alfa Laval Corporation.
-
Page 7: Safety Summary
MAINTENANCE Always use OEM Parts: OEM parts are to be used to maintain safe function of the equipment. Alfa Laval is not responsible for any adverse effects to operator, equipment or product (being processed) safety that is created from the use of non-OEM components. -
Page 8: Safety And Inspection Symbols
2 Safety Summary 2.3 Safety and Inspection Symbols Below table 2-1 is a listing of all safety warning symbols and their meanings. Danger Cold Surface High Pressure Slip Hazard Rotating Shaft Hand Crush / Pinch Hazard Sharp Edges Potentially Corrosive Materials Burn Hazard Inspection Point Leaking Hazard... -
Page 9: Safety And Potential Hazards Drawing
2 Safety Summary 2.4 Safety and Potential Hazards Drawing Figures 2-1A and 2-1B list all safety warning signs and their meanings and highlights safety concerns. Figure 2-1A Safety Warnings (Refer to section 2.3 for safety and inspection symbols) - Page 10 2 Safety Summary Figure 2-1B Safety Warnings (Refer to section 2.3 for safety and inspection symbols)
-
Page 11: Warranty And Product Support
Alfa Laval Inc. offers the following warranty on the materials, workmanship and equipment of the Contherm™ SSHE to the original purchaser of the Contherm™. 1. Alfa Laval Inc. warrants to the original purchaser that all equipment manufactured by Alfa Laval Inc. Is free from defects in material and workmanship. - Page 12 3.2.4 Office and Service Locations For your convenience, we encourage you to work with our local representatives in your area. If you cannot locate an Alfa Laval Inc. representative in your area, please contact us directly at the following location: Alfa Laval Inc.
-
Page 13: Portfolio Description & Equipment Limitations
With a wide selection of components, now also including the low shear rotor for large particulates, numerous Contherm™ configurations are available. Trained, knowledgeable Alfa Laval staff can customize each Contherm™ unit by selecting the appropriate materials, features and options to meet each customer’s exact requirements. -
Page 14: Limits Of Machinery
- The Contherm™ cylinder is a ASME and/or PED certified pressure vessel. The user must not alter or perform maintenance tasks on the cylinder aside from inspection and cylinder replacement. Only Alfa Laval can perform cylinder maintenance such as honing or welding to the vessel. - Page 15 4 Portfolio Description & Equipment Limitations Interface Limits: The Contherm™ scraped surface heat exchanger is designed to be integrated with other equipment as part of a process line. Typical equipment before and after the Contherm™ are pumps, valves, instrumentation, strainers, mixers, holding tubes and tanks.
- Page 16 4 Portfolio Description & Equipment Limitations Application Limits Contherm™ Convap Contherm™ Core Contherm™ • • • • Viscosity Up to 25,000 cps • • • • Up to 50,000 cps • • • Up to 200,000 cps • • • Up to and >...
-
Page 17: Serial Number And Material Information
No HIPEX T Triple-Chrome The information provided by your Contherms™ serial number should be referenced whenever you correspond with Alfa Laval Contherm™ Inc. or order spare parts. The nameplate is in two locations. One is located on the heat exchanger pressure vessel itself enclosed within the trim sheet cover and the duplicate nameplate is located on the exterior stainless steel outer trim sheet both as shown below in Figure 5-1. -
Page 18: Contherm™ Name Plate
5 Serial Number and Material Information 5.2 Contherm™ Name Plate The serial number is inscribed on the inspection plate mounted on the exterior of the Contherm™ and on the pressure vessel heat exchanger cylinder. Figure 5-1 Contherm™ Nameplate... -
Page 19: Installation
Any modifications to the equipment can likely void the equipment warranty and can WARNING possibly create a safety risk. Contact Alfa Laval before modifying the equipment. Apply anti-seize compound to non-product contact threaded connections to enhance CAUTION... -
Page 20: Uncrating And Unpacking The Equipment
Ttake note of all contents of every crate upon arrival. Seek out crates that hold spare parts and important documentation (including thumb drive with electronic files) and ensure proper personnel promptly receives this information. Alfa Laval is not responsible for lost items. - Page 21 Use the packing list and this Instruction Manual to verify that all equipment has been received. If any part of the shipment is missing, notify your local Alfa Laval Inc. representative as soon as possible. Leave all components in their crates and containers in a safe environment until you are ready to install them.
- Page 22 6 Installation Recommended Lifting Procedures Removing the Contherm™ heat exchanger should involve strapping around the media connections of the outer jacket as shown to the below right. Proper lifting of a Contherm™ from its Crate Figure 6-2. Proper Lifting of a Contherm™ from its Crate For vertical mounting columns, strap column at center of gravity location.
- Page 23 6 Installation Typical Contents of Crate Containing Horizontal Contherm Mount Note: Motor and other important items such as spare parts, blades and documentation will likely be in the crate with the horizontal frame as shown. Figure 6-4. Typical Contents of a Crate Containing Horizontal Contherm™ Mount...
-
Page 24: Installing The Vertical Mount
Both mounting methods are shown in Figure 6-5. The “A” Frame for bolting the mount to the wall and the ceiling plate for bolting the mount to the ceiling are not supplied by Alfa Laval Inc. The end user is responsible for these structural mounting items. - Page 25 6 Installation Table 6-4. Wall and Ceiling Mounting Mounting column Contherm cross-arm Motor cross-arm Motor mounting plate Mount floor plate and tie-down bolt Ceiling plate (bolted to ceiling by installer) “A” Frame (bolted to wall by installer) Wall mounting plates (bolted to wall by others)
- Page 26 6 Installation Perform all steps of the procedure described in Table 6-5 upon receipt of shipment of your Contherm™ Table 6-5. Erecting the Vertical Mount Step Action Secure the floor plate (P/N 7401337-01) to the floor by drilling a 1-inch (25.4 mm) DIA x 6-inch (152.40 mm) deep hole into the floor for the tie-down rod (P/N 7401836-01).
-
Page 27: Mounting And Installing The Contherm™ In A Vertical Configuration
6 Installation 6.4 Mounting and Installing the Contherm™ In a Vertical Configuration After installing the mount, you can then mount and install the Contherm™ heat exchanger. Before starting this procedure, review the safety warnings in section 6.1 and obtain the lifting equipment required for the safe installation of this equipment. When you are ready to install the Contherm™, proceed to Table 6-6 and perform each step of the procedure in the sequence in which it is presented. - Page 28 The Contherm™ Motor Plate Assembly is shown in Figure 6-8. The location of the motor plate on the vertical mount is preset by Alfa Laval Inc. at the factory to minimize the need for adjustments. Final adjustments must be made on side to insure proper alignment.
-
Page 29: Installing The Coupling Guard
6 Installation 6.5 Installing the Coupling Guard After installing the drive coupling, be sure to install the safety guard. Refer to table and figures below for the installation procedure. Table 6-8 Describes the list of components for the coupling guard. Item Part Number Description... - Page 30 6 Installation Figure 6-11A Installing the coupling guard. Figure 6-11B Installing the coupling guard continued...
-
Page 31: Installing The Components Of The Rotor Lifting Device
6 Installation 6.6 Installing the Components of the Rotor Lifting Device Each vertically mounted Contherm™ is provided with a hydraulically controlled rotor lifting system. This system permits the Contherms™ rotor and blade assembly to be raised or lowered safely and easily for inspection, maintenance or manual cleaning. Refer to Figure 6-13 for detailed description. - Page 32 6 Installation For safety, it is essential that a single operator safely adjust and align the lower product head with one hand while manipulating the stack valve assembly handle with the other hand. The Rotor Lifting System’s Stack Valve Assembly (P/N 7401305) is a hydraulic directional control valve used to lower or raise the Contherms™...
- Page 33 6 Installation Figure 6-15 below demonstrates a dual rotor lifting system configuration. This configuration utilizes a Stack Valve Assembly with two center sections also known as a Dual Stack Valve Assembly. Figure 6-15. The major components of the rotor lifting device: Supply from the hydraulic pump.
- Page 34 Figure 6-19. Connect Two Stack Valve Assemblies If the Contherm™ mounting assembly has been provided by Alfa Laval Inc., the location of the stack valve assembly on the mount is predetermined at the factory. Otherwise, you must locate the assembly near the lower end of the Contherm™, either on a mounting panel or an adjacent wall.
- Page 35 6 Installation Table 6-10. Installing the Components of Rotor Lifting Device Step Action Run a length of supplied 0.38-inch (9 mm) O.D. tubing between each stack valve connection and the two fittings on each end of the Contherm™ hydraulic lift piston assembly. Avoid crimping the tubing and ensure that the tubing is not resting against moving parts.
-
Page 36: Mounting And Installing The Standard Contherm™ Or A Contherm™ Core In A Horizontal Configuration
CIP drainage. Alfa Laval Contherm™ Product Center is not responsible for equipment failures due to improper mount designs by others. If the mount has been supplied by your local Alfa Laval Company or another company, use the procedure they have provided. - Page 37 6 Installation Contherm™ HEAD ORIENTATION and Equipment Drainability in Horizontal Installations To maintain a dry bearing area, the Contherm™ head and port orientation should be kept in the configuration as demonstrated in your project specific general arrangement drawing otherwise pooling of product, CIP solution or moisture can occur causing premature bearing failure.
- Page 38 Figure 6-14. Inlet / Outlet Head Orientation 6.6.3. Rotor Removal Trough As shown in Figure 6-15, the horizontal mount provided by Alfa Laval Inc. includes a rotor removal trough (P/N 7402714). This device will help you manually remove the rotor from the Contherm™.
- Page 39 6 Installation Figure 6-15. Horizontal mounting frame with rotor and rotor removal trough. Table 6-9. Removing the Rotor from The Contherm™ With the Rotor Removal Trough Action Step First Step for all maintenance procedures is to always verify there is no pressure in system, system is drained of all fluids, and temperatures are suitable for handling.
-
Page 40: Installing Ancillary Equipment Or Piping To Support Heating Or Cooling In The Contherm
6 Installation 6.8 Installing Ancillary Equipment or Piping to Support Heating or Cooling in the Contherm™ DANGER 1. Do not allow liquid to be isolated in the Contherm™ (product or media side) without pressure relief protection. Thermal expansion or contraction can seriously damage the equipment or create an extreme pressure situation causing injury or death. -
Page 41: Installing A Steam Heating System
6 Installation 6.9 Installing a Steam Heating System Figure 6-18 shows a typical steam heating system configuration for a Contherm™. Depending on your specific media, power, product, and plant layout, your installation configuration may vary from what is shown in this diagram. The pressure and temperature gauges are important tools that should be incorporated within your Contherm™... - Page 42 6 Installation Figure 6-21. Contherm™ Product inlet Contherm™ Product outlet Steam supply / Inlet Steam return / Outlet Steam control valve Temperature or pressure gauge Process control Temperature signal to controller Steam trap Condensate leg Figure 6-21.
-
Page 43: Installing An Ammonia For Freon: Full-Flooded Refrigeration System
6 Installation 6.10 Installing an Ammonia for Freon: Full-Flooded Refrigeration System The refrigeration system and related pipework should only be installed and tested by a qualified refrigeration technician. Ensure that debris and contaminants associated with installing the refrigeration pipework are removed from piping and do not foul the Contherm™... - Page 44 6 Installation Safety Relief Valve The refrigeration safety relief valve prevents pressure in the accumulator from rising above a safe limit. Purge Valve A refrigeration system that uses ammonia must have a purge valve located at a low point so that the oil that accumulates in the refrigerant line can be drained from the system.
- Page 45 6 Installation Figure 6-22 Contherm™ Product inlet Contherm™ Product outlet Liquid feed line Suction line Accumulator vessel Dual back pressure regulator Pressure relief valve Hand expansion valve Level sensing float switch Sniffer line (Freon only) Hot gas line Down leg purge valve/drain Down leg Accumulator assembly support Process controls...
-
Page 46: Installing A Liquid Heating Or Cooling Media System
6 Installation 6.11 Installing a Liquid Heating or Cooling Media System The Contherm™ operates most efficiently with counter-current flow between the product and the media. Product enters the cylinder at the bottom or non-driven end while liquid media enters the top or drive end. It is extremely important that pumps, pipe lines and valves be sized and installed properly to ensure that the flow rate of the media reaches a turbulent level. -
Page 47: Uninstalling The Contherm
Utilize the above installation guidelines in reverse order to properly disassemble the Contherm™ equipment. Refer to all safety instructions provided in this chapter and in chapter 2. 6.12.1. Scrapping the Contherm™ Drain equipment of all fluids. All metallic materials are recyclable Consult with local laws on recycling Alternately, return equipment to Alfa Laval for proper recycling. -
Page 48: Operations
2. If hydraulic lift system is not operating properly, go directly to the troubleshooting guide to correct the problem. This is a safety issue. 3. Contact Alfa Laval if on-site operation and maintenance training is desired 4. Before attempting to operate the Contherm™ beyond what is specified in your order documentation, contact Alfa Laval to ensure you do not exceed the equipment’s... - Page 49 7 Operations Table 7-4. Operating the Hydraulic Rotor Lifting System Step Action Turn off the Contherms™ Rotor Drive System. Clean the system with CIP, then flush the Contherm™ with cold water and then drain before disassembling unit. Remove the product piping from the lower product head of the Contherm™. Start the hydraulic Rotor Lift Pump (P/N 7402078).
- Page 50 7 Operations Figure 7-1. Hydraulic Rotor Lift System Component List Stack valve handle Hydraulic tubing Blades Rotor hold down feature Helper plate Helper plate / Contherm™ cylinder clamp Figure 7-1. Hydraulic Rotor Lift System...
-
Page 51: Rotor Lift Helper Plate To Aid In Serving Lower Components
7 Operations 7.3 Rotor Lift Helper Plate to Aid in Serving Lower Components The Rotor Lift Helper Plate (P/N 7401322) is used with the hydraulic lifting system to aid in the inspection of the lower head assembly, seals and bearings. The procedure for operating the Contherms™ Rotor Lift Helper Plate is provided in Table 7-5. Refer to Figure 7-1 for component identification and location information. - Page 52 7 Operations Figure 7-2A. Installing the Rotor Helper Plate Figure 7-2A. Installing the Rotor Helper Plate...
- Page 53 7 Operations Figure 7-2B. Using Helper Plate to Access Lower Head & Seal Components Figure 7-2B. Using Helper Plate to Access Lower Head & Seal Components...
-
Page 54: Contherm™ Pre-Test
7 Operations 7.4 Contherm™ Pre-Test Perform the pretest procedure below to verify its operational status. Contherm™ Pre-Test Procedure Step Action To ensure that your Contherm™ is ready to begin operation, perform the following steps: Ensure that the flexible couplings of the drive motor and the Contherm™ are aligned properly. Adjust if necessary as misalignment can cause damage to the Contherm™... -
Page 55: Operating The Contherm™ In A Steam Heating Configuration
7 Operations Table 7-7. Start-Up and Initial Testing Guidelines Step Action Do not proceed with the start-up and initial testing of the Contherm™ unless you have read this manual. Ensure that the hydraulic lift system is operating properly. Flush the product chamber and thoroughly clean it of all foreign materials before operating the rotor. Jog all motors and pumps to ensure their proper operation and direction of rotor. -
Page 56: Operating The Contherm™ In An Ammonia Or Freon Full-Flooded Refrigeration Configuration
7 Operations 7.8 Operating the Contherm™ in an Ammonia or Freon Full-Flooded Refrigeration Configuration The installation and set-up of the Contherm™ for a refrigerated configuration is described in Chapter Six, Section 6.10 Installing an Ammonia or Freon Full-Flooded Refrigeration System. An installation drawing of the configuration is provided in Figure 5-12. -
Page 57: Operating A Water Heating Or Cooling Contherm™ Or Brine Cooling Contherm
7 Operations 7.9 Operating a Water Heating or Cooling Contherm™ or Brine Cooling Contherm™ The installation and set-up of the Contherm™ for a water or brine cooled configuration is described in Chapter Five, Section 5.10 Installing A Water or Brine Cooling System. Typical installation drawings of the configuration are provided in Figure 5-13. Refer to those portions of Chapter Five as necessary while performing the initial start-up and operating procedure that is provided in Table 7-11. -
Page 58: Shutting Down The Contherm
Table 7-12 identifies the recommended steps in the cleaning program that are suitable for your Contherm™. If you have a question about any of the steps in the cleaning program, contact your local Alfa Laval Inc., local chemical supplier representative. - Page 59 7 Operations Table 7-12. Recommended Cleaning Program for The Contherm™ Cleaning Agents Temp. Time Chemical Solution pH Purpose Concentration (Conc.) Water Rinse 5 - 10 minutes; until Not Applicable Not Applicable To remove loose soil 60-120°F 16-49°C discharge is clear Caustic Alkaline 160-190°...
-
Page 60: Inspection & Maintenance
This chapter provides a recommended schedule for performing maintenance. You must perform periodic maintenance on the equipment and components of your Contherm™ to ensure its safe and efficient operation. Alfa Laval Service personnel are also available to assist with equipment service. Assistance can be requested via e-mail (USContherm.support@alfalaval.com). - Page 61 All Contherm™ equipment field repairs should be considered only if all required tools and work conditions can be met. Alfa Laval can perform all equipment repairs highlighted in this chapter at one of our closest Service Centers. Please contact your local Alfa Laval representatives or contact USContherm.support@alfalaval.com for more information...
-
Page 62: Recommended Inspection
8 Inspection & Maintenance 8.2 Recommended Inspection Tables 8-1A, 8-1B and Figures 8-1A, 8-1B describe suggested inspection points. Table 8-1A Recommended Inspection Points (refer to section 2.3 for symbol references) 1A, 1B - Ensure clamps/bolts are properly tightened - Inspect all blade pins for wear - Inspect lower mechanical seal for cleanliness. - Page 63 - Ensure hydraulic pressure is 450 psi (31 Bar or less). Figure 8-1B. Recommended Inspection Points NOTE: ALFA LAVAL recommends the customer create a physical inspection checklist to be used regularly by staff to ensure proper equipment function. Store inspection records for later use.
-
Page 64: Scheduled Maintenance
This schedule has been developed to support a Contherm™ operated in a production run of approximately 40 to 50 hours per week. This table has been provided by Alfa Laval Inc. as a suggested maintenance guideline. Table 8-2. Initial Inspection and Maintenance for The Contherm™... - Page 65 8 Inspection & Maintenance WARNING Refer to Section 8.1 Introduction and safety recommendations before performing the following procedures. 8.4.1 Standard and Hard Face Rotary Seals The actual lifecycle of the rotary seal will be determined by the following combination of factors: 1.
- Page 66 8 Inspection & Maintenance Figure 8-2 Component List Figure 8-2.
- Page 67 8 Inspection & Maintenance 8.4.2 Flushed Standard and Flushed Hard Face Rotary Seals The Flushed Rotary Seal is used for applications that require additional lubrication or aseptic sealing. It provides the same rotary sealing action as the standard rotary seal, but with one additional feature -- it lubricates, cleans or sterilizes the non-product side of the seal.
- Page 68 8 Inspection & Maintenance Figure 8-3 Component List Refer to above Table Figure 8-3. 8.4.3. Seal Inspection and Replacement This section describes how to inspect and replace the Contherms seal components. Seal inspection and replacement are easy tasks that can be performed by one individual. The seal inspection process consists of looking for signs of visual mechanical wear such as seal face chipping, metal scoring, seal pin notching, evidence of leaks, worn or failed O-rings, or worn seal faces.
- Page 69 The seal face must be replaced if it is cracked or broken, or is worn down to the point where there is no longer any seal face protruding from the seal shell. Alfa Laval Inc. recommends that you always have adequate spare seal face assemblies available so that replacement may be performed quickly.
- Page 70 8 Inspection & Maintenance Table 8-8. Replacing the Seal Face Step Action After removing the O-ring, chip out the damaged seal face. Note: Use care when chipping out the seal face. Do not scratch or distort the seal shell. Wash the seal shell with detergent and water to remove any product residue and/or pieces of the seal face. Rinse thoroughly.
- Page 71 Hold the pin over the hole. Using a hammer tap the pin into place. The top of the pin should protrude from the shaft, only .125” (3.175 mm). Please call the Technical Services Department at Alfa Laval Inc. Contherm™ Product Center if you have any questions: 978-465-5777 or e-mail to UScontherm.support@alfalaval.com...
- Page 72 8 Inspection & Maintenance Table 8-11. Seal Pin Locations for Rotors with Internal Bearings Contherm™ Dimension “A” Rotor Type 6 x 3 6 x 6 6 x 9 6 x 11 75.28 inches 85.81 inches Standard Rotor 27.28 inches (692.9 51.28 inches (1302.5 (1912.1 mm) (2179.5 mm)
-
Page 73: Scraping Blades
8 Inspection & Maintenance 8.5 Scraping Blades The following sections describe how to install, inspect, and maintain the blades used with your Contherm™. Table 8-13 shows how the information in this section is organized. Table 8-13. Installation and Maintenance Procedures for The Scraping Blades Section Description 8.4.1... - Page 74 8 Inspection & Maintenance Figure 8-6. Blade Pin Orientation Figure 8-7. Blade Orientation of Beveled Edge 1. Contherm rotor 1. Contherm cylinder 2. Lead blade pin slot (reverse) 2. Rotor 3. Blade pins 3. Blade 4. Blade bevel orientation 8.5.2 Inspecting the Scraping Blades Contherm™...
- Page 75 8 Inspection & Maintenance Before raising the rotor with blades installed, insert the blade funnel by wrapping the funnel around the rotor. Insert the collar into the Contherm™ cylinder as shown in Figure 8-8 A, B & C. The blade funnel will assist in guiding the blades as they enter the cylinder and ensure they do not come into contact with the cylinder edge causing damage to both the blade and cylinder edge.
- Page 76 8 Inspection & Maintenance Figure 8-8A. Purpose of the Blade Funnel When raising the rotor using the hydraulic lift, blade pins can contact the cylinder end and damage this area which can cause the Contherm™ to leak due to an un-flat surface. Figure 8-8A.
- Page 77 8 Inspection & Maintenance Figure 8-8B. Inst the Blade Funnel Follow the below sequence of installing the funnel and raising of the rotor. Figure 8-8B. Inst the Blade Funnel...
- Page 78 8 Inspection & Maintenance Figure 8-8C. Removing the Blade Funnel Remove the funnel once the last set of blades is within the Contherm cylinder Figure 8-8C. Removing the Blade Funnel...
- Page 79 8 Inspection & Maintenance 8.5.3 Maintenance of the Scraping Blades If a jagged or razor-sharp edge is found, remove it by dressing the blade as shown in Figure 8-9 and described in Table 8-16. Table 8-16. Maintenance of the Scraping Blades Action Step Remove the blade from the rotor.
- Page 80 8 Inspection & Maintenance 8.5.4 Maintenance of The Blade Pins If your Contherms™ scraping blades begin to wear unevenly or start to break, the blade pin slot may be distorted. Distortion may result from any of the following conditions: 1. Improper removal of the blades during inspection and maintenance. 2.
- Page 81 8 Inspection & Maintenance Table 8-17. Repairing A Damaged Blade Pin Step Action Place a 0.125 inch (3.2 mm) thick feeler gauge into the slot of the damaged blade pin to determine the extent of the distortion. Hold a striking pad against the top of the blade pin and strike the pad with a hammer. Check the 0.125 inch (3.2 mm) thick feeler gauge until the proper opening is obtained.
-
Page 82: Bearings
(non-driven end) and upper (drive head) bearings once per month and based on experience, extend the inspection time to what is deemed to be a practical and safe frequency. The bearings supplied by Alfa Laval Contherm Inc. are supplied pre-greased and sealed to withstand the aggressive cleaning cycles and equipment wash downs that the Contherms™... - Page 83 8 Inspection & Maintenance Table 8-19. Replacing the Lower Bearings (Non- Hold Down Style) Step Action First step is always to make sure there is no pressure, no fluid and no extreme temperatures present. Remove the Contherms™ lower head clamp (part number 7403038- 01) and lower the rotor, using the hydraulic rotor lifting device.
- Page 84 8 Inspection & Maintenance Figure 8-11 Component List Product Head Bearing Clamp (7401579-01) Slinger Ring (7401964-01) Bearing Cap (7401618-01) Spacer (7402979-02) Bearing (7401391-01) Rotor End (7402982-02) Bearing Cap Cover (7402993-01) Socket Head Cap Screw (7401242-10) Lock Washer (7401244-06) Hex Head Cap Screw (7401241-21) Socket Head Cap Screw (7401242-03) Retaining Ring (7401243-08) Lift Beam Assembly (7401283-02)
- Page 85 8 Inspection & Maintenance 8.6.3 Replacing the Lower Bearing (Rotor Hold Down Style) The procedure for replacing the Contherms lower bearing (Rotor Hold Down Style) is provided in Table 8-20. Refer to Figure 8-12 while performing this procedure. The drawing provided in Figure 8-12 shows the location and identifies the parts of the lower bearing.
- Page 86 8 Inspection & Maintenance Figure 8-12 Component List Product Head Slinger Ring (7401964-01) Bearing seal (7401621-01) Bearing (7401391-01) Bearing Clamp (7401579-01) Bearing Cap (7401618-01) Bolt Sleeve (7401289-01) Hex Head Cap Screw (7401286-01) Retaining Ring (7401243-08) Lift Beam Assembly (7401283-01) Tapered Pin (7401749-01) Piston Rod (7401173) Figure 8-12.
- Page 87 8 Inspection & Maintenance 8.6.4 Replacing Upper Bearings, Direct Coupled Motor Drive Systems The procedure for replacing the upper bearing on Contherms™ equipped with a direct coupled, electric motor drive system is provided in Table 8-21. Refer to Figure 8-13 while performing this procedure. The drawing shows the location and the identification of the parts of the upper bearing.
- Page 88 8 Inspection & Maintenance Figure 8-13. Upper Bearings, Direct Coupled, Electric Drive Motor...
-
Page 89: Heat Exchanger Cylinder
(there should be a series of photographs of various states of cylinder wear, showing what is normal and expected, and then showing pitting, scoring, flaking, and scalloping.) If any of the above conditions exist, please contact your local Alfa Laval Inc. representative for additional assistance. -
Page 90: Hydraulic Pump And Stack Valve Assembly
8 Inspection & Maintenance Table 8-23. Recommended Demineralizing Procedures Cylinder Material Action All Stainless Steels 1. Rinse. 2. Acid wash 2.0 to 2.2 pH, 120°F to 140°F (49°C to -60°C) for 30 to 45 minutes.) 3. Rinse. 4. Neutralize (Use a mild general cleaner). 5. - Page 91 8 Inspection & Maintenance Figure 8-14 Component List 1 Inlet Body Kit with check balls and seats 7402083-02 2 Outlet Body Kit with O-rings & Shims 7402083-04 3 Valve Section with O-rings & Shims 7402083-03 4 Handle Kit with Linkage Pins & Retaining Rings 7402083-01 5 Mounting Bracket 7401781-01...
- Page 92 8 Inspection & Maintenance 8.8.1 Replacing O-Rings in The Stack Valve Assembly Table 8-24. Replacing O-Rings in The Stack Valve Assembly Action Steps Drain the hydraulic fluid from the Contherms™ Rotor Lift System and disconnect all hydraulic lines (tubing) from the Stack Valve Assembly’s center section. WARNING: Ensure that all the Contherms™...
-
Page 93: Disassembly And Reassembly Of The Contherm
8 Inspection & Maintenance 8.9 Disassembly and Reassembly of the Contherm™ This section provides the detailed procedures for disassembling and reassembling a vertically mounted Contherm™. Table 8-25 identifies the disassembly/reassembly procedures that are contained in this section. Table 8-25. Contherm™ Disassembly and Reassembly Procedures Section Description 8.9.1... - Page 94 8 Inspection & Maintenance Support the weight of the Contherm™ by using a properly rated lifting device. Ensure that the support slings are placed correctly to prevent any damage from occurring to the Contherm. With all clamps securely in place, 7" clamps P/N 7403038-01, pass a sling through the slots on the Contherms™...
- Page 95 8 Inspection & Maintenance 8.9.3 Reassembly of the Contherm™ Table 8-27. Reassembly of the Contherm™ Steps Action This procedure assumes that you have disassembled the Contherm™ in accordance with all directions provided in Table 8-26. Place the cylinder assembly into the trim sheet, 1.50-inch media connection end first. Align the media connection with the mounting connection of the trim sheet.
- Page 96 8 Inspection & Maintenance 8.9.4 Disassembly of The Contherms™ Hydraulic Lift Cylinder The procedure for disassembling the Contherms™ hydraulic lift cylinder is provided in Table 8-28. Refer to Figures 8-18 for parts location and identification information while performing this procedure. Figure 8-18 shows the disassembly of a Contherm™...
- Page 97 8 Inspection & Maintenance Figure 8-18 Component List Item Qty Part Number Description Item Qty Part Description Number 2 7401109-01 U-Cup, Hydraulic Piston Seal 2 7401243-06 Retaining Ring, Ext., Hydraulic Lift Cylinder 2 7401137-02 O-Ring, Size 223, BUNA 2 7401243-07 Retaining Ring, Internal, 1-7/8 Bore 1 7401137-04 O-Ring, Size 218 BUNA N (Nitrile) 3 7401243-08 Retaining Ring, Hydraulic Lift Cylinder...
- Page 98 8 Inspection & Maintenance Figure 8-18 Component List Item Part Number Description 7401109-01 U-Cup, Hydraulic Piston Seal 7401137-02 O-Ring, Size 223, BUNA 7401137-04 O-Ring, Size 218 BUNA N (Nitrile) 7401137-90 O-Ring, Size 116, BUNA 7401162-01 Cap, Hydraulic Lift Cylinder 7401164-01 Head, Hydraulic Lift Cylinder 7401169-03 Cylinder, Hydraulic Lift...
- Page 99 8 Inspection & Maintenance Figure 8-18B . CONTHERM™ Hydraulic Lift Assembly With Hold Down...
-
Page 100: Troubleshooting
The troubleshooting information is provided as a series of easy-to-follow tables, with each table addressing a specific topic or area. The information provided in this chapter reflects both the knowledge acquired by Alfa Laval Inc.’s engineers as well as customers experience with the Contherm™. -
Page 101: Seal Leaks
Seal spring failure due fatigue Inspect frequently and replace as needed based on experience. Damaged rotor or improper repair of rotor Wear on rotor surface not allowing for a proper seal. Contact Alfa Laval for rotor repair. Extreme temperature differences between Use of non-OEM seals or O-rings Product inlet and media will cause seal leaks. -
Page 102: Lower Bearing
“Rotor hold down” version is included with your equipment. If not, refer to step below. An improperly set rotor stop. Contact Alfa Laval for more information on “Rotor stop” / Non-Hold Down Note: Applies only to Contherms™ designs. -
Page 103: Rotor Lift System
9 Troubleshooting 9.4 Rotor Lift System A hydraulic Rotor Lift System is provided as standard equipment with each vertically mounted Contherm™. This system provides a safe and easy method for lowering or raising the Contherms™ rotor and blade assembly for inspection, maintenance, or manual cleaning. - Page 104 Increase speed and frequency of scraping. Cylinder wear / grooving is allowing fouling to Inspect the cylinder frequently and address any wear that can impact the mechanical and the heat transfer performance. Contact Alfa Laval for an occur equipment audit.
-
Page 105: Product Cooling (Water/Glycol/Brine)
9 Troubleshooting 9.6 Product Cooling (Water/Glycol/Brine) If a product cooling problem does occur, the following procedure shows you how to identify its cause and resolve the problem. Table 9-8 identifies specific factors that may result in the product not being cooled to the proper temperature. To resolve the problem, perform the appropriate action as described in the table. -
Page 106: Product Cooling (Ammonia/Freon)
9 Troubleshooting 9.7 Product Cooling (Ammonia/Freon) If a product cooling problem does occur, the following procedure shows how to identify its cause and resolve the problem. The two most common product cooling problems that may occur in a Contherm™ using Ammonia/Freon media are the following: 1. - Page 107 9 Troubleshooting Problem: Contherm™ system is freezing up Table 9-10 identifies specific factors that may result in the system freezing up. System freeze up is a process situation where the rotors cease to spin and scrape due to freezing of product at a rate that exceeds the Contherms™ ability to remove frozen material from the heat transfer wall.
-
Page 108: Appendix A: Additional Installation Drawings
10 Appendix A: Additional Installation Drawings Additional Installation Drawings The below drawings follow a typical sequence of how to install your vertical Contherm™ scraped surface heat exchanger equipment. 1. Assemble the mounting column - Below demonstrates a split column. Not all columns are split and require assembly as shown below. Top of column... - Page 109 10 Appendix A: Additional Installation Drawings 2. Place the cross arms onto the column as shown. - The cross arms must sit on top of the column brackets and be bolted as shown for a safe installation. Top of column...
- Page 110 10 Appendix A: Additional Installation Drawings 3. Install the drive motors onto the motor mounting plates. - Remove the motor plate from the mount. - Attach motor to the motor plate. - Attach the upper coupling hub to the motor shaft - Install the upper coupling component onto the motor drive shaft as shown.
- Page 111 10 Appendix A: Additional Installation Drawings 4. Installing the vertical column(s). - Fix the column to a ceiling brace and to the floor. The mount floor plate and the ceiling or wall bracing must be secured by others that are qualified and can ensure a safe installation of the equipment. Consult a structural engineer.
- Page 112 10 Appendix A: Additional Installation Drawings 5. Installing the Contherm to the vertical column. - Insert the lower media port into and through the cross-arm holes then insert the upper media port through the upper crossarm hole and secure with the 3-inch mounting nuts.
- Page 113 10 Appendix A: Additional Installation Drawings 6. Install the coupling guard components - Place the guard ring over the Contherm bearing housing as shown below. Leave this ring loose at this step. Install the lower coupling half to the Contherm drive shaft exactly as shown with coupling facing up.
- Page 114 10 Appendix A: Additional Installation Drawings 7. Install the motor onto the motor cross arm. - The motor and motor place should have already been preassembled. - Note orientation of motor couplings. Install the couplings exactly as shown below. - Use adjustment hardware (1,2,3,4) to position the motor so that the couplings are aligned.
- Page 115 10 Appendix A: Additional Installation Drawings 8. Align the drive motor to the Contherm shaft - Ensure the couplings are completely aligned via the use of a straight edge or laser shaft alignment device. - Use spacer provided (1) to ensure proper alignment. - Misalignment will cause premature wear to components.
- Page 116 10 Appendix A: Additional Installation Drawings 9. Install the coupling guard components. - Refer to section 6.5 for additional detail. - Secure the plastic ring to the bearing housing top plate with the 4 socket head cap screws.
- Page 117 10 Appendix A: Additional Installation Drawings...
- Page 118 10 Appendix A: Additional Installation Drawings 10. Install the hydraulic lift pump and stack valve components.
- Page 119 10 Appendix A: Additional Installation Drawings 11. Install the hydraulic tubing - Refer to section 6.7 for proper installation of hydraulic lifting system components Oil return from piston 2 Oil return from piston 1 Oil return to pump from stack valve Oil supply to piston 1 Oil supply to stack valve...
- Page 120 10 Appendix A: Additional Installation Drawings 12. Fill hydraulic pump reservoir and test hydraulics - Refer to table 6-10 for installation instructions and proper oil specification. - You are now ready to operate your Contherm equipment. - Make sure rotor raises and lowers in the same direction as the stack valve handle.
-
Page 121: Appendix B: Other Equipment Supplier Documentation
12 Appendix C: Available Tools to Assist in Inspection and Maintenance Tools Text to be added/modified Available Tools to Assist in Inspection and Maintenance Component Part Number (P/N) Description Helper Plate 7401322-04 (5’’ Rotors) The Rotor Lift Helper Plate (P/N 7401322) is 7401322-03 (4.0"... -
Page 122: Appendix D: Contherm Cylinder Capacity
13 Appendix D: Contherm Cylinder Capacity SCN, STAGGERED, ALFALON II BLADES 2-INCH TANGENTIAL HEADS COILED CYLINDER 3-in. Rotor 4-in. Rotor 4.5-in. Rotor Media Annulus Model Capacity (76-mm) (102-mm) (114-mm) Capacity US Gallon Liter US Gallon Liter 18.1 14.8 US Gallon Liter 25.3 18.0... -
Page 124: Appendix 1: Project-Specific Documentation
© Alfa Laval Corporate AB This document and its contents is owned by Alfa Laval Corporate AB and protected by laws governing intellectual property and thereto related rights. It is the responsibility of the user of this document to comply with all applicable intellectual property laws. Without limiting any rights related to this document, no part of this document may be copied, reproduced or transmitted in any form or by any means (electronic, mechanical, photocopying, recording, or otherwise), or for any purpose, without the expressed permission of Alfa Laval Corporate AB.
Need help?
Do you have a question about the Contherm 6X3 and is the answer not in the manual?
Questions and answers