Advertisement
Table of Contents
- 1 Table of Contents
- 2 Safety Information
- 3 Safety Instructions
- 4 Product Description
- 5 Control Panel
- 6 Before First Use
- 7 Daily Use
- 8 Clock Functions
- 9 Using the Accessories
- 10 Additional Functions
- 11 Hints and Tips
- 12 Care and Cleaning
- 13 Troubleshooting
- 14 Electrical Installation
- 15 Energy Efficiency
- 16 Your Guarantee
- Download this manual
Advertisement
Table of Contents

Related Manuals for Lamona LAM4403-1


Summary of Contents for Lamona LAM4403-1
- Page 1 Built-Under Double Oven LAM4403-1 User Manual www.howdens.com/appliance-registration...
- Page 2 See back page for product serial number...
-
Page 3: Table Of Contents
Contents Safety information Safety Instructions Product description Control panel Before first use Daily use Clock functions Using the accessories Additional functions Hints and tips Care and cleaning Troubleshooting Electrical installation Energy efficiency Your guarantee Subject to change without notice. -
Page 4: Safety Information
Safety information Before the installation and use of the appliance, carefully read the supplied instructions. The manufacturer is not responsible for any injuries or damages that are the result of incorrect installation or usage. Always keep the instructions in a safe and accessible location for future reference. -
Page 5: Safety Instructions
Before carrying out any maintenance, disconnect the • appliance from the power supply. Ensure that the appliance is switched off before replacing • the lamp to avoid the possibility of electric shock. Do not use a steam cleaner to clean the appliance. •... - Page 6 • Make sure not to cause damage to the mains cable. Should the mains cable need to be replaced, this must be carried out by our Authorised Service Centre. • Do not let mains cables touch or come near the appliance door, especially when the door is hot.
- Page 7 unit or the floor. Do not close the furniture panel until the appliance has cooled down completely after use. Care and cleaning WARNING! Risk of injury, fire, or damage to the appliance. • Before maintenance, deactivate the appliance and disconnect the mains power to the oven.
-
Page 8: Product Description
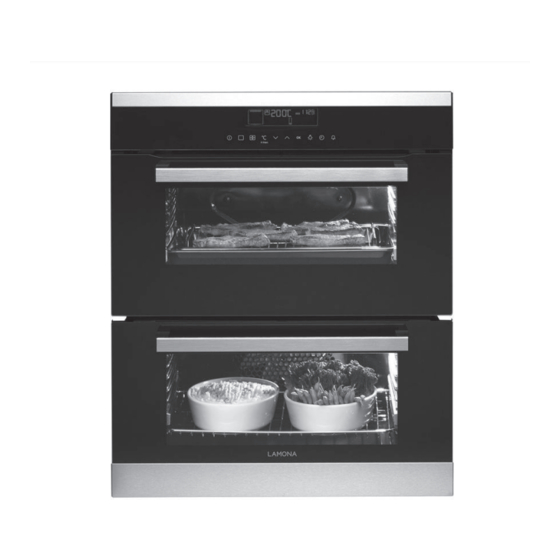
Product description General overview Control panel Electronic programmer Heating element Lamp Shelf support, removable Shelf positions Accessories • Wire shelf For cookware, cake tins, roasts. • Grill- / Roasting pan To bake and roast or as pan to collect fat. •... -
Page 9: Control Panel
Control panel Electronic programmer Use the sensor fields to operate the appliance. Sensor Function Description Field DISPLAY Shows the current settings of the appliance. ON / OFF To activate and deactivate the appliance. OPTIONS To set an oven function or an automatic programme. OVEN SELECTION To switch between top and main oven. - Page 10 Sensor Function Description Field CLOCK To set the clock functions. MINUTE MINDER To set the Minute Minder. Display A. Oven function symbol B. Temperature / time of day display C. Clock / Residual heat display / Minute Minder D. Residual heat indicator E.
-
Page 11: Before First Use
Before first use WARNING! Refer to Safety chapters. To set the Time of day refer to "Clock functions" chapter. Initial Cleaning Remove all accessories and removable shelf supports from the oven. Refer to "Care and cleaning" chapter. Clean the oven and the accessories before first use. Put the accessories and the removable shelf supports back to their initial position. - Page 12 Oven function Application Defrost This function can be used for defrosting frozen foods, such as vegetables and fruits. The defrosting time depends on the amount and size of the frozen food. Bottom Heat To bake cakes with crispy bottom and to preserve food. ECO Roasting When you use this function during cooking, it allows you to optimize the energy consumption.
- Page 13 Oven func- Application tion Defrost This function can be used for defrosting frozen foods, such as vegetables and fruits. The defrosting time depends on the amount and size of the frozen food. Bottom Heat To bake cakes with crispy bottom and to preserve food. ECO Roasting When you use this function during cooking, it allows you to optimize the energy consumption.
-
Page 14: Clock Functions
The Fast heat up function decreases the heat up time. To activate the Fast heat up function touch and hold for more than three seconds. If you activate the Fast heat up function, the bars on the display flash one by one and comes on to show that the function operates. - Page 15 6. Touch . The DURATION time starts automatically after 5 seconds. When the set time ends, an acoustic signal sounds for 2 minutes. and time setting flash in the display. The appliance deactivates. 7. Touch a sensor field or open the oven door to stop the acoustic signal. 8.
-
Page 16: Using The Accessories
5. Touch a sensor field or open the oven door to stop the acoustic signal. COUNT UP TIMER 1. To reset the Count Up Timer press: at the same time . 2. Press and hold: . When the display shows "00:00" the Count Up Timer starts to count up again. - Page 17 Small indentation at the top increase safety. The indentations are also anti-tip devices. The high rim around the shelf prevents cookware from slipping of the shelf. Telescopic runners - inserting the accessories With the telescopic runners you can put in and remove the shelves more easily. CAUTION! Do not clean the telescopic runners in the dishwasher.
- Page 18 Wire shelf and deep pan together: Place the wire shelf and the deep pan together on the telescopic runner. Trivet and Grill- / Roasting pan WARNING! Be careful when you remove the accessories from a hot oven. There is a risk of burns. You can use the trivet to roast larger pieces of meat or poultry on one shelf position.
-
Page 19: Additional Functions
2. Put the deep pan into the oven on the necessary shelf position. Additional functions Using the Function Lock You can activate the function only when the appliance operates. The Function Lock prevents an accidental change of the oven function. 1. -
Page 20: Hints And Tips
2. Touch to set the setting. 3. Touch 4. Touch to change the value of the setting. 5. Touch To exit the Settings menu, touch or touch and hold Automatic Switch-off For safety reasons the appliance deactivates automatically after some time if an oven function operates and you do not change any settings. - Page 21 Double oven Top oven The top oven is the smaller of the two ovens. It has 4 shelf positions. Use it to cook smaller quantities of food. It gives especially good results when used to cook fruitcakes, sweets and savoury flans or quiche. Main oven The main oven is the bigger of the two ovens.
- Page 22 Baking results Possible cause Remedy The cake browns unevenly. The oven temperature is too Set a lower oven temperature high and the baking time is and a longer baking time. too short. The cake browns unevenly. The mixture is unevenly dis- Spread the mixture evenly on tributed.
- Page 23 Food Temperature (°C) Time (min) Shelf position Pasta, Lasagne etc. 170 - 180 40 - 50 Pastry: - Choux 180 - 190 30 - 40 - Eclairs, Profiteroles 180 - 190 30 - 40 - Flaky / Puff Pies 210 - 220 30 - 40 Shortcrust: - Mince Pies...
- Page 24 Food Temperature (°C) Time (min) Shelf posi- tion Conventional True Fan Cooking Cooking Fruit Pies, Crum- 180 - 200 170 - 180 30 - 50 bles Milk Puddings 150 - 170 140 - 160 60 - 90 Pastry: - Choux 180 - 190 180 - 190 30 - 40...
- Page 25 Pizza Setting Top oven Food Temperature (°C) Time (min) Shelf position Apple Pie 160 - 180 160 - 180 Plate Tart 160 - 180 25 - 50 Pizza Follow manufacturer's instructions. Quiches / Tarts 160 - 180 25 - 50 Main oven Food Temperature (°C)
- Page 26 Pork Food Quantity (kg) Temperature Time (min) Shelf position (°C) Shoulder, neck, 1 - 1.5 160 - 180 90 - 120 Pork chop 1 - 1.5 160 - 180 60 - 90 Meat loaf 0.75 - 1 160 - 170 45 - 60 Knuckle of pork 0.75 - 1...
- Page 27 Food Quantity (kg) Temperature Time (min) Shelf position (°C) Turkey 2.5 - 3.5 160 - 180 105 - 150 Turkey 4 - 6 140 - 160 150 - 240 Fish (steamed) Type of meat Quantity (kg) Temperature Time (min) Shelf position (°C) Whole fish 1 - 1.5...
- Page 28 Food Time (min) - Well Done 12 - 15 Grilling - Main oven Food Temperature Time (min) Shelf position (°C) 1st side 2nd side Roast beef 210 - 230 30 - 40 30 - 40 Filet of beef 20 - 30 20 - 30 Back of pork 210 - 230...
-
Page 29: Care And Cleaning
Food Quanti- Defrost- Further de- Comments ty (kg) ing time frosting time (min) (min) Meat 90 - 120 20 - 30 Turn halfway through. Trout 0.15 25 - 35 10 - 15 Straw- 30 - 40 10 - 20 berries Butter 0.25 30 - 40... - Page 30 2. Pull the rear end of the shelf support away from the side wall and remove it. Install the removed accessories in the opposite sequence. The retaining pins on the telescopic runners must point to the front. Catalysis CAUTION! Do not clean the catalytic surface with oven sprays, abrasive cleaning agents, soap or other cleaning agents.
- Page 31 1. Open the door fully. 2. Fully lift up the clamping levers (A) on the two door hinges. 3. Close the door until it is at an angle of approximately 45°. 45° 4. Hold the door with one hand on each side and pull it away from the appliance at an upwards angle.
- Page 32 9. Clean the glass panel with water and soap. Dry the glass panel carefully. When the cleaning is completed, do the above steps in the opposite sequence. Install the smaller panel first, then the larger and the door. WARNING! Make sure that the glasses are inserted in the correct position otherwise the surface of the door may overheat.
-
Page 33: Troubleshooting
3. Clean the glass cover. 4. Replace the lamp with a suitable 300 °C heat-resistant lamp. 5. Install the glass cover. 6. Install the left shelf support. Troubleshooting WARNING! Refer to Safety chapters. What to do if... Problem Possible cause Remedy The oven does not heat up. -
Page 34: Electrical Installation
Problem Possible cause Remedy The display does not show The display is deactivated. Touch at the same the time during the off status. time to activate the display again. It takes too long to cook the The temperature is too low or Adjust the temperature if nec- dishes or they cook too quick- too high. -
Page 35: Energy Efficiency
• Cable / flex type: H05 V2V2-F (T90) Energy efficiency Product Fiche and information according to EU 65-66/2014 Supplier's name Lamona Model identification LAM4403-1 Top oven: 105.6 Energy Efficiency Index Main oven: 106.8 Top oven: A Energy efficiency class Main oven: A... -
Page 36: Your Guarantee
• The product’s model & serial numbers • Howdens Proof of Purchase document • Your full contact details Call the Depot number on your Proof of Purchase Document supplied with the product / kitchen. Call the LAMONA Service Line on 0344 460 0006. - Page 37 Product installed in a domestic or non-domestic kitchen where 8 or fewer people use the appliance. ENVIRONMENTAL CONCERNS Recycle materials with the symbol . Put the packaging in relevant containers to recycle it. Help protect the environment and human health by recycling waste of electrical and electronic appliances.
- Page 40 Product serial number (Place sticker here) ISSUE...
Need help?
Do you have a question about the LAM4403-1 and is the answer not in the manual?
Questions and answers