Table of Contents
Advertisement
Advertisement
Table of Contents

Related Manuals for Lamona LAM4402


Summary of Contents for Lamona LAM4402
-
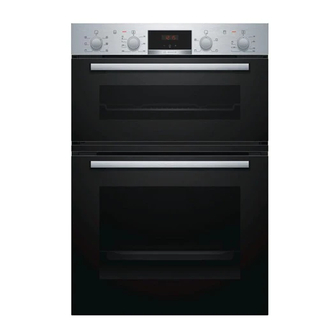
Page 1: Double Oven
Built under LAM4402 Double Oven User Manual... -
Page 2: Table Of Contents
CONTENTS Safety information Using the accessories Safety instructions Additional functions Product description Hints and tips Before first use Care and cleaning Daily use Troubleshooting Clock functions Your guarantee Subject to change without notice. SAFETY INFORMATION Before the installation and use of the appliance, carefully read the supplied instructions. -
Page 3: Safety Instructions
Internally the appliance becomes hot when in operation. Do • not touch the heating elements that are in the appliance. Always use oven gloves to remove or put in accessories or ovenware. Before maintenance cut the power supply. • Ensure that the appliance is switched off before replacing •... - Page 4 • Make sure not to cause damage to the • Do not operate the appliance with wet mains plug and to the mains cable. hands or when it has contact with water. Should the mains cable need to be • Do not apply pressure on the open door. replaced, this must be carried out by our •...
-
Page 5: Product Description
• Make sure the appliance is cold. There is WARNING! Risk of electrical the risk that the glass panels can break. shock. • Replace immediately the door glass • Before replacing the lamp, disconnect panels when they are damaged. Contact the appliance from the power supply. -
Page 6: Before First Use
For roasting and grilling. Use the trivet only with the Grill- / roasting pan. BEFORE FIRST USE To set a new time, refer to "Setting the WARNING! Refer to Safety time". chapters. Preheating Initial Cleaning Preheat the empty appliance to burn off the Remove all accessories and removable remaining grease. -
Page 7: Main Oven Functions
Activating and deactivating the top / main oven It depends on the model if your appliance has knob symbols, indicators or lamps: • The indicator comes on when the oven heats up. • The lamp comes on when the oven operates. •... -
Page 8: Clock Functions
Symbol Oven function Application True Fan Cooking To bake on up to 2 shelf positions at the same time and to dry food. Set the temperature 20 - 40 °C lower than for Conventional Cooking. Defrost To defrost frozen food. Display A) Function indicators B) Time display... -
Page 9: Using The Accessories
For the Minute Minder function You can use the functions the display shows the time left. Duration and End at the 3. When the time ends the indicator of the same time to set the time for clock function flashes and an acoustic how long the appliance should signal sounds. -
Page 10: Additional Functions
You can use the trivet to roast larger pieces of meat or poultry on one shelf position. 1. Put the trivet into the deep pan so that the supports of the wire shelf point up. Wire shelf and the deep pan together: Push the deep pan between the guide bars of the shelf support and the wire shelf on the guide bars above. -
Page 11: Hints And Tips
HINTS AND TIPS your usual settings (temperature, WARNING! Refer to Safety cooking times) and shelf positions to the chapters. values in the tables. • The manufacturer recommends that you The temperature and baking use the lower temperature the first time. times in the tables are guidelines •... - Page 12 Baking results Possible cause Remedy The cake is too dry. The baking time is too long. The next time you bake, set a shorter baking time. The cake browns unevenly. The oven temperature is too Set a lower oven temperature high and the baking time is and a longer baking time.
- Page 13 Food Temperature (°C) Time (min) Shelf position Fish 170 - 190 20 - 30 Fish Pie (Potato Topped) 190 - 200 20 - 30 Fruit Pies, Crumbles 190 - 200 30 - 50 Milk Puddings 150 - 170 90 - 120 Pasta, Lasagne etc.
- Page 14 Food Temperature (°C) Time (min) Shelf position - Rich Fruit 130 - 140 120 - 150 - Christmas 130 - 140 180 - 270 Fish 160 - 180 20 - 30 Fish Pies, Crumbles 170 - 180 30 - 50 Milk Puddings 140 - 160 60 - 90...
- Page 15 Grilling and Fast Grilling - Top oven Food Time (min) Bacon Rashers 5 -6 Beefburgers 10 - 20 Chicken Joints 20 - 40 Lamb Chops 15 - 25 Pork Chops 20 - 25 Whole Fish, Trout / Makarel 10 - 12 Fillets, Plaice / Cod 4 - 6 Kebabs...
-
Page 16: Care And Cleaning
Food Quantity Defrosting Further de- Comments time (min) frosting time (min) Cream 2 x 200 g 80 - 100 10 - 15 Whip the cream when still slightly frozen in places. Gateau 1.4 kg CARE AND CLEANING Removing the shelf supports WARNING! Refer to Safety chapters. - Page 17 You can fold down the heating element on the oven ceiling to clean the oven ceiling easily. 1. Hold the heating element with two hands at the front. 2. Pull it forwards against the spring pressure and out along the supports on the two sides.
-
Page 18: Troubleshooting
The back lamp The lamp glass cover is at the back of the cavity. 1. Turn the lamp glass cover counterclockwise to remove it. 2. Clean the glass cover. 3. Replace the oven lamp with a suitable 9. Clean the glass panel with water and 300 °C heat-resistant oven lamp. -
Page 19: Your Guarantee
Problem Possible cause Remedy The oven does not heat up. The fuse is released. Make sure that the fuse is the cause of the malfunction. If the fuse releases again and again, contact a qualified electrician. The lamp does not operate. The lamp is defective. -
Page 20: Environmental Concerns
• Your full contact details Call the Service Line on 0845 00 60 ENVIRONMENTAL CONCERNS Recycle the materials with the symbol Put the packaging in applicable containers to recycle it. Help protect the environment and human health and to recycle waste of electrical and electronic appliances. - Page 23 867300132-A-142014 If supplied, please stick your self adhesive product rating plate here, or make a note of the product serial number below in the box below for future reference. Serial Number : ...................
Need help?
Do you have a question about the LAM4402 and is the answer not in the manual?
Questions and answers