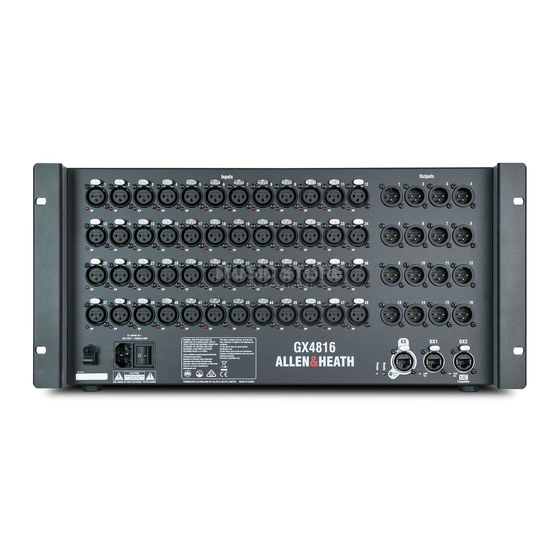
Summary of Contents for ALLEN & HEATH GX4816
- Page 1 GX Expander Getting Started Guide GX4816 Before starting please check www.allen-heath.com for the latest mixer firmware and product documentation. AP11651...
- Page 2 Any changes or modifications to the product not approved by Allen & Heath could void the compliance of the product and therefore the user’s authority to operate it. GX4816 Getting Started Guide Copyright © 2018 Allen & Heath. All rights reserved. ALLEN&HEATH Allen &...
-
Page 3: Important - Read Before Starting
Allen & Heath website. Allen & Heath do not accept liability for damage caused by maintenance, repair or modification by unauthorised personnel. Register your product Register your product online at www.allen-heath.com/register. GX4816 Getting Started Guide AP11651 Issue 1... -
Page 4: Table Of Contents
IEC mains lead Introduction The GX4816 is an I/O Expander for Allen & Heath digital mixing systems. It provides 48 remote controlled mic/line preamps and 16 XLR line outputs, as well as 2 DX ports for further system expansion or connection to the ME personal mixing system. -
Page 5: Installing The Expander
1.2 Rack mounting and flight casing The GX4816 is designed as a 19 inch rack mount unit and occupies 5U of rack space. The plastic feet may need to be removed before rack mounting; retain them for future use. -
Page 6: Front Panel
Input sockets – Balanced XLR mic/line inputs with +48V Phantom Power indicator. The preamps are built into the GX4816 and their Gain, Pad and +48V are controlled from the mixer via the Cat5 link. The +48V indicator detects voltage at the socket whether supplied by the GX4816 or received from an external source. -
Page 7: Rear Panel
– Ensure good ventilation and avoid obstruction of vents while operating. Avoid dirt or liquid ingress. – Ultra-quiet fan. Make sure the ventilation opening is not obstructed. Kensington Lock - A slot for fitting standard Kensington anti-theft security devices. GX4816 Getting Started Guide AP11651 Issue 1... -
Page 8: Connect And Power Up
DX 2 4.3 ME connection Connect a ME-U, ME-1 or ME-500 to the DX2 port on the GX4816. Channel names and stereo links are communicated to connected ME systems, and the ME output patch temporarily replaces the output patch to the DX2 port. -
Page 9: Dimensions
5. Dimensions 441.00mm/17.4" 115.60mm/4.6" 100.1mm/4" 390.00mm/15.3" 481.60mm/18.9" 183.80mm/7.2" GX4816 Getting Started Guide AP11651 Issue 1... -
Page 10: Technical Specs
GX4816 481.6 x 255 x 229.5 mm x 8kg (18.9” x 10” x 9” x 17.6lbs) GX4816 (boxed) 560 x 385 x 310 mm x 10kg (22” x 13.3” x 12.2” x 22lbs) GX4816 Getting Started Guide AP11651 Issue 1...


Need help?
Do you have a question about the GX4816 and is the answer not in the manual?
Questions and answers