
Related Manuals for Comelit IPTHCAM1DUAL


Summary of Contents for Comelit IPTHCAM1DUAL
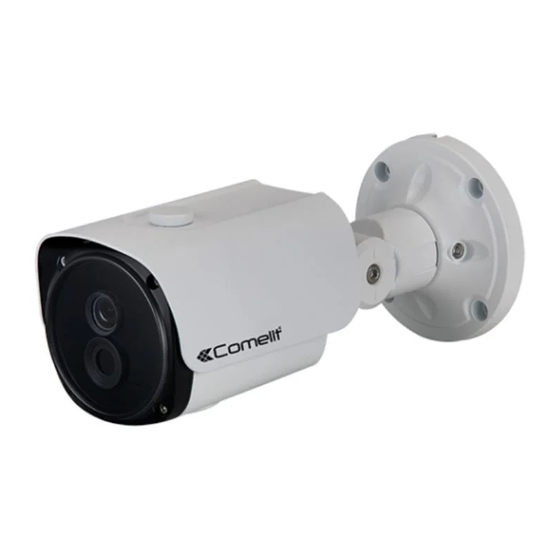
- Page 1 IP THERMAL CAMERA ART. IPTHCAM1DUAL Please read this manual thoroughly before use and keep it for future reference...
- Page 2 Before reading this manual This is a basic operation manual for use of a network camera. Users who are using this product for the first time, as well as users with experience using comparable products, must read this operation manual carefully before use and heed to the warnings and precautions contained herein while using the product.
- Page 3 Before reading this manual Safety Precautions WARNING: TO REDUCE THE RISK OF ELECTRIC SHOCK, DO NOT REMOVE COVER (OR BACK). NO USER-SERVICEABLE PARTS INSIDE. REFER SERVICING TO QUALIFIED SERVICE PERSONNEL. Important Safeguards 1. Read Instructions 10. Overloading All the safety and operating instructions should be read before the Do not overload wall outlets and extension cords as this can result in appliance is operated.
- Page 4 Before reading this manual FCC Compliance Statement THIS EQUIPMENT HAS BEEN TESTED AND FOUND TO COMPLY WITH THE LIMITS FOR A CLASS A DIGITAL DEVICE, PURSUANT TO PART 15 OF THE FCC RULES. THESE LIMITS ARE DESIGNED TO PROVIDE REASONABLE PROTECTION AGAINST HARMFUL INTERFERENCE WHEN THE EQUIPMENT IS OPERATED IN A COMMERCIAL ENVIRONMENT.
-
Page 5: Table Of Contents
Table of Contents Part 1 Introduction………………………..………………………………………………..7 In this manual, Features ....................7 Remote Setup………………………………………………………………………………………………………….11 Quick Setup……………………………………………………………………………………………………………..12 Network ........................13 Video ........................... 14 System…………………………………………………………………………………………………………………… 15 User/Group……………………………………………………………………………………………………………..16 Network………………….……………………………………………………………………………………………….16 Port/QoS………………………………………………………………………………………………………………….18 Bandwidth Control…………………………………………………………………………………………….…….19 Security…………………………………………………………………………………………………………………..20 Camera……………………………………………………………………………………………………………………21 Streaming……………………………………………………………………………………………………………….24 MAT……………………………………………………………………………………………………………………..…25 Privacy Masking………………………………………………………………………………………………..…….26 Alarm Out, E-mail………..………………………………………………………………………………………….27 FTP Upload.…………………………………………………………………………………………………………….28 Event…………………………………………………………………………………………………………………..….30 Motion Detection……………………………………………………………………………………………………31 System Event….……………………………………………………………………………………………………….32... - Page 6 Table of Contents Part 2 Web viewer…………………………………………………………………..……..34...
-
Page 7: Part 1 Introduction
This network thermal camera compresses live video and transmits the video over Ethernet connections. The camera can be accessed, configured and managed by using the COMELIT THERMAL TOOL (Integrated Network Installation Tool) program. It has a built-in web server, Web Viewer, allowing you to monitor live video remotely using a web browser. The remote programs provided with the camera also allow remote management, monitoring, searching and recording. - Page 8 Package Contents Dual Thermal Camera Mounting Bracket and Screws Dimensions...
- Page 9 Network Port: Connect a Cat5 cable with an RJ-45 connector. You can change the settings, manage the camera. Refer to the COMELIT THERMAL TOOL User’s Manual for details about network connection setup. When using a PoE switch, the camera can be supplied with power over Ethernet cable (Refer to the PoE switch manufacturer’s manual for details).
- Page 10 Installation 1. Please make the hole to the wall, and fix the base (mounting bracket) with screws. 2. Loosen the screws from stand bracket, and adjust camera body to 90 degree direction. 3. Adjust mounting bracket with camera junction box hole, and tighten the screw completely. 4.
-
Page 11: Remote Setup
Configure basic network camera settings and all other system settings. Screen images may vary depending on the model. Remote Setup Launch the COMELIT THERMAL TOOL program and then from the main screen, select a network camera whose settings you wish to change. -
Page 12: Quick Setup
Quick Setup General Quick Setup allows you to set up System, Network, Language: Select the language you wish to use for Video and other basic settings needed for camera remote setup. use. Name: Enter a name for the camera. (Up to 31 alphanumeric characters, including space). -
Page 13: Network
Network Change the network settings and security features, and control network bandwidth use. Type: Select the type of network you are using. If this option has been changed, click Save to apply the current settings, and then restart Remote Setup. If you do not restart Remote Setup, the changes afterwards will not be applied. -
Page 14: Video
System Video Change the camera’s system information, add users/ groups, and/or import/export settings. Configure camera mirroring, streaming setup. Camera Mirroring : Select Horizontal or Vertical reverse to flip the image horizontally or vertically. Compression: Choose the streaming compression method. Resolution: Choose a resolution setting for video streaming. -
Page 15: System
Click Save to apply the changes right away. settings, connect to the camera by using the • Time Sync COMELIT THERMAL TOOL program. - Automatic Sync: Select to synchronize the system’s time with the time server at a specified Setup interval. -
Page 16: User/Group
User/Group • User/Group settings can only be configured by users belonging to the Administrator group. • There is no default password for the Administrator group's admin user. • Standard groups (Administrator, Operator, and User) cannot be edited or deleted. Authorities assigned here apply identically to ONVIF protocol user groups. - Page 17 Type: Select the type of network you are using. If this IP Address option has been changed, click Save to apply the current settings, and then restart Remote Setup. If you do not restart Remote Setup, the changes afterwards will not be applied.
-
Page 18: Port/Qos
Part 1 – Remote setup • Use HTTPS: Select this option to apply https protocol- Port based security on Watch • Use UPnP: If the camera is connected to the network via an IP router (or NAT), select this option to connect to the camera without setting up port forwarding. -
Page 19: Bandwidth Control
Part 1 – Remote setup Bandwidth Control • In a WAN environment, it is recommended that you use the UPnP function. Otherwise, monitoring or recording might not be smooth depending on the network environment. • Each port number must be unique. •... -
Page 20: Security
Part 1 – Remote setup Security • SSL: Select this option to enable SSL (Secure Sockets Layer). Enabling this option applies SSL protocol protection on data transmitted out. However, programs and systems that do not support SSL will not be able to connect to the camera. -
Page 21: Camera
Part 1 – Remote setup Video Configure Camera, Streaming, MAT and Privacy Masking option 3DNR (3D Noise Reduction). When 3DNR is Camera enabled, the level of background noise is reduced in low light conditions. It does not cause overall image blurring which might occur when using noise filter, but it may cause afterimage (lag). - Page 22 Part 1 – Remote setup Exposure Thermal Sensor AGC : It reduces the noise by using equalizing the image data. AE Target Gain: Specify exposure Event Action settings must be configured correctly in order to Default value is On. If it is set to Off, the image color perform event actions.
- Page 23 Part 1 – Remote setup Type Color LUT Thermal Adjustment Default setup is Anti-Iron, and other many uses ar e WhiteHot and Rainbow PIP Display User can select below functions. PIP Display enable : Primary or Secondary Position : (5 Different Positions) Zoom : Thermal Image Zoom on/off Display Color Bar Brightness...
-
Page 24: Streaming
Part 1 – Remote setup Streaming • Primary/Secondary > Multi stream is supported (Primary>Secondary). Enable/disable streaming use. The Secondary stream setting may change depending on Primary stream settings. -
Page 25: Mat
• Frame Rate: Designate the frame rate to be used between the end of the Inactivity Period and the next motion detection. When the slow shutter mode is Select the MAT option to use the MAT (Motion Adaptive enabled under Video > Camera menu, the fame rate Transmission) feature during video transmission and may change. -
Page 26: Privacy Masking
Privacy Masking Select Privacy Masking to set up a privacy mask over a specific area. The section on which a privacy mask is applied will appear as black when monitoring video. • Privacy Masking Setup: Set up privacy masks (up to 8). -
Page 27: Alarm Out, E-Mail
Alarm out Email Select Alarm Out to enable alarm out. Select Email to send out emails. • SMTP Server/Port: Enter the SMTP server’s IP address • Dwell Time: Designate the alarm out duration. When (or domain name) and port number you received an event occurs, alarm out will be generated for the from the network administrator. -
Page 28: Ftp Upload
FTP Upload Select FTP Upload to upload .jpg image of the event detected to an FTP server. - FTP Server: Enter the FTP server’s IP address (or domain name). - Upload Path: Designate the file upload path. - Port: Enter the FTP server’s port number. - User ID, Password: Enter the user ID and password needed for connecting to the FTP server. - Page 29 to add event detection date and time information to - Resolution/Quality: Choose the resolution and each image file. Select Add Sequence Number Suffix - quality of the images to upload to the FTP server. max. Count to number the image files based on the Range of resolution settings you can use here can order of event detection.
-
Page 30: Event
Event Configure event detection settings. Alarm In Select Alarm In to enable alarm in event. With alarm in event enabled, alarm in detections by the alarm in connector will be assumed as events. Title: Enter the alarm-in device’s name. • Type: Select the alarm in type. •... -
Page 31: Motion Detection
Motion Detection Motion Ignoring Interval: With Motion Ignoring • Interval configured, no event log or notification is generated for motions detected during a period of Select Motion Detection to configure motion detection time following a motion detection event. event settings. With motion detection event enabled, •... -
Page 32: System Event
• Alarm In Bad: Select to check the alarm in status and System Event then set up a schedule. - Send Email: Select to send out an email if no Select System Event and configure system event change is detected in the alarm in status. settings. -
Page 33: Temperature Event
Temperature Event Event zone & Point setup Select Temperature Event & Point and configure the event settings. With system event enabled, user can denigrate the area where user would like to check the min. & max. temperature from the screen as below. - Page 34 Part 2 – Web Viewer Web Viewer is a program that allows you to view and search video from remote locations over the Internet and can be accessed on a Microsoft Internet Explorer. System requirements for running Web Viewer are as follows: •...
- Page 35 When prompted with the Web Viewer login window, select LIVE-PORT or PLAY-PORT as the desired mode. Enter the ID and password and click LOGIN to sign in using the selected mode. (Default setup for ID/Password = admin/no password) • Web Viewer supports Microsoft Internet Explorer only and no other type of web browser. •...
- Page 36 Web Live Mode ② ③ ① ④ ⑤ ⑥ ⑦ A remote web monitoring program that allows you to monitor images from remote locales in real -time. Information: You can see general information about camera Play Viewer: Click This button, change to play viewer Quad Picture: You can select quad picture, full screen picture Export: Export Image file and remote mode.
- Page 37 Alarm: On /Off Selectable Alarm-Out Control: Click to control an alarm out device remotely (A and B type models only Event Status Window: The event status window at the bottom displays a list of events that were detected in the camera Alarm In On/Off Motion Detection Trip-Zone...
- Page 38 Web Play Mode A remote web search program that allows you to search for recordings from remote locales in real-time. While in Web Search mode, connection to remote locales will terminate automatically after 30 minutes of inactivity. ② ③ ③ ④...
- Page 39 Brightness: Adjust Brightness Image Filter: Click to blur, sharpen, equalize, revert and interpolate playback images. NOTE: Image processing works only in the pause mode. Time-Lapse Search: Click to enter the time-lapse search mode which allows you to search for recorded data by time and then play back images found within the time parameters.
Need help?
Do you have a question about the IPTHCAM1DUAL and is the answer not in the manual?
Questions and answers