
Subscribe to Our Youtube Channel
Related Manuals for ZKTeco FaceKiosk Series

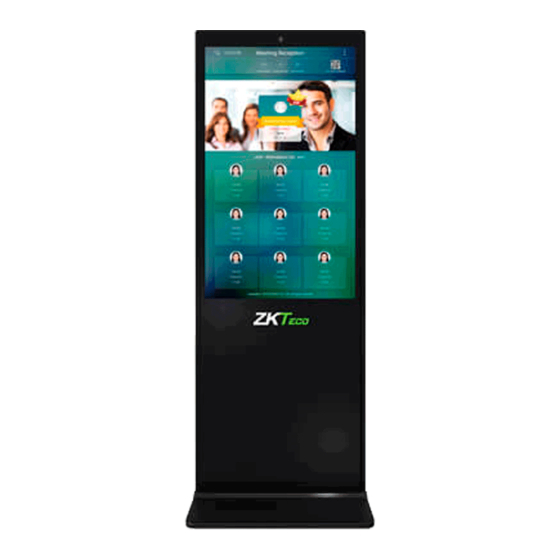
Summary of Contents for ZKTeco FaceKiosk Series
- Page 1 FaceKiosk Series User Manual Version: 2.4 Date: 11/26/2018 1 F16 Quick Start Guide...
- Page 2 Declaration Thank you for choosing our product. Before using this product, read this manual carefully to use the software properly. Proper use will result in good effect and fast verification. None of the content of this document shall be copied or delivered in any forms or by any means without the prior written consent of our company.
-
Page 3: Table Of Contents
Contents 1. Note ..................................................1 1.1. Configurations ..........................................1 1.2. Installation ............................................1 1.2.1 Installation Environment .................................... 1 1.2.2 Installation Procedure ....................................2 1.3. Precautions ............................................4 1.4. Notes for Access Control Wiring ..................................4 1.4.1 Access Control Interface ..................................... 4 1.4.2 Connection with Lock .................................... - Page 4 8.1 Attendance Record and Photo Search ................................23 8.2 Meeting Information ......................................... 24 8.3 Stranger Photo ..........................................24 8.4 Blacklist Photo ..........................................25 9. System Information ..........................................26 10. Advertisement Setting ......................................... 26 11. Personal ................................................. 28 12. Access Control Management ......................................30 12.1 Access Control Parameters ....................................
-
Page 5: Note
1. Note This user manual is applicable for 21.5-inch, 32-inch and 43-inch FaceKiosk series device. The content of this manual includes the UI display of 43-inch FaceKiosk as an example to show some basic operations of the product. 1.1. Configurations... -
Page 6: Installation Procedure
Step 4: Keeping the device upper part vertical, remove its protective film. Step 5: Connect the power supply and turn on the switch at the rear of the machine. Installation Procedure (Wall Hanging): The following tools are required for installation: 2 FaceKiosk Series User Manual... - Page 7 Step 5: Hammer the micelle or explosive screws of accessories into the drilled holes, then lock the hanging board with self-tapping or cap of screw tightly. Step 6: There are four hanging holes behind the FaceKiosk device. It’s easy to hang it from top to bottom aiming to FaceKiosk Series User Manual 3...
-
Page 8: Precautions
3C certification. 1.4. Notes for Access Control Wiring 1.4.1 Access Control Interface Access Control interface is divided into 5 rows: J5, J6, J7, J8, J9. Currently J8 and J5 interface are used, rest others are reserved. 4 FaceKiosk Series User Manual... -
Page 9: Connection With Lock
(shown as “-” in the figure) poles. At the time of wiring, connect the “+” of diode to the “-” of electric lock and the “-” of diode to the “+” of electric lock. Keep the diode as close as possible to the electric lock. FaceKiosk Series User Manual 5... -
Page 10: Wiegand Output Connection
The recommended identification distance is about 1m to 5 m from the face of the device. Recommended distance is about 3 m, shown in the following figure. 2. Check-in interface and Main Menu The check-in interface is divided into 4 areas: Title bar, Information bar, Monitoring screen and Check-in result. 6 FaceKiosk Series User Manual... - Page 11 Check-in result: It displays the relevant information about the personnel verification result. On the initial screen, press to open the main menu, as shown in the following figure. FaceKiosk Series User Manual 7...
- Page 12 Note: If the device has no super administrator, press to access the menu. If the device has a super administrator, then his/her verification is required to access the menu. For security purposes, you are advised to register as an 8 FaceKiosk Series User Manual...
-
Page 13: Employee Management
Add an employee: Click < in the upper left corner to return to the employee list screen. Click in the upper right corner to jump to the [New User] screen, as shown in the following figure. FaceKiosk Series User Manual 9... - Page 14 [System setting]. Register a facial template: Click [Next] to call the camera. Click [START FACE ENROLLMENT] and stand in the monitoring area. When your face is identified, the registration is successful and your photo is saved. 10 FaceKiosk Series User Manual...
-
Page 15: Communication Settings
Click [WI-FI setting] to connect to the Wi-Fi, or choose [Ethernet setting] to connect to the network by Ethernet. 4.1 Wi-Fi Settings On the [Communication Setting] screen, click [WI-FI] to set WLAN parameters. 4.2 Ethernet Settings On the [Communication Settings] screen, click [Ethernet Setting]. The [Ethernet Setting] screen is displayed. FaceKiosk Series User Manual 11... -
Page 16: Server Settings
Please enter server type BioTime, ZKBioSecurity. Domain name server Enable the domain name server. Please enter server address Set the server IP address of software. Please enter server port Set the server port of software. 12 FaceKiosk Series User Manual... -
Page 17: System Settings
5. System Settings Set system parameters based on your requirements. On the main menu screen, click [System Setting]. 5.1 Time and Date On the main menu screen, click [Date & time]. FaceKiosk Series User Manual 13... - Page 18 3. On the time and date screen, select [Set time]. 4. On the time and date screen, select [Select time zone], and scroll downwards to set the hour, minute, and second to select a time zone. 14 FaceKiosk Series User Manual...
-
Page 19: Face Parameters
The recommended value is 80, and it ranges from 30 to 80. [Multiple recognition]: If selected, it will support the multiple recognition function. After enabling, 4-6 persons can be recognized at the same time. It’s not recommended in access control scenes. FaceKiosk Series User Manual 15... -
Page 20: Attendance Parameters
[Check-in title]: Set the display title of FaceKiosk device. (Note: When the device uses BioTime software, meeting title will automatically switch. It is sent by the software.) [Check-in time range]: The face appearing in the monitoring area will not be identified if the device is not within 16 FaceKiosk Series User Manual... -
Page 21: Stranger Photo Save Function
5.6 Blacklist Photo Save Function In the system setting interface, click [Blacklist photo save function] and select to enable. When it is enabled, person FaceKiosk Series User Manual 17... -
Page 22: Blacklist Alarm Function
BioTime or ZKBioSecurity software, the QR code generated in the device check-in interface will automatically obtain the device’s serial number information. When user scans the QR code to register, the device’s serial number will be seen in the review interface on software. 18 FaceKiosk Series User Manual... -
Page 23: Data Management
[Delete all attendance photo]: Deletes all attendance photos from the device. [Delete all blacklist information]: Deletes all blacklist record from the device. [Delete blacklist photo]: Deletes all blacklist photos from the device. [Delete stranger’s photo]: Deletes all stranger’s photo from device. FaceKiosk Series User Manual 19... -
Page 24: Backup Data
Local restore: Restore the backup data from the Restore path specific path. U-disk restore: Plug into the U-disk before operation. After setting the details, click [Start restore] to restore the backup data in device or U-disk. 20 FaceKiosk Series User Manual... -
Page 25: U Disk Management
The supported file formats include AVI, 3GP, WMV, FLV, MP4, MKV. Select either advertising pictures or advertising videos on a device. For example, if Precautions advertising pictures are added to a device, advertising videos cannot be added. FaceKiosk Series User Manual 21... -
Page 26: Downloading Data Over A Usb Drive
Download all attendance record in attendance device or for a specific time period. record] (TXT) Format: TXT. 8. Record Search Click on [Record Search] module to enter below shown interface. Related record can be checked in FaceKiosk device. 22 FaceKiosk Series User Manual... -
Page 27: Attendance Record And Photo Search
Click the head portrait of attendance record to enlarge the person photo. Display information include: Employee name, Employee ID, Check-in time, Attendance photo, as shown below: FaceKiosk Series User Manual 23... -
Page 28: Meeting Information
This function is only available for BioTime software, as shown below: 8.3 Stranger Photo Select [Stranger photo] to view or delete the stranger’s captured photo. Go to [System setting] [Stranger photo save function] to enable this function. 24 FaceKiosk Series User Manual... -
Page 29: Blacklist Photo
8.4 Blacklist Photo Select [Blacklist photo] to view or delete the blacklist capture photo. Go to [System setting] [Blacklist photo save function] to enable this function. FaceKiosk Series User Manual 25... -
Page 30: System Information
On the main menu screen, click on [System Info]. 10. Advertisement Setting On the [AD Setting] screen, click on [Turn on AD Player] to enable advertisement playing and setting the advertisement photo/video switching time, as shown in the following figure. 26 FaceKiosk Series User Manual... - Page 31 Switch advertisement time: Use to set the frequency of change for advertisements. Automatic switch advertising time without face: Use to set the time duration after which, advertisement picture/video will be shown if no face is detected. FaceKiosk Series User Manual 27...
-
Page 32: Personal
11. Personal Click on [Personal] in the main menu. The main functions can be used to set voice broadcast content, sleep time of device, status bar display, special effects setting of VIP, etc. As shown below: 28 FaceKiosk Series User Manual... - Page 33 Note: Setting up more characters in this function will lead to a longer broadcast time. In multiple recognition situation, it will influence the feedback result of successful recognition. Users can choose whether to turn on this function or not according to the actual needs. FaceKiosk Series User Manual 29...
-
Page 34: Access Control Management
[Door Sensor Delay (s)]: When the door is opened, the door sensor will be monitored after a time period; if the state of the door sensor is inconsistent with that of the door sensor mode, the alarm will be triggered. This time period is 30 FaceKiosk Series User Manual... -
Page 35: Wiegand Output Setting
[Pulse Interval (us)]: The default is 1000, the range is 200-20000. [Failed ID]: It is defined as the output value for failed user verification. The output format depends on the [Wiegand Format] setting. It’s disabled by default; the range is 0 - 65535. FaceKiosk Series User Manual 31... -
Page 36: Biotime 7.0 Connection
[Serial Number]: Serial number of the attendance device. [IP Address]: IP address of the attendance device. [Port No]: Port number of the attendance device. The default value is 4370. [Area]: Areas divided on the device for data management. 32 FaceKiosk Series User Manual... -
Page 37: User Management
After attendance records are uploaded to the software, set the schedule to manage attendance statistics. For details of the software, see the related user manual. Click on the home screen to refer the help menu. FaceKiosk Series User Manual 33... -
Page 38: Zkbiosecurity Connection
1. On the function menu, go to [Attendance] [Device] [New]. The following screen is displayed. 2. Set parameters and click [OK] to add the device. You can click [Cancel] to cancel the addition. 34 FaceKiosk Series User Manual... -
Page 39: User Management
If you enable the device, data is uploaded and delivered properly. (Currently, the function of setting the device as a registration device is added.) 14.2 User Management 14.2.1 Adding a User Go to [Personnel] [Person] [New] to add a user. FaceKiosk Series User Manual 35... -
Page 40: Uploading A Photo
(2) Go to [Personnel] > [Person] and click [Personnel ID] or [Edit]. The user profile editing screen is displayed. (3) Click [Capture]. The photo capturing screen is displayed. The browser allows you to select the camera. The screen is as follows: 36 FaceKiosk Series User Manual... -
Page 41: Importing User Information In Batches
1. Export the user information template, click [Export], select [Export Personnel], select user information fields, and click [OK] to download the template. 2. Fill in the template information. 3. Click on [Import] and select [Import Personnel]. The import screen is displayed. FaceKiosk Series User Manual 37... -
Page 42: Importing User Photos In Batches
Recommended user photo requirements: Face in center, distinct face, no deformation of photo, no reflection. 640*480<pixel<1920*1080. Only jpg format is supported. Click [Import] and select [Import User Photos] to enter the [Import Photos] interface. 38 FaceKiosk Series User Manual... -
Page 43: Adding Advertisement
[File Upload]: Click [Browse] and select the desired image file to upload. The size and suffix name will be displayed automatically. [Name]: Enter the image name of the advertisement. It shouldn’t be more than 10 characters. FaceKiosk Series User Manual 39... -
Page 44: Add Ad Video
Note: if the advertisement video is too big (over 50MB), then it needs to be uploaded by USB disk. The video issued by the software only supports MP4, WMV and AVI format, and the size is within 50 MB. Image supports JPG, BMP, GIF and PNG format. 14.3.3 Advertisement Settings 40 FaceKiosk Series User Manual... - Page 45 Click on the [Add Advertisement] button under the device to set the advertisement content of the device. The content list is added from the [Advertisement] column. Delete advertisement Select the required advertisement and click [Delete] to remove the advertisement content. FaceKiosk Series User Manual 41...
-
Page 46: Attendance Management
After background verification: The software background interface is shown. Click [Personnel]→[Personnel]→ [Temporary Personnel] Select the desired personnel and the administrator. Click [Audit] to check and verify. Only after the successful approval, face verification can be carried out through the device. 42 FaceKiosk Series User Manual... - Page 47 FaceDepot Series User Manual 43 © Copyright 2018. ZKTeco Inc. ZKTeco Logo is a registered trademark of ZKTeco or a related company. All other product and company names mentioned are used for identification purposes only and may be the trademarks of their respective owners. All specifications are subject to...
Need help?
Do you have a question about the FaceKiosk Series and is the answer not in the manual?
Questions and answers