
Subscribe to Our Youtube Channel
Related Manuals for Sunrise Medical Quickie Q500 Series


Summary of Contents for Sunrise Medical Quickie Q500 Series
- Page 1 000690800.02 Powere d W h ee l c h a i r Instructions for Use Quickie Q500 M/F/R Q500 M/F/R Rev.C...
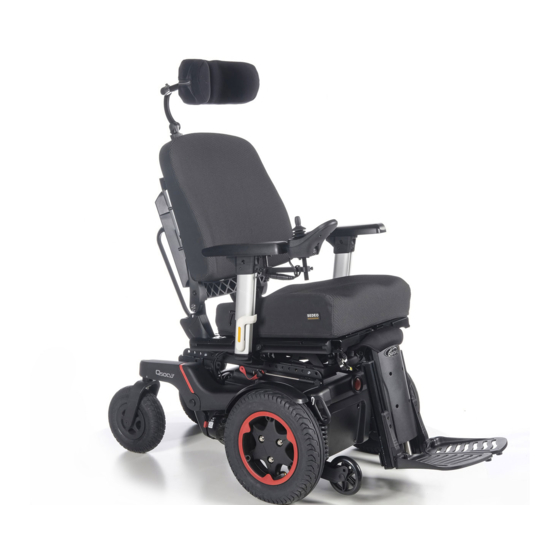
- Page 2 Wheelchair Components We at SUNRISE MEDICAL have been awarded the ISO-9001 certificate, which affirms the quality of our products at every stage, from R & D to production. This products meet the requirements in accordance with EC guidelines. Options or accessories shown are available at extra cost.
-
Page 3: Table Of Contents
1.0 User information ........... 4 approved Sunrise Medical service agent. If you do not 1.1 This user manual ��������������������������������������������������������������4 know of an approved dealer in your area or have any other 1.2 For further information ... -
Page 4: User Information
If one of the user manuals was not included with your wheelchair, please contact your dealer immediately. 1.2 For further information Please contact your local, authorized Sunrise Medical dealer if you have any or alternatively is available on questions regarding the use, maintenance or safety of your wheelchair. In request in large text. -
Page 5: Safety
2.0 Safety Fig. 2.1 Follow the instructions carefully next to these warning symbols! Not paying careful attention to these instructions could result in physical injury or damage to the wheelchair or the environment. Where ver possible, safety information is provided in the relevant chapter. 2.1 Symbols and labels used on the product The signs, symbols and instructions affixed to the wheelchair comprise part of the safety facilities. -
Page 6: Safety: Moving Parts
2.3 Safety: Moving parts, (Fig.2.10) Fig.2.9.1 DANGER! A wheelchair has moving and rotating parts. Contact with moving parts may result in serious physical injury or damage to the wheelchair. Contact with the moving parts of the wheelchair should be avoided. •... -
Page 7: Safety: Choking Hazard
2.5 Safety: Choking hazard 2.7 Safety: Trays Safety: Swing away tray: DANGER! This mobility aid uses small parts which under certain DANGER! circumstances may present a choking hazard to young • The maximum weight allowed for the tray is 2.5kg. children. -
Page 8: Intended Use Of The Wheelchair
Due to its modular design, simplicity and wide range of adjustments, the Quickie Q500 series is a perfect choice for easy service, refurbishment and recycle requirements. The Q500 series fulfils individual preferences, needs or circumstances and is available in the following configurations: •... -
Page 9: Area Of Application: The User Environment
3.2 Area of application: The user environment WARNING! This wheelchair has been designed to accommodate both • If you are under the influence of medicines that can have an indoor and outdoor use (EN12184 (2014) Class B). When effect on your ability to drive, you are not permitted to drive a driving the wheelchair outdoors, drive only on paved roads, wheelchair. -
Page 10: Setting Up The Wheelchair
4.0 Setting up the wheelchair 4.3 Centre of gravity Sunrise Medical wheelchairs can be adjusted according to DANGER! specific needs of the user. Adjusting the centre of gravity on a powered wheelchair is In this, we make a distinction between wheelchair settings and both physically demanding and safety critical. -
Page 11: Lap Strap / Seating Positioning Belt
4.6 Lap strap / seating positioning belt Fig. 4.1 DANGER! / WARNING! • This product is only to be used to position a single person in a wheelchair. • Lap straps are not suitable for transit purposes, approved occupant restraint systems must be used. •... -
Page 12: Using The Wheelchair
5.0 Using the wheelchair Checking free wheel lever • Ensure that the free wheel lever has been set to ‘drive’. (Chapter 5.8). DANGER! • Be aware that you may need to adjust the controller settings Checking seating of your system. •... -
Page 13: Making A Transfer
5.2 Making a transfer 5.3 Driving the wheelchair Sunrise Medical recommend that you consult your healthcare WARNING professional for assistance in developing your personal front or • The user of the wheelchair is at all times completely side transfer technique to best suit your needs and avoid any responsible for complying with the applicable local safety personal injury. -
Page 14: Curves
5.5 Braking & Emergency stop Road use Please show the utmost consideration for the other traffic There are three ways to stop your wheelchair: on the road. • Simplest and safest way to stop the wheelchair is to release the joystick. This will bring the chair to a halt in a controlled manner. -
Page 15: Driving On A Slope
5.6 Driving on a slope Gradients: ascents: Your wheelchair has been designed and tested to allow its use on WARNING! slopes or gradients of at least 6°. • When going uphill, keep the chair moving. Q500 M: 6° (10.5%) in standard configuration. •... -
Page 16: Obstacles & Kerbs
5.7 Obstacles & kerbs: Dismounting the kerb. DANGER! DANGER! Move the chair slowly and carefully in a forward direction until • Never descend a kerb backwards. both front wheels are on the edge of the kerb, again in a 90° •... -
Page 17: Pushing The Wheelchair
5.8 Pushing the wheelchair The wheelchair can be moved by pushing. In order to do so, the motors must be disengaged using a freewheel lever. This feature was developed for the attendants of wheelchair users and also functions as an emergency freewheel lever. The freewheel lever has 2 positions 1. -
Page 18: Powered) Seating Options
5.9 (Powered) seating options The wheelchair can be equipped by the following mechanical and/or powered options to adjust your seating position. These options can be operated by the user without the use of tools. Powered adjustable seating options (Fig.5.5 - Fig.5.7). How to operate these powered seating options can be found in &... -
Page 19: Batteries, Charging And Range
Safety cut-outs • Return the batteries back to Sunrise Medical or directly to In the event of a short circuit there are several safety systems the battery manufacturer for recycling, when they no longer built into your wheelchair to safeguard your electrical circuits, hold charge. -
Page 20: Charging Batteries
12 hours to fully charge the batteries again. mobility vehicle. • Only use an approved Sunrise Medical charger compatible DANGER! with the vehicle to be charged. • Make sure the cord is located so that it will not be stepped •... -
Page 21: The Range Of Your Vehicle
The majority of charger sizes are electrically double Sunrise Medical measure the range of their vehicles in a insulated and no earth connection is required. Some larger consistent and uniform manner, but variances still occur due to sizes may be electrically earthed and this will be clearly motor efficiencies and overall product load weight. -
Page 22: Battery Warranty
6.4 Battery warranty: Fig. 6.2 Battery warranties are subject to periods set by the manufacturers. However, most of these warranties are subject to a wear and tear clause, and if you genuinely wear out your batteries in 6 months, it will not be possible to obtain a replacement under warranty. - Page 23 To disconnect the batteries on Front and Rear-wheel drive: Fig. 6.6.1 • Release the two handle screws under the mid of the seat frame, that connect the seat frame with the seat module interface (step 1) and release the lever (step 2) (Fig.6.6.1 - 6.6.2).
-
Page 24: Transportation
7.0 Transportation Fig. 7.1 7.1 Transport of the wheelchair in a car Getting in and out of the vehicle DANGER! • Confirm that the vehicle is suitably equipped to transport a passenger in a wheelchair, and ensure the method of access/ egress is suitable for your wheelchair type. - Page 25 Fig. 7.4 DANGER! • The wheelchair can only be secured by using the tie-down points on the wheelchair’s frame (Fig. 7.5). • The tie-down points (2 in the front, 2 in the back) are indicated by the tie-down symbol (Fig. 7.4). Fit the front straps first, then the rear.
-
Page 26: Using The Dahl Docking System
7.2 Using the Dahl Docking System Fig. 7.6 CAUTION! The installation should be performed or supervised by a technician. Read all instructions carefully before proceeding with the installation. To install Docking Plate use Dahl Adaption Kit #501798 1. Fit the 8 mm spacer onto the lock plate (Fig. 7.6). 2. - Page 27 5. Mark where to cut the screws. (Fig. 7.10). Fig. 7.10 6. Remove the screws together with the spacer/spacers (Fig. 7.11). Fig. 7.11 7. Cut the screw where the mark is (Fig. 7.12). Fig. 7.12 It is very important that the fitter checks that the length of the bolts are correct.
- Page 28 9. Attach the five screws together with the plastic spacer/ Fig. 7.14 spacers (to prevent the batteries from coming into contact with the nuts) and the lock plate on the underside of the chassis box. Tightening torque: 16-18 Nm/13.3 lb.ft (Fig. 7.14). Please refer to Section 6.6 of this manual for reverse the procedure to replace batteries.
-
Page 29: The Wheelchair As A Passenger Seat
(meeting the system wherever possible. Sunrise Medical recognizes that it is requirements specified in ISO 7176-19:2008). not always practical for the user to be transferred and in these •... -
Page 30: Special Transport Requirements
7.4 Special transport requirements Passenger with a user weight < 22 kg. When the user being transported is a child, less than 22 kg Using your wheelchair on the train. mass and the vehicle involved has less than eight (8) seated Before you travel, please contact the train operator. -
Page 31: General Transport Warnings
B. Remove the leg rests (& Seating system). consulting Sunrise Medical. C. Remove the armrests (& Seating system). • The wheelchair should be inspected by a Sunrise Medical D. Fold down the backrest (& Seating system). authorised dealer/service agent, before reuse following involvement in any type of vehicle collision. -
Page 32: Maintenance & Cleaning
Sunrise Medical Service Centre. • Push the joystick slowly forwards until you hear the parking The contact details of your local Sunrise medical service centre brakes operate. can be found on the inside front cover of this booklet. -
Page 33: Tyre Maintenance And Pressures
(Fig.8.1). • A complete inspection, safety check and service should be made by a Sunrise Medical authorised dealer at least once Fig. 8.1 per year. • All fasteners must be replaced like for like using the correct length, tensile strength and materials. -
Page 34: Drive Wheel Tyre Repair
8.2.3 Drive wheel tyre repair Fig. 8.3 To remove the wheel/tyre: Please see below and next page for photographs. • Remove the colour ring. • Use a 16 mm AF lug nut to loosen the 3-Socket studs, (Fig. 8.2). • Jack the base/battery box up and support it using blocks, (Fig. 8.3). - Page 35 Fig. 8.7 Fig. 8.8 Fig. 8.9 Fig. 8.10 8.2.4 Removing the castor wheels (M base) (Fig.8.11). Fig. 8.11 • Use a 17.0 mm spanner/socket to undo the axle bolt. • Remove the nyloc nut. Removing the castor wheels (F/R base) (Fig.8.12) •...
-
Page 36: Wheels & Tyres Maintenance
Daily check routine as described in chapter 5.1 Weekly check routine as described in chapter 8.1 Clean wheelchair upholstery & Seating system Complete inspection, safety check and service should be made by a Sunrise Medical authorised dealer. 8.3 Wheels & tyres maintenance To ensure that your wheelchair functions properly, it is essential that the tires are kept at the correct pressure. -
Page 37: Lighting Maintenance
When storing your wheelchair for long periods of time (in excess of one week), follow these simple instructions: CAUTION! • Fully charge the wheelchair for at least 24 hours. • We recommend the use of Sunrise Medical authorized spare • Disconnect the charger. parts only. • Disconnect the batteries. -
Page 38: Disposal
9.0 Disposal The symbols below mean that in accordance with local laws and regulations your product should be disposed of separately from household waste. When this product reaches the end of its life, take it to the local collection point designated by local authorities. The separate collection and recycling of your product at the time of disposal will help conserve natural resources and ensure that it is recycled in a manner that protects the environment. -
Page 39: Trouble Shooting
10.0 Trouble shooting If the wheelchair is not working as it should, check the following points. • Check whether the batteries are charged. • Turn the wheelchair off and then back on again. • Check whether the battery plugs are all securely in place. •... - Page 40 Model Q500 series Type / configuration Q500 M Mid wheel drive Maximum user weight In combination with Sedeo Lite 136 kg 300 lbs. In combination with Sedeo Pro 160 kg 350 lbs. EN12184 class: Metric system values Imperial system values & alternative Description Minimum Maximum...
- Page 41 Model Q500 series Type / configuration Q500 F Front wheel drive Maximum user weight In combination with Sedeo Lite 136 kg 300 lbs. In combination with Sedeo Pro 160 kg 350 lbs. EN12184 class: Metric system values Imperial system values & alternative Description Minimum Maximum...
- Page 42 Model Q500 series Type / configuration Q500 R Rear wheel drive Maximum user weight In combination with Sedeo Lite 136 kg 300 lbs. In combination with Sedeo Pro 160 kg 350 lbs. EN12184 class: Metric system values Imperial system values & alternative Description Minimum Maximum...
- Page 43 Technical specifications: SEDEO Lite seating system Imperial system values & Metric system values alternative Minimum Maximum Minimum Maximum Seat angle adjustment Powered tilt with COG adjustment optional 0° - 30° -5° - 25° Powered tilt with COG adjustment optional -5° - 25° 0°...
- Page 44 Imperial system values & Metric system values alternative Minimum Maximum Minimum Maximum Swing away SEDEO LITE legrests, manual elevating / power elevating Lower leg length (from seatplate) 350 mm 510 mm 13.8" 20.1" Knee angle 0° - 70° 0° - 70° Ankle angle 0°...
- Page 45 Technical specifications: SEDEO Pro seating system Imperial system values & Metric system values alternative Minimum Maximum Minimum Maximum Seat angle adjustment 0° - 30° 0° - 30° Powered tilt with COG adjustment optional Powered tilt with COG adjustment optional -5° - 25° -5°...
-
Page 46: Warranty
* Means the Sunrise Medical facility from which the product was purchased. Additional Notes For Australia Only: For goods provided by Sunrise medical Pty Ltd in Australia, our goods come with a guarantee by Sunrise Medical that cannot be excluded under Australian Consumer Law. - Page 47 Q500 M/F/R Rev.C...
- Page 48 Bezplatná linka 800 900 809 F: +31 (0)30 – 60 55 880 E: info@sunrisemedical.nl Sunrise Medical ApS www.SunriseMedical.nl Park Allé 289 G DK-2605 Brøndby Sunrise Medical HCM B.V. Tlf. 70 22 43 49 Vossenbeemd 104 Email: info@sunrisemedical.dk 5705 CL Helmond www.SunriseMedical.dk The Netherlands T: +31 (0)492 593 888 Sunrise Medical Pty.
Need help?
Do you have a question about the Quickie Q500 Series and is the answer not in the manual?
Questions and answers
Quickie q500m wheelchair with controller problems. Mode and profile buttons do not work. Also cannot recline or.tilt. the left legs and lift features work.