Table of Contents
Advertisement
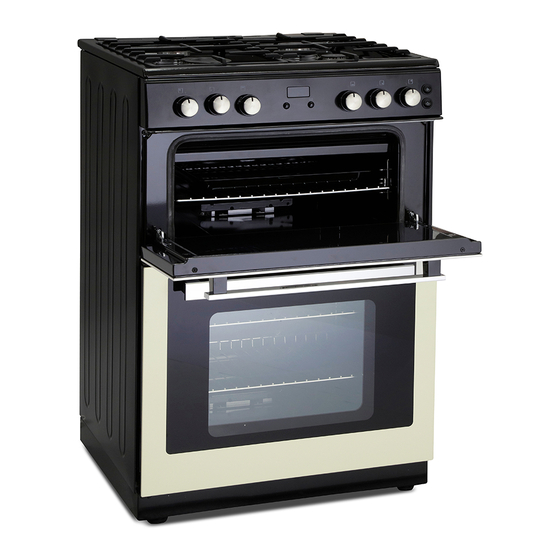
60cm Gas Mini Range Cooker
RMC61GOC-K-X -
Please read these instructions carefully before attempting to install or use this appliance.
We recommend that you keep these instructions in a safe place for future reference.
THE PERFECT BALANCE OF FUNCTION AND STYLE
LAUNDRY - DISHWASHING - COOKING - COOLING
Installation and Operating Instructions
Cream/Black/Stainless
Advertisement
Table of Contents

Subscribe to Our Youtube Channel
Related Manuals for montpellier RMC61GOK


Summary of Contents for montpellier RMC61GOK
- Page 1 THE PERFECT BALANCE OF FUNCTION AND STYLE LAUNDRY - DISHWASHING - COOKING - COOLING Installation and Operating Instructions 60cm Gas Mini Range Cooker RMC61GOC-K-X - Cream/Black/Stainless Please read these instructions carefully before attempting to install or use this appliance. We recommend that you keep these instructions in a safe place for future reference.
- Page 2 Welcome Thank you for choosing this Montpellier Mini Range Cooker. Our Cookers have been designed to provide you with the best combination of style, reliability and performance to give you years of trouble-free use. You may be familiar with a similar product, but please take time to read these instructions carefully before installing or using your Mini Range Cooker to ensure you get the most from your purchase.
- Page 3 Thank you for choosing this product. This User Manual contains important safety information and instructions on the operation and maintenance of your appliance. Please take the time to read this User Manual before using your appliance and keep this book for future reference. Icon Type Meaning...
-
Page 4: Table Of Contents
CONTENTS 1.SAFETY INSTRUCTIONS ....................4 1.1 General Safety Warnings ....................4 1.2 Installation Warnings ......................7 1.3 During Use ........................8 1.4 During Cleaning and Maintenance ................10 2.INSTALLATION AND PREPARATION FOR USE ............12 2.1 Instructions for the Installer ..................12 2.2 Installation of the Cooker ....................13 2.3 Gas Connection ......................13 2.4 Gas Conversion (If available) ..................14 2.5 Electrical Connection and Safety (If available) .............16... -
Page 5: Safety Instructions
1. SAFETY INSTRUCTIONS • Carefully read all instructions before using your appliance and keep them in a convenient place for reference when necessary. • This manual has been prepared for more than one model therefore your appliance may not have some of the features described within. - Page 6 • For models which incorporate a hob lid, clean any spillages off the lid before use and allow the cooker to cool before closing the lid. • Do not operate the appliance with an external timer or separate remote-control system. WARNING: To prevent the appliance tipping, the stabilising brackets must be...
- Page 7 technicians may be dangerous. Do not alter or modify the specifications of the appliance in any way. Inappropriate hob guards can cause accidents. • Before connecting your appliance, make sure that the local distribution conditions (nature of the gas and gas pressure or electricity voltage and frequency) and the specifications of the appliance are compatible.
-
Page 8: Installation Warnings
be taken while cleaning to avoid scratching. Avoid hitting or knocking the glass with accessories. • Make sure that the supply cord is not trapped or damaged during installation. If the supply cord is damaged, it must be replaced by the manufacturer, its service agent or similarly qualified persons in order to prevent a hazard. -
Page 9: During Use
• Protect your appliance from the atmosphere. Do not expose it to sun, rain, snow, dust or excessive humidity. • Materials around the appliance (i.e. cabinets) must be able to withstand a minimum temperature of 100°C. 1.3 During Use • When you first use your oven you may notice a slight smell. - Page 10 valve off when gas appliances are not in use. • Make sure the appliance control knobs are always in the “0” (stop) position when the appliance is not in use. • The trays incline when pulled out. Take care not to spill or drop hot food when removing it from the oven.
-
Page 11: During Cleaning And Maintenance
compartment may get hot when the appliance is in use. Avoid touching the inside surface. • Do not hang towels, dishcloths or clothes from the appliance or its handles. 1.4 During Cleaning and Maintenance • Make sure that your appliance is turned off at the mains before carrying out any cleaning or maintenance operations. - Page 12 disposed of correctly, you will help prevent potential negative consequences for the environment and human health, which could otherwise be caused by inappropriate waste handling of this product. For more detailed information about recycling of this product, please contact your local city office, your household waste disposal service or the retailer who you purchased this product from.
-
Page 13: Installation And Preparation For Use
2. INSTALLATION AND PREPARATION FOR USE Air inlet section WARNING : This appliance must be min. 100 cm installed by an authorised service person or qualified technician, according to the instructions in this guide and in compliance with the current local regulations. -
Page 14: Installation Of The Cooker
• The appliance should not be installed circulation. next to a dishwasher, fridge, freezer, • If a cooker hood or cupboard is to be washing machine or clothes dryer. installed above the appliance, the safety • The appliance can be placed close to distance between cooktop and any other furniture on condition that, in the cupboard/cooker hood should be as... -
Page 15: Gas Conversion (If Available)
• The hose that supplies the appliance with gas must be changed once a year for your safety. Gas pipe • The hose must be kept clear of areas that may heat up to temperatures of Seal more than 90°C. Hose • The hose must not be cracked, torn, fitting... - Page 16 • Cut off the main gas supply and unplug Oven Injector the appliance from the mains electrical The oven burner is held in its cradle by supply. a single clip on the left-hand side of the burner. Pull the clip towards the left and, • Remove the burner caps and the with your other hand, lift the burner up adapters.
-
Page 17: Electrical Connection And Safety (If Available)
gas supply and leakage check” clause explained above. Valve without flame Valve with flame failure failure device device 2.5 Electrical Connection and Safety (If available) WARNING: The electrical connection of this appliance should be carried out by an authorised service person or qualified electrician, according to the Bypass screw Screw(inside the hole) -
Page 18: Anti-Tilting Kit
and then close the cover. Product Dimensions A (mm) B (mm) (Width X Depth X Height) (Cm) • The terminal box connection is placed on the terminal box. 60x60x90 (Double Oven) 297.5 50x60x90 (Double Oven) 247.5 Blue 90x60x85 60x60x90 309.5 60x60x85 309.5 50x60x90... -
Page 19: Product Features
3. PRODUCT FEATURES Important: Specifications for the product vary and the appearance of your appliance may differ from that shown in the figures below. List of Components 1. Cooktop 2. Control Panel 3. Top Oven Door Handle 4. Top Oven Door 5. -
Page 20: Use Of Product
4. USE OF PRODUCT lines and will avoid any accumulation of unburned gas. Wait 90 seconds before re- igniting an extinguished gas burner. 4.1 Use of Gas Burners Oven / Grill (If available) Burners Ignition of the Burners Regardless of the model of your appliance, The position symbol above each control all oven burners are equipped with a gas knob indicates the burner that the knob... - Page 21 could cause serious burns. • Do not allow pan handles or any other cooking utensils to project over the edge of the cooker top. Crown Spark plug Burner To switch the hob burners off, turn the hob burner knob clockwise to the ‘0’ position or so that the marker on the hob burner knob points upwards.
- Page 22 illuminate the cooking area. Press the lamp button to switch the lamp on or off.Top Position Temperature(°C) Oven Controls Top Oven Burner Controls After you ignite the oven burner, you can adjust the temperature inside the oven, as required, using the numbers on the control panel or knob.
- Page 23 tray and dishes used will affect base browning. Enamel, dark, heavy or nonstick utensils increase base browning. Shiny aluminium or polished steel trays reflect the heat away and reduce base browning. • When cooking more than one dish in the oven, place dishes centrally on different shelves rather than cluster several dishes on one shelf.
-
Page 24: Use Of The Digital Minute Minder Timertime Adjustment
the grid to allow for maximum circulation 3. The symbol will of air. remain illuminated, the time will be saved and • Never cover the grill pan or grid with foil the warning will be set. as this can lead to grill fires. • If your appliance has a grill pan and handle set as an accessory, refer to the accessories section for information on... -
Page 25: Cleaning And Maintenance
Cleaning the Inside of the Oven • The inside of enamelled ovens are best cleaned while the oven is warm. • Wipe the oven with a soft cloth soaked in soapy water after each use. Then, wipe the oven over again with a wet cloth and dry it. -
Page 26: Maintenance
• Wipe the enamelled parts with a soft cloth soaked in soapy water. Then, wipe them over again with a wet cloth and dry them. Do not clean the enamelled parts while they are still hot from cooking. Do not leave vinegar, coffee, milk, salt, water, lemon or tomato juice on the enamel for a long time. -
Page 27: Troubleshooting&Transport
6. TROUBLESHOOTING&TRANSPORT 6.1 Troubleshooting If you still have a problem with your appliance after checking these basic troubleshooting steps, please contact an authorised service person or qualified technician. Problem Possible Cause Solution The oven and/or grill may be in the ´off` position. -
Page 28: Transport
There is foreign matter caught between the timer buttons. Remove the foreign matter and try again. The timer buttons cannot be pressed Touch model: there is moisture on the Remove the moisture and try again. properly. control panel. Check whether the key lock function is set. The key lock function is set. -
Page 29: Technical Specifications
7. TECHNICAL SPECIFICATIONS 7.1 Injector Table G30 28-30mbar 12.3 kW 894 g/h G30/G31 II2H3+ Class: 1 G20 20 mbar 28-30/37 mbar LARGE BURNER DIA. of INJECTOR (1/100mm) NOMINAL RATING (kW) CONSUMPTION 276 l/h 218,1 gr/h MEDIUM BURNER DIA. of INJECTOR (1/100mm) NOMINAL RATING (kW) 1,75 1,75... -
Page 30: Energy Fiche
7.2 Energy Fiche Brand RMC61GOK Model RMC61GOX RMC61GOC Type of Hob Number of Cooking Zones Heating Technology-1 Size-1 Auxiliary Energy Efficiency-1 Heating Technology-2 Size-2 Semi-Rapid Energy Efficiency-2 59,0 Heating Technology-3 Size-3 Semi-Rapid Energy Efficiency-3 59,0 Heating Technology-4 Size-4 Rapid Energy Efficiency-4... - Page 31 Brand Model RMC61GOK RMC61GOX RMC61GOC Type of Oven Mass 43,0(+/-2) Energy Efficiency Index - conventional 101,8 Energy Efficiency Index - fan forced Energy Class Energy consumption (gas) - conventional MJ/cycle - 4,85 kWh/cycle 1,35 Energy consumption (gas) - fan forced...
- Page 32 Your 2 year Manufacturer’s guarantee THIS DOES NOT AFFECT YOUR STATUTORY RIGHTS. Your new Montpellier appliance carries a free guarantee which protects you against the cost of repairs during the first 24 months from date of purchase provided that: Any claim is accompanied by evidence of the model reference, model serial number and proof of purchase, such as a Sales Receipt, showing that the appliance was purchased within the 24 months prior to the date of claim.
- Page 33 Montpellier Domestic Appliances Ltd. Unit 1, Tewkesbury Retail Park, Northway Lane, Tewkesbury, Gloucestershire GL20 8JU www.montpellier-appliances.com The symbol on the product or on its packaging indicates that this product may not be treated as household waste. Instead it shall be handed over to the applicable collection point for the recycling of electrical and electronic equipment. By ensuring this product is disposed of correctly, you will help prevent potential negative consequences for the environment and human health, which could otherwise be caused by inappropriate waste handling of this product.
Need help?
Do you have a question about the RMC61GOK and is the answer not in the manual?
Questions and answers