Page 1
Installation and Operating Instructions Model: MDG600LW/K/S 60cm Gas Double Oven Cooker Model shown for illustration purposes only) EN -2-...
Page 2
Introduction Thank you for choosing this appliance. It has been designed to give years of trouble-free use provided it is installed and maintained correctly. Please read these instructions carefully before installing or using your appliance. It is advisable to keep your purchase and installation receipts with these instructions in a safe place for future reference.
Page 3
THIS DOES NOT AFFECT YOUR STATUTORY Your new Montpellier appliance carries a free guarantee which protects you against the cost of repairs during the first 24 months from date of purchase provided that: Any claim is accompanied by evidence of the model reference, model serial number and proof of purchase, such as a Sales Receipt, showing that the appliance was purchased within the 24 months prior to the date of claim.
Page 4
AOB-6029 Dear Customer, Our goal is to offer you high quality products that exceed your expectations. Your appliance is produced in modern facilities and is thoroughly tested for quality. This manual is intended to help you use your appliance, which has been manufactured using the most recent technology with confidence and maximum efficiency.
CONTENTS SAFETY INSTRUCTIONS ..................4 INSTALLATION AND PREPARATIONS FOR USE ..........10 Instructions for the Installer ................10 Installation of the Cooker ................11 Gas Connection ..................... 12 Gas Conversion (If available) ................. 14 Electrical Connection and Safety (If available) ..........17 Anti-tilting kit ....................
SAFETY INSTRUCTIONS Read these instructions carefully and completely before using your appliance and keep them in a convenient place for reference when necessary. This manual is prepared for more than one model. Your appliance may not have some of the features described in this manual. Pay particular attention to any figures while you are reading the operating manual.
Page 7
• WARNING: To prevent the appliance tipping, the stabilizing brackets must be installed. (For detailed information refer to the anti-tilting kit set guide.) • During use the appliance will get hot. Care should be taken to avoid touching heating elements inside the oven. •...
Page 8
such as for non-domestic use or in a commercial environment or room heating. • Do not use the oven door handles to lift or move the appliance. • This appliance is not connected to a ventilation device. It shall be installed and connected in accordance with current installation regulations.
Page 9
Installation Warnings • Do not operate the appliance before it is fully installed. • The appliance must be installed by an authorised technician. The manufacturer is not responsible for any damage that might be caused by defective placement and installation by unauthorised people.
Page 10
instead switch the cooker off and cover the pan with its lid or a fire blanket. • Always position pans over the centre of the cooking zone, and turn the handles to a safe position so they cannot be knocked or grabbed.
Page 11
• CAUTION: The inside surface of the storage compartment may get hot when the appliance is in use. Avoid touching the inside surface. • Do not hang towels, dishcloths or clothes from the appliance or its handles. During Cleaning and Maintenance •...
INSTALLATION AND PREPARATIONS FOR USE WARNING : This appliance must be installed by an authorised service person or qualified technician, according to the instructions in this guide and in compliance with the current local regulations. • Incorrect installation may cause harm and damage, for which the manufacturer accepts no responsibility and the warranty will not be valid.
Cooker hood Electrical ventilator flue Air inlet section Air inlet section min. 100 cm min. 100 cm General instructions • After removing the packaging material from the appliance and its accessories, ensure that the appliance is not damaged. If you suspect any damage, do not use it and contact an authorised service person or qualified technician immediately.
Gas Connection Assembly of gas supply and leakage check The connection of the appliance should be performed in accordance with applicable local and international standards and regulations. First, check what type of gas is installed on the cooker. This information is available on a sticker on the back of the cooker. You can find the information related to appropriate gas types and appropriate gas injectors in the technical data table.
Page 15
stable in your area, it may be necessary to assemble an available pressure regulator on the gas inlet. You should contact the authorised service to make these adjustments. Points that must be checked during flexible hose assembly: • If the gas connection is made by a flexible hose fixed onto the gas inlet of the hob, it must be fixed on by a pipe collar.
Gas pipe Gas pipe Seal Seal Adapter Hose fitting Gas hose Mechanical with collar gas hose Gas pipe Gas pipe Seal Mechanical Mechanical gas hose gas hose The Cooker must be installed and maintained by a suitably qualified gas registered technician in accordance with current safety legislation.
Page 17
Burner Spanner Injector Adapter Grill Injector The grill injector is held in position by a single screw on the tip of the burner. This screw is already visible. Remove the screw, pull the grill burner towards you and the injector will be visible on the rear surface of the oven cavity.
Page 18
Injector Clip Remove the injectors using a 7mm spanner and replace the injector with the ones from the spare set. Make sure you use corresponding diameters suitable to the type of gas that is going to be used, according to the information chart (which is also supplied in the gas conversion kit).
minimum position for 5 minutes, then open and close the oven door 2-3 times to check the flame stability of the burner. Non-thermostatic Thermostatic oven valve oven valve Bypass screw Bypass screw Changing the gas inlet For some countries, the gas inlet type can be different for NG/LPG gases. In such a case, remove the current connection components and nuts (if any) and connect the new gas supply accordingly.
• The appliance is designed for a power supply of 220-240 V~. If your supply is different, contact the authorized service personnel or qualified electrician. • The power cable (H05VV-F) must be long enough to be connected to the appliance. •...
Page 21
Wall Anti-tilting bracket PRODUCT DIMENSIONS A (mm) B (mm) (Width x Depth x Height) (cm) 60x60x90 (Double Oven) 297.5 50x60x90 (Double Oven) 247.5 90x60x85 60x60x90 309.5 60x60x85 309.5 50x60x90 247.5 50x60x85 247.5 50x50x90 247.5 50x50x85 247.5 EN -19-...
Adjusting the feet Your product stands on four adjustable feet. For safe operation, it is important that your appliance is safe and balanced. Make sure the appliance is level prior to cooking.To increase the height of the appliance, turn the feet anti-clockwise. To decrease the height of the appliance, turn the feet clockwise.
Control Panel 8. Button (Ignition/Oven Lamp) 9. Main Oven Control Knob 10. Top Oven Control Knob 11. Hob Control Knob EN -21-...
Page 24
1. USE OF PRODUCT Use of Gas Burners Ignition of the Burners The position symbol above each control knob determines the burner that the knob controls. Manual ignition of the gas burners If your appliance is not equipped with any ignition aid or in case there is a failure in the electric network, follow the procedures listed below: For hob burners: Push in the knob of the burner you wish to ignite and keep it pressed while turning anticlockwise so that the knob is in the „maximum‟...
Page 25
OFF position MAX position MIN. position MODULATE After ignition, visually check the flames. If you see a yellow tip, lifted or unstable flames, turn the gas flow off, then check the assembly of burner caps and crowns once they have cooled. Make sure there in no liquid in the burner cups. If the burner flames go out accidently, turn the burners off, ventilate the kitchen with fresh air and wait at least 90 seconds before attempting re-ignition.
Page 26
Make sure that the tips of the flames do not spread out from the outer circumference of the pan, as this may harm the plastic accessories, such as handles. When the burners are not in use for prolonged periods, always turn the main gas control valve off.
Page 27
Function Description S 1...9 Max. Turn the control anti-clockwise to set to the Gas Mark as required. Preheating When you need to preheat the oven, we recommend you do so for 10 minutes. For recipes needing high temperatures, e.g. bread, pastries, scones, soufflés etc., best results are achieved if the oven is preheated first.
Page 28
• Do not place baking trays directly on the oven base as it interferes with the oven air circulation and can lead to base burning. Use the lower shelf position. Control of Oven Lamp (For main oven) There is an oven lamp inside the oven to illuminate the cooking area. Press lamp button to turn the lamp on or off.
Page 29
Cooking • Ensure that food is placed centrally on the shelf and that there is sufficient room around the baking tray / dish to allow for maximum circulation. • Stand dishes on a suitably sized baking tray on the shelf to prevent spillage onto the oven base and to help reduce the amount of cleaning required.
Page 30
There are two screws equipped with bushes under the oven control panel. Align the bushes with the assembly slots so that the shield is stuck between the control panel and the bush. Push the shield towards the appliance until it is firmly in place. Cooking •...
Page 31
Grill Pan and Handle Set The grill pan set is used when grilling steaks, etc. WARNING: The grill pan has a detachable handle. Make sure when using the grill pan handle that it is centralised and secure as shown in the figure. Do not leave the handle in position when grilling.
Page 32
Gas shut-off valve For your safety, the glass hob lid is equipped with a safety valve that will cut out the gas feed to the hob burners if the lid is lowered. However, the oven and grill burners will continue to operate regardless of the position of the hob lid.
Maintenance WARNING: The maintenance of this appliance should be carried out by an authorised service person or qualified technician. Change of Oven Lamp WARNING: Switch off the appliance and allow it to cool down before cleaning your appliance. • Remove the glass lense and then remove the bulb. •...
Page 34
Maintenance WARNING: The maintenance of this appliance should be carried out by an authorised service person or qualified technician. Other Controls • Periodically check the gas connection pipe. If a defect is found, inform the technical service to have it changed. •...
TROUBLE SHOOTING&TRANSPORT Trouble shooting After checking these basic trouble shooting, if you have still problem with your appliance, please contact with an authorised service person or qualified technician. Problem Possible Cause Solution • The oven and/or grill may be • Check the position of oven and/ ´off` position.
Page 36
• Burner cap and crown are • Ensure the burner parts have not assembled correctly. been placed correctly. • Supply gas pressure may be • Check the gas supply and gas improper. pressure. • LPG cyclinder(if your • You may need replacing LPG appliance working with LPG Hob burners cylinder) may be depleted.
Transport If you need to transport the product, use the original product packaging and carry it using its original case. Follow the transport signs on the packaging. Tape all independent parts to the product to prevent damaging the product during transport. If you do not have the original packaging;...
Page 39
Brand MDG600LW MDG600LK Model MDG600LS Type of Oven Mass 44(+/-2) Energy Efficiency Index - conventional 115,3 Energy Efficiency Index - fan forced Energy Class 4,93 MJ/cycle - Energy consumption (gas) - conventional kWh/cycle 1,37 MJ/cycle - Energy consumption (gas) - fan forced...
Page 40
Brand MDG600LK Model MDG600LW MDG600LS Type of Hob Number of Cooking Zones Heating Technology-1 Size-1 Auxiliary Energy Efficiency-1 Heating Technology-2 Size-2 Semi-Rapid Energy Efficiency-2 59,0 Heating Technology-3 Size-3 Semi-Rapid Energy Efficiency-3 59,0 Heating Technology-4 Size-4 Rapid Energy Efficiency-4 57,0 Energy Efficiency of Hob...
Page 41
Repairtech Service Help-line below. Please ensure that you have the model number, serial number, date of purchase and retailers information available before you make the call. www.montpellier-appliances.com MONTPELLIER SERVICE HELP-LINE Should your appliance develop a fault, please call the Repairtech Service Helpline...
Page 42
Important Note: This appliance is marked according to the European directive 2002/96/EC on Waste Electrical and Electronic Equipment (WEEE). By ensuring this product is disposed of correctly, you will help prevent potential negative consequences for the environment and human health, which could otherwise be caused by inappropriate waste handling of this product.
Need help?
Do you have a question about the MDG600LW and is the answer not in the manual?
Questions and answers
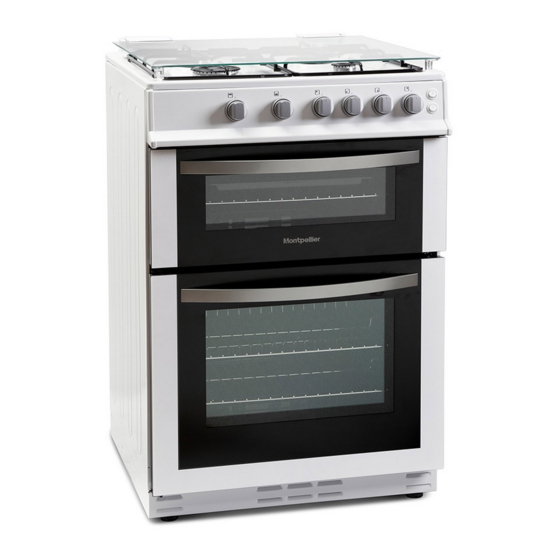
I need to renew the bottom oven door catch. Also need instructions on how to fit catch. Any help would be greatly appreciated.