Table of Contents
Advertisement
Quick Links
Advertisement
Table of Contents

Subscribe to Our Youtube Channel
Related Manuals for Riken Keiki RI-85


Summary of Contents for Riken Keiki RI-85
- Page 1 PT0E-0136 Portable Infrared CO Gas Monitor RI-85 Operating Manual...
- Page 2 This instrument is a portable gas monitor to monitor CO2 gas in air. This is instruction manual is the guidebook for the Model RI-85 to operate. Not only a beginner user, but also experienced user has to read this instruction manual and understand it before the actual use.
-
Page 3: Table Of Contents
Index Page 1.Name of each parts ‥‥‥‥‥‥‥‥‥‥‥‥‥‥ 3 ~ 4 2.How to use 2-1.Preparation ‥‥‥‥‥‥‥‥‥‥‥‥‥‥‥‥‥‥‥ 5 ~ 6 2-2.How to start ‥‥‥‥‥‥‥‥‥‥‥‥‥‥‥‥‥‥ 6 ~ 7 2-3.How to detect ‥‥‥‥‥‥‥‥‥‥‥‥‥‥‥‥‥‥ 7 ~ 12 2-4.How to finish ‥‥‥‥‥‥‥‥‥‥‥‥‥‥‥‥‥‥ 12 3.Alarm/Self-diagnosis 3-1.Kinds of alarm and pattern ‥‥‥‥‥‥‥‥‥‥‥ 13 3-2.Treatment for alarm/Self-diagnosis ‥‥‥‥‥‥‥... -
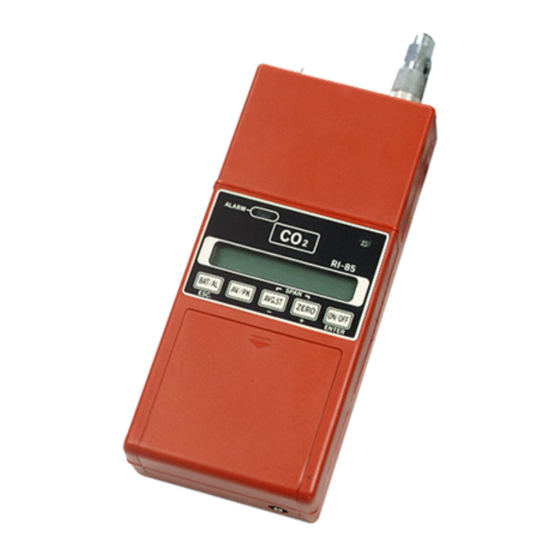
Page 4: 1.Name Of Each Parts
1. Name of each parts ① Gas outlet ② Gas inlet ③ Alarm lamp ⑤ Window of photo ④ Gas name sensor plate ⑥ Display ⑪ BAT/AL /ESC switch ⑦ ON/OFF /ENTER switch ⑩ AV/PK switch ⑧ ZERO /+ switch ⑨... - Page 5 ① Gas outlet ② Gas inlet ③ Alarm lamp Lamp ON at alarm. ④ Gas name plate Indicates measuring gas, CO2. ⑤ Window of light receive source Automatically light ON of instrument display by detecting darkness around. ⑥ Display (LCD display with light) Indicates gas concentration etc.
-
Page 6: 2.How To Use
2.How to use Check before use Instrument itself: ・Make sure no defect on the LCD display. Gas sampling probe (with absorbent cotton): ・Make sure the absorbent cotton is clean. If not, replace it with new one. (Refer to 4-4.) ・In case of drawing water drop, dry it off. ・Make sure no defect on the gas sampling probe. -
Page 7: 2-2.How To Start
! Caution ・ Connect gas sampling probe and gas sampling hose (spiral) to the instrument (gas inlet) firmly. Otherwise, correct measuring can not be performed. ・ Keep the gas sampling probe (with absorbent cotton) on the instrument all the time during gas detection. ・... -
Page 8: 2-3 How To Detect
STAND BY OK (Preparation is end.) Approx 5 sec. 700 ppm (Detection starts. <Gas concentration indicates>) ① Indication and action at pump connection failure.(Refer to 3-1.) FAIL PUMP (Buzzer:Continuous) ② Indication and action at battery voltage shortage.(Refer to 4-1.) REPLACE BATTERY (Buzzer:Continuous)... - Page 9 (1) Normal detection (moment value detection) At the place where want to check the CO2 concentration, start measuring and read the indication after over 20 seconds. In order to measure more accurately, read the indication after over 30 seconds. ・Normal indication: 700...
- Page 10 (2) Average value measuring Average value can be measured by pressing AVG.ST switch while displaying gas concentration. ・ Three kinds of measuring time are available, 1 minute ・ 3 minutes ・ 15 minutes . The result of measured average value is memorized after power off. ・...
- Page 11 In order to cancel measuring average value, press ESC switch while ④,⑤. ④ 3min: 800 ppm (Measuring average value.) Press ESC switch. ESCAPE ? Press ESC switch, keep measuring average value. (to ⑤) Press ENTER switch, cancel and return to the beginning (measuring mode). (to ①) The previous data (peak value and average value) are kept.
- Page 12 (5) Clearing average value and peak value Peak value and average value are cleared by pressing ESC. switch for 3 seconds. 700 ppm (Gas concentration indication.) Press AV/PK switch. AVG.: 800 ppm (Average value indication.) Press ESC. switch for 3 seconds. Press AV/PK...
-
Page 13: 2-4 How To Finish
(7) Alarm set value selection The figures of alarm set value start blinking by pressing ENTER switch for 5 seconds, alarm set value can be selectable. Available alarm set values are following 3 kinds. 1000ppm ・ 5000ppm ・ OFF ① 700... -
Page 14: 3.Alarm/Self-Diagnosis
3.Alarm/Self-diagnosis 3-1 Kinds of alarm and pattern The function of gas alarm and self-diagnosis are available to this model. Each alarm is informed by lamp, buzzer and indication. Kinds of alarm and pattern Condition Lamp Buzzer Indication Battery voltage shortage Continuous "REPLACE BATTERY"... -
Page 15: 3-2 Treatment For Alarm/Self-Diagnosis
In case of dropping, giving hard impact and long time usage, it might indicate this error message. (6) System error (“SYSTEM ERROR”) In case of affected heavy noise, it might indicate this error message. Power turns on again. If indicating same error message again, please consult RIKEN KEIKI or our representatives. -
Page 16: 4.Maintenance
4.Maintenance 4-1 Replacing battery Replace all 4 batteries with new one according to following procedure. (1) Confirm the battery is run down. Power off, in case of power on. (2) Remove the instrument from carrying case. (3) Slide the battery cover with pushing softly. (4) Remove old batteries 4 pcs, and install new one taking care of direction. - Page 17 (1) Prepare absorption tube (with absorbent agent) or zero gas and gas sampling bag for zero calibration. (2) Remove gas sampling probe, gas sampling hose (spiral), prepare absorption tube or gas sampling bag to be able to connect to gas inlet. (3) Power turns on, and make zero calibration.
- Page 18 ! Caution If zero calibration is done with sucking CO2 gas in the atmosphere directly, correct detection can not be performed. Normally, CO2 exists 300ppm~500ppm in the air. (Refer to 2-3.) * Note In case of using zero gas. ・ Gas sampling bag should be filled with zero gas. ・...
- Page 19 ・ The number of times for absorption tube usage capability is depending upon CO2 concentration in sample gas, storage condition, closeness, temperature and humidity. In order to make zero calibration more accurately, it is better to use new absorbent agent or use zero gas. Following table is the sample of number of times for 1 minute sample drawing/time.
-
Page 20: 4-3.Span Calibration
4-3.Span calibration Regular span calibration (over 1 time every 6 months) must be done after long time no use and/or requiring more accurate measuring. Span calibration is done in following order Preparation → Zero calibration → Span calibration . (1) Preparation Prepare absorption tube or zero gas, span gas and gas sampling bag. Zero gas, span gas and gas sampling bag are optional accessories. -
Page 21: Span Calibration
SPAN CAL. ? (Start span calibration.) Press ENTER switch. SET SPAN GAS ? (Press ENTER switch after introducing calibration gas to gas inlet.) Make sure introducing calibration gas. (Calibration → Press ENTER switch. ADJUST SPAN ? Cancel → Press ESC. switch.) 2300ppm... -
Page 22: 4-4 Replacing Absorbent Cotton
4-4 Replacing absorbent cotton Check the absorbent cotton inside of gas sampling probe, and replace with new one if it is dirty. (1) Remove knurling part of gas sampling probe. (2) Pick out absorbent cotton inside of gas sampling probe. (3) Put in new absorbent cotton inside of gas sampling probe uniformly, and attach knurling part of gas sampling probe as before. -
Page 23: 4-5 Daily Maintenance/Regular Maintenance
Check battery voltage. ・ (2) Regular maintenance Regular maintenance at manufacture/representative one time every year is recommended. Ask RIKEN KEIKI or representative. 4-6 Replacing parts Following parts have each lifetime. Replace them with new one regularly. Absorbent cotton : Any time, if it is dirty Pump :... -
Page 24: 5.Disposing The Instrument
5.Disposing the instrument Any harmful material is not used for the instrument. When disposing the instrument, treat it as general unburnable waist. -
Page 25: 6.Trouble Shooting
6.Trouble shooting The trouble shooting below does not cover all the problems. It might help to discover the causes of the problems which seem to occur the most frequency. Condition Cause Treatment Empty batteries. Install battery correctly, ・ Power does Battery consumed up. -
Page 26: 7.Precautions
7.Precautions To maintain the ability of the instrument, keep the following items ; ! Warning Never modify or change the electric circuit or the structure. If any modification or change takes place, the ability cannot be maintained. ! Caution Do not drop or hit the instrument. This is a precision apparatus. ・... -
Page 27: 8-1.Specifications
8.Specifications 8-1 Specifications Model RI-85 Measuring gas Carbon dioxide (CO2) in air Detection principle Non-Dispersive Infrared Detection (NDIR) Measuring range 0~10,000ppm ※ Current reading, Average value, or Peak reading (Push button Display select). Alarm set value 1,000ppm, 5,000ppm, OFF(selectable) Alarm function Alarm display ALARM lamp and buzzer (non-latching)... -
Page 28: 8-2.Accessories
8-2 Accessories Standard accessories: ①Carrying case ②Gas sampling hose (spiral) ③Gas sampling probe(with absorbent cotton) ④Absorption tube ⑤AA size dry battery ⑥Instruction manual ② ③ ① ⑤ ④ Optional accessories: ①Gas sampling bag ②Absorbent agent for absorption tube ③Plug for external output signal ④Protective filter... -
Page 29: 9.Detection Principle
9.Detection principle Model RI-85 is based of NDIR method (Non-dispersive Infrared) and this structure is shown below. The infrared beam emitted from the light source passes through the measuring cell, and optical band pass filter which can pass the absorption wave of measuring gas and attains to the infrared sensor.
Need help?
Do you have a question about the RI-85 and is the answer not in the manual?
Questions and answers