Table of Contents
Advertisement
Quick Links
Request for the Customers
•
Read and understand this operating manual before using the gas monitor.
•
Use the gas monitor in accordance with the operating manual.
•
Regardless of warranty period, we shall not make any compensation for accidents and
damage caused by using this product.
•
Because this is a safety unit, daily maintenance, gas calibration for every six months, and
regular maintenance must be performed.
•
The sensors of the gas monitor, having its sensor life, must be replaced at regular intervals.
•
If any abnormality was found in the gas monitor, notify them to Riken Keiki headquarters or
authorized local representative immediately.
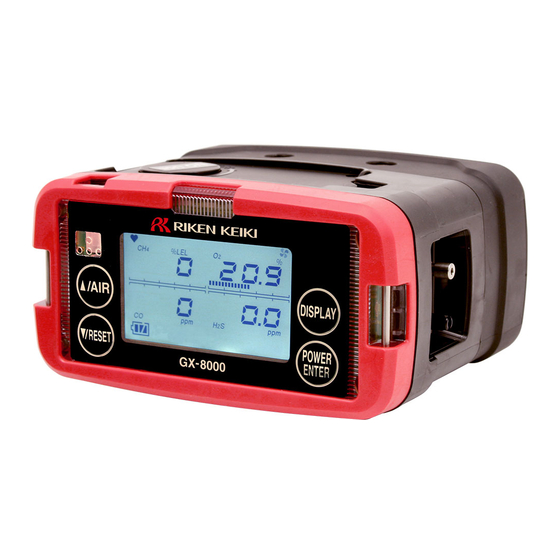
Portable Gas Monitor
GX-8000
Operating Manual
PT-xxx
Advertisement
Table of Contents

Related Manuals for Riken Keiki GX-8000


Summary of Contents for Riken Keiki GX-8000
-
Page 1: Operating Manual
• The sensors of the gas monitor, having its sensor life, must be replaced at regular intervals. • If any abnormality was found in the gas monitor, notify them to Riken Keiki headquarters or authorized local representative immediately. -
Page 2: Safety Information
Safety information The Portable Gas Monitor Model GX-8000 is a gas monitor designed to provide continuous exposure monitoring of combustible gas, oxygen (O2), toxic gas such as carbon monoxide (CO) and hydrogen sulfide (H2S) in hazardous environments. The gas sample is sucked in by build-in micro pump. -
Page 3: Preface
In addition to this operating manual, there are two other manuals available for the gas monitor: "Maintenance Manual" and "Data Logger Management Program Manual." Contact Riken Keiki if these manuals are needed. -
Page 4: Table Of Contents
Li-ion battery unit or dry battery unit replacement [Option] ........36 4-6. Consumables ......................37 Troubleshooting....................... 38 Specifications and Others..................40 6-1. GX-8000 specifications.................... 40 6-2. Combinations of detected gases by type..............41 6-3. GX-8000 accessories ....................42 GX-8000 - 4 -... -
Page 5: Part Names
1 Part Names 1-1. Part names (Li-ion battery type) [Standard type] Part Names 1-1. Part names (Li-ion battery type) [Standard type] GX-8000 - 5 -... - Page 6 There are sensors inside. May be opened only when the sensor is to be replaced. (14) Activated carbon filter knob: Turn this knob to detach and replace the activated carbon filter. (15) Battery unit screws: Turn these screws to detach and replace the battery unit. GX-8000 - 6 -...
-
Page 7: Part Names (Dry Battery Type) [Option]
There are sensors inside. May be opened only when the sensor is to be replaced. (14) Activated carbon filter knob: Turn this knob to detach and replace the activated carbon filter. (15) Battery unit screws: Turn these screws to replace the dry battery pack. GX-8000 - 7 -... -
Page 8: Lcd Display
1 Part Names 1-3. LCD display 1-3. LCD display GX-8000 - 8 -... -
Page 9: How To Use
• Do not use the gas monitor near a device or equipment that emits strong electromagnetic waves. • Do not drop or give shock to the gas monitor by, for example, relocating the gas monitor with a water trap, an optional accessory, attached. The gas inlet may be damaged. GX-8000 - 9 -... -
Page 10: Preparation
(1) Packing check After opening the package, check the gas monitor and accessories. If anything in the following list is not included, contact the dealer or Riken Keiki. Gas monitor GX-8000 and Li-ion battery pack AC powered charger (only for recharging type) -
Page 11: How To Start And Exit
After conducting self diagnosis on power voltage, sensor connection, flow rate and other operations and functions, the gas monitor enters gas detection mode. Steps 1. Power-on → Warm-up → Gas concentration reading on the display screen → 2. Measurement → 3. Power-off GX-8000 - 11 -... - Page 12 2 How to Use 2-3. How to start and exit The operation after power-on is as follows: GX-8000 - 12 -...
-
Page 13: High-Concentration Combustible Gas Zero Calibration (Type-A And Type-E Models)
(4) When END is displayed, the calibration has been successfully completed. Remove the sampling bag from the gas inlet. (5) When FAIL is displayed, the calibration means to be failed. [If calibration failed at an oxygen concentration of 8% or higher] Press the /RESET switch to reset the error. GX-8000 - 13 -... -
Page 14: Fail Display
FAIL displays and explanation of them. FAIL display examples ← AIR calibration failed AIR calibration failed. Press the RESET switch. If AIR calibration fails again, contact the dealer or Riken Keiki headquarters or authorized local representative. ← Battery voltage low The battery voltage is insufficient. -
Page 15: Measurement
10 MΩ or less). • Do not use the gas monitor while recharging it. • If the combustible gas reading exceeds 100% LEL, the CO reading rises temporarily but this is not an abnormality. GX-8000 - 15 -... -
Page 16: End Of Measurement
POWER/ENTER switch pressed until the power is turned off. If the power is turned off before the display resets to zero (or 20.9% for oxygen), only the pump may operate (for 30 seconds at the longest). Count-down GX-8000 - 16 -... - Page 17 • If the gas monitor is not used for a long time, turn on the power at least once every six months and check that the pump draws in air. The gas monitor, when not activated for a long time, may cease to work because of hardening of the grease in the pump motor. GX-8000 - 17 -...
-
Page 18: Explanation Of Functions (1)
• If AIR calibration fails due to a sensor abnormality, a message appears, indicating which sensor failed. • Do not remove the panel sheet on the LCD display and operation panel. The water-proof and dust-proof performances will be deteriorated. GX-8000 - 18 -... -
Page 19: Explanation Of Functions (2) Display Switch
(2) If the reading is 3 vol% or less and the oxygen concentration is 19.5% or more during vol% range measurement, keep the RESET switch pressed to forcibly change the display to the %LEL range. VOL% range measurement %LEL range measurement GX-8000 - 19 -... - Page 20 Press the DISPLAY switch once. Press the POWER/ENTER switch to change the setting. Press the DISPLAY switch if you choose not to change the setting. Press the /AIR or /RESET switch. When AUTORANG is displayed, press the POWER/ENTER switch. GX-8000 - 20 -...
-
Page 21: Peak Value Display
← Display example Combustible (methane): 10%LEL Oxygen: 20.8% Carbon monoxide: 80 ppm Hydrogen sulfide: 0 ppm The PEAK value display automatically reverts to the measurement screen in 20 seconds. GX-8000 - 21 -... -
Page 22: Stel Value Display
Press the DISPLAY switch four times during measurement to display the TWA value detected after power-on. (Only carbon monoxide and hydrogen sulfide) ← Display example Carbon monoxide: 20 ppm Hydrogen sulfide: 0 ppm The TWA value display automatically reverts to the measurement screen in 20 seconds. GX-8000 - 22 -... -
Page 23: Alarm Test (Full-Scale/Alarm Setpoint Display)
It is recommended to turn off the power if no measurement is performed at least for 10 minutes. (1) Press the DISPLAY switch six times to enter the PUMP OFF screen. Press the POWER/ENTER switch to turn the pump OFF. Press the DISPLAY switch if you choose to cancel the operation. GX-8000 - 23 -... -
Page 24: Station Id Selection
/RESET switch to select a station ID. After selecting a station ID, press the POWER/ENTER switch. Press the DISPLAY switch if you choose to cancel the operation. (3) When END is displayed, the change is completed. GX-8000 - 24 -... -
Page 25: Manual Memory Storage And Display
(1) Press the DISPLAY switch eight times to enter the manual memory display screen. Press the POWER/ENTER switch to display the values stored to the manual memory. Press the DISPLAY switch if you choose to cancel the operation. GX-8000 - 25 -... - Page 26 /RESET switch to select a memory number. Storage date Memory number (3) Press the POWER/ENTER switch to display a concentration stored to the manual memory. Stored concentration Station ID (4) Press the DISPLAY switch twice to return to the measurement screen. GX-8000 - 26 -...
-
Page 27: Error (Fail) Display
NOTE • If the battery voltage is insufficient, recharge or replace the batteries. For other errors, contact the dealer or Riken Keiki headquarters or authorized local representative. 2-19. Dedicated battery unit (1) Recharging procedure (Li-ion version only) Open the Recharging jack cover of the gas monitor. - Page 28 Paying attention to the polarities of batteries, replace all the three batteries with new ones. Close the battery cover in a procedure opposite to the one described in Step (1). GX-8000 - 28 -...
- Page 29 Water may also get in if a minute foreign substance is caught beneath the cover. • If the gas monitor of the dry battery type is not used for a long time, store it after removing the batteries. GX-8000 - 29 -...
-
Page 30: Alarms
0.5 second one second one second intervals. intervals. intervals. intervals. intervals. LCD display concentration concentration concentration concentration concentration and ALARM and OVER and TWA and STEL WARNING display blink. display blink. display blink. display blink. display blink. GX-8000 - 30 -... - Page 31 Request the sampling batteries with due to a circuit conducting the dealer or probe. new ones. abnormality. same Riken Keiki Request the operation, the Check that headquarters dealer or gas monitor there is no or authorized Riken Keiki has failed.
-
Page 32: User Actions For Gas Concentration Alarms
The gas monitor totals a concentration every minute from power-on and triggers an alarm when the integrated value exceeds the alarm setpoint for hydrogen sulfide or carbon monoxide. GX-8000 - 32 -... -
Page 33: Maintenance
Maintenance Since this is a safety unit, the following maintenance must be regularly performed to maintain performances. If an abnormality is found in the gas monitor, notify them to the dealer or Riken Keiki headquarters or authorized local representative promptly. -
Page 34: Span Adjustment
(not sufficiently tightened), accurate measurement may not be possible due to leaks, or water may get inside. • Use only an activated carbon filter dedicated to the gas monitor (GX-8000). Using a similar product may have harmful effects on the gas detection performance. - Page 35 CAUTION If the knob is not completely tightened, accurate measurement may not be possible due to leaks, or water may get inside. The same thing occurs if a minute foreign substance is caught beneath the knob. GX-8000 - 35 -...
-
Page 36: Li-Ion Battery Unit Or Dry Battery Unit Replacement [Option]
Water may also get in if a minute foreign substance is caught beneath the battery unit. • Do not damage the rubber seal. • To maintain the water-proof and dust-proof performances, it is recommended to replace the rubber seal every two years, whether or not it has an abnormality. GX-8000 - 36 -... -
Page 37: Consumables
1 year Rubber seal 2 years 1 set Tube 6 months 3 - 8 years 1 set Pump unit (RP-11) 6 months 1 - 2 years Li-ion battery pack About 500 (BP-8000) cycles of charging and discharging GX-8000 - 37 -... -
Page 38: Troubleshooting
When you suspect a failure, check the gas monitor using the following checklist first, before sending it to the dealer or Riken Keiki for repair. (If the gas monitor is inoperative, remove all the batteries and reinstall them before attempting to operate it.) - Page 39 (Li-ion batteries A recharging circuit Request the dealer or Riken Keiki local representative only) abnormality occurred. for repair. (When fully recharged batteries are recharged again, the recharging indicator lamp does not go on.)
-
Page 40: Specifications And Others
6 Specifications and Others 6-1. GX-8000 specifications Specifications and Others 6-1. GX-8000 specifications Model GX-8000 Gas to be Hydrogen Carbon Combustible (CH and HC) Oxygen (O detected sulfide (H monoxide (CO) Detection Thermal Catalytic Galvanic cell Electrochemical Electrochemical principle conductivity... -
Page 41: Combinations Of Detected Gases By Type
6 Specifications and Others 6-2. Combinations of detected gases by type Model GX-8000 Operating temperature range: -20 to 50°C, operating humidity range: below 95%RH (Non-condensing) Operating environment Storage temperature range: -25 to 60°C, storage humidity range: below 95%RH (Non-condensing) External External dimensions: 154*81*127 mm, Weight: About 1.1 kg (BUL-8000 when in use) -
Page 42: Gx-8000 Accessories
6 Specifications and Others 6-3. GX-8000 accessories 6-3. GX-8000 accessories 1. Related to power supply (1): BUL-8000 (Li-ion battery unit), (2) AC powered charger 2. Related to storage Standard accessories (1) Shoulder strap 3. Related to sampling (1) Gas sampling hose, 1m (spiral), (2) sampling probe 1. - Page 43 Warranty Policy RIKEN KEIKI CO., LTD., warrants gas alarm equipment sold by us to be free from defects in materials, workmanship, and performance for a period of one year from date of shipment from RIKEN KEIKI CO., LTD., Inc. Any parts found defective within that period will be repaired or replaced, at our option, free of charge.
Need help?
Do you have a question about the GX-8000 and is the answer not in the manual?
Questions and answers