
Related Manuals for Riken Keiki FI-8000


Summary of Contents for Riken Keiki FI-8000
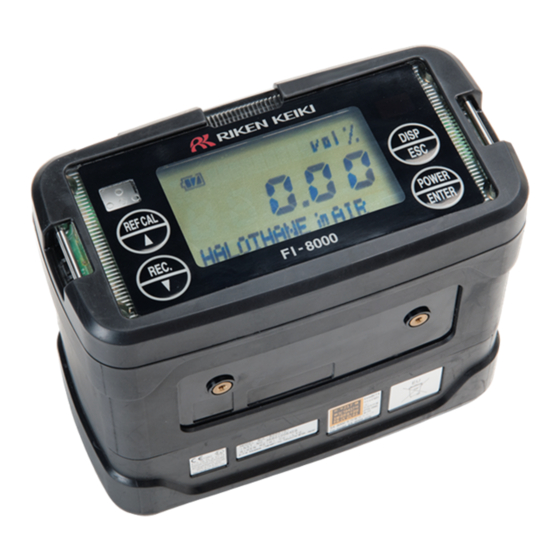
- Page 1 PT3E-0525 Optical Interferometric Gas Concentration Meter FI-8000 Operating Manual (PT3-052)
-
Page 2: Table Of Contents
<Contents> 1 Outline of the Product ......................2 1-1. Preface ..........................2 1-2. Purpose of use ........................2 1-3. Definition of DANGER, WARNING, CAUTION and NOTE ..........2 2 Important Notices on Safety ....................3 2-1. Danger cases ........................3 2-2. -
Page 3: Outline Of The Product
The measuring gases and ranges vary by the type of FI-8000 you purchased. Check the type again before use and perform gas measurement properly in accordance with purposes (see "Measuring Gas Specifications by Type"... -
Page 4: Important Notices On Safety
(2) For indoor use, use the gas detector while standing on a conductive work floor (with a leakage resistance of 10 MΩ or less). 【FI-8000】The battery units that can be connected are the BUL-8000(F)(TC21066), BUL-8000 (F1)(TC21067), or BUD-8000(F)(TC21065). ... - Page 5 The nameplate shows the followings as well as the product model. Product model : Main unit: FI-8000 Lithium ion battery unit: BUL-8000 (F), BUL-8000(F1) Dry battery unit: BUD-8000 (F) : 【FI-8000】Ex ia IIC T4 Explosion proof class 【BUL-8000(F), BUL-8000(F1), BUD-8000(F)】 Ex ia IIC T4 Ambient temperature : -20 to 50ºC Charging terminal rating : 【BUL-8000(F), BUL-8000(F1)】Allowable voltage AC250V 50/60Hz...
-
Page 6: Warning Cases
2 Important Notices on Safety 2-2. Warning cases 2-2. Warning cases WARNING Sampling point pressure The concentration meter is designed to draw gases around it under the atmospheric pressure. If excessive pressure is applied to the gas inlet (GAS IN) and outlet (GAS OUT) of the concentration meter, measuring gases may leak out from its inside and may cause dangerous conditions. -
Page 7: Precautions
2 Important Notices on Safety 2-3. Precautions 2-3. Precautions CAUTION Do not measure gases that contain interference gases. If a measuring gas contains an interference gas (other than measuring and base gases), accurate readings cannot be obtained. Do not measure gases that contain interference gases. The gas inlet and outlet should be at the atmospheric pressure. - Page 8 2 Important Notices on Safety 2-3. Precautions Do not use a transceiver near the concentration meter. Radio wave from a transceiver near the concentration meter may disturb readings. If a transceiver or other radio wave transmitting device is used, it must be used in a place where it disturbs nothing.
-
Page 9: Safety Information
2-4. Safety Information 2-4. Safety Information The FI-8000 is an optical interferometer which is used for measuring gas concentration or calorie of flammable gases in hazardous location. It has two different suction styles, one is manual aspirating with squeezing a rubber bulb and other is automatic suction by an internal micro pump. -
Page 10: Product Components
3-1. Main unit and standard accessories Product Components 3-1. Main unit and standard accessories After opening the package, check the main unit and accessories. If anything in the following list is not included, contact RIKEN KEIKI. <Main Unit> <Standard Accessories> Alkaline dry battery: 3 FI-8000 main unit ... - Page 11 3 Product Components 3-1. Main unit and standard accessories DANGER 【FI-8000】The battery units that can be connected are the BUL-8000(F)(TC21066), BUL-8000 (F1)(TC21067) or BUD-8000(F)(TC21065). 【BUL-8000(F), BUL-8000(F1), BUD-8000(F)】The main unit that can be connected is FI-8000(TC21064) only. 【BUL-8000(F), BUL-8000(F1), BUD-8000(F)】Do not attach and remove the battery unit in a hazardous location.
- Page 12 3 Product Components 3-1. Main unit and standard accessories NOTE Connect either the lithium ion battery unit BUL-8000(F), BUL-8000(F1) or dry battery unit BUD-8000(F). Check the model of the battery unit with the nameplate affixed to the unit. A nameplate indicating a compatible model is affixed to the battery unit to avoid using the gas monitor in combination (Top view of battery unit) with a wrong unit.
-
Page 13: Names And Functions For Each Part
3 Product Components 3-2. Names and functions for each part 3-2. Names and functions for each part <Outline Drawing> (Main Unit) LCD display Displays a measuring gas name, concentration, error, etc. Emits a buzzer sound at power-on/off or error occurrence. Buzzer sound opening (Do not block it.) Alarm LED arrays... - Page 14 3 Product Components 3-2. Names and functions for each part POWER switch Turns ON/OFF the power. [Used to make a selection in the setup and recording measurement [ENTER switch] modes.] Gas inlet Draws in a gas (do not block it). The gas sampling hose is connected. (10) Discharges a gas drawn into the concentration meter (do not block it).
-
Page 15: How To Use
4 How to Use 4-1. Before using the concentration meter How to Use 4-1. Before using the concentration meter Not only the first-time users but also the users who have already used the concentration meter must follow the operating precautions. Ignoring the precautions may damage the unit, resulting in inaccurate gas measurement. - Page 16 4 How to Use 4-2. Preparation for start-up (1) Using a flathead screwdriver or coin, Battery cover turn the battery cover fixing screw Battery cover fixing screw counterclockwise to open the battery cover. (2) Paying attention to the polarities of batteries, replace all the three batteries with new ones.
- Page 17 4 How to Use 4-2. Preparation for start-up (1) Open the charging jack cover of the concentration meter. Charging indicator lamp CAUTION Do not pull the charging jack cover too hard. It may get damaged. Charging jack Put the plug of AC powered charger into the charging jack Charging jack cover (rubber cap)
- Page 18 Insert the handy aspirator all the way into the gas outlet (GAS OUT) to ensure connection. Insert the sampling hose or relay tube to the gas inlet (GAS IN) until it clicks into place to ensure connection. CAUTION Use only the tubes specified by RIKEN KEIKI. - 17 -...
-
Page 19: Basic Operating Procedures
4 How to Use 4-3. Basic operating procedures (measuring mode) 4-3. Basic operating procedures (measuring mode) <Measuring Mode> (long pressing) <Caution Display> <Manual Memory> <Measuring Gas/Range Detail Display> <Error Display> (long pressing) <Reference Gas Calibration> NOTE The concentration meter provides various operating modes: "Measuring mode" for measuring a specified gas continuously, "Setup mode"... -
Page 20: How To Start The Concentration Meter
4 How to Use 4-4. How to start the concentration meter 4-4. How to start the concentration meter <Start-up Procedures> (Measuring mode) Keep the POWER switch pressed for three seconds or more. All LCDs light up. Alarm lamp lights up. Buzzer sounds once. - Page 21 4 How to Use 4-4. How to start the concentration meter <Self-diagnosis Function at Start-up> The concentration meter provides various operating modes: "Measuring mode" for measuring a specified gas continuously, "Setup mode" for changing a measuring gas, setting time, etc. and "Recording measurement mode (pump suction type only)"...
-
Page 22: Measurement Method (Measuring Mode)
4 How to Use 4-5. Measurement method (measuring mode) 4-5. Measurement method (measuring mode) The concentration meter provides the following display in the measuring mode. Display example <- Display example Sevoflurane concentration: 7. 43 vol% Base gas: Air Battery level: Sufficient <Automatic Draw-in by Built-in Pump>... - Page 23 <Points of attention in fumigation gases measurement> FI-8000 might indicate different reading from true measuring concentration due to influence of carbon dioxide concentration variation. In order to reduce the influence of carbon dioxide concentration variation as much as possible, please operate the FI-8000 with below instructions.
- Page 24 4-5. Measurement method (measuring mode) CAUTION Filters are consumables. Please replace both filters periodically. Incorrect filter connection sequence can cause failure. The FI-8000 will suck the moisture which is generated from carbon dioxide removal filter. <Correct use> Fumigation area gas (Environment before/after...
-
Page 25: Manual Memory
4 How to Use 4-6. Manual Memory 4-6. Manual Memory Any instantaneous value during measurement can be recorded. Up to 256 points of data can be recorded. (1) In the measuring mode, press the REC. switch (for about two seconds). (2) The buzzer blips and the time and instantaneous value at that time are recorded. -
Page 26: Measuring Gas/Range Detail Display
4 How to Use 4-7. Measuring Gas/Range Detail Display 4-7. Measuring Gas/Range Detail Display The detailed information of measuring gas/range can be checked. (1) Press the DISP switch. The concentration meter displays the following screens in turn (the display content varies by the combination of measuring and base gases). (2) After displaying ten cycles, the normal display returns. -
Page 27: Reference Gas Calibration
4 How to Use 4-8. Reference gas calibration 4-8. Reference gas calibration Draw a specified reference gas from GAS IN. When the reading is stabilized, press the REF. CAL switch (for more than two seconds). When the buzzer blips, release the REF. -
Page 28: Setup Mode
4 How to Use 4-9. Setup mode 4-9. Setup mode This mode allows changing various displays and settings. This mode can be entered by pressing the POWER switch while holding down the /REF CAL switch. Every time the switch is pressed, various menu screens are displayed in turn. Power ON Start-up procedures Press the POWER switch while... - Page 29 Every time the or switch is pressed, the displayed SPE number changes. (4) Press the ENTER switch to confirm it. After a value is confirmed, the concentration meter returns to the setup mode menu automatically. NOTE Contact RIKEN KEIKI for a change or addition of selectable gases. - 28 -...
- Page 30 4 How to Use 4-9. Setup mode <Date/Time Setting "2. SET DATE/TIME"> The date and time of the internal clock can be set. (1) Press the / switch and select "2. SET DATE/TIME" from the setup mode menu. (2) When the ENTER switch is pressed, the set time is displayed. (Input example: January 20, 2014 23:47) NOTE When there is no need of changing the setting, press the ESC switch to return to the setup mode menu.
- Page 31 4 How to Use 4-9. Setup mode <Saved Data Display "3. VIEW SAVED DATA"> The data recorded in the manual memory or recording measurement mode is displayed. (1) Press the / switch and select "3. VIEW SAVED DATA" from the setup mode menu. (2) Press the ENTER switch to display the saved data.
- Page 32 4 How to Use 4-9. Setup mode <Saved Data Clear "4. CLEAR SAVED DATA"> The data recorded in the manual memory or recording measurement mode can be deleted. (1) Press the / switch and select "4. CLEAR SAVED DATA" from the setup mode menu. (2) When the ENTER switch is pressed, a confirmation screen asking for permission to delete the saved data appears.
- Page 33 4 How to Use 4-9. Setup mode <Switch to Measuring Mode "6. START MEAS."> The measuring mode can be entered from the setup mode. (1) Press the / switch and select "6. START MEAS." from the setup menu. (2) When the ENTER switch is pressed, a confirmation screen asking for permission to enter the measuring mode appears.
-
Page 34: Recording Measurement Mode (Pump Suction Type Only)
4 How to Use 4-10. Recording measurement mode (pump suction type only) 4-10. Recording measurement mode (pump suction type only) NOTE The recording measurement mode is unavailable for the handy aspirator manual draw-in type. The concentration meter enables automatic measurement and data recording at specified time intervals. While measurement is not performed, the concentration meter is put into the power-saving state. - Page 35 4 How to Use 4-10. Recording measurement mode (pump suction type only) Pump suction time setting Pump suction time setting Set a pump suction time during ⇒P37 recording measurement. Memory free space display Display a memory free space. Recording measurement start Recording measurement start Start recording measurement.
- Page 36 4 How to Use 4-10. Recording measurement mode (pump suction type only) <Measuring Gas Setting> A measuring gas can be selected. (1) Press the / switch and select measuring gas setting from the recording measurement mode menu. The measuring and base gases, range and other information are displayed in turn on the concentration meter (the displayed information varies by the selected measuring gas or range).
- Page 37 4 How to Use 4-10. Recording measurement mode (pump suction type only) <Recording Measurement Interval Setting "REC. INTERVAL"> A recording measurement interval can be selected from 5 sec, 10 sec, 30 sec, 60 sec, 5 min, 10 min, 30 min and 60 min.
- Page 38 4 How to Use 4-10. Recording measurement mode (pump suction type only) <Pump Suction Time Setting "PUMPING TIME"> A pump suction time can be selected from 10 sec, 30 sec, 60 sec, 300 sec and CONTINUOUS. (1) Press the / switch and select pump suction time setting from the recording measurement mode menu.
- Page 39 4 How to Use 4-10. Recording measurement mode (pump suction type only) <Recording Measurement Start "RECORDING MEAS."> Recording measurement can be started. (1) Press the / switch and select recording measurement start from the recording measurement mode menu. (2) When the ENTER switch is pressed, recording measurement is started. The following screens are displayed in turn on the concentration meter during recording measurement.
-
Page 40: How To Exit
4 How to Use 4-11. How to exit 4-11. How to exit After measurement, make the concentration meter draw fresh air from GAS IN and discharge the measuring gas remaining inside. To turn off the power, hold down the POWER switch. The buzzer sounds three times. Hold down the POWER switch until the screen display disappears to turn off the power. -
Page 41: Operations And Functions
Low battery voltage, low contrast, low UV intensity, calibration failure, out-of-specification temperature, out-of-specification pressure Determine the causes and take appropriate actions. If the unit has problems and the caution display appears frequently, contact RIKEN KEIKI immediately. <Display Operation> LCD display Provides the normal and caution displays alternately. -
Page 42: Error Display
Battery error, contrast error, UV intensity error, setting information error, system error, built-in clock error, optical sensor unit error Determine the causes and take appropriate actions. If the unit has problems and the error display appears frequently, contact RIKEN KEIKI immediately. <Display Operation> LCD display Provides the error detail. -
Page 43: Maintenance
6 Maintenance 6-1. Maintenance intervals and items Maintenance To maintain the performance of the concentration meter and improve the reliability, perform regular maintenance and check. 6-1. Maintenance intervals and items Daily maintenance: Perform maintenance before beginning to work. Regular maintenance: Perform maintenance once or more every year to maintain the performance. -
Page 44: Calibration
6-2. Calibration Perform span adjustment of sensors using a calibration gas at least once a year. Request RIKEN KEIKI to perform span adjustment. 6-3. How to clean Clean the concentration meter if it becomes extremely dirty. The concentration meter must be turned off while cleaning it. -
Page 45: Parts Replacement
The operation of most of the periodical replacement parts must be checked after replacement by a qualified service engineer. For the stable operation of the unit and safety, ask a qualified service engineer to take care of replacement of the parts that require operation check. Please contact RIKEN KEIKI. - 44 -... -
Page 46: Storage And Disposal
7-2. Procedures to use the concentration meter again CAUTION When using a stopped or stored concentration meter again, never fail to perform a calibration. For information on readjustment including calibration, please contact RIKEN KEIKI. - 45 -... -
Page 47: Disposal Of Products
7 Storage and Disposal 7-3. Disposal of products 7-3. Disposal of products When the concentration meter is disposed of, it must be treated properly as an industrial waste in accordance with the local regulations. WARNING Dispose of the batteries in accordance with procedure specified by the local authority. ... -
Page 48: Troubleshooting
Low contrast caution is The contrast of Replacement or repair of the interferometric sensor is displayed. interferometric sensor has recommended. Request RIKEN KEIKI for the (CAUTION) been decreased due to replacement or repair. LOW CONTRAST contamination. The UV intensity of... - Page 49 Turn off the power and charge the batteries in a non-hazardous area. The contrast of interferometric sensor has Contrast error is been decreased so much displayed. Request RIKEN KEIKI for the replacement or repair due to contamination that (ERROR) of interferometric sensor. measurement cannot be LOW BRIGHTNESS performed.
- Page 50 8 Troubleshooting <Troubles in Reading> Symptoms Causes Actions Drifting of sensor output Perform reference gas calibration. Measuring and base gases were not selected Select measuring and base gases correctly. correctly. If an interference gas (other than measuring and base Presence of interference gases) is included, correct measurement cannot be performed by the concentration meter.
-
Page 51: Product Specifications
9 Product Specifications Product Specifications 9-1. List of specifications Model FI-8000 Measuring Optical interferometric type principle Measuring gases See *1 below Reading accuracy Depending on the measuring gas. See *2 below Sampling method Automatic draw-in by built-in pump Manual draw-in by handy aspirator... - Page 52 9 Product Specifications *2 Reading accuracy is calculated with the formula below. (The calculated value is the reading accuracy right after the reference gas calibration. Reading Accuracy=±(Reading - REF CAL Value)X 0.03 (Example) Measuring gas : Halothane : Base gas Oxygen :...
-
Page 53: List Of Accessories
Type" at the end of this manual) Product warranty Lithium ion battery unit (BUL-8000(F), FI-8000(F1)) Optional AC powered charger accessories See "Measuring Gas Specifications by Type" at the end of this manual for the FI-8000 specification. - 52 -... -
Page 54: Definition Of Terms
10 Definition of Terms Definition of Terms vol% Gas concentration indicated in the unit of one-hundredth of the volume An acronym for Lower Explosive Limit. LEL refers to the lowest concentration of a combustible gas in air capable of causing explosion when ignited. -
Page 55: Detection Principle
11 Detection Principle Detection Principle The refractive index of gases is determined by the types of composing gases and the mix ratio. When a mixed gas consists of two different gases and the types are known, the mix ratio (concentration) can be obtained by measuring the refractive index. -
Page 56: Measuring Gas Specifications By Type
NOTE Measuring gases vary by the type of the concentration meter. The type of FI-8000 can be checked with the nameplate attached to the side of the main unit. (See the right figure for the nameplate location.) How to identify the type. - Page 57 [Anesthetic Gas] Anesthetic gas and pump specification TYPE P-24-50 TYPE A-24-50 Anesthetic gas and handy aspirator specification Selectable gases and measuring ranges Measuring gas type Measuring range Reference gas Drift amount* (Display characters) (Minimum digit) (REF CAL value) Halothane in O2 0.00 - 6.00 vol% ±0.11 vol% (HALOTHANE in O2)
- Page 58 [Fumigation Gas] TYPE P-48-52 Fumigation gas and pump specification Fumigation gas and handy aspirator specification TYPE A-48-52 Selectable gases and measuring ranges Measuring gas type Measuring range Reference gas Drift amount* (Display characters) (Minimum digit) (REF CAL value) Methyl bromide in AIR 0 - 200 g/m ±5.0 g/m (CH3Br in AIR)
- Page 59 - 58 -...
Need help?
Do you have a question about the FI-8000 and is the answer not in the manual?
Questions and answers