
Related Manuals for Ultimaker Original


Summary of Contents for Ultimaker Original
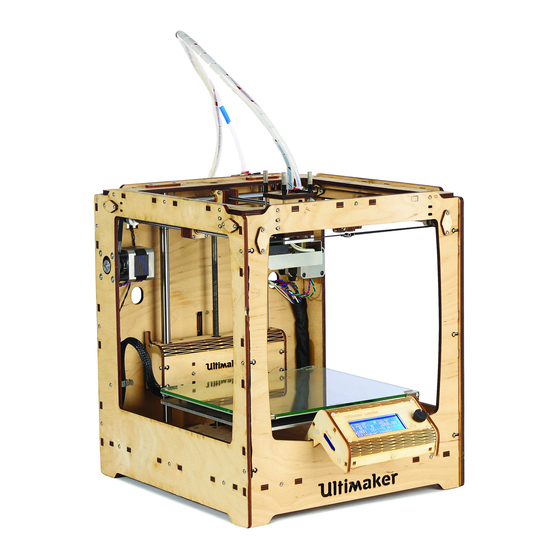
- Page 1 Original The fast, easy to use, Open-source 3D printer User manual English Version 1.1...
-
Page 3: Table Of Contents
Table of Contents Welcome to the Ultimaker Original The Ultimaker experience Speciications of the Ultimaker Original First use of your Ultimaker Original Downloading and installing Cura The irst run wizard Installing ilament Make a print ile with ura software Cura software interface Cura mouse interface... -
Page 4: Welcome To The Ultimaker Original
WELCOME TO THE ULTIMAKER ORIGINAL... -
Page 5: A1. The Ultimaker Experience
This user manual will guide you through the setup and printing process step by step. Available online: www.ultimaker.com/pages/support/manuals There s also a wealth of information tips tricks and amazing Ultimaker printed objects on our online community forum. Drop by and say hello: www.ultimaker.com/forum... -
Page 6: A2. Speciications Of The Ultimaker Original
Never reach inside of the Ultimaker Original while it is in operation lways control the Ultimaker Original from the push wheel on the UltiController or with the power-switch on the back. Allow the Ultimaker Original to cool down for at least 5 minutes before reaching inside. -
Page 7: First Use Of Your Ultimaker Original
FIRST USE OF YOUR ULTIMAKER ORIGINAL... -
Page 8: B1. Downloading And Installing Cura
Downloading and installing ura Before we start using the Ultimaker Original we need to install the soft- ware to calibrate the machine. The preferred software for your Ultimaker Original is Cura developed at Ultimaker. This software pack- age prepares your 3D model into instructions that your Ultimaker uses... -
Page 9: The Irst Run Wizard
The i rst run wizard This chapter guides you through the steps and the i rst run of the Ultimaker Original. After you switch on your Ultimaker Original, lets install Cura and make your 3D printer print ready. When you start ura for the i rst time Make sure you follow the coni guration wizard Select Ultimaker Original as your printer. - Page 10 NOTE: ker Original+ In the next coniguration steps we want to do some check ups on your Ultimaker Original. Make sure before doing these checks you have: - Connected the usb cable - The printhead is in the middle of the frame...
- Page 11 When Cura asks you to click the bottom Z-endstop, use the hex screw driver to touch and click it. The irst run wizard First use of your Ultimaker Original...
- Page 12 Repeat this step for all corners. Follow the instructions, when you have mate- rial inserted your Ultimaker Original, you should select the [Resume] button again and now your Ultimaker printhead will heat up and print a square in lines to show and check that your build plate is level and the material sticks to the tape.
- Page 13 Ultimaker Original, you should select the [Resume] button again and now your Ultimaker printhead will heat up and print a square in lines to show and check that your build plate is level and the material sticks to the tape.
-
Page 14: Installing Ilament
Installing ilament and the spoolholder First rotate the the small black lever vertically then pull it all the way up. Now take the black feeder part and pull it outwards, this gives you a better view how to get your ilament into the material feeder Now take the ilament wire and guide it up- wards between the two wooden plates and up through the coupling. - Page 15 MAKE A PRINTFILE WITH CURA SOFTWARE...
-
Page 16: Make A Printile With Ura Software
Scale model options When you press this button Material Diameter Option to change the scale of If you buy Ultimaker ilament the object you would like to the prepared toolpath will be saved on your drive or SD card. the default value is 2,85mm print. -
Page 17: C2. Cura Mouse Interface
Cura mouse interface The following mouse actions are used to work, navigate and view the 3D model: Leftmouse button Scrollwheel button Select objects Hold and move Use the scroll wheel to zoom the mouse to drag in or out. object on the D print area Rightmouse button Rightmouse button + Shift... -
Page 18: From Youmagine Com To Load Ile In Ura
From YouMagine.com to Cura Now that you are familiar with Cura we continue to explain how you can download a D ile from YouMagine.com and load this into Cura. YouMagine.com is an online community for 3D printing. Open your browser and go to www.youmagine.com Use the search ield at the menu bar next to the magnifying glass to ind a model of your... -
Page 19: C4. Preparing A 3D Model
Preparing a 3D model Most D printable iles that you will ind on YouMagine.com are in the STL format. Let’s start by clicking the Load button in Cura. When you have loaded a ile into ura you might notice the progress bar. -
Page 20: From Sd Card To Print Your Ile
From SD card to print your ile fter saving the ile and safely ejecting your SD card from your computer it is time to insert it in the SD-card Slot at the side of your UltiController. By navigating to [card menu] and chosing a ile on the sd card you press the button and your object will start printing From SD card to print your ile Make a printile with ura software... - Page 21 USE OF THE ULTIMAKER CONTROLLER DISPLAY...
-
Page 22: D T Irst Sight
When switching on the Ultimaker, the main thing you will notice is that the display lights up. You instantly get the mainscreen of the controller as shown in the image bellow. First lets explain what you see and their functionalities Push wheel : You can navigate through the display by using the button. -
Page 23: D2. Navigation And Basic Functionalities
Prepare -> Via > settings that can be used to prepare your Ultimaker Original. >Disable steppers: With this function you will disable the steppers. This allows you to move the printhead and printbed without the motor resistance >Auto home: With auto home you sent the printhead to the auto home position. - Page 24 When you have selected you will proceed to the next sub-menu where you will ind a variety of settings that can be used to control your Ultimaker Original Temperature: In this sub menu you can change several settings that inluence the tempe rature of your Ultimaker Here you can change the nozzle and bed temperature and fanspeed Motion: Only make changes in the Motion menu if you know what you are doing.
-
Page 25: D3. Use Of The Controller During Printing
UltiController to continiue the print ommon worklow with the Ulti ontroller common worklow with a well calibrated Ultimaker Original is saving a sliced model on your SD-card with Cura (Cura set to Ultimaker Original machine settings). Safetly remove the... -
Page 26: Maintenance For Your Ultimaker Original
MAINTENANCE FOR YOUR ULTIMAKER ORIGINAL... -
Page 27: E1. In General
New irmware means that we have optimised the control of the electronics which results in better print results and user experience If you see this notiication connect the USB cable between your computer and your Ultimaker Original and follow the instructions in Cura. -
Page 28: E2. The Build Plate
Now carefully push-slide the plexiglass plate out of its clamp system. Reapply tape to either the whole build plate or just part of it and carefully push-slide the plate back. After removeing the buildplate re-check if the calibration is still right. E2. The build plate Maintenance for your Ultimaker Original... -
Page 29: E3. The Heated Build Plate
Clean the glass plate using some dishwashing soap and water. Reinsert the glass plate and do a quick check if the platform is still level E3. The Heated build plate Maintenance for your Ultimaker Original... -
Page 30: E4. Cleaning The Material Feeder
Cleaning the material feeder Note: The drive might look diferent for your machine In the Ultimaker material feeder sits a knurled bolt This bolt grips the ilament and can so- metimes get clogged because the feeder is a bit dirty. Then the material will start to slip. You clean its as follow. -
Page 31: E5. Lubricating The Axes
(Magnalube-G) is supplied with the Ultima- ker Original. This grease is the lubrication which has to be used only on the threaded Z-stage rod. Note: the green grease should be applied as shown in the photograph. -
Page 32: Terminology
TERMINOLOGY ULTIMAKER ORIGINAL... -
Page 33: F1. Terminology
Push button: By rotating and pushing the button in Gantry: The construction of metal rods that allow front of the Ultimaker Original, you can access the movements on the x y and z axis control panel. G-code: The code that comes out of the slicing pro- SD-card: Secure Digital memory card that can store cess of a 3D model in Cura. - Page 34 NOTES: Notes...
- Page 35 Ultimaker B.V. urgemeester R vd Venlaan 4191PL Geldermalsen Support@ultimaker.com The Netherlands Ultimaker.com...
Need help?
Do you have a question about the Original and is the answer not in the manual?
Questions and answers