Ultimaker 3 Original Manual
Hide thumbs
Also See for 3:
- User manual ,
- Installation and user manual (50 pages) ,
- Training manual (35 pages)
Table of Contents
Advertisement
Advertisement
Table of Contents
Troubleshooting

Subscribe to Our Youtube Channel
Related Manuals for Ultimaker 3


Summary of Contents for Ultimaker 3
- Page 1 Ultimaker 3 Installation and user manual Original manual v1.4 2017...
- Page 2 Ultimaker 3. Always make sure that anyone who uses the 3D printer knows and understand the contents of the manual and makes the most out of the Ultimaker 3 or Ultimaker 3 Extended.
- Page 3 Certifications 1. Safety and compliance 1.1 Safety messages 1.2 Hazards 2. Introduction 2.1 Main components Ultimaker 3 or Ultimaker 3 Extended 2.2 Specifications 3. Unpack and install the hardware 3.1 Unboxing 3.2 Installing the hardware accessories 4. Set up for first use Print core installation 4.2 Loading materials...
-
Page 4: Preface
Preface This is the installation and user manual for your Ultimaker 3 or Ultimaker 3 Extended. This manual contains chapters about the installation and use of the 3D printer. The manual contains important information and instructions on safety, installation and use. Please read all information and follow the instructions and guidelines in this manual carefully. -
Page 5: Certifications
Certifications For the latest version of the CE document go to www.ultimaker.com... -
Page 6: Safety And Compliance
Safety and compliance It is very important to work safely with your Ultimaker 3 or Ultimaker 3 Extended. This chapter is about safety and hazards. Please read all information carefully to prevent possible accidents and injuries. -
Page 7: Safety Messages
Never reach inside of the Ultimaker 3 or Ultimaker 3 Extended while it is in operation. Always control the printer with the button at the front or the power switch at the back. Allow the Ultimaker 3 or Ultimaker 3 Extended to cool down for 5 minutes before reaching inside. -
Page 8: Hazards
Mechanical Safety The Ultimaker 3 contains moving parts. No damage to the user will be expected from the drive belts. The force of the build plate is big enough to give some damage, so keep hands out of the reach of the build plate during operation. -
Page 9: Introduction
Introduction Meet your Ultimaker 3 and learn what the possibilities of this 3D printer are. -
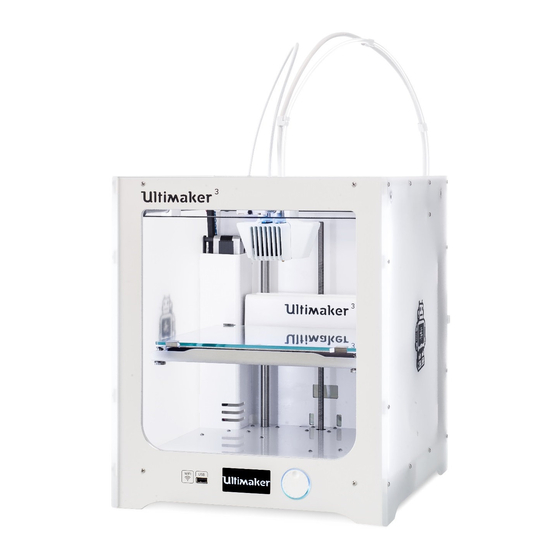
Page 10: Main Components Ultimaker 3 Or Ultimaker 3 Extended
Feeder 2 The model exposed is the Ultimaker 3. The main components of the Ultimaker 3 Extended are the same and on the exact same position. The only difference between the two printers is the height of the housing. See Specifications... -
Page 11: Specifications
Operating ambient temperature See material specifications for optimal conditions Non-operating temperature 0 - 32 ºC Software Supplied software Ultimaker Cura, our free print preparation software Supported OS MacOS, Windows, and Linux File types STL, OBJ, X3D and 3MF G and GCODE... -
Page 12: Unpack And Install The Hardware
Unpack and install the hardware Carefully unpack your Ultimaker 3 or Ultimaker 3 Extended and set up the hardware according to the instructions in this chapter. -
Page 13: Unboxing
Remove the Styrofoam part that is placed at the front bottom side of the Ultimaker 3. Take the Ultimaker 3, remove the bottom Styrofoam part and place the Ultimaker 3 on a flat surface. Cut the zip tie that secures the print head. - Page 14 This in the box Besides the spools of PLA (350 g) and PVA (350 g), test print and a quick start guide, the Ultimaker 3 is supplied with several hardware accessories. Check if all these accessories are included before continuing.
-
Page 15: Installing The Hardware Accessories
Guide the NFC cable through the notch in the back panel. If you have an Ultimaker 3 you should coil the remaining cable up against the back panel, so that it fits behind the cable cover properly. This is not necessary for the Ultimaker 3 Extended. - Page 16 The Ultimaker 3 is capable of using currents in the range of 230 V AC 50 Hz or 110 V AC 60 Hz. It should use an earthed wall socket to protect against over-current and the building should have dedicated means to protect against short-circuit.
-
Page 17: Set Up For First Use
After installing the accessories, you have to set up the printer for the first use. In this chapter you find the steps to be taken for print core installation, loading the materials, setting up Wi-Fi, updating the firmware and installing the Ultimaker Cura software. -
Page 18: Print Core Installation
Type BB: for printing water-soluble support material Each Ultimaker 3 comes with two print cores AA 0.4 - of which one is already installed in print head slot 1 - and one print core BB 0.4. This means that it is possible to make prints with two build materials or with a build and support material. -
Page 19: Loading Materials
4.2 Loading materials Before you can start printing on the Ultimaker 3, you need to load materials into the printer. For the first use it is recommended to use the spools of PLA and PVA that came with the Ultimaker 3. - Page 20 Insert the end of the material into feeder 1 and gently push it until the material is grabbed by the feeder and is visible in the Bowden tube. Select confirm to continue. Wait for the Ultimaker 3 to heat up print core 1 and to load the material into the print head. Confirm when the new material extrudes from the print head.
-
Page 21: Installing Wi-Fi And Firmware
System g Network g Run WiFi setup. Updating the firmware As a last step the Ultimaker 3 will check if the latest firmware is installed. If not, it will get the latest firmware from the network and install it. This will take several minutes. -
Page 22: Installing Ultimaker Cura
For experts, there are over 200 settings to adjust to your needs. For the Ultimaker 3 you must use Ultimaker Cura 2.3 or higher. It is recommended to always use the latest stable version. -
Page 23: Operation
Operation After installation, it is time to start printing with your Ultimaker 3. This chapter provides information about the control and display, materials, Ultimaker Cura, starting the print, removing the print and support material, changing materials and print cores, and calibrations. -
Page 24: Control And Display
The display at the front side of the Ultimaker 3 shows all the necessary information for setting up and using your Ultimaker 3. When turning on the Ultimaker 3 for the first time you will be guided through the welcome setup. When turning on your Ultimaker 3 after the first use, you will always see the Ultimaker logo first after which the main menu appears. -
Page 25: Materials
For all materials that are supported on the Ultimaker 3 it is also recommended to apply a thin layer of glue (using the glue stick from the Accessory Box) or an adhesion sheet to the glass plate before starting a print. This will make sure that your print adheres well to the glass plate. -
Page 26: Preparing A Print With Ultimaker Cura
5.3 Preparing a print with Ultimaker Cura Interface After you have added the Ultimaker 3 in Ultimaker Cura, the main interface will become visible. Here is an overview of the interface. Open file Adjustment tools Non-printable areas 3D model View mode... - Page 27 If you create a dual-color print you have to assign material colors to the models and merge the models before finishing your slice. For more instructions on how to use Ultimaker Cura take a look at the Ultimaker Cura manual on our website.
-
Page 28: Starting A Print
Printing with Cura Connect The Ultimaker 3 offers the possibility to print over a network, either via Wi-Fi or Ethernet. This can be done with Cura Connect in Ultimaker Cura when your Ultimaker 3 and computer are connected to the same network. - Page 29 Printing with USB When it is not possible to print via a network, 3D print files can still be transferred to your Ultimaker 3 with a USB stick. Place the USB stick in your computer. Slice your 3D model in Ultimaker Cura. Ensure that the print core and material configuration in Ultimaker Cura match the configuration on your Ultimaker 3.
-
Page 30: Removing The Print
Use water If neither of these methods works, remove your print using water. Remove the glass plate and print from the Ultimaker 3. Be careful not to burn your fingers if the glass plate is still warm. Run cool tap water on the back side of the plate to cool quickly. -
Page 31: Removing Support Material
2. Rinse with water After PVA supports are totally dissolved, rinse the print with water to remove any excess PVA. 3. Let the print dry Let the print dry completely and apply additional post-processing to the build material if preferred. - Page 32 Removing Breakaway support Prints using Ultimaker Breakaway as support material will require post-processing to remove the support structures. This can be achieved by breaking the support structures from the build material. 1. Tear the inner support structure Start by removing the walls of the support structure with a gripping plier. This allows you to quickly tear away the majority of the inner support structure.
-
Page 33: Changing Materials And Print Cores
Insert the material into the feeder and push it until the feeder grabs it. Confirm that you have inserted the material into the feeder by pushing the button at the front side of the Ultimaker 3. After the material has been forwarded, wait until it extrudes from the print head and then push on the button. -
Page 34: Calibrations
If the level of the build plate is off too much (and active leveling cannot compensate for this), manual leveling can be done. Go to System g Build plate g Manual leveling. Wait for the Ultimaker 3 to do its homing procedure and continue when the print head is in the center at the back of the build plate. - Page 35 For this it is only necessary to set the correct height by using the calibration card. Place the calibration card between the second nozzle and build plate. Rotate the button at the front of the Ultimaker 3 until it touches the calibration card and fine-tune it until you feel slight friction/resistance when moving the card.
- Page 36 The switch bay is what enables the lifting and lowering of the second print core. For successful dual-extrusion prints, it is important that the switching functions well. The lift switch is already calibrated when the Ultimaker 3 is shipped, but the calibration can also be done manually.
-
Page 37: Maintenance
Maintenance In order to have a smoothly working Ultimaker 3 it is important to maintain it correctly. In this chapter the most important maintenance advice is described. Read this carefully in order to achieve the best results with your Ultimaker 3. -
Page 38: Updating The Firmware
Place the USB stick in the USB port on the Ultimaker 3. Go to System g Maintenance g Update firmware. The Ultimaker 3 will detect it if there is a firmware file on the USB stick. Select the file to start the firmware update. -
Page 39: Storage And Handling Of Materials
6.2 Storage and handling of materials When you have multiple spools of material in use or do not print with a material, it is very important that you store them properly. When stored incorrectly this may affect the quality and process-ability of the material. To keep your materials in optimal condition it is important that you keep them: •... -
Page 40: Maintenance Schedule
6.3 Maintenance schedule To keep your Ultimaker 3 in optimal condition we recommend the following maintenance schedule, based on 1,500 printing hours per year: Every month Every 3 months Every year Clean printer Check for play on axles Clean feeders and replace Bowden tubes... -
Page 41: Clean The Printer
6.4 Clean the printer For the best print results it is important to keep the Ultimaker 3 clean while using it. Therefore it is advised to not use the Ultimaker 3 in a room where it can easily be covered with dust and to remove small pieces of material that might be in the printer. - Page 42 Clean the nozzles While using the Ultimaker 3, material can get stuck to the nozzles. Although this will not damage your printer, it is recommended keep the nozzles clean in order to achieve the best print results. Before starting a new print, always check the nozzles. At least once a month, remove the plastic from the outside of the nozzles by taking the following steps: On the Ultimaker 3, navigate to Material/PrintCore g PrintCore 1 g Set temperature.
- Page 43 Clean the Bowden tubes Particles in the Bowden tubes can impede smooth movement of the filament or mix colors. To clean them, the Bowden tubes have to be removed from the printer Remove the material by navigating to Material/PrintCore g Material [x] g Unload. After this, turn off the printer. Place the print head in the front-right corner.
-
Page 44: Lubricate The Axles
A bottle of machine oil is included in the Accessory Box of your Ultimaker 3. This oil is specifically for the smooth axles of the Ultimaker 3. Only use the supplied machine oil, as using other oils or Magnalube may affect the coating of the axles, which can affect the performance of your Ultimaker 3. -
Page 45: Check For Play On Axles
Start with the right X axle. Place the print head in the back-left corner of the printer to keep it out of the way. Hold the frame of the Ultimaker 3 with one hand, and firmly hold the right X axle with the other. Attempt to move the axle forwards and backwards;... -
Page 46: Check The Tension Of The Short Belts
6.7 Check the tension of the short belts Maintaining correct tension on the short belts is important to ensure good print quality. The short belts transfer the movements of the X and Y motors to the print head. If the belts are too loose, the movements of the print head may not be accurate. -
Page 47: Check For Residue In The Front Fan Of The Print Head
6.8 Check for residue in the front fan of the print head The front fan cools the print cores during a print. This helps to prevent the heat from the nozzle traveling too far upwards. The fan takes in air from the front of the print head and directs it towards the print cores. Sometimes the airflow causes thin strands of filament to be sucked into the fan during a print. -
Page 48: Check The Quality Of The Silicone Nozzle Cover
According to these images, it is highly recommended to replace the cover on the left and advisable to replace the cover in the middle. The cover on the right is in perfect condition and will not need to be replaced. Instructions on how to replace the silicone nozzle cover can be found on the Ultimaker website. -
Page 49: Lubricate The Lead Screw Of The Z Motor
In the Ultimaker menu, go to System g Build plate. Select “Raise” and then “Lower” to move the build plate up and down to evenly distribute the Magnalube. Do not use Magnalube on the smooth axles, this will affect the working of your Ultimaker 3. -
Page 50: Clean The Print Cores
PLA instead. Cleaning filament can be used to clean the print core on an Ultimaker 3 by applying hot and cold pulls. Hot pulls are used to get the biggest parts of dirt or carbonized material out of the print core and are especially necessary when a print core is clogged. - Page 51 Hot pull Insert the filament (Ultimaker 3 cleaning filament or PLA) into the print head until you feel some resistance. Hold the filament with pliers and gently apply pressure to the material for ±1 second so that it extrudes from the nozzle or until it cannot be pushed any further.
- Page 52 If the tip of the filament is not clean, go back to hot pull or cold pull to repeat the cleaning steps. Reassembly Reinsert the Bowden tube into the print head and secure with the clamp clip. Keep pressure on the Bowden tube while doing this. Confirm to continue. Wait for the Ultimaker 3 to finalize the cleaning procedure.
-
Page 53: Clean The Feeders And Replace The Bowden Tubes
6.12 Clean the feeders and replace the Bowden tubes Clean the feeders The feeders forward filament to the print head. To make sure that exactly the right amount of material is extruded, it is important that the feeder gears can turn smoothly. After many hours of printing, or when material has been ground down, there is a chance that there are small filament particles in the feeders. - Page 54 Replace the Bowden tubes The Bowden tubes guide the filament from the feeders to the print head. Forwarding improperly cut or ground down filament through the Bowden tube could scratch or damage the inside of the tube. If this happens, the filament can no longer be forwarded to the print head smoothly. This can lead to under extrusion or other print quality issues.
- Page 55 Reassembly Take the new Bowden tube and note the two different sides. The side which is drilled should be inserted into the feeder. This allows easier access of the filament into the Bowden tube. The flat side should be inserted into the print head.
-
Page 56: Troubleshooting
Troubleshooting There are a few printer specific issues that could occur while using your Ultimaker 3. If you run into one of these issues, you can troubleshoot the issue yourself with the help of the information on the next pages. -
Page 57: Error Messages
7.1 Error messages This is the list with the most common error messages that can show up on the Ultimaker 3. For more information on troubleshooting these error messages please go to the error specific page on the Ultimaker website. -
Page 58: Print Core Troubleshooting
Print core not recognized If a print core is not recognized by the Ultimaker 3, the printer will inform you about this. The main reason for this are dirty contact points on the chip at the back side of the print core. When this happens, clean the contact points with a cotton swab... -
Page 59: Print Quality Issues
Re-calibrate the build plate manually and then do the active leveling (see chapter 5.8 Calibrations). • Check the Ultimaker Cura settings that were used and try printing with one of the default Ultimaker Cura profiles. Grinding PVA There could be several reasons for grinding material, but specifically for PVA incorrect handling or storage of the material can lead to grinding.
Need help?
Do you have a question about the 3 and is the answer not in the manual?
Questions and answers