Ultimaker 2+ Installation And User Manual
Hide thumbs
Also See for 2+:
- User manual (48 pages) ,
- Installation and user manual (46 pages) ,
- Quick start manual (45 pages)

Related Manuals for Ultimaker 2+


Summary of Contents for Ultimaker 2+
- Page 1 Ultimaker OUR MOST ADVANCED 3D PRINTER JUST GOT EVEN BETTER INSTALLATION AND USER MANUAL Original manual V1.0 2015...
- Page 2 Failure to read the manual may lead to personal injury, inferior results or damage to the Ultimaker 2+. Always make sure that anyone who uses the 3D printer knows and understands the contents of the manual to make the most out of the Ultimaker 2+.
-
Page 3: Table Of Contents
TABLE OF CONTENTS 1. SAFETY AND COMPLIANCE ................................6 Safety messages Hazards 2. INTRODUCTION ....................................9 Ultimaker 2+ at a glance Specifications 3. UNPACKING AND INSTALLATION ..............................13 Unboxing Installation 4. OPERATION ......................................18 Display and controller First use Bed leveling... - Page 4 This ensures that you will obtain great quality prints and that possible accidents and injuries will be prevented. Make sure that everyone who uses the Ultimaker 2+ has access to this manual.
- Page 5 EC DECLARATION OF CONFORMITY FOR THE FOLLOWING Product 3D-printer Models Ultimaker 2, Ultimaker 2 Extended, Ultimaker 2 Go, Ultimaker 2+, Ultimaker 2 Extended+ MANUFACTURER Ultimaker B.V. Watermolenweg 2 4191PN Geldermalsen The Netherlands +31 (0)345 712 017 Info@ultimaker.com YEAR OF AFFIXING CE MARKING: 2013...
-
Page 6: Safety And Compliance
SAFETY AND COMPLIANCE It is very important to work safely with your Ultimaker 2+. This chapter is about safety and hazards. Please read all information carefully to prevent possible accidents and injuries. -
Page 7: Safety Messages
The Ultimaker 2+ generates high temperatures and has hot moving parts that can cause injury. Never reach inside the Ultimaker 2+ while it is in operation. Always control the Ultimaker 2+ with the button at the front or the power switch at the back. -
Page 8: Hazards
HEALTH The Ultimaker 2+ is designed to print with PLA and ABS filaments. The use of other materials is at your own risk. When printing with ABS, small concentrations of Styrene vapor can be released. In some cases, this can cause headaches, fatigue, dizziness, confusion, drowsiness, malaise, difficulty in concentrating, and a feeling of intoxication. -
Page 9: Introduction
INTRODUCTION Meet your Ultimaker 2+, the 3D printer that produces high quality 3D prints. -
Page 10: Ultimaker 2+ At A Glance
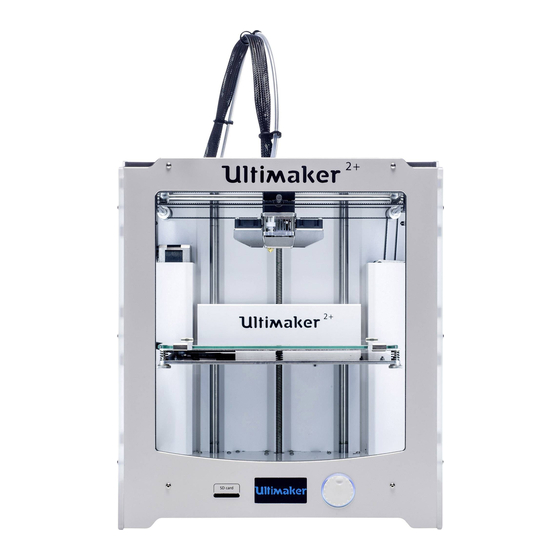
ULTIMAKER 2+ AT A GLANCE Build plate 4 Print head cable 7 Display 2 Print head 5 Build plate clamps 8 SD card slot 3 Bowden tube 6 Push/rotate button 9 Build plate screws... - Page 11 Bowden tube 4 Power switch 7 Spool holder 2 Print head cable 5 USB connector 3 Feeder 6 Power connector...
-
Page 12: Specifications
Standalone 3D printing from SD card Build plate leveling Manual, assisted leveling process *Ultimaker printers can be used with third party filament. However for the best printing results we recommend you use Ultimaker PLA, ABS or CPE. PHYSICAL DIMENSIONS Dimensions... -
Page 13: Unpacking And Installation
UNPACKING AND INSTALLATION Carefully unpack your Ultimaker 2+ and set it up according to the instructions in this chapter. -
Page 14: Unboxing
Lift the build plate and remove the packaging material under the plate. Cut the zip tie that secures the print head. Hold the Ultimaker 2+ by the frame and do not hold it by the belts or axes while carrying it. - Page 15 THIS IS INCLUDED The Ultimaker 2+ is supplied with an SD card in the 3D printer and several other accessories. Check if all these accessories are included before continuing. 0.75 kg filament Power supply and cable Glass plate USB cable...
-
Page 16: Installation
To install the Ultimaker 2+: PLACING SPOOL HOLDER Take the spool holder and insert the top part in the hole at the back of the Ultimaker 2+. 2. Push the spool holder down until it snaps into place. PLACING GLASS PLATE Open up the two build plate clamps at the front of the build plate. - Page 17 Connect the power cable to the power brick. 2. Plug the power cable into a wall socket and connect the other side of the power supply to the Ultimaker 2+. The flat side of the cable needs to point upwards.
-
Page 18: Operation
OPERATION After the installation, it’s time to turn on your Ultimaker 2+ and start printing. This chapter provides information about the display, first use, how to level the bed, how to load and change the filament, the Cura software and how to change... -
Page 19: Display And Controller
A blinking button means the Ultimaker 2+ is waiting for user input. When turning on your Ultimaker 2+ after the first use, you will always see the Ultimaker logo first after which the main menu appears. The main menu offers three options: “Print”, “Material” and “Maintenance”. -
Page 20: First Use
FIRST USE When you turn on the Ultimaker 2+ for the first time, the display shows “Welcome”. The Ultimaker 2+ will guide you through some steps for calibrating the build plate. Follow the instructions shown in the display. The Ultimaker 2+ will do the “homing”... -
Page 21: Bed Leveling
Go to “Maintenance” > “Build plate” to start the bed leveling process. (When using the Ultimaker 2+ for the first time, you can skip this step). 2. Wait for the Ultimaker 2+ to do its homing procedure and continue when the print head is in the center at the back of the build plate. -
Page 22: Loading And Changing Filament
3. When the nozzle is hot, the Ultimaker 2+ will automatically start turning the feeder wheel, through which the filament will be rewind completely. If the filament doesn’t come out of the feeder completely, you can pull it out by hand. -
Page 23: Starting A Print
SD card to start with. Simply select one of the files and press the button to start. After a print file has been chosen, the Ultimaker 2+ will prepare itself by homing the print head and build plate and heating up the build plate and nozzle. -
Page 24: Cura Software
3. After Cura has converted the file, save the print file (GCode) via the “Save” button. If the SD card has been inserted, it will directly save the file to the SD card. 4. Remove the SD card from your computer - make sure to remove it safely - and insert it into your Ultimaker 2+ to start printing. -
Page 25: Using Glue
HOW TO USE? The glue stick that was delivered with your Ultimaker 2+ can be used for the glass plate. To use glue, simply put a thin, even layer on the glass plate. It is only necessary to apply glue to the print area. -
Page 26: Changing Nozzles
CHANGING NOZZLES A Nozzle Kit is supplied with the Ultimaker 2+. This kit contains three nozzle sizes (0.25 mm, 0.6 mm and 0.8 mm). The 0.4 mm nozzle is already installed on the Ultimaker 2+. To replace the nozzle: REMOVING THE CURRENT NOZZLE Remove the filament from the Ultimaker 2+ (via the “Material”... -
Page 27: Maintenance
MAINTENANCE In order to have a smoothly working Ultimaker 2+, it is important to maintain it correctly. This chapter describes the most important maintenance tips. Read them carefully in order to achieve the best results with your Ultimaker 2+. -
Page 28: Glass Plate
2. Open up the build plate clamps at the front side. 3. Slide the glass plate to the front of the build plate until you can take it out of the Ultimaker 2+. 4. Remove any excess glue with some warm water and a cloth. If necessary, you can also use some soap to clean it. -
Page 29: The Feeder
THE FEEDER Using the feeder in the right way and keeping it clean is important for a good extrusion. These are tips to maintain the feeder. FEEDER TENSION In order to guide the filament properly through the feeder into the bowden tube and print head, it is important that the tension on the feeder is set correctly. -
Page 30: Lubricating The Axes
When you notice small ridges on the surfaces of your 3D printed objects or feel that the X and Y axes are dry, it is advised to put a single drop of sewing machine oil onto the X and Y axes. This will help your Ultimaker 2+ to run smoothly. -
Page 31: Atomic Method
ATOMIC METHOD After longer use of your Ultimaker 2+, you might notice that it cannot extrude enough plastic anymore. This so called under extrusion is usually shown by very thin or missing layers in a print. In most cases, it is caused by some dirt or carbonized material in the nozzle or another hot end part through which a (partial) blockage is created. - Page 32 REMOVING THE NEW FILAMENT Lower the temperature to 90 degrees (for PLA) or 110 degrees (for ABS). 2. Pull the filament out with a quick, firm pull, once the temperature has been reached. 3. Check the color and shape of the tip of the filament; the goal is to have a clean, cone-shaped tip. 4.
-
Page 33: Help & Support
HELP & SUPPORT There are a few printer specific issues that could occur while using your Ultimaker 2+. If you run into one of these issues, you can troubleshoot the issue yourself with help of the information on the next pages. -
Page 34: Troubleshooting
Extrusion problems can have several reasons. The nozzle could be blocked, so no material can come out. It could also mean that the Ultimaker 2+ does not extrude enough plastic, leading to very thin or missing layers in a print. This is called “under extrusion”. - Page 35 ERROR MESSAGES This refers to a problem with the PT100 B sensor, which is the sensor that ERROR - STOPPED TEMP SENSOR measures the temperature of the nozzle. It means that the sensor registers incorrect values and due to safety reasons it will prevent the nozzle from heating up.
-
Page 36: Support
Ultimaker 2+. If you ever need personal help resolving an issue with your Ultimaker 2+, you can also get in touch with one of our local... - Page 37 www.ultimaker.com...
Need help?
Do you have a question about the 2+ and is the answer not in the manual?
Questions and answers